Buf Technology Sport-HD User manual

BUF Technology, 12335 World Trade Drive, Suite 11, San Diego, CA 92128
Telephone: 858-451-1350 www.buftek.com Fax: 858-451-6589
High Definition Replay System
INSTRUCTION MANUAL
VERSION: 110930

Version: 110930 Sport-HD INSTRUCTION MANUAL Page 2 of 20
TABLE OF CONTENTS
INTRODUCTION ..........................................................................................................................................................4
FCC RADIO FREQUENCY INTERFERENCE STATEMENT ................................................................................4
WARRANTY STATEMENT.....................................................................................................................................4
OVERVIEW .............................................................................................................................................................4
QUICK REFERENCE..............................................................................................................................................6
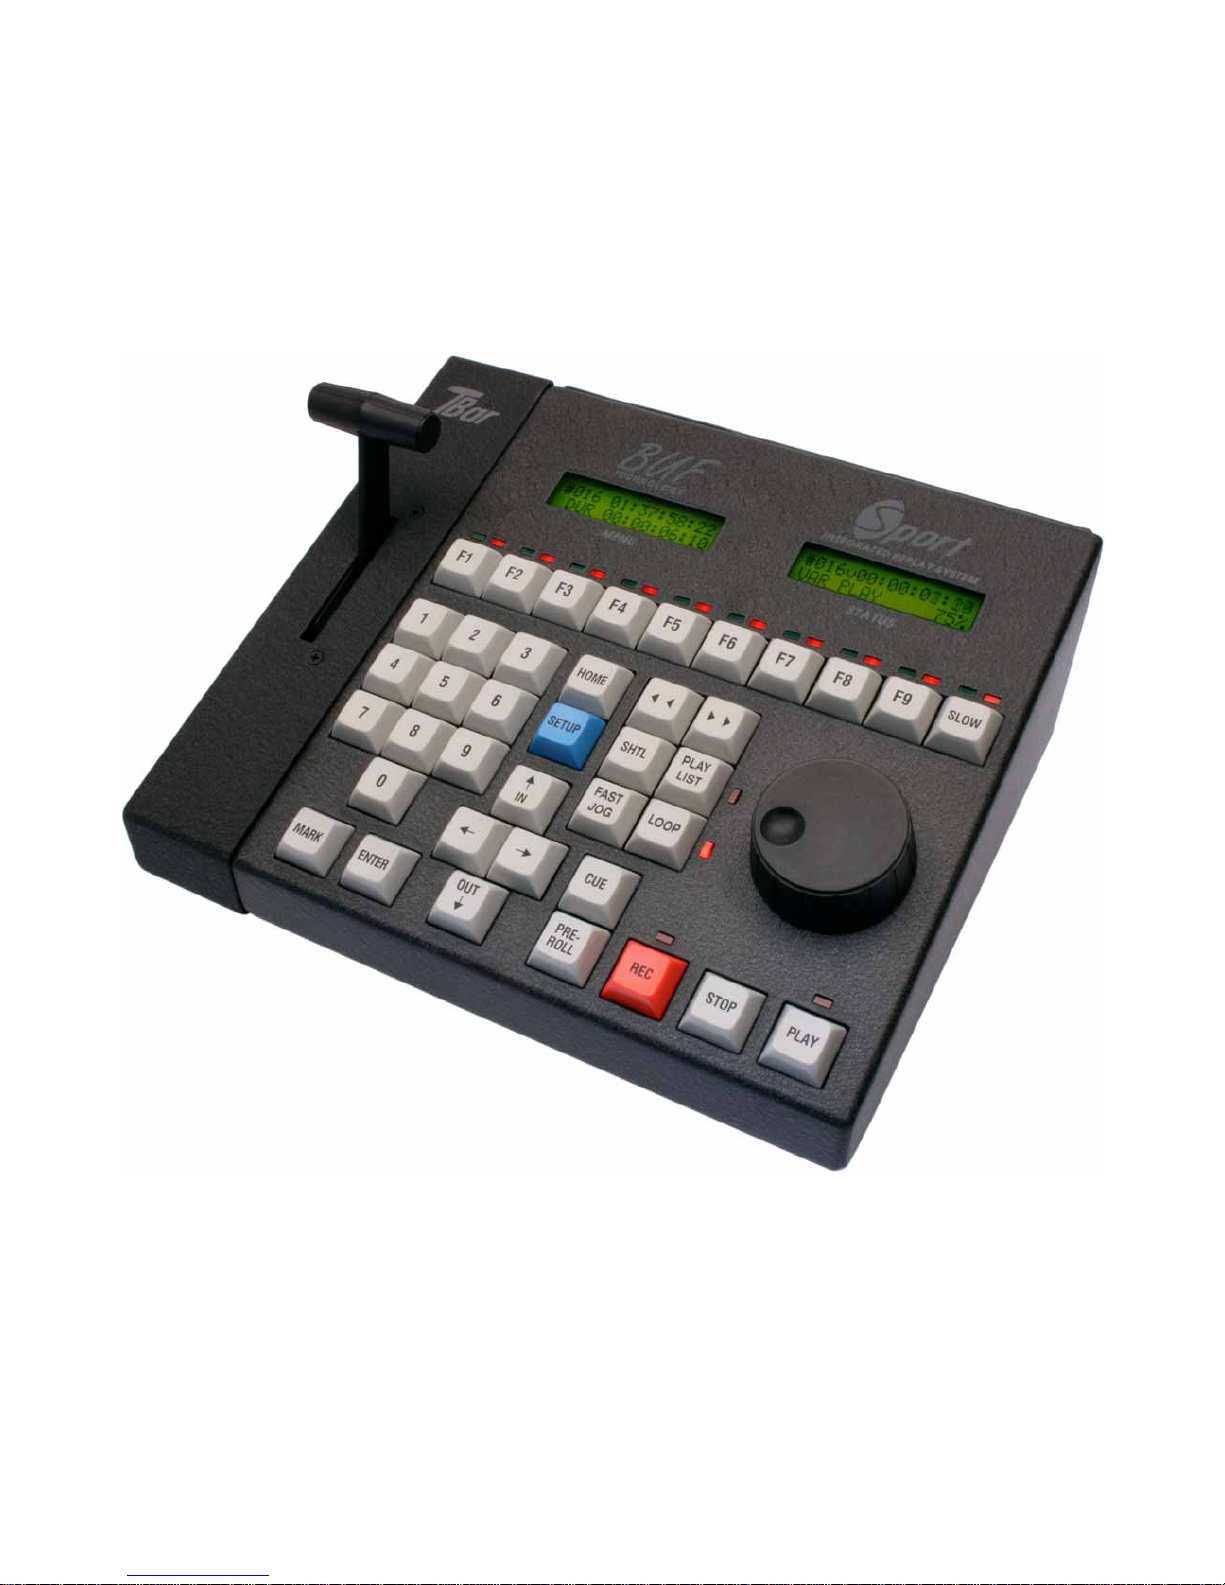
INSTALLATION ......................................................................................................................................................7
BASIC OPERATION...............................................................................................................................................8
COLD BOOT...........................................................................................................................................................8
OPERATION.................................................................................................................................................................9
SELECTING CHANNELS.......................................................................................................................................9
RECORDING...........................................................................................................................................................9
PLAYBACK.............................................................................................................................................................9
REVERSE PLAYBACK ..........................................................................................................................................9
PLAYBACK WITHOUT TBAR..............................................................................................................................10
CUE POINTS.........................................................................................................................................................10
CREATING AND TRIMMING CUE POINTS ...................................................................................................10
MARK BACKTIMING.......................................................................................................................................10
VIEWING AND USING CUE POINTS .............................................................................................................10
DELETING CUE POINTS................................................................................................................................10
PREROLL..............................................................................................................................................................11
FUNCTION KEYS (F-KEYS).................................................................................................................................11
SLO-MO SPEED PRESET KEYS ...................................................................................................................11
QUICK CUE KEYS ..........................................................................................................................................11
BUMP I/O (TBAR REQUIRED)........................................................................................................................11
SCAN.....................................................................................................................................................................11
CLIP SCAN ...........................................................................................................................................................12
SHUTTLE..............................................................................................................................................................12
ERASING RECORDED MATERIAL.....................................................................................................................12
PLAYLISTS...........................................................................................................................................................12
PLAYLIST SETUP...........................................................................................................................................12
QUICK PLAYLIST CREATION........................................................................................................................12
PLAYLIST PLAYBACK...................................................................................................................................12
LOOPING ..............................................................................................................................................................13
STATUS DISPLAY................................................................................................................................................13
REMAINING TIME DISPLAY...........................................................................................................................13
REMAINING TIME IN SLO-MO.......................................................................................................................13
TIMECODE POSITION DISPLAY ...................................................................................................................13
MENU DISPLAY....................................................................................................................................................13
HOME DISPLAY..............................................................................................................................................13
PLAYLIST DISPLAY .......................................................................................................................................14
MENUS.............................................................................................................................................................14
CUSTOMIZATION......................................................................................................................................................15
PERSONALITY MENU ITEMS .............................................................................................................................15
SAVE PERSONALITY.....................................................................................................................................15
RECALL PERSONALITY REGISTER.............................................................................................................15
RECALL DEFAULTS.......................................................................................................................................15
CALC VS. PHONE STYLE NUMERIC KEYPAD............................................................................................15
DDR SETUP ITEMS..............................................................................................................................................15
EXTERNAL REF (SD CHANNELS ONLY).....................................................................................................15
SET INPUT LEVELS (SD CHANNELS ONLY)...............................................................................................15
EXT DDR CONTROL (NATIVE/ODETICS).....................................................................................................15
EXT DDR SOFTWARE UPDATE....................................................................................................................16
RECORD SETTINGS............................................................................................................................................16
INPUT VIDEO SEL ..........................................................................................................................................16
TIME OF DAY & DATE....................................................................................................................................16

Version: 110930 Sport-HD INSTRUCTION MANUAL Page 3 of 20
COMPRESSION (SD CHANNELS ONLY)......................................................................................................16
TV STANDARD SEL........................................................................................................................................16
DELETE CLIPS................................................................................................................................................16
DELETE NON-PL CLIPS.................................................................................................................................16
CLEAR CUES NO DELETE ............................................................................................................................16
ERASE ALL VIDEO.........................................................................................................................................17
FORMAT DISK!!!.............................................................................................................................................17
REC END MODE..............................................................................................................................................17
MAXIMUM RECORD DURATION...................................................................................................................17
OPERATIONAL PREFERENCES........................................................................................................................17
CHANNEL QUANTITY ....................................................................................................................................17
RECUE WHEN PLAY......................................................................................................................................17
BUMP AUTO START.......................................................................................................................................17
KNOB SENSITIVITY........................................................................................................................................17
JOG MAX SPEED............................................................................................................................................17
JOG SENSITIVITY...........................................................................................................................................17
SCANNING SPEEDS............................................................................................................................................17
PLAYLIST SETUP MENU.....................................................................................................................................17
CUE POINTS.........................................................................................................................................................18
SET PREROLL......................................................................................................................................................18
F-KEYS SETUP MENU.........................................................................................................................................18
MISC MENU ITEMS..............................................................................................................................................18
VERSION AND TEST......................................................................................................................................18
LED BRIGHTNESS..........................................................................................................................................18
MENU & STATUS DISPLAY ANGLES...........................................................................................................18
INITIALIZE UNIT..............................................................................................................................................18
COLD BOOT.........................................................................................................................................................18
SPECIFICATIONS......................................................................................................................................................19
VIDEO....................................................................................................................................................................19
AUDIO ...................................................................................................................................................................19
CONTROL RESOLUTION....................................................................................................................................19
POWER .................................................................................................................................................................19
ENVIRONMENT....................................................................................................................................................19
DIMENSIONS/WEIGHT ........................................................................................................................................19

Version: 110930 Sport-HD INSTRUCTION MANUAL Page 4 of 20
INTRODUCTION
FCC RADIO FREQUENCY INTERFERENCE STATEMENT
This device complies with part 15 of FCC rules. Operation is subject to the following two conditions: (1) this device
may not cause harmful interference, and (2) this device must accept any interference received, including
interference that may cause undesired operation.
This equipment has been tested and found to comply with the limits for a class A digital device, pursuant to Part 15
of the FCC Rules. These limits are designed to provide reasonable protection against harmful interference when
the equipment is operated in a commercial environment. This equipment generates, uses and can radiate radio
frequency energy and, if not installed and used in accordance with the instruction manual, may cause harmful
interference to radio communications. Operation of this equipment in a residential area is likely to cause harmful
interference in which case the user will be required to correct the interference at his own expense.
Changes or modifications not expressly approved by BUF Technology could void the user’s authority to operate
this equipment. Shielded cables must be used with this equipment to maintain compliance with FCC regulations.
WARRANTY STATEMENT
BUF Technology warrants that the equipment it manufactures is free from defects in materials and workmanship.
Equipment that has been operated within its ratings and has not been subjected to mechanical or other abuse or
modification and has failed because of such defects, will, at the option of BUF Technology, be repaired or replaced
if it is returned, freight pre-paid, to BUF Technology within two years from the date of shipment. Equipment that
fails under conditions other than described herein will be repaired at the price of parts and labor in effect at the time
of repair.
The disk drive used in the Sport-HD Replay System is not warranted by BUF Technology. Please refer to the
respective disk drive manufacturer for warranty information. When Sport-HD is disconnected from its power
supply, power should not be reapplied for at least five (5) seconds. Failure to follow this procedure results in “short
cycling” of the power and could cause permanent damage to the disk drive. Also, the disk cartridge should never
be removed from or installed into Sport-HD while power is connected.
This warranty is in lieu of all other warranties, express or implied, including, but not limited to, any implied warranty
of merchantability or fitness for a particular purpose. BUF Technology is not liable for any consequential damages.
OVERVIEW
The Sport-HD Replay System is a multi channel replay system consisting of a Sport-EX control panel with TBar
and one to six separate RM-HD Replay Recorder hard disk replay recorders. Separate single channel HD video
servers are used, so record and playback operations are separate and cannot occur simultaneously (recording
must stop when in playback mode). One HDSDI input and output are provided per channel which carry eight
channels of embedded digital audio in addition to the video signal. Two channels of analog audio are provided
which replace the first two embedded channels if used. Power supply to each RM-HD Replay Recorder is 12VDC
at 3A maximum. Power to the Sport-EX controller is provided by the first RM-HD in the system.
All recording and playback operations are controlled by the operator via the SPORT-EX control panel. Channels
can be selected together, independently, and/or in any combination. Memory for up to 1000 cue points allows
instant cueing of any or all channels to the same point in time. Cue points are referenced by the clip from which
they are made, and by timecode within each clip that may begin at zeros or the time of day when recorded. Clips
are named as they are recorded using the next available cue point number. When a new cue point is manually
marked, it automatically remembers the clip that was playing or recording, which is recalled each time the cue point
is used. Clip names are handled transparently to the operator, however a cue point that denotes a recorded clip is
indicated by a period (.) after its number, and can be deleted, but not changed. Ten playlists of up to 100 cue
points can be programmed and played with seamless cut edits. Cue points or entire playlists can be looped
indefinitely.

Version: 110930 Sport-HD INSTRUCTION MANUAL Page 5 of 20
SPORT-EX CONTROL PANEL

Version: 110930 Sport-HD INSTRUCTION MANUAL Page 6 of 20
QUICK REFERENCE
To best learn Sport-HD, feed channels with test sources (tape, off air, or DVD), and outputs to monitors. Don't use
static pictures for testing, the more motion the better. Start with displays, F1-Fx, REC, MARK, CUE, PLAY, SLOW,
KNOB, SCAN ( , ). Play with it until you are comfortable, then move on to PLAYLIST, LOOP, BUMP I/O.

Version: 110930 Sport-HD INSTRUCTION MANUAL Page 7 of 20
INSTALLATION
1. Install the RM-HD1 and/or RM-HD2 SPORT-HD Replay Recorders in a 19 inch rack using standard mounting
methods. The rear of the units may secured if desired using separately purchased rack ears (required only in
high shock applications).
2. Connect HDSDI IN of each channel to a feed from a camera, CCU, or an input selection router.
3. Connect HDSDI OUT of each channel to a video switcher, distribution system, and/or monitor.
4. Connect HD or SD video reference to REF input (standard bi-level SD blackburst or tri-level HD sync signals
are adequate). Reference is optional but important for frame accurate multi channel systems or when timed
signals are required by the production switcher.
5. Optionally, connect up to 2 channels of line level analog audio inputs and outputs to the XLR connectors on the
units (+4 professional levels, not -10 consumer levels). Alternately the HDSDI IN may be fed through a digital
audio embedder and/or the HDSDI OUT may feed a digital audio disembedder to add/extract embedded digital
audio to/from the HDSDI signals. Eight channels of audio are available using embedded signals.
6. Using the 15 foot (5 meter) RJ45 cable, connect the PANEL connector of the first (CH-1) RM-HD unit to the
AUX-E connector on the TBar. Using a short RJ45 cable, connect the AUX connector on the TBar to the main
control panel RJ45 connector. In applications where the control panel must be located farther than a 15 foot
cable will allow, an extension system is available that allows up to 1000 meters of distance.
7. Using a short RJ45 cable, connect the PANEL connector of each successive RM-HD unit to the previous
channel's NEXT connector. This is how the channels are assigned to the control system.
8. If time of day timecode is available, connect it to the TC connector on the Sport-EX TBar.
9. Connect the 12VDC, 3A (minimum) power supply to the power input of each RM-HD and apply mains power.
The displays of the control panel should light up and the lamps on each RM-HD disk should light. After about
25 seconds, all channels should be finished booting and recording/playback should be possible.
10. Press SETUP, STOP, UP arrow to CHANNEL QTY, ENTER. Type the number of channels on the keypad (1-
6), ENTER. F1 through up to F6, depending on the number of channels, are channel select keys.
11. Double-tap a channel select F-key to control all channels. Select a single channel with a single tap. Hold one
and press others to select some channels. The red LED above channel select keys indicate the channels
being controlled. The green LED above one indicates which channel is shown on the STATUS display.
12. Select the type of HDSDI signal that is to be used on each channel as follows: Select one or more channels.
Press SETUP, REC, use the UP and DOWN arrows to INPUT VIDEO SEL, press ENTER, UP and DOWN
arrows to input type (INTERLACE, PROGRESSIVE), press ENTER. Also set the frame rate (field rate if
interlaced): DOWN arrow to TV STANDARD SEL, enter, UP and DOWN arrows to the frame (or field) rate
(59.94, 50). These must both be set correctly or recordings will playback black and playback will not cue.
13. Optionally, enter the time of day and date using the menu (if timecode is applied, only the date is relevant):
Press SETUP, REC, UP/DOWN arrows to SET TIME OF DAY, ENTER, and enter the time of day (HHMMSS)
in 24 hour format (add 12 to hours for PM, 00 for 12AM), ENTER, enter date (YYMMDD), ENTER, HOME.
14. Make a test recording: Press REC, wait at least five seconds, press CUE, the STATUS display should read
CUED. Press PLAY, all channels should play back the recorded video. If CUED does not appear and/or video
does not play back on any channels, check the HDSDI type and rate (step 12) and check input/output signals
by inserting a BNC barrel between the input and output cables in place of the suspect RM-HD to see if input
HDSDI feeds through to the output monitoring. If it checks OK and you are sure the HDSDI is the same format
as set in step 12, the disk may be bad or may need formatting.
WARNING: Whenever power is disconnected from an RM-HD, always wait at least 5 seconds before reapplying
power. Failure to follow this procedure results in “short cycling” the disk drive power and, on rare occasions, could
cause permanent damage to the disk drive. Avoid applying unreliable power that is susceptible to repeated
interruptions or “brown outs”. The disk drive is not covered under the Sport-HD warranty.

Version: 110930 Sport-HD INSTRUCTION MANUAL Page 8 of 20
BASIC OPERATION
1. To select a channel for control, press its F-key (F1 for ch-1, etc.). Double-tap the F-key to select all channels.
Hold the F-key and tap others to select some channels. The red LED lights above channels selected for
control, the green LED lights above the status channel (the channel shown on the STATUS display).
2. Press REC to start recording. A cue point is automatically created. Cue points are tagged with time of day.
Always records on an unused part of the disk(s) so existing material cannot accidentally be recorded over.
3. Stop recording and scan back at 6 times normal speed using the reverse scan ( ) key. The forward scan
key ( ) scans forward. Hold for scan, release for still. Turn the knob to fine tune the position (jog mode).
4. Press PLAY to playback at normal speed (play mode) or press F7, F8, or F9 to playback in slo-mo at ¼, ½, or
¾ normal speed. Use the TBar to adjust slo-mo speed; the knob for jog.
No button pushes are needed to change between play, slo-mo, and jog modes. All the way up is play mode,
move down for slo-mo, still at the bottom. Then just turn the knob for jog, TBar back up to return to slo-mo.
5. During recording or playback, press MARK to create a new cue point.
NEW: For better accuracy, hold down MARK to back-time the cue point by the amount of time it is held.
6. Press CUE to cue playback to the location that MARK was hit, or press PREROLL to cue 2 seconds earlier. If
multiple channels are selected, they will all cue to the same point in time.
7. To select any cue point, BUT NOT cue playback, enter the cue number on the keypad and press ENTER.
To select any cue point, AND instantly cue playback, enter the cue number on the keypad and press CUE.
8. Hold ENTER and hit F1-F6* to store a quick cue. Anytime a quick cue key is hit, playback is instantly cued.
9. To change the current cue’s out point (end), hold the OUT key and press MARK. Normal or slo-mo playback
will pause exactly at the out point. To resume playback, press PLAY or a slo-mo key. Playback will again stop
at the end of the recording. To cue to the out point, hold OUT while pressing CUE. Hold OUT and press
PREROLL to cue 2 seconds before the out point.
10. To change the in point (beginning) of an existing cue, hold ENTER (or IN) and press MARK.
11. Clip scan: To quickly scan a loaded clip from in to out, press both scan keys ( & ) together.
As the TBar is moved, playback continually cues to the point proportional to the TBar position.
End the clip scan mode by using any playback or record function (example: turn knob to enter jog mode).
12. The STATUS display shows the time remaining before the out point. Slo-mo speed is taken into account so
the display shows the actual time it will take to finish playing. Hold IN or OUT to show timecode.
13. Hold ENTER and press PLAY LIST to add the current cue to the end of the current playlist. To edit a playlist,
press SETUP, PLAYLIST. Use the arrow and number keys to insert cues anywhere in the playlist, to delete
cues, or to insert pauses (STL). Press HOME when done.
14. To play a playlist, press PLAYLIST, CUE, then PLAY (or a slo-mo key). As playback reaches the out point of
each cue in the list, a clean cut is made to the in point of the next cue. While playing a playlist, the STATUS
display shows the time remaining in the entire list (or until the next pause), and is adjusted for slo-mo speed. A
pause (STL) stops playback and shows a still frame at the out point of the cue preceding the pause, press
PLAY to still frame at the in point of the next cue. Then resume playback as usual.
15. There are ten playlists. To select a different playlist for setup or playback, press a keypad number (0-4)
immediately before the PLAYLIST key. To add the current cue to any playlist, hold its keypad number (0-4)
and press PLAYLIST. Each playlist holds up to 100 cues.
* Depending on number of channels, F1-Fx will select channels and not perform other functions.
COLD BOOT
If the Sport-EX controller is acting strangely or not communicating with the connected channels, normal operation
may be restored by performing a COLD BOOT. See COLD BOOT near the end of this manual for directions.

Version: 110930 Sport-HD INSTRUCTION MANUAL Page 9 of 20
OPERATION
SELECTING CHANNELS
To select a channel for control, press its F-key (F1 for ch-1, F2 for ch-2, etc.). Double-tap the F-key to select all
channels. Hold the F-key and tap others to select some channels. The red LED lights above channels selected for
control, the green LED lights above the status channel (the channel shown on the STATUS display). All transport
and other functions apply to the selected channels and not unselected ones.
When the REC key is pressed to begin recording, ALL CHANNELS are automatically selected, so if you DO NOT
want to record on all channels, press and hold the first channel to record, then press others to record, and while still
holding the first key, press REC. Only the channels with red LEDs will enter record mode.
To set the total number of channels in the system:
Press SETUP, F1, the total number of channels (both HD and SD) on the keypad (1-6), ENTER.
RECORDING
To record, simply press REC. A new recording is made on an unused part of the disks of all channels; existing
material will not be recorded over. To stop recording and enter the playback mode, press any playback related key
such as STOP, CUE, PREROLL, or reverse scan ( ).
To make it more difficult to end record mode (as with important long term recording), you can set the controller to
end recording only when the STOP key is hit:
Press SETUP, REC, use the UP and DOWN arrows to select REC END MODE, ENTER, UP arrow (ONLY STOP
KEY), ENTER. Recording will stop only when the STOP key is used.
You can check the remaining record time by pressing SETUP, REC - the amount of available recording time for the
selected channel is shown in timecode format. If SET TIME OF DAY is shown, then current time of day is shown
instead; hit DOWN ARROW to show free space. The "FREE=" time displayed is approximate and can vary
somewhat depending on program content.
See SELECTING CHANNELS if recording is not to occur on all channels.
PLAYBACK
Press PLAY to play material at normal speed, or use F7 to play at ¼, F8 to play at ½, or F9 to play at ¾ normal
speed (see SLO-MO SPEED PRESET KEYS). Move the TBar to vary playback speed between zero and 100%
normal speed. So that speed changes are always smooth and don't change suddenly, the TBar does not affect
playback until moved to the position corresponding to the current speed (this assumes the speed was set by
keystroke such as PLAY or an F-key). When the TBar needs to be moved to take control, a LED above the SLOW
key flashes: green if the TBar needs to be moved up, red if it needs to be moved down. Press the SLOW key to
force playback to the TBar speed.
It is not necessary to press any keys to change between variable play (slow motion) and jog modes:
When playback is at still, simply turn the knob to jog or raise the TBar from the bottom to begin playing in slow
motion. In jog, playback moves relative to the amount the knob is turned and stops when the knob is stopped.
The FAST JOG key enters the fast jog mode which is identical to jog, but picture movement is much faster (the
knob operates with much greater sensitivity), allowing you to quickly move through more material.
Hold the HOME key while jogging for SLOW JOG, which allows moving very slowly to an exact frame.
REVERSE PLAYBACK
To playback in reverse at the current TBar speed, press and hold the SLOW key. Release the SLOW key to play
forward. Speed can be changed while in reverse by moving the TBar. If the TBar is at the top, reverse play will be
at normal speed but in reverse. To smoothly reverse speed, move the TBar to the bottom (still), then press and
hold the SLOW key, move the TBar up - speed increases in reverse. Then move the TBar back to the bottom
before releasing the SLOW key, move the TBar up. Only hold or release the SLOW key when the TBar is down at
still. In this way, you can repeatedly play through a segment forward and reverse with smooth speed control.

Version: 110930 Sport-HD INSTRUCTION MANUAL Page 10 of 20
PLAYBACK WITHOUT TBAR
Playback behavior is somewhat different if the TBar is not connected: Press SLOW to begin slow motion playback
paused, or press a speed preset key (F7-F9 by default) to start at another speed, use the knob to vary the playback
speed from 0% to 100%. Press STOP to enter the jog mode. Reverse playback is not possible without the TBar.
CUE POINTS
A cue point is a memory location that stores a particular point of recorded material, allowing this location to be
recalled at any time. For speed reasons, cue points are referenced numerically, from zero to 999.
When a cue point is created, it includes the currently playing timecode, called the IN point, and the clip filename
from which it is being made. When a cue point is used, the stored filename is automatically loaded for playback.
The cue point also contains another timecode number called the OUT point. The duration of the cue point (how
long it will play) is found by subtracting the OUT point from the IN point. The OUT point is important if the cue point
is looped or used in a playlist. It is also handy to pause playback at a certain point, and is frame accurate.
When playing at normal or slow motion speeds, playback goes to still when the OUT point is reached.
Playback is resumed up to the end of the clip by pressing PLAY or entering slow motion when at the OUT point.
The OUT point is ignored when in jog mode making it easy to jog beyond the OUT point.
The duration of a cue point is shown on the MENU display because it is useful information. The OUT point can be
observed by holding the OUT key.
CREATING AND TRIMMING CUE POINTS
A new cue point is created by pressing the MARK key. Cue points are created sequentially from 000 to 999.
To change, or trim, a cue point’s beginning (IN point) to the current position, hold ENTER and hit MARK.
Often, the IN isn’t exactly where you want it, so hit CUE and turn the knob to jog to the perfect point, then hold
ENTER and hit MARK.
To set or change a cue point’s OUT point (end) to the current position, hold OUT and hit MARK.
You can trim a cue point after entering it into a playlist and the trimmed cue point is inherently fixed in the
playlist too (because the playlist simply contains a reference to the cue point’s number).
MARK BACKTIMING
A unique feature of the Sport-EX controller is called variable mark backtiming. This feature applies quick and
effortless compensation for the amount of time taken to hit the MARK key after “replay worthy” action was
observed and evaluated. Events that are worthy of replay generally are not apparent until after they occur.
Also, it is common to want some amount of action prior to the event to be included in the replay. Variable mark
backtiming is a powerful tool that allows the operator to perfectly mark a cue point, or at least get very close to
the optimum IN point the first try, eliminating or reducing the need to trim the IN point. Backtiming subtracts the
time that the MARK key is held down from the point at which it is first hit to create the mark point. The idea is:
Think about how long ago the beginning of action that should be included in the replay occurred, and hold the
MARK key down about that length of time. While MARK is held, the IN point runs backwards, the amount of
which can be viewed on the STATUS display following the ‘M’ indicator. When released, the backtiming ends,
leaving the marked point placed with unsurpassed flexibility. Speed is taken into account, so if MARK is held
during slow motion or shuttle, backtiming works as expected. It also works when marking the OUT point.
VIEWING AND USING CUE POINTS
The cue point shown on the MENU display is called the current cue point.
The CUE key cues playback to the current cue point’s IN point.
The PREROLL key cues playback to 2 seconds before the cue point (or the beginning of the clip).
Hold OUT and hit CUE to cue to the current cue’s OUT point.
Hold OUT and hit PREROLL to cue 2 seconds before the OUT point. (You can then play the last 2 seconds.)
To make a cue point current without affecting playback, enter its number on the keypad and hit ENTER.
To make a cue point current and cue playback, enter its number on the keypad and hit CUE.
The RIGHT/LEFT arrow keys change the current cue to the next/previous cue point.
Hold IN and hit the RIGHT/LEFT arrow keys to also cue playback to the next/previous cue point.
DELETING CUE POINTS
Cue points can be deleted in various ways, see the RECORD SETTINGS menu. DELETE CLIPS deletes a
specified range of cue points and erases the recorded clips included in that range (“record” cue points, marked

Version: 110930 Sport-HD INSTRUCTION MANUAL Page 11 of 20
with a period after the number). DELETE NON-PL CLIPS does the same, but skips cue points and clips that
are used in playlists. CLEAR CUES NO DELETE deletes a range of cue points, but not the clips - it does not
erase any recorded material. ERASE ALL VIDEO and FORMAT DISK!!! delete all cue point memory, playlists,
and recorded clips. A cue point always retains its original number and is not renumbered to fill deleted ones.
Instead, deleted cue points are displayed with a “deleted” mark ‘d’ after its number. There are a couple of
reasons for this. First, clips are named with cue point numbers and cannot be renamed, so a cue point that
designates a recorded clip must remain available. The second reason is so that any external notes referencing
cue points by number remain valid after deleting lower numbered cue points. Cue points marked as deleted can
be reused, except when they denote recorded clips. The last used cue point can be made current by hitting
999, ENTER. An attempt to cue to a higher cue point (number, CUE) has no effect, unless a clip that is named
with that number exists on any channel. In this case, the cue point is marked as a record cue (with a period),
and cue points below it are marked with a period if a clip exists, or a “delete” mark (d) if not. If the clip exists on
the status channel, its record start (IN) and duration are assigned and the clip is cued. This mechanism allows
selected clips to be preserved indefinitely, like ones used in BUMP I/O keys.
PREROLL
PREROLL cues to the location 2 seconds before the IN point, or to the beginning of the clip if the IN point is within
the first 2 seconds. The preroll time can be changed by pressing SETUP, PREROLL and entering a different time.
FUNCTION KEYS (F-KEYS)
Each of the function keys F1-F9 that are not used to select channels serve any of three purposes: Slo-mo Speed
Preset, Quick Cue, or Bump I/O. A Slo-mo Speed Preset key plays in slow motion at a preset speed (then the
TBar can be used to vary the speed). A Quick Cue key cues playback instantly to any cue point. A Bump I/O key
sandwiches the current cue point between pre-designated IN and OUT bumper clips. By default, F1-F6 are Quick
Cue keys and F7-F9 are slow motion speed preset keys. To change a key’s function, press SETUP, the key, then
the UP/DOWN arrow keys.
SLO-MO SPEED PRESET KEYS
To change the speed of a Slo-mo Speed Preset key, press SETUP, the Slo-mo Speed Preset key, the speed in
percent of normal, then ENTER. Press HOME when done.
QUICK CUE KEYS
The current cue point (the one showing on the MENU display) can be assigned to a Quick Cue key at any time
by holding the ENTER key while pressing a Quick Cue key. Alternately, press SETUP, the Quick Cue key, the
cue point number on the keypad, then press ENTER. Press HOME when done.
The green LED lights above any Quick Cue keys that are assigned to the current cue point.
BUMP I/O (TBAR REQUIRED)
To set the bumper clips, press SETUP, the Bump I/O key, the IN bumper cue point number on the keypad, then
press ENTER, then the OUT bumper cue point, then ENTER (ENTER toggles between the IN and OUT
bumpers). Press HOME when done.
Any cue points can be set as the IN and OUT bumper clips. A Bump I/O key automatically cues the IN bumper
clip, delays, then plays it at normal speed, then cuts to the currently selected cue point and plays it at the speed
set on the TBar, then at its OUT point, playback cuts to the OUT bumper, which again plays at normal speed.
Speed can be changed with the TBar while the clip is being played. The OUT bumper transition can be forced
early (before the currently playing cue point’s OUT point), by hitting the RIGHT arrow key.
Bumper clips might be “swoop” animations that take you into and out of replays with a sponsor's graphic or any
other desired clip. Bumper clips must be at least two seconds in length. “i" and “o” icons on the STATUS
display indicate when the IN and OUT bumpers are playing. When done, the OUT bumper still frames at the
OUT point. Hit CUE to change to the current cue (and remove the “o” icon).
If you want to press PLAY manually after the IN bumper is cued (instead of it playing automatically), or change
the delay before playing, see the BUMP AUTO START item in the OPERATIONAL PREFERENCES menu.
NOTE: Bumper clips need to be somewhat over 2 seconds long to work properly (test to make sure).
Cue points used with bumper clips should be at least 3 seconds long; a shorter duration may not work correctly.
SCAN
The reverse scan ( ) and forward scan ( ) keys scan playback while being held, and pause the picture
when released. While paused, turning the knob allows fine adjustment of picture position (jog), or lifting the TBar

Version: 110930 Sport-HD INSTRUCTION MANUAL Page 12 of 20
from the bottom to begins slow motion playback. The default scan speeds are 6 times normal speed. To change
the scan speed, press SETUP, the scan key to change, turn the knob until the desired speed is shown, then press
ENTER.
CLIP SCAN
“Clip Scan” is entered by tapping both scan keys ( & ) together. While in clip scan mode, playback
continually cues to the point in the last cued clip relative to the TBar position. This allows clips of any length to be
scanned quickly from heads (bottom = IN point) to tails (top = OUT point). Any other transport key (STOP, PLAY,
SHTL, etc.) exits the clip scan mode. Also, turning the knob exits the clip scan mode and enters jog (still).
SHUTTLE
To shuttle quickly through material, press the SHTL key and use the TBar (or knob if no TBar). Near the middle is
still, up from middle shuttles forward, down from middle shuttles in reverse. Speed response uses a logarithmic
scale providing a natural feel for both fast and slow speeds. While in the still range, the knob can be used to jog
without leaving the shuttle mode. The SHTL key sets shuttle speed to still and the SLOW key LEDs indicate the
direction the lever must be moved to gain control. A second use of the SHTL key (SHTL when already in shuttle
still) sets shuttle speed to the current position of the TBar. As in other modes, the MARK key can be used to mark
cue points while in shuttle.
ERASING RECORDED MATERIAL
Press SETUP, REC and use the UP and DOWN arrows to select DELETE CLIPS to delete entire recordings
(material contained in record cue points). ERASE ALL VIDEO deletes all recorded material, cue points, and
playlists. The latter selection should be used occasionally to avoid possible disk fragmentation. Deleted material
cannot be recovered! See RECORD SETTINGS for more information on deleting.
PLAYLISTS
Sport has memory for up to ten playlists each containing up to 100 steps which can be assigned cue points or stills.
When played, as the OUT point of each step’s cue point is reached, a seamless cut is made to the cue point of the
following step while motion continues. Cue points must have a duration of at least 1 second for playlists to operate
properly. While playlist mode is enabled (PLAYLIST LED lit), the MENU display shows the current playlist number,
the current step and cue point, and the next step and cue point. The STATUS display shows the actual time,
adjusted for slo-mo speed, that it will take for the playlist to finish playing to the next still (STL) or end. If looping is
enabled while playing a playlist, the entire playlist is looped.
PLAYLIST SETUP
To create a playlist, press SETUP, the number of the playlist (0-4), then PLAYLIST. If you skip the number key,
the last setup playlist is used. The MENU display shows the playlist number and a playlist step with its cue
point. To add a cue point to the list, enter its number on the keypad and press ENTER. The next step is then
shown. Press ENTER without numbers to add the current cue point to the list. The RIGHT and LEFT arrow
keys change the displayed step. While holding the zero (0) key, the RIGHT and LEFT arrow keys change the
step by 10. If the cue point is END, every new point you enter is added to the end of the list. If not at END, an
entry is inserted at the current step and other steps are rippled up to make room. Press the DOWN arrow to
program a still (STL) at the current step. To delete the current step and ripple all higher steps down, press the
UP arrow key. (Reminders of the UP and DOWN arrow key functions are shown with icons on the display).
QUICK PLAYLIST CREATION
A shortcut method allows cue points to be added quickly to the end of playlists: Hold the ENTER key and press
the PLAYLIST button to add the current cue point (the one on the MENU display) to the end of the current setup
playlist (the one last selected by pressing SETUP, a keypad number 0-4, then PLAYLIST). To add the current
cue point to any playlist, hold the keypad number of the desired playlist (0-4) and press PLAYLIST. This allows
separate playlists to be created for different purposes, such as special playlists for key athletes or types of
plays.
PLAYLIST PLAYBACK
To prepare a playlist for playback, press the number of the playlist (0-4), then PLAYLIST. If the number is
omitted, the last playback playlist is selected. The PLAYLIST LED lights. When lit, turn the playlist mode off by
again pressing PLAYLIST. Press CUE to cue playback to the first step (the step 00 cue point). Press PLAY or
a slo-mo key to begin playlist playback. When a still (STL) step is reached, the OUT point of the preceding step
is frozen until PLAY or a slo-mo key is pressed, which freezes on the first frame of the next step. Press PLAY
or a slo-mo key again to continue playing. Note that the playback playlist can be different than the setup

Version: 110930 Sport-HD INSTRUCTION MANUAL Page 13 of 20
playlist, so don't assume pressing PLAYLIST will load the same one you've been setting up (if in doubt, always
hit the playlist number on the keypad before hitting PLAYLIST).
Playback speed can be varied while a playlist is playing, just hit F9 to change to 75% (by default), and turn the
knob to vary speed on the fly. This allows you to see some events more slowly than others and allows the
playback time to be extended. (Slo-mo speeds cannot be programmed into playlist steps, they can only be
changed manually.) The STATUS display is continually updated to show the actual amount of time it will take to
finish playing the playlist at the speed in effect at each moment (or time until the next STL if any are
programmed). Sometimes you don't have time to finish playing a playlist and want to hurry it up. To do this,
press the RIGHT arrow key while a playlist is playing, the current step ends early and a switch is made to the
next step as though the end of the current step was reached. While stopped, the current step can be changed
using the RIGHT and LEFT arrow keys or by entering a step number and pressing ENTER. If the IN or OUT
key is held while the LEFT or RIGHT arrow is pressed, playback is cued to the IN or OUT point of the new
step’s cue point. To cue to the current (not first) step, hold the IN key while pressing CUE. Hold OUT and press
CUE to cue to the OUT point (or PREROLL for 2 seconds earlier).
LOOPING
Looping is enabled by pressing the LOOP key so that the LOOP LED lights. When on, playback will continuously
loop between the last used cue point’s IN and OUT points. If the playlist mode is enabled, the entire playlist will
loop forever. Cue points must have a duration of at least 1 second for looping to operate properly.
STATUS DISPLAY
The STATUS display always shows the current status of the video server regardless of what is being done in the
menu system. Also, all transport keys (PLAY, STOP, CUE, SLO-MO, etc.) are always active. The bottom line of
the STATUS display always shows the record or playback status. When in slow motion mode, the speed reads out
in percent of normal speed, when in scan or shuttle, the display reads in multiples of normal speed. The beginning
of the top line shows the cue point that was last cued with CUE or PREROLL or created with REC.
REMAINING TIME DISPLAY
The top line of the STATUS display shows the time remaining in either the current clip (time until OUT point), or
if playlist mode is enabled, the time remaining until the end of the playlist or the next still step. The format of the
remaining time is -HH:MM:SS:FF, where the - sign indicates playback is before the OUT point (or playlist STL or
END), HH is hours, MM is minutes, SS is seconds, and FF is frames. If playback is after the OUT point, the
time after is shown preceded by a + sign.
REMAINING TIME IN SLO-MO
If playback is in slow motion and not stopped, the approximate remaining time is shown scaled for the current
playback speed. As speed is changed (by turning the knob or using speed preset keys), the remaining time is
adjusted on the fly to represent the actual time that playback will continue at that speed. If more than one hour
of recorded material remains, the speed calculation is not used. When the remaining time is scaled for speed, it
is preceded by a ‘v’ to indicate that variable play speed is taken into account.
TIMECODE POSITION DISPLAY
The actual timecode being played is displayed in lieu of remaining time when the OUT key is held down.
MENU DISPLAY
The MENU display is used for various purposes depending on the panel’s mode. Press HOME and turn PLAYLIST
off to return to normal display mode.
HOME DISPLAY
The MENU display normally shows the “current” cue point number and IN point timecode on the top line and its
duration on the bottom line. The OUT point timecode can be viewed instead of duration by holding the OUT
key. To change to a different cue point, simply enter the cue point number on the keypad and press ENTER. If
you press CUE or PREROLL instead of ENTER, it has the same effect as pressing ENTER, then CUE or
PREROLL (playback immediately cues to the newly entered cue point). The RIGHT and LEFT arrow keys
change to the next or previous cue point. If IN or OUT is held while the RIGHT or LEFT arrow is used, playback
cues to each new cue point. This allows quick browsing of successive cue points.

Version: 110930 Sport-HD INSTRUCTION MANUAL Page 14 of 20
PLAYLIST DISPLAY
The PLAYLIST button toggles the playlist mode on and off. If a number key (0-4) is pressed before PLAYLIST,
that playlist is selected for playback. While playlist mode is enabled (PLAYLIST LED lit), the MENU display
shows the playlist number and the current and next steps and cue points. To see the IN point and duration for
the current step’s cue point, press and turn off PLAYLIST. Note that turning PLAYLIST off just before reaching
the end of a playlist step will cause playback to pause at the OUT point of the current step.
MENUS
The MENU display is also used for navigating SETUP menus. Setup menus are entered by pressing SETUP
followed by another key. Press HOME when done with a setup menu.
The setup menus are:
KEY PRESSED AFTER SETUP MENU MENU ITEMS
MARK PERSONALITY MENU
ITEMS SAVE PERSONALITY
RECALL PERSONALITY REGISTER
RECALL DEFAULTS
CALC VS. PHONE STYLE NUMERIC KEYPAD
PLAY DDR SETUP ITEMS EXTERNAL REF (SD CHANNELS ONLY)
SET INPUT LEVELS (SD CHANNELS ONLY)
EXT DDR CONTROL (NATIVE/ODETICS)
EXT DDR SOFTWARE UPDATE
REC RECORD SETTINGS
(SHOWS DISK SPACE) INPUT VIDEO SEL
TIME OF DAY & DATE
COMPRESSION (SD CHANNELS ONLY)
TV STANDARD SEL
DELETE CLIPS
DELETE NON-PL CLIPS
CLEAR CUES NO DELETE
ERASE ALL VIDEO
FORMAT DISK!!!
REC END MODE
MAXIMUM RECORD DURATION
STOP OPERATIONAL
PREFERENCES CHANNEL QUANTITY
RECUE WHEN PLAY
BUMP AUTO START
KNOB SENSITIVITY
JOG MAX SPEED
JOG SENSITIVITY
SCAN ( & ) SCANNING SPEEDS SCANNING SPEEDS
PLAYLIST PLAYLIST SETUP MENU PLAYLIST SETUP
CUE CUE POINTS KNOB SCROLLS THROUGH CUE POINTS
PREROLL SET PREROLL IN FRAMES TO 99 SECONDS
F1-F9 F-KEYS SETUP MENU FUNCTION KEYS (F-KEYS)
ENTER MISC MENU ITEMS VERSION AND TEST
LED BRIGHTNESS
MENU & STATUS DISPLAY ANGLES
INITIALIZE UNIT

Version: 110930 Sport-HD INSTRUCTION MANUAL Page 15 of 20
CUSTOMIZATION
PERSONALITY MENU ITEMS
All user configuration settings are stored in permanent memory and remain safe even after extended periods
without power (at least 10 years). Settings can be stored in any of five personality registers for later recall, allowing
different users to personalize the panel to their preferences. Press SETUP, MARK to enter the PERSONALITY
MENU ITEMS menu. Use the UP and DOWN arrows to choose a selection and select it with the ENTER key.
SAVE PERSONALITY
After selecting this item, enter a register number on the keypad (0-4), then press ENTER. You can then name
the register by turning the knob to change the character and using the RIGHT and LEFT arrow keys to change
the character position. Press ENTER when done. The personality remains protected unless the unit is
initialized (see MISC MENU ITEMS, INITIALIZE UNIT).
RECALL PERSONALITY REGISTER
To recall a previously stored personality, enter the register number (0-4) on the keypad (names of registers are
shown as you press different keypad keys), then press ENTER. The settings that were in effect when the
register was saved are recalled.
RECALL DEFAULTS
Recalls the factory default settings. Saved personality registers are not altered.
CALC VS. PHONE STYLE NUMERIC KEYPAD
The numeric keypad is arranged telephone style. The panel can be changed to calculator style by changing this
menu item. This setting is stored separately from personality data and can only be changed using this menu.
After changing the style, it is necessary to physically swap the keycaps between the 1-2-3 and 7-8-9 keys.
DDR SETUP ITEMS
Press SETUP, PLAY to enter the DDR SETUP ITEMS menu. Use the UP and DOWN arrows to choose a
selection and select it with the ENTER key. This menu changes video server related settings.
EXTERNAL REF (SD CHANNELS ONLY)
Enables or disables external video timing reference and facilitates subcarrier and horizontal phase adjustments.
If reference video is not supplied to the REF connector, you MUST disable this menu or serious random picture
breakup and timing disturbances will occur. If external reference is not required or applied, select DISABLED
and press ENTER to enable internal “free run” reference.
Video timing can be adjusted only in playback mode. In the record and EE (input check - double hit REC)
modes, input video is fed directly to the outputs without processing and the input to output delay is fixed and not
affected by timing adjustments. Record a short clip of color bars (at least two seconds), press CUE, turn on
LOOP, and press PLAY to continually play the signal for timing reference adjustment.
If external “blackburst” video reference is applied to the REF connector, select ENABLED in this menu and
press enter. The UP arrow selects SUBCARRIER for adjustment, the DOWN arrow selects HORIZONTAL.
The knob adjusts the selected phase. Phase adjustments affect the outputs as the knob is turned, but the new
values are not stored in memory until ENTER is pressed. HOME cancels the adjustment process without
saving and restores the original timing.
SET INPUT LEVELS (SD CHANNELS ONLY)
Allows adjustment of the input video processing levels. The UP and DOWN arrows select which adjustment to
make, the knob adjusts the level. Unlike most other adjustments, the results are saved as soon as the
adjustments are made (the ENTER key need not be used). The input adjustments should be done while in the
input check mode (double-tap the STOP key). Adjustments are for BRIGHTNESS (black level), CONTRAST
(like gain, but counteracts with black), SATURATION, and HUE. This adjustment does not affect the SDI input.
EXT DDR CONTROL (NATIVE/ODETICS)
The default setting is PANEL CONTROL, which means the Sport panel has control of the internal video server.
While Sport has control, the REMOTE connector is “hot” with Sport’s TX signals, so any external controller must
be disconnected. EXT NATIVE CONT allows an external controller connected to the REMOTE connector

Version: 110930 Sport-HD INSTRUCTION MANUAL Page 16 of 20
access to the server. The server operates in “Native” mode and Odetics protocol extensions are not available.
EXT ODETICS CNT changes the mode of the server to Odetics protocol mode, then releases control to the
REMOTE connector. For the Odetics mode to be enabled, the REMOTE connector must be disconnected from
an external controller until EXTERNAL CONTROL appears on the STATUS display. The server will then
operate as a fully functional Odetics protocol video server. Material recorded in the Native mode will not be
accessible in Odetics mode, however material recorded using an external controller in Odetics mode will be
accessible when the unit is returned to PANEL CONTROL. Sony P2 protocol VTR commands work in both
Native and Odetics modes.
EXT DDR SOFTWARE UPDATE
The internal video server is put into a software download mode and control is temporarily released to the
REMOTE connector. A computer can then upload video server software updates via the REMOTE connector
using the XMODEM protocol. A computer port must be converted from RS-232 to RS-422 to communicate with
the video server via the REMOTE connector. Once selected, Sport cannot regain control of the video server
until the unit is powered down (always for a minimum of 5 seconds), then powered back up.
RECORD SETTINGS
Press SETUP, REC to enter the RECORD SETTINGS menu. Use the UP and DOWN arrows to choose a
selection and select it with the ENTER key. While in this menu, the available FREE recording time is shown on the
MENU display top line. This is an approximate time and is affected by picture content.
INPUT VIDEO SEL
(HD: PROGRESSIVE, INTERLACED, SD: COMPOSITE, Y/C, OR SDI)
Selects the type of input video that will be recorded. This must match the input format or recordings will not
succeed, even though it may appear so when recording.
TIME OF DAY & DATE
Do not set (set to zeros) if using HD channels! Sets the current time of day and date. When enabled (nonzero)
clips are created with IN points at the time of day. This does not work with HD channels, which must start at
zero or cueing will not work. Once set, SD channels keep track of time of day even through power interruptions.
If a timecode signal is applied to the TBar TC input, time of day is automatically set.
DO NOT APPLY TIMECODE TO THE TBAR IF HD CHANNELS ARE USED!
COMPRESSION (SD CHANNELS ONLY)
Sets the amount of data compression used for recording from 4:1 to 20:1 (default is 5:1). The best picture
quality is achieved at 4:1, with no noticeable signal degradation. At 20:1, the picture quality is poor, but the
available record time is significantly increased. A compression rate of about 6:1 provides a good compromise
between quality and record capacity and is similar to DV compression. As the compression rate is changed, the
display shows the approximate amount of available record time taking into account the compression shown.
The new setting is not put into effect until the ENTER key is used and a new recording is started.
TV STANDARD SEL
(HD: 59.94, 50, SD: NTSC, PAL)
Selects the television frame rate standard (or field rate for interlaced) to be used for recording (typically 59.94 in
North and South America, 50 elsewhere). Also must match the input format for recordings to succeed.
DELETE CLIPS
Permanently erases recorded clips from all selected channels. Clips defined by record cue points (ones marked
with periods) that fall within the range entered are deleted. Deleted material cannot be recovered! If material in
these recordings is used in cue points outside of this range, it will be erased regardless, and those cue points
will be marked as deleted. Deleted cue points are indicated with a small ‘d’, but are not removed so any
external documentation of higher cue points that you may be keeping will still refer to the correct cue point
numbers. Deleted cue points are removed if there are no other higher numbered cue points.
DELETE NON-PL CLIPS
Same as DELETE CLIPS, except does not delete clips that are used in any playlists.
CLEAR CUES NO DELETE
Clears all cue points in the specified range, but does not delete any recorded clips. Existing clips are skipped
by subsequent recordings and cue points and as they are used (cued), their IN and OUT points are restored.

Version: 110930 Sport-HD INSTRUCTION MANUAL Page 17 of 20
ERASE ALL VIDEO
Deletes all recorded clips, cue points, and playlists. This cannot be undone!
FORMAT DISK!!!
Formats a disk for recording. This menu item allows a new disk to be formatted for use. Once formatted, power
must be removed (always for at least 5 seconds), then restored. Format will erase any material that may exist
on the disk and erases all cue points and playlists. You will be asked to hold the REC key and press MARK to
confirm before formatting begins.
REC END MODE
The default is ANY XPORT KEY. While recording, the record process is stopped and playback mode is entered
whenever any playback related key such as STOP, CUE, or reverse scan ( ) is hit while recording. If you
do not want to stop recording so easily, set this menu to ONLY STOP KEY.
MAXIMUM RECORD DURATION
Sets the maximum length of time that a clip will record. If set to zero (default), recording continues until disk is
filled. This is useful for applications where long term unattended recording is desired, especially when some
remaining disk space is needed.
OPERATIONAL PREFERENCES
Press SETUP, STOP to enter the OPERATIONAL PREFERENCES menu. Use the UP and DOWN arrows to
choose a selection and select it with the ENTER key.
CHANNEL QUANTITY
Allows setting the number of replay channels connected to the panel. When only one channel is used, the F1
key is not needed to select channels, so is available for other F-key features (see FUNCTION KEYS (F-KEYS)).
RECUE WHEN PLAY
When enabled, if playing at normal or slow motion speeds, the CUE key causes a clean cut to the current cue
(the one on the MENU display) without stopping or even pausing. Normally, the CUE key stops playback and
cues to a still. This works like a manual playlist step, continuing to the new cue point at the current speed.
When playing, enter any cue point number on the keypad then hit CUE to switch to the next cue, then repeat as
desired. If disabled (default), this feature can be used by holding HOME when hitting CUE (while playing, enter
cue number, ENTER, hold HOME, hit CUE).
BUMP AUTO START
When disabled, requires manual playing of the IN bumper clip after using a Bump I/O key. For more information
see BUMP I/O. Default is ENABLED. When enabled, a second part of this menu allows changing the IN
bumper delay, which delays at still after cueing the IN bumper before playing. Default is 10 frames delay.
KNOB SENSITIVITY
Reduces the overall sensitivity of the knob by two or four fold. If you feel the knob is too sensitive in all modes,
use this item to reduce it’s sensitivity.
JOG MAX SPEED
Limits the maximum speed the jog mode uses. Use the knob to set the fastest speed that the picture will travel
by turning the knob in the jog mode. The JOG MAX SPEED may be set from zero to 500% normal speed. The
default is 500%. This setting does not affect the fast jog mode.
JOG SENSITIVITY
Adjusts the speed the knob must be turned in the jog mode to reach the JOG MAX SPEED. This setting affects
the fast jog mode also. Default is 10 units (units are arbitrary).
SCANNING SPEEDS
By default, the scan keys ( & ) scan playback at 6 times normal speed. To change the speed of either
key, press SETUP, the scan key, turn the knob until the desired speed is shown, then press ENTER.
PLAYLIST SETUP MENU
See PLAYLIST SETUP in the OPERATION, PLAYLISTS section.

Version: 110930 Sport-HD INSTRUCTION MANUAL Page 18 of 20
CUE POINTS
Press SETUP, CUE to enter the CUE POINTS menu. While in this menu, you can scroll through all cue points
using the knob.
SET PREROLL
Press SETUP, PREROLL to change the preroll time. The PREROLL key operates identically to the CUE key
except it cues to a point earlier than the IN or OUT point being cued. 2 seconds is the default, but the preroll
advance can be changed in 1 frame increments to any amount of time up to 99 seconds.
F-KEYS SETUP MENU
See FUNCTION KEYS (F-KEYS) in the OPERATION section.
MISC MENU ITEMS
Press SETUP, ENTER to enter the MISC MENU ITEMS menu. Use the UP and DOWN arrows to choose a
selection and select it with the ENTER key.
VERSION AND TEST
Displays software version dates and performs a self test. First, the version dates of the selected video server
are shown, press any key to show the control panel firmware version. All 24 LED indicators light and the
keyboard can be tested by checking that keystrokes show on the STATUS display. Move the TBar up and
down and observe the TBAR readings from 1 to 4095. Turn the knob to end the keyboard test. If a PROM
FAILED! message appears, the program PROM needs replacement. The unused stack space (MEM FREE:) is
also displayed and should be a non-zero number, if not, please call the factory.
LED BRIGHTNESS
Adjusts the brightness of the 24 LED indicators. Turn the knob until the desired LED brightness is reached,
then press any key.
MENU & STATUS DISPLAY ANGLES
Adjusts display contrasts to optimize for viewing angle.
INITIALIZE UNIT
DO NOT USE THIS MENU ITEM LIGHTLY! This menu item clears all PERSONALITY REGS which is not
recommended unless you really mean to clear them. This can be done without erasing personality data by
using the COLD BOOT function (see COLD BOOT).
COLD BOOT
In rare instances, especially during heavy ESD (electrostatic discharge) events like lightning storms or dry weather
in carpeted environments, panel memory can become corrupted. This can cause random symptoms including
garbage (random characters) displayed in menu settings, strange slow motion speeds, other settings that are out of
normal range, and/or complete failure of communication with connected channels. There are hardware circuits in
the panel designed to avoid errant RAM writes whenever power is below a certain voltage level, but there is no way
to completely protect against ESD induced problems.
A COLD BOOT restores all system memory to the factory default condition except the personality registers. It also
erases all cue points and playlists.
To perform a COLD BOOT: Disconnect the RJ45 cable from the main panel, and hold down the MARK and PLAY
keys while reconnecting. Continue holding the keys until you see characters on the displays.
If you had stored a personality register, it can be recalled after the COLD BOOT to bring the panel back to the way
you like it. If you save personality after the panel is already corrupted, it may contain corrupted data and still cause
problems. If personality data itself is corrupted, a stored register will appear as “default”, so if the name you saved
appears, you can trust that register (see PERSONALITY MENU ITEMS).

Version: 110930 Sport-HD INSTRUCTION MANUAL Page 19 of 20
SPECIFICATIONS
VIDEO
Standards: SMPTE 274M (1080I/29.97), SMPTE 296M (720P/59.94)
Input: HDSDI (1) BNC 75 OHM
Output: HDSDI (1) BNC 75 OHM
Supported Resolutions: 1920 x 1080I/29.97
1280 x 720P/59.94
1920 x 1080I/25
1280 x 720P/50
Compression: JPEG-2000
Bit Rate: Maximum supported by disk, up to 100Mbit/S
Reference Input: SD blackburst or HD tri-level sync - required for frame accuracy
AUDIO
Embedded: 8 channels embedded on HDSDI signals
AES (option): 4 channels - inputs ch 1-4 take priority over embedded if applied
Analog (replaces AES): 2 channels balanced, +4 dBu nominal line level
Resolution: 24 bits
Sampling Rate: 48 KHz
CONTROL RESOLUTION
Knob resolution: 256 PPR minimum, 2 pulse direction change hysteresis
TBar resolution: 12 bits (4095 steps), 2 step direction change hysteresis
DISK DRIVE
Interface Type SATA - 2.5” form factor cartridge with mini-USB
Capacity 500G
POWER
Voltage: 12VDC +/- 20%
Current, Startup: 3A Maximum (required for startup)
Power, Operating: Less than 20W typical
ENVIRONMENT
Operating: 0-35 Degrees C, 10-90% Relative Humidity (non-condensing)
Storage: 0-70 Degrees C, 10-90% Relative Humidity (non-condensing)
DIMENSIONS/WEIGHT
SPORT-EX Control Panel: 9.75"W x 8.1"D x 3.7"H / 6 lbs
RM-HD1 (Single Recorder): 1RU 1.7"H x 8.4"W x 9.5"D (including connectors) / 5 lbs
RM-HD2 (Dual Recorder): 1RU 1.7"H x 16.8"W x 9.5"D (including connectors) / 10 lbs

Version: 110930 Sport-HD INSTRUCTION MANUAL Page 20 of 20
FRONT PANEL SINGLE
REAR PANEL SINGLE
FRONT PANEL DUAL
REAR PANEL DUAL
Other manuals for Sport-HD
1
This manual suits for next models
1
Table of contents