4
APPLIANCESAFETYANDIMPORTANTSAFEGUARDS
SAVETHESEINSTRUCTIONS
RISK OF CHILD ENTRAPMENT
Child entrapment and suffocation are not problems of
the past. Junked or abandoned appliances are still
dangerous, so please do the following before
discarding your old refrigerator:
1) Take off the doors or drawers.
2) Leave shelves in place so children may not easily
Before the appliance is used, it m\ust be
properly positioned and insatalled as described in this manual, so read
the manual carefully to reduce the risk of fire, electrical shock or injury
when using the appliance by folllowing the basic precautions
below:Electrical cord for Refrigerator must be plugged into a 3 prong
outlet.
•
Do not remove grounding prong.
•
Do not use an adapter or extension cord.
•
It is recommended your Refrigerator be powered by a separate
circuit dedicated only to your appliace.
•
Use a receptacle that cannot be turned fo off by a swithch or
pull-chain.
•
Do not connect or disconnect the electric plug when your
hands are wet.
•
Unplug the appliance or disconnect power before cleaning or
servicing. Failuer to do so can result in electrical shock or
death.
•
Never clean appliance parts with flammable liquids. These
liquids have fumes that can create a fire or explosion hazard.
•
Do not store or use gasoline or other liquids with flammable
vapors in the vicinty of the or any other appliance that can
create a fire or explosion hazard.
•
Do not attempt to repair or replace any part of your appliance
unless it is specifically recommended in this manual. All other
servicin
should be referred to a
ualified
technician.
Yoursafetyandthesafetyofothersisveryimportant.
We have provided many safety messages in this manual and
on your appliance. Always read and obey all safety messages.
This is the Safety Alert Symbol. This symbol alerts you to
potential hazards that can injure or kill you and others. All safety
messages will follow the Safety Alert Symbol with the word ‘DANGER’
or ‘WARNING’
‘DANGER’ means that failure to heed this
safety statement may result in severe personal injury or death.
‘WARNING’ means that failure to heed this
safety statement may result in extensive product damage, severe
personal injury or death.
All safety messages will alert you about the potential hazard, tell you
how to reduce the chance for injury and let you know what can happen if the
instructions are not followed.
APPLIANCE SAFETY
IMPORTANT SAFEGUARDS
BEFORE INSTALLING YOUR APPLIANCE
Remove the exterior and interior packing.
Before connecting the appliance to the power source, let it stand
for approximately 24 hours.This will reduce the possibility of a
malfunction in the cooling system from handling during
transportation.
Clean the interior surface with lukewarm water using a soft cloth.
Install the handle to the door if needed.
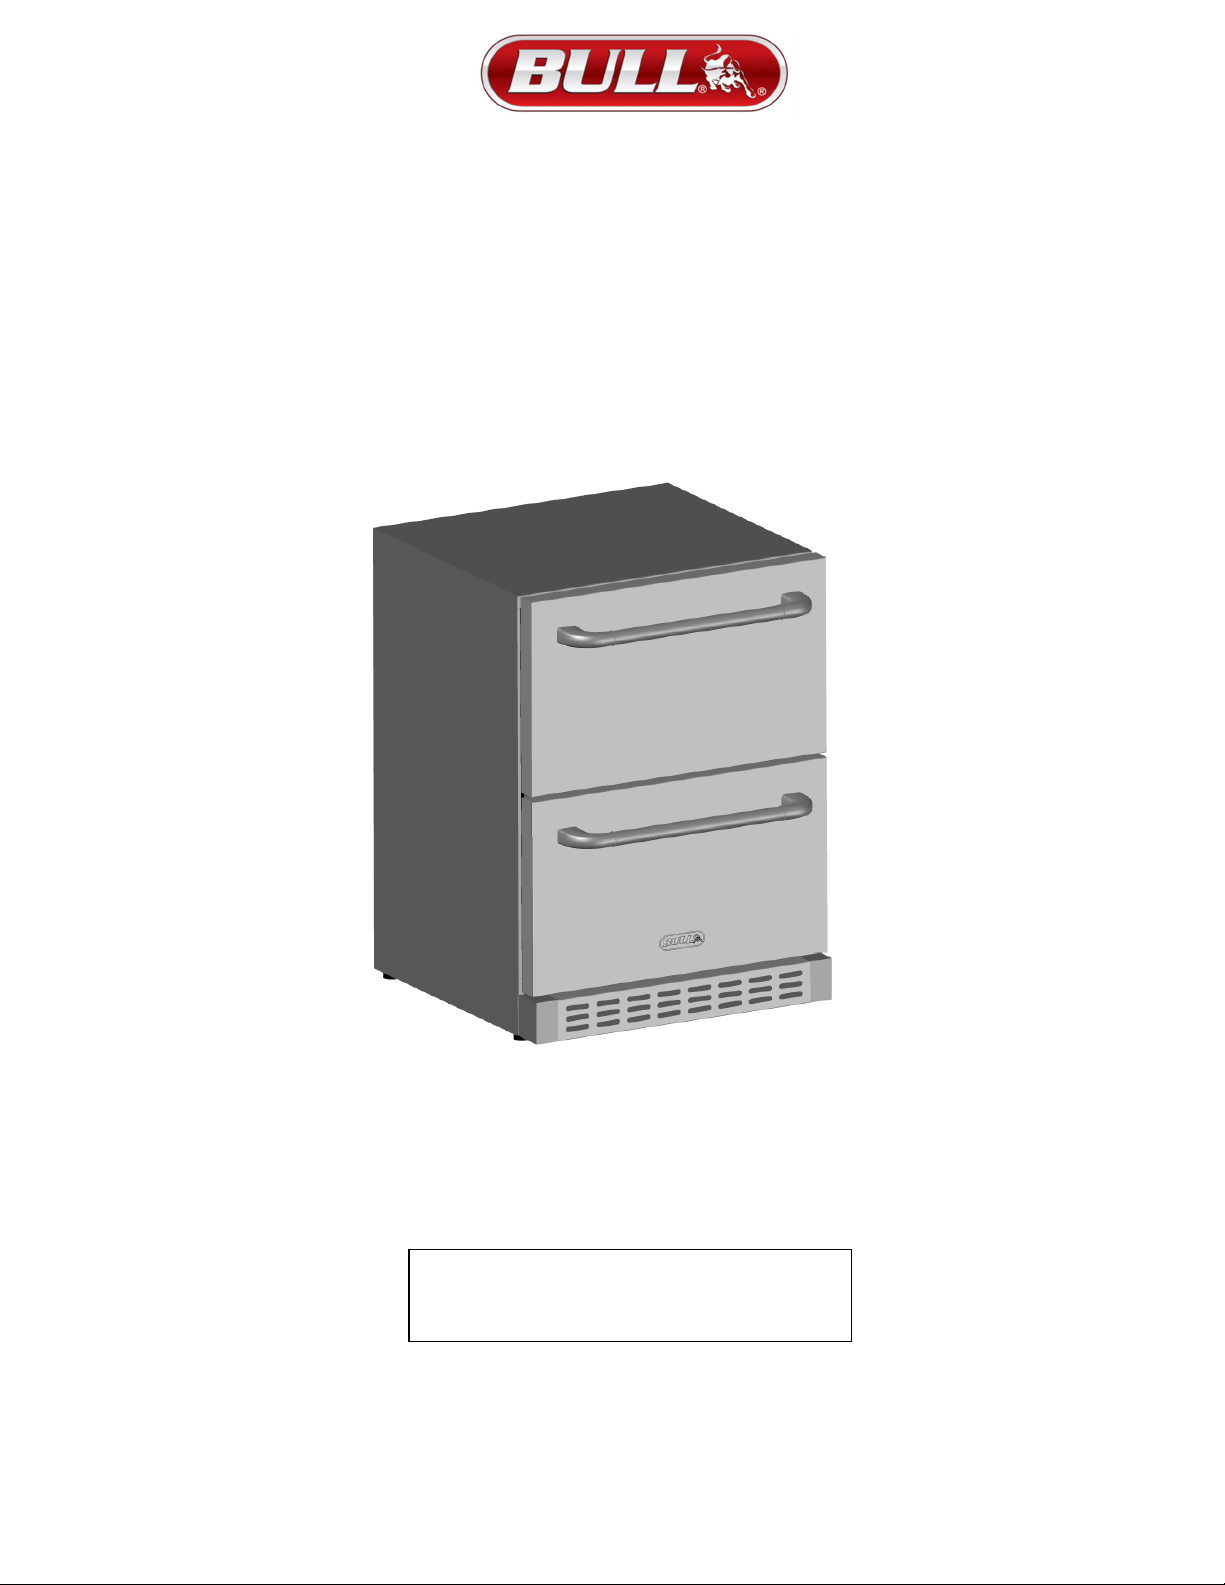
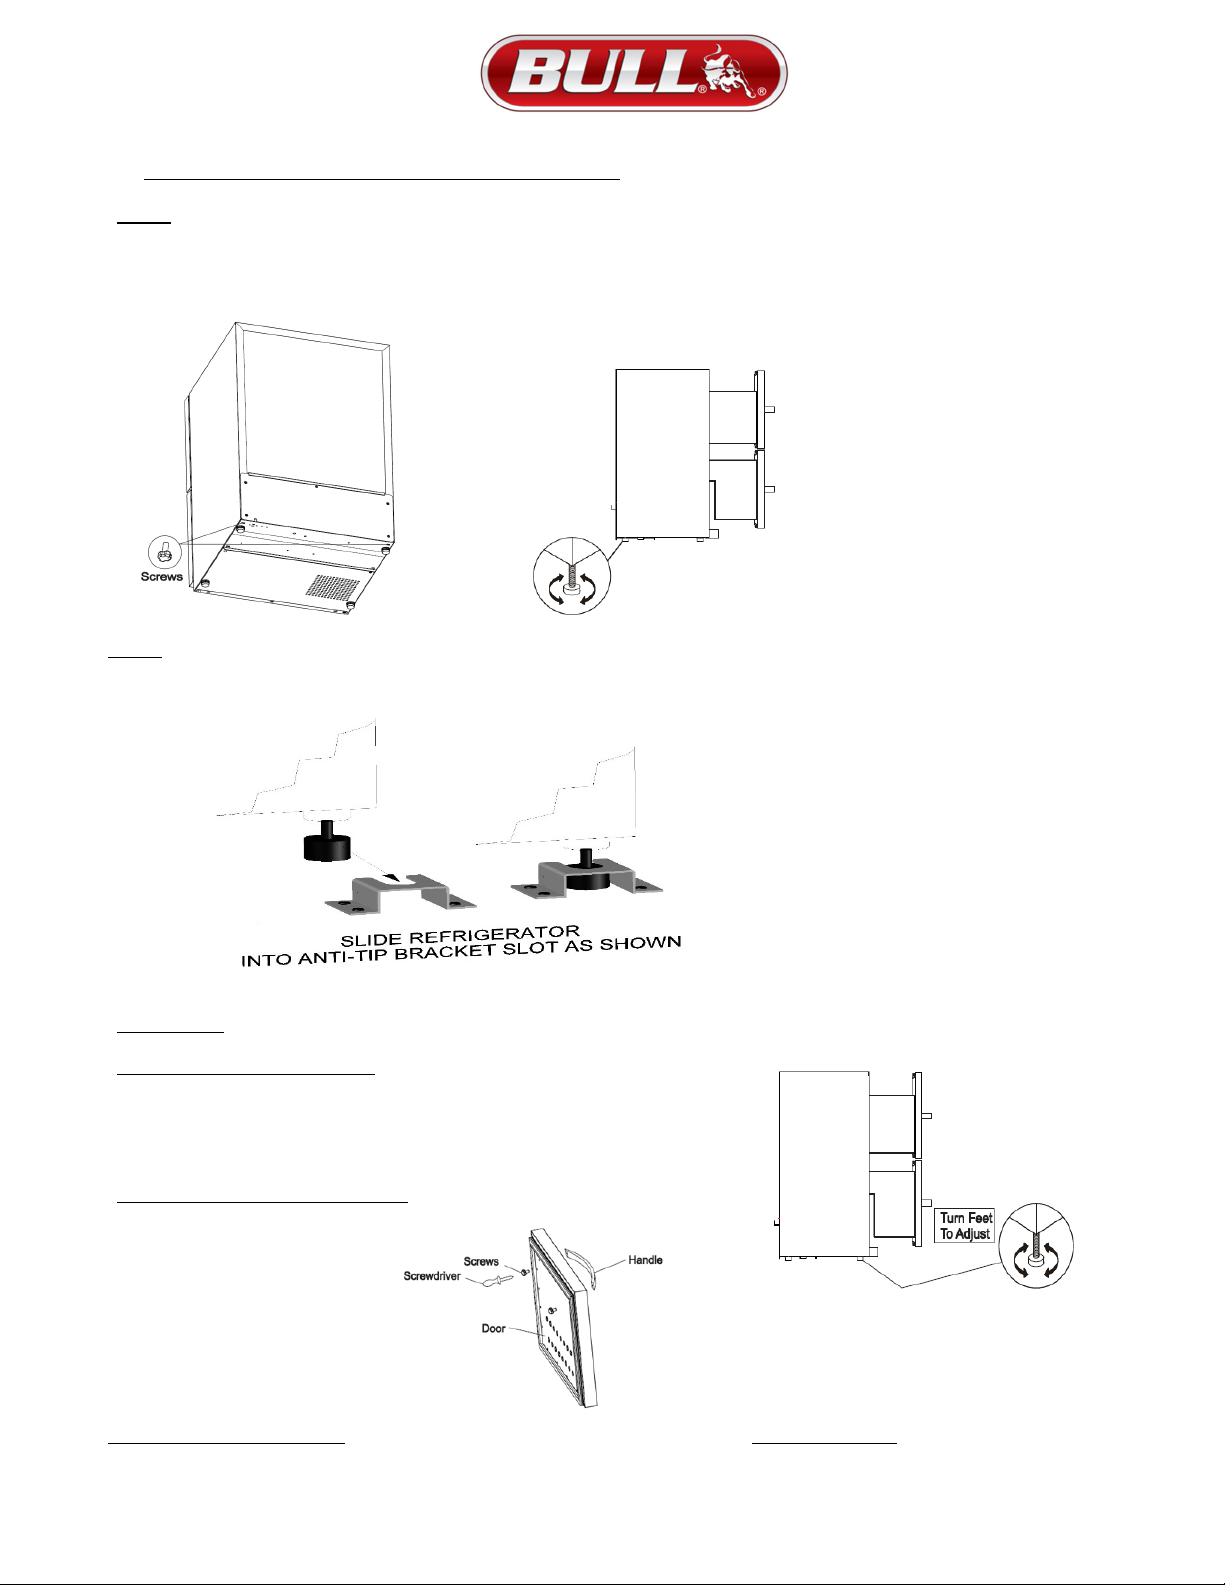
INSTALLING YOUR APPLIANCE
Your outdoor double drawer refrigerator has been designed for
built-in or free standing use.
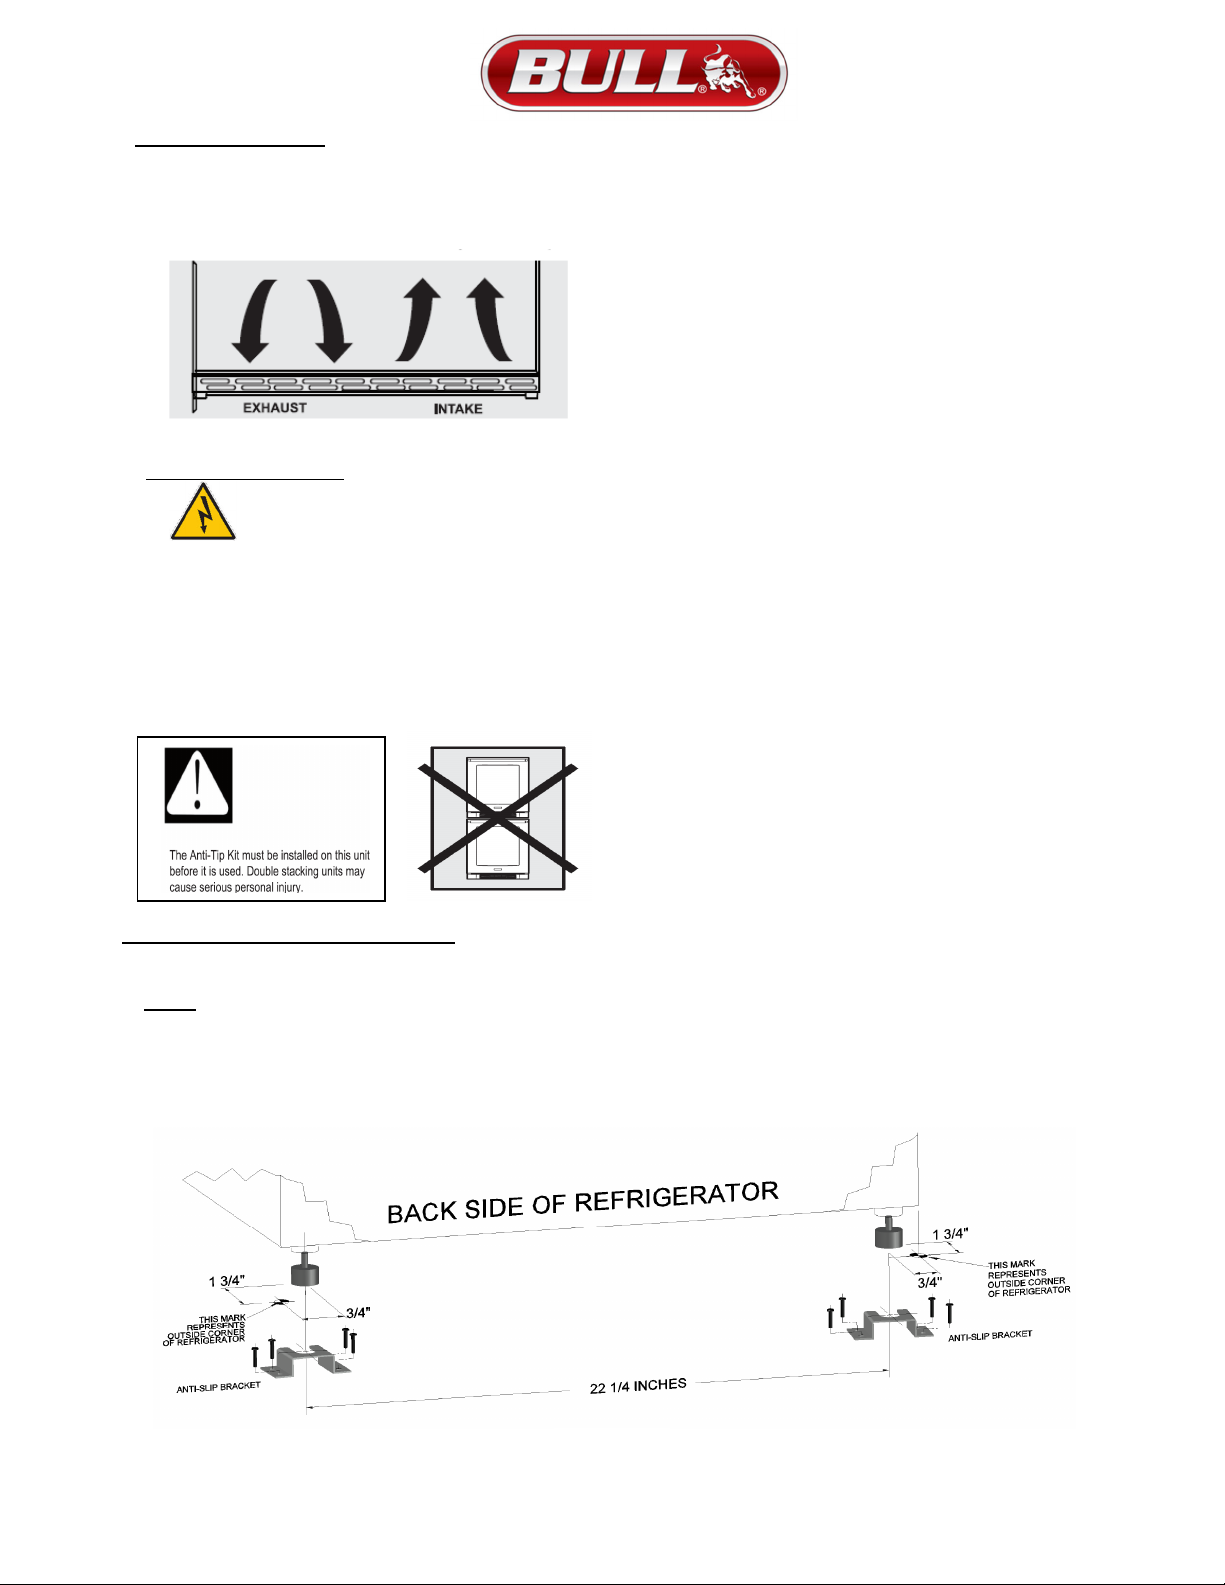
For built-in use, the front grill must not be obstructed.
No air space is required for the top, side or rear.
NOTE:
It is recommended that you do not install the appliance near
an oven, radiator or other heat source as it may increase
appliance electrical consumption.
Do not install in a location where the temperature will below
50 degrees Fahrenheit, or in a moist area.
For best performance, do not install behind a cabinet door or
in a manner that obstructs the front grill.
Plug the appliance into a dedicated, properly grounded wall
outlet
INSTALLATIONINSTRUCTIONS