5
A O
The 161 All-in-One combines several premium audio components into one unit,
providing multiple options for highest-quality reproduction of music.
Sophisticated Analog Circuit Engineering
The 161 has been designed in its entirety using sophisticated analog circuitry. The
signal path – front to back DC-coupled without distorting coupling capacitors –
guarantees precise bass reproduction because there is no phase shift in the audible
range.
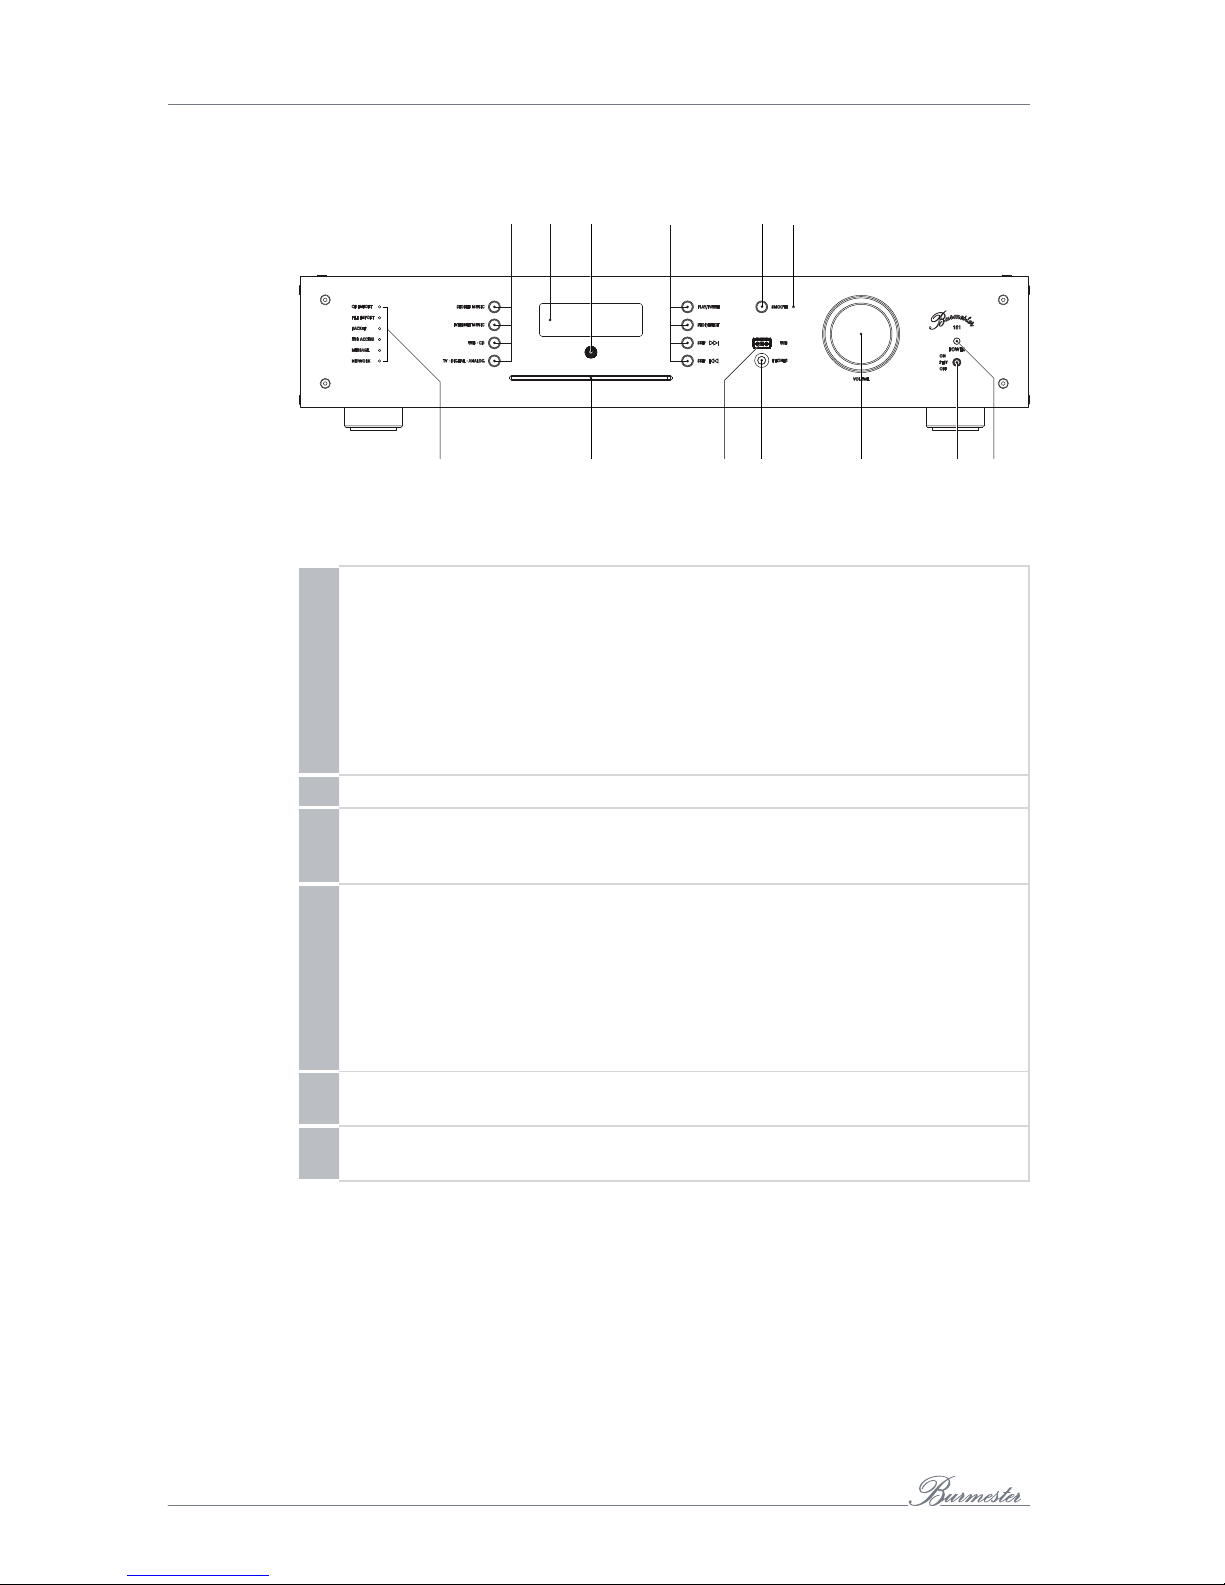
CD drive
Play music from a CD or use it to rip CDs to the internal hard disk.
Internal hard disk
Offers a memory capacity of three terabytes and optimizes the sound quality during
the ripping process.
If the device is connected to the Internet the CD cover art as well as information on
album content and artist are automatically downloaded and saved to the library.
Select music for replay from the library by track, by artist, album or genre or by using
the search function.
Home network
Connect the 161 to your home network. Thanks to the DLNA/UPnP standard it has
access to the musical content stored on other devices on the same network and can
stream content to other devices on the same network. This could be a another Phase 3,
Burmester Musiccenter or UPnP/DLNA server on the net
Music streaming, Music download and Internet radio1
With an existing Internet connection, you may stream high-resolution music from
TIDAL, download high-resolution music from HIGHRESAUDIO and access a variety of
Internet radio stations.
Using the iPad® app
Conveniently control the device with an Apple iPad® using the free BurmesterMC app:
• Select the signal source.
• Start ripping a CD to memory.
• Scroll through the covers of saved albums or display information on album contents
and artists.
• Export songs to a USB stick.
• Create and play playlists.
Operation using a web browse
Even without an iPad® you can access the device using any standard web browser. In
addition to selecting albums, tracks or playlists for playback the web browser interface
offers a variety of other functions:
• Import audio files in the formats flac, m4a, aif, wav, mp3, aac, ogg and dsd.
• Edit album and track information.
• Call up device-specific information
• Change device settings.
1 Connecting to the Internet and downloading music may result in usage-dependent cost.