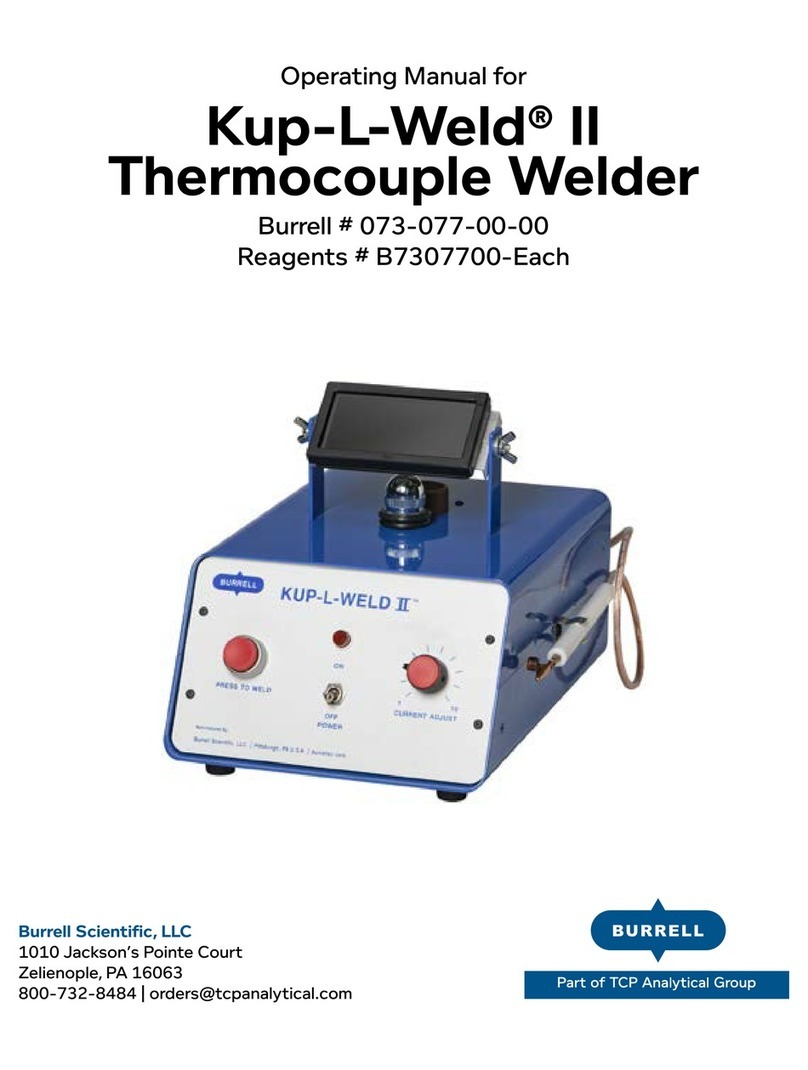
Burrell Kup-L-Weld II User manual

Operating Manual for
Kup-L-Weld®II
Thermocouple Welder
Item #073-077-00-00
Burrell Scientific, LLC
1010 Jackson's Pointe Court
Zelienople, PA 16063
800-732-8484 | [email protected]

2
800-732-8484
WARNING
Do not attempt to assemble, connect to power source, or
operate the Kup-L-Weld® II Thermocouple Welder without
rst reading these instructions. Also assure that each per-
son that will operate this unit becomes familiar with these
operating instructions.
Specications................................................................................ 2
Unpacking ..................................................................................... 3
Safe Operations ........................................................................3-6
Service........................................................................................... 6
Maintenance ................................................................................. 6
Accessories ................................................................................... 7
Warranty ....................................................................................... 7
CONTENTS PAGE
OPERATIONS MANUAL
Please read the User Manual carefully before use, and
follow all operating and safety instructions!
OPERATING INSTRUCTIONS
SPECIFICATIONS
ITEMS SPECIFICATIONS
Dimensions (H x W x D): 15 x 11 x 12 inches
Weight: 12 pounds
Voltage: 110 -120 VAC
Material (metal case): Abrasion-and corrosion-resistant paint
Warranty: One year

3
www.burrellsci.com
UNPACKING YOUR STIRRER
LISTING OF ITEMS
The packing includes the following items:
•The Burrell Scientic Kup-L-Weld® II Thermocouple Welder
•Welding Pen
•Power Cord
•Operating Manual
Unpack the stirrer carefully and check for any damages that
may have occurred during shipment.
Should any damage occur in shipment, do not
operate and notify Burrell Scientic Customer Service
department at 1-800-637-6074.
SAFE OPERATIONS
PREPPING THE KUP-L-WELD®II
•The Kup-L-Weld® II Thermocouple Welder must be
connected to a properly wired, 3-prong, grounded outlet
capable of supplying 110-120 volts at 30 amperes.
•Set up the welder in a spacious area on a stable, clean, non-
slip, dry, and reproof surface.
•Safety goggles or glasses must be worn when operating the
welder.
TO WELD
•The operator sets the Current Adjustment control to the
appropriate setting – the maximum of 10 for most welds –
however it is adjustable from 1 to 10 depending on wire gauge.
WARNING
If there is any apparent damage to the system, please do
not plug it into the power line.

4
800-732-8484
•The Kup-L-Weld® II can be set to draw from a minimum of
19 amps up to a maximum of 28 amps.
•After twisting together the ends of a thermocouple wire, use
the alligator clamp holder to grasp the thermocouple wires
about one inch from the ends to be welded.
•Press the “WELD” button and strike an arc between the
carbon rod and wires.
•Voltage is present on the carbon rod only while the “WELD”
button is depressed.
APPROVED WIRES
•The Kup-L-Weld® II welder will accommodate wire sizes
from 14 gauge to 30 gauge in chromel-alumel, chromel-
constantan, copper-constantan, iron-constantan, and
platinum-rhodium.
CURRENT ADJUST
•The “Current Adjust” control can be set at maximum for
most work.
•If diculty is experienced with excessive heat on smaller
gauge wires, the “Current Adjust” control can be turned
counter-clockwise to achieve a lower setting.
SAFETY FEATURES
•For operator safety, a ash protection viewing screen
is standard, however the screen is not to be used as a
substitute for proper eye protection.
•The viewing screen can be locked in the desired position by
tightening the thumb screws.
•The Kup-L-Weld® II welder has a 115-volt lamp which
illuminates the carbon rod contact area while welding. This
very useful feature adds to the overall safety of the unit
because it is not necessary to look over the viewing screen
to observe weld contact.
•The lamp may be replaced by removing the lamp shield,
then removing the lamp.
•Safety goggles or glasses are required, despite these safety
features.

5
www.burrellsci.com
THE USE OF BORAX FLUX
•The use of borax ux while welding is optional. Some
operators prefer not to use any ux and produce clean,
acceptable welds.
•CAUTION: Fumes will result from a borax ux, please
consult the manufacturer’s Safety Data Sheet.
•If ux is desired, the ux cup surrounding the carbon
electrode is a convenient place to store a quantity of borax
ux.
•Borax ux will adhere to the ends of the wires to be welded
in 2 ways:
1. By dipping the wire ends in water and then the ux.
2. By heating the ends of the twisted wires. Do to
this, contact the wire ends with the carbon rod
momentarily while gripping the wire in the pen style
alligator clamp holder with its insulated handles and
pressing the “WELD” button.
A DB EC F G
Fig. 1 Fig. 2
A. Push to Weld Button
B. Power On/O Toggle Switch
C. Weld Current Adjustment:
Set from 1-10 (18-30 amps)
D. Thermocouple Holding Pen
E. Adjustable Weld Flash
Protection Lens
F. Weld Point Illumination Bulb
G. Carbon Electrode Weld
Contact

6
800-732-8484
CHANGING THE CARBON ELECTRODE
•Disconnect the Kup-L-Weld® from power source.
•Loosen the Flux Cup screw
•Lift the Flux Cup. Be careful not to stretch connecting wires
too harshly.
•Loosen set screw with an Allen Wrench on Flux Cup and
remove the Flux Cup.
•Loosen bolt from copper clamp holding the Carbon. Remove
Carbon.
•To re-install, reverse these procedures.
If you encounter any problems with the installation or
initial operations of this unit, please contact us at:
800-732-8484 or [email protected].
SERVICE
If assistance is needed, please contact Burrell Scientic
for technical support. Please provide us with the following
information: certication, description of problem, methods
and procedures used to resolve the issue, and your contact
information.
CLEANING AND MAINTENANCE
CLEANING
•Do not allow moisture to get into the unit when cleaning.
•The welder must not be placed in the cleaning agent for the
purpose of cleaning.
•Spot clean only.
MAINTENANCE
•The welder must be cleaned and put into the original
packaging carton before sending out for service or repair.
•Switch the welder to the OFF position and store in a dry,
clean, and stable place at room temperature when not in
use.

7
www.burrellsci.com
WARRANTY
The Burrell Scientic Kup-L-Weld® II Thermocouple Welder
is warranted to be free from defects in materials and
workmanship under normal use and service, for a period
of 12 months from the date of invoice. The warranty is
extended only to the original purchaser. Warranty will not
apply to any product or parts which have been damaged
on account of improper installation, improper connections,
misuse, accident, or abnormal conditions of operations.
This welder can only be returned after receiving a return
authorization # from Burrell Scientic.
ACCESSORIES
Flux Cup
Item #: 073-077-25-00
Kup-L-Weld Carbon
Item #: 073-077-05-00
Replacement
Welding Pen
Item #: 073-077-06-00

Burrell Scientific, LLC
1010 Jackson's Pointe Court
Zelienople, PA 16063
800-732-8484 | [email protected]
This manual suits for next models
1
Table of contents
Other Burrell Welding System manuals
Popular Welding System manuals by other brands

Clarke
Clarke MIG102NG Operation & maintenance instructions

Lincoln Electric
Lincoln Electric RANGER IM834-B Operator's manual

ims PRO
ims PRO POWERMIG 200-4S manual

ESAB
ESAB Aristo RobustFeed U6 instruction manual

Ross
Ross RXT170P operating instructions

Eastwood
Eastwood ARC 80 20295 Assembly & operating instructions