TABLE OF CONTENTS
INTRODUCTION .................................................................................................................................................... 2
TABLE OF CONTENTS ......................................................................................................................................... 3
BEFORE YOU SET OFF ........................................................................................................................................ 4
SETTING UP .......................................................................................................................................................... 5
ARRIVAL AT SITE ................................................................................................................................................... 5
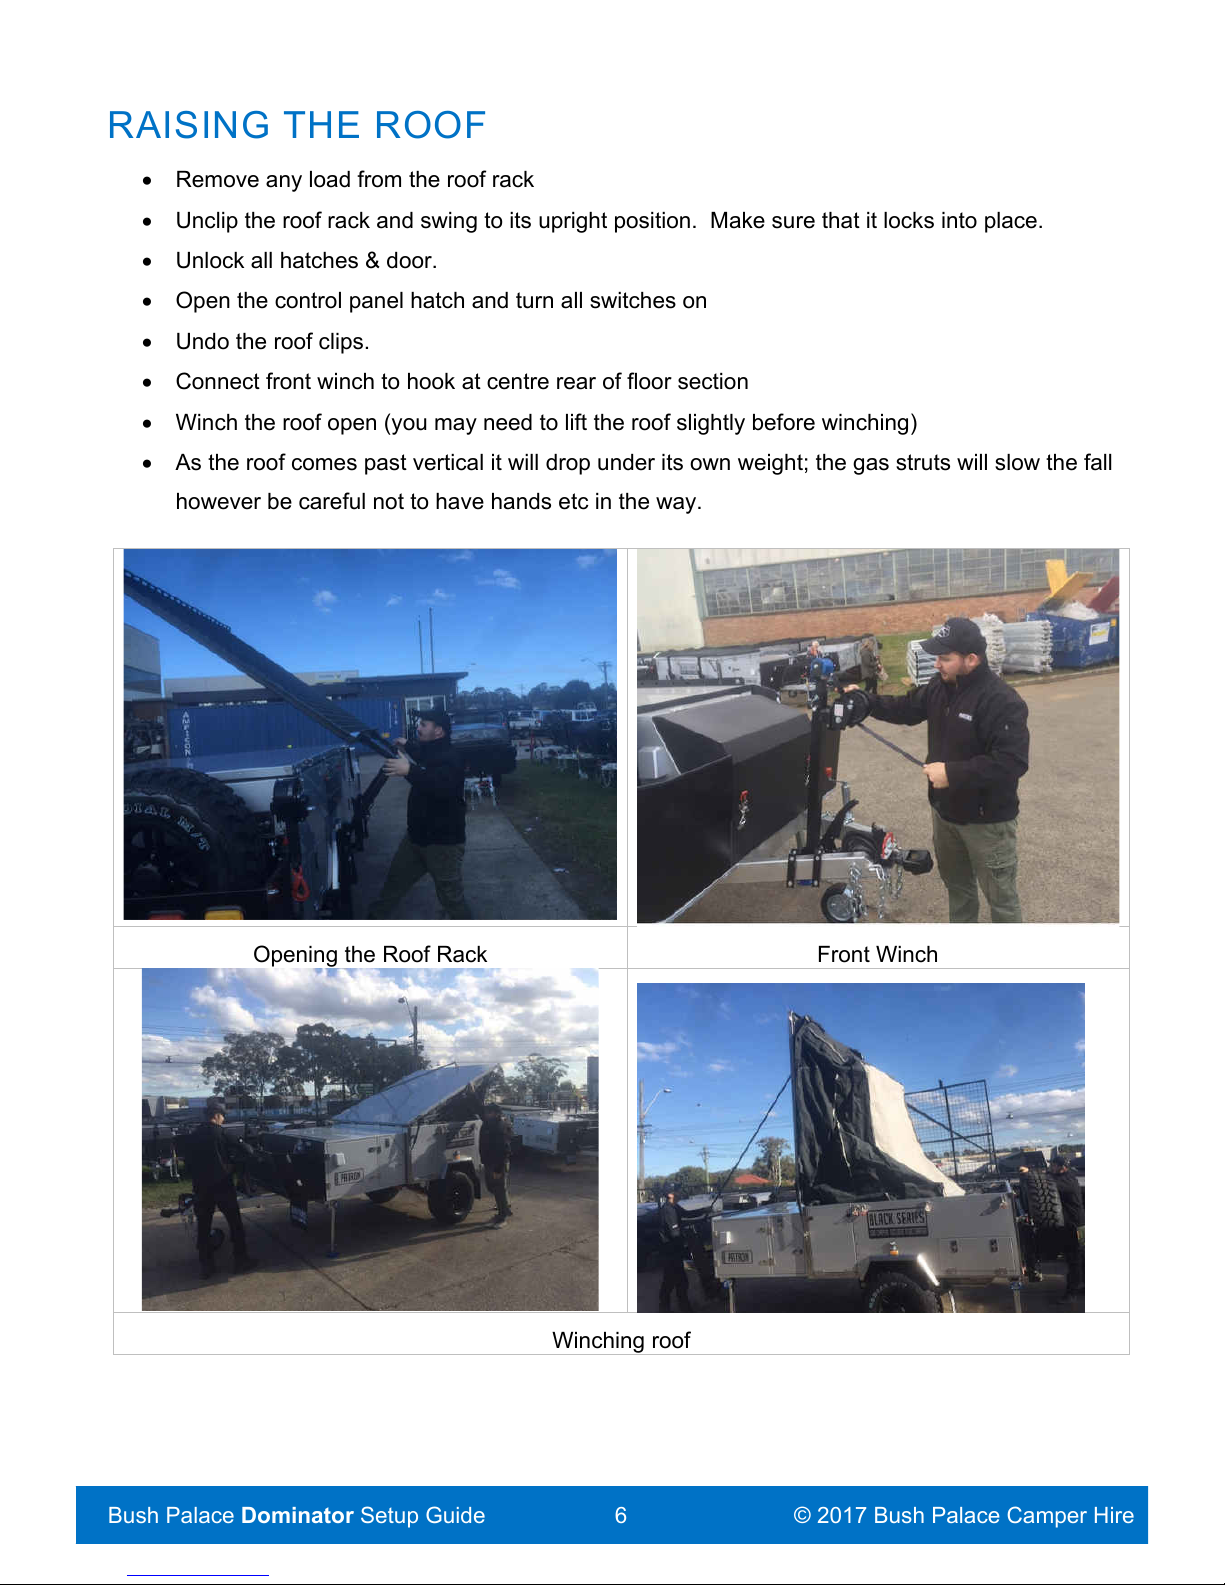
RAISING THE ROOF ............................................................................................................................................... 6
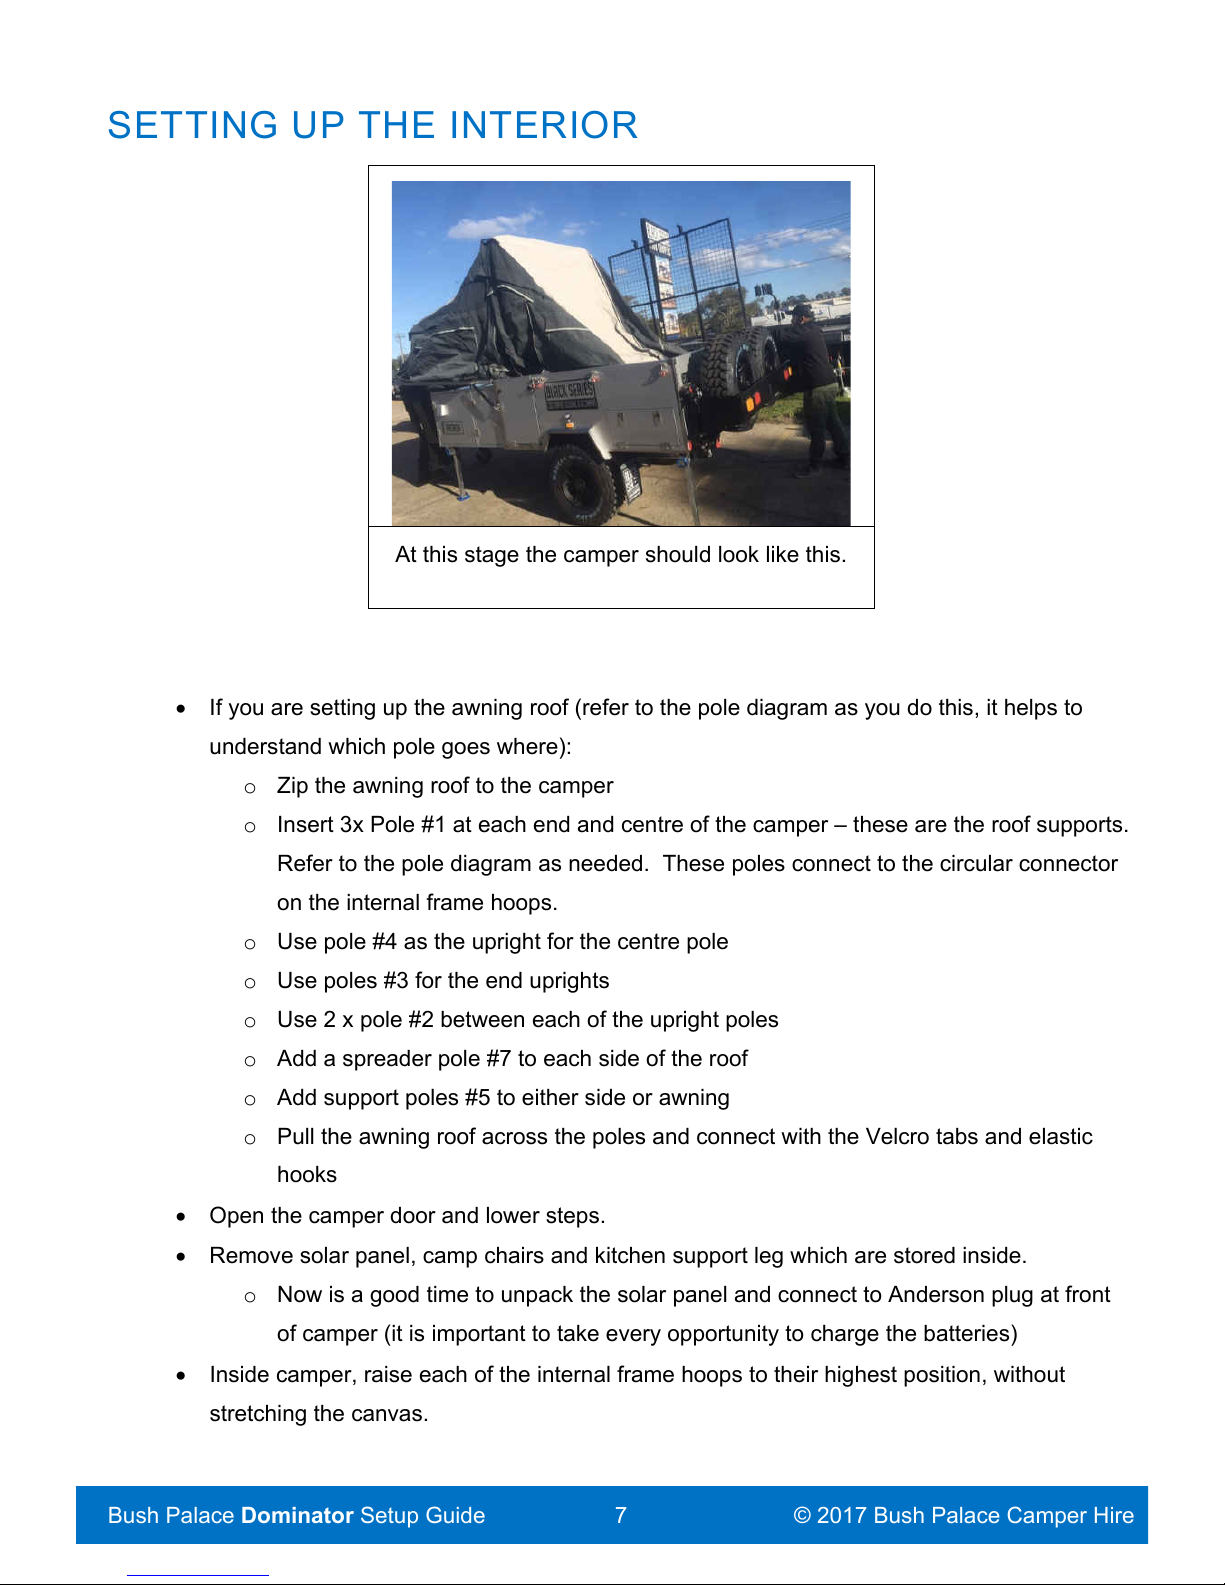
SETTING UP THE INTERIOR .................................................................................................................................... 7
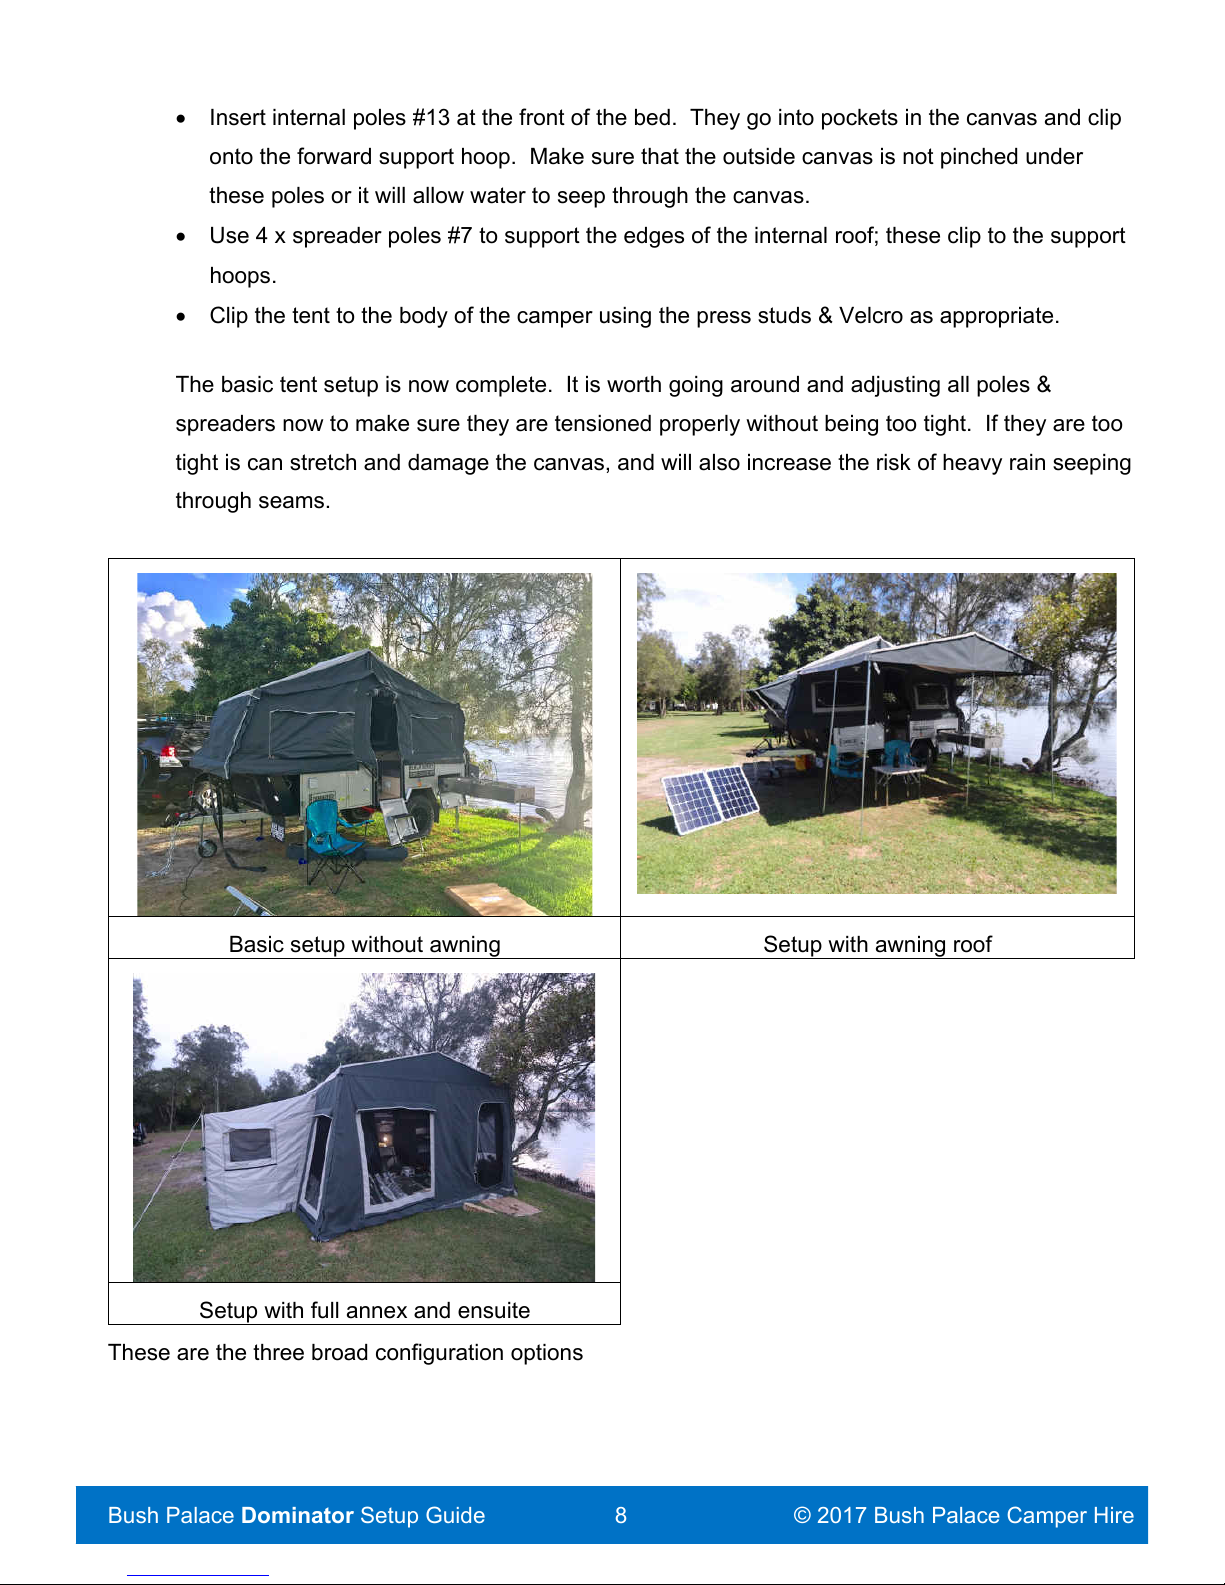
KITCHEN SETUP ................................................................................................................................................... 9
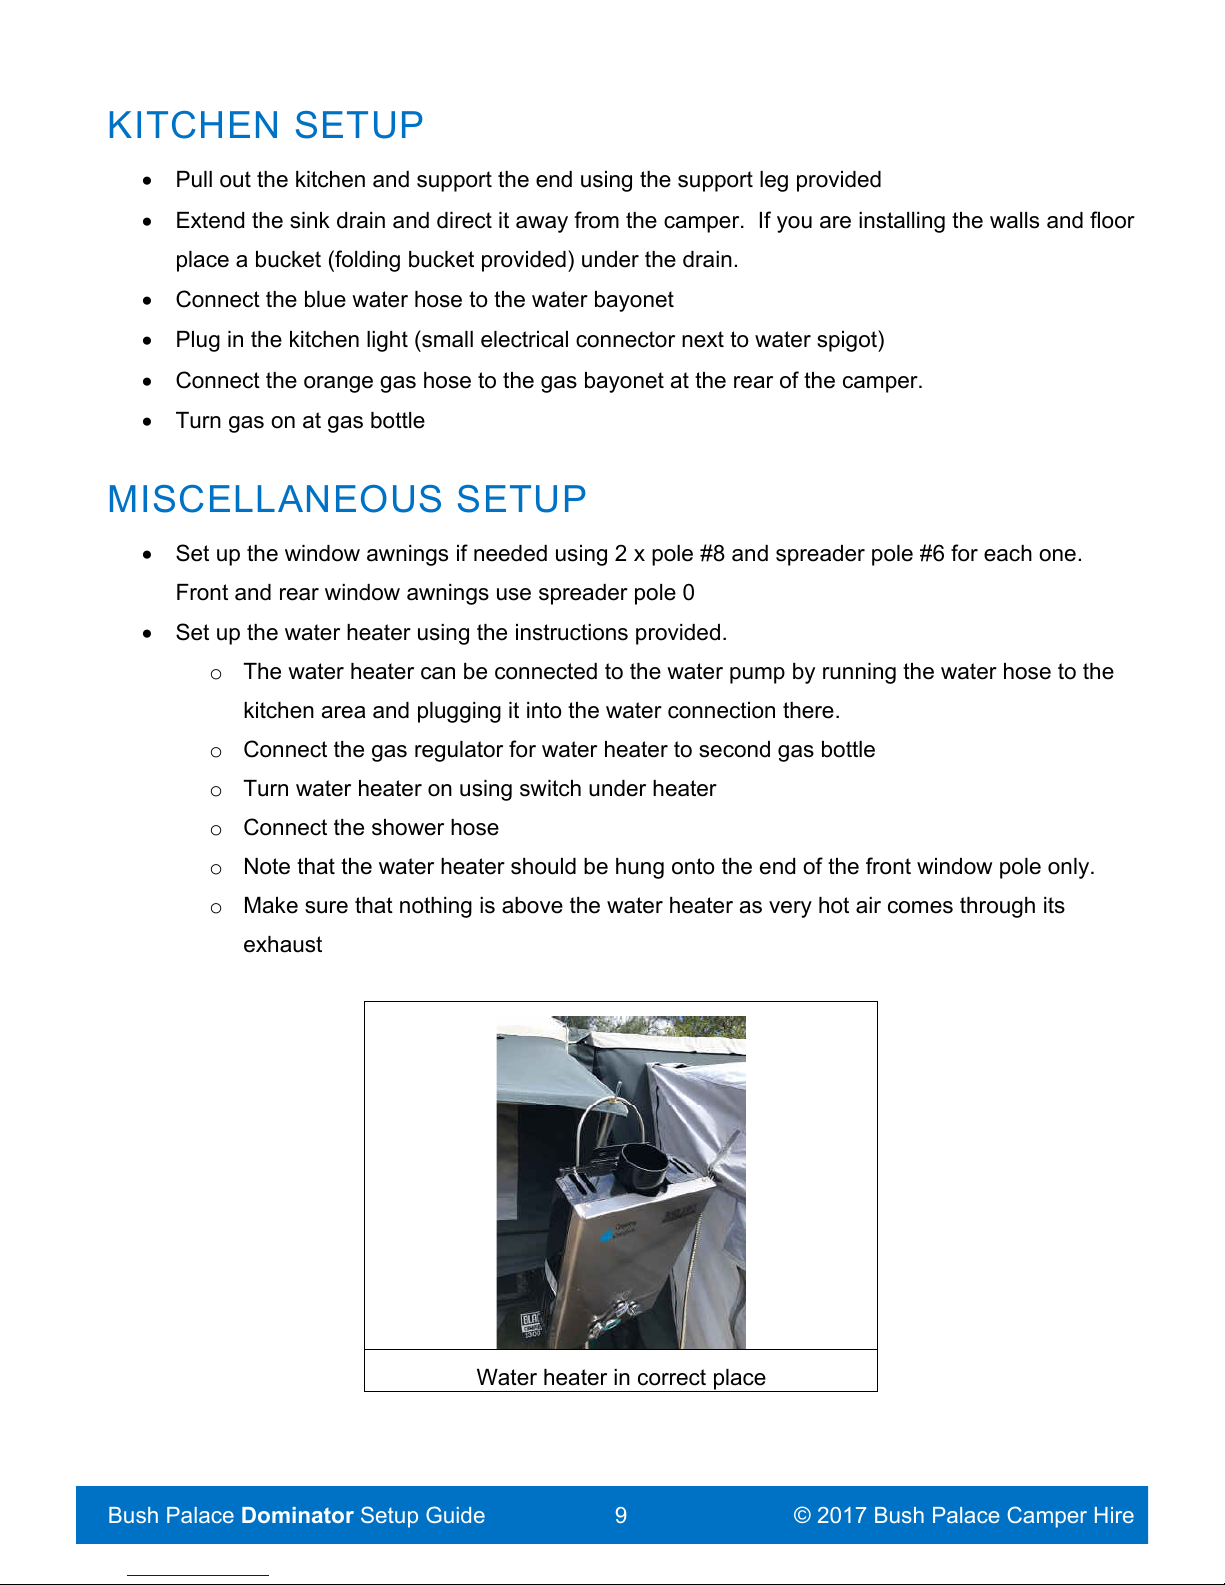
MISCELLANEOUS SETUP ....................................................................................................................................... 9
SIT DOWN & ENJOY! ............................................................................................................................................ 10
PACKING UP ....................................................................................................................................................... 11
INITIAL STEPS ..................................................................................................................................................... 11
HOOKING UP ...................................................................................................................................................... 12
FINAL CHECK ..................................................................................................................................................... 13
POLE GUIDE ....................................................................................................................................................... 14
INVENTORY ......................................................................................................................................................... 15
OPTIONAL ITEMS ............................................................................................................................................... 18
TV/DVD ............................................................................................................................................................ 18
SATELLITE DISH ................................................................................................................................................. 18
Unpack ......................................................................................................................................................... 18
Pack away .................................................................................................................................................... 20
INFLATABLE KAYAKS ........................................................................................................................................... 21
Setup ............................................................................................................................................................ 21
Packing away ............................................................................................................................................... 21
GAZEBO ............................................................................................................................................................. 22
GIC BLACK SERIES TRAILER CARE GUIDE ................................................................................................... 23
ANDERSON PLUG: .......................................................................................................................................... 23
WINCHES ........................................................................................................................................................... 23
JOCKEY WHEEL .................................................................................................................................................. 23
STABILISER LEGS ............................................................................................................................................... 23
CANVAS & TENT SECTION ................................................................................................................................... 24
BATTERY GUIDE ................................................................................................................................................. 26