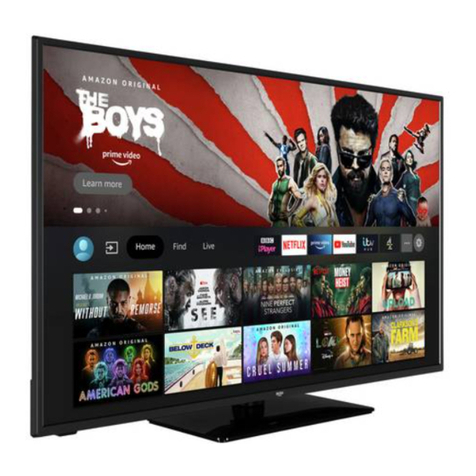
Bush LE-55GB2A Manual

55" Full HD 1080p LED TV
Installation & Operating Instructions - Please keep for future reference 747/1498
LE-55GB2A
These instructions contain important information which will help you get the best from your
television and ensure safe and correct installation and operation.
For any help concerning set up and use of your TV please call the
Customer Helpline: 0845 604 0105
Lines open: 9am - 8pm Monday to Saturday and 10am - 4pm Sunday
Important - Please read these instructions fully before installing or operating
Issue 1 - 8/11/12
BUSH-LE-55GB2 (TI12421)_IM V01.indd 1 2012/10/22 15:13:31

BUSH-LE-55GB2 (TI12421)_IM V01.indd 2 2012/10/22 15:13:31

1
For any help concerning set up and use of your TV please call the Customer Helpline: 0845 604 0105
Contents
Safety Information 2 - 3
Support 4
TV Features 5
Accessories included 5
Base Stand Assembly Instruction 6
Viewing remote control - TV 7-9
TV - Control buttons (Right side) 10
Aerial connection 10
Power connection 10
Remote control - Inserting batteries 11
Switching the TV On and Off 11
Operation using TV control buttons 12
Operation using remote control 12
Initial set up 13
General operation 13
Getting Started 4 - 13
Left sideconnections explained 14-15
HDMI Connections 16
SCART Connections 16
VGA Connections 16
Connections 14 - 16
How to navigate menus 17
Electronic programme guide (EPG) (DTV
mode) 17
Teletext (ATV mode) 18
Digital Teletext (DTV mode) 19
Time Shift Function (DTV mode) 19-20
Recording DTV Programme onto a USB
Storage Device 20
Timer Programming 21
Play Recorded Programme 22
Channel management (ATV / DTV Mode)
23-26
Picture management 27
Basic Features 17 - 38
Viewing Photo 39
Listening to Music 40
Viewing Movies 41
My Text 42
Entertainment 39 - 42
Sound management 28
Time management 29-30
Lock management 31-33
Setup management 33-38
6SHFL¿FDWLRQV
Digital reception 43
Plug replacement - UK and Ireland only 44
Energy label 44
Trouble shooting 45
6XSSRUWHG¿OHIRUPDWV
Disposal information 46
Other information 43 - 46
BUSH-LE-55GB2 (TI12421)_IM V01.indd 1 2012/10/22 15:13:31

2For any help concerning set up and use of your TV please call the Customer Helpline: 0845 604 0105
Safety Information
Important - Please read these instructions fully before installing or operating
Power source
RISK OF ELECTRIC SHOCK
DO NOT OPEN
CAUTION
CAUTION:
TO REDUCETHE RISK OF ELECTRIC SHOCK,
DO NOT REMOVE COVER (OR BACK).
NO USER-SERVICEABLE PARTS INSIDE.
REFER SERVICING TO QUALIFIED SERVICE
PERSONNEL.
7KHOLJKWQLQJÀDVKZLWKDUURZKHDGV\PERO
ZLWKLQDQHTXLODWHUDOWULDQJOHLVLQWHQGHGWR
alert the user to the presence of uninsulated
“dangerous voltage” within the product’s
HQFORVXUHWKDWPD\EHRIVXI¿FLHQWPDJQLWXGH
to constitute a risk of electric shock of persons.
The exclamation point within an equilateral
triangle is intended to alert the user to
the presence of important operating and
maintenance (servicing) instructions in the
literature accompanying the appliance.
7KH79VKRXOGEHRSHUDWHGRQO\IURPD9$&
50 Hz outlet.
Warning: Do not leave your TV in standby or operating
mode when you leave your house.
Positioning the TV
)RUYHQWLODWLRQSOHDVHOHDYHDFOHDUVSDFHRIDWOHDVW
10cm all around the TV.
Do not block the ventilation openings.
'RQRWSODFHWKH79RQVORSLQJRUXQVWDEOHVXUIDFHVWKH
TV may tip over.
7RSUHYHQWGDPDJHWRWKH79GRQRWSODFHDQ\REMHFWV
on top of the TV.
Only use the TV in moderate climates.
10cm
10cm
10cm
Power cord and plug
The power cord plug should be easily accessible. In
FDVHRIVWRUPVDQGOLJKWQLQJZKHQJRLQJRQKROLGD\
or when the TV is not used for a long period of time
disconnect the power cord from the mains power socket.
Do notSODFHWKH79IXUQLWXUHHWFRQWKHSRZHUFRUGRU
pinch the cord.
+DQGOHWKHSRZHUFRUGE\WKHSOXJGRQRWXQSOXJWKH
TV by pulling the power cord.
Never touch the power cord/plug with wet hands as this
could cause a short circuit or electric shock.
Never make a knot in the power cord or tie it with other
cords.
Power cords should be placed in such away that they
are not likely to be stepped on or driven over.
$GDPDJHGSRZHUFRUGSOXJFDQFDXVH¿UHRUJLYH\RX
DQHOHFWULFVKRFN:KHQGDPDJHGLWPXVWEHUHSODFHG
WKLVVKRXOGRQO\EHGRQHE\TXDOL¿HGSHUVRQQHO
Moisture and Water
Do not use this TV in a humid or damp place (avoid
EDWKURRPVWKHVLQNLQWKHNLWFKHQDQGQHDUWKHZDVKLQJ
machine).
Do notH[SRVHWKLV79WRUDLQRUZDWHUDVWKLVPD\EH
dangerous.
Do notSODFHREMHFWV¿OOHGZLWKOLTXLGVVXFKDV
ÀRZHUYDVHVRQWRSRIWKH79$YRLGIURPGULSSLQJRU
splashing.
,IDQ\VROLGREMHFWRUOLTXLGIDOOVLQWRWKHFDELQHWXQSOXJ
WKH79DQGKDYHLWFKHFNHGE\TXDOL¿HGSHUVRQQHO
before operating it any further.
Ventilation
The slots and openings on the TV set are intended for
ventilation and to ensure reliable operation.
7RSUHYHQWRYHUKHDWLQJWKHVHRSHQLQJVPXVWQRWEH
blocked or covered in anyway.
BUSH-LE-55GB2 (TI12421)_IM V01.indd 2 2012/10/22 15:13:33

3
For any help concerning set up and use of your TV please call the Customer Helpline: 0845 604 0105
Heat sources and Flames
Do not expose the TV to direct sunlight or other heat
sources.
7KH79VKRXOGQRWEHSODFHGQHDUWRRSHQÀDPHVDQG
sources of intense heat such as an electric heater.
(QVXUHWKDWQRRSHQÀDPHVRXUFHVVXFKDVOLJKWHG
FDQGOHVDUHSODFHGRQWRSRIWKH79
Safety Information
Headphone volume
Excessive sound pressure from earphones and
KHDGSKRQHVFDQFDXVHKHDULQJORVVSOHDVHWDNHFDUH
Wall mounting (optional)
7RSUHYHQWLQMXU\WKLV79PXVWEHVHFXUHO\DWWDFKHGWR
the wall in accordance with the installation instructions (if
the option is available).
LCD Screen
The LCD screen is a very high technology product
ZLWKDERXWDPLOOLRQWKLQ¿OPWUDQVLVWRUVJLYLQJ\RX¿QH
SLFWXUHGHWDLOV2FFDVLRQDOO\DIHZQRQDFWLYHSL[HOV
PD\DSSHDURQWKHVFUHHQDVD¿[HGEOXHJUHHQRU
red point. Please note that this does not affect the
performance of your product.
7DNHFDUHQRWWRVFUDWFKWKHVFUHHQZLWK¿QJHUQDLOVRU
RWKHUKDUGREMHFWV
Cleaning
%HIRUHFOHDQLQJXQSOXJWKH79IURPWKHZDOOVRFNHW
Do notXVHOLTXLGRUDHURVROFOHDQHUV2QO\XVHDVRIW
dry cloth.
Batteries
Warning: Incorrect installation of batteries may cause
EDWWHU\OHDNDJHDQGFRUURVLRQUHVXOWLQJLQGDPDJHWR
the remote control.
Do notPL[ROGDQGQHZEDWWHULHVRU
batteries of different types.
Do notGLVSRVHRIEDWWHULHVLQD¿UH
Do not dispose of batteries with normal household
ZDVWHWDNHWRDORFDOUHF\FOLQJFHQWUH
Replacement parts
:KHQUHSODFHPHQWSDUWVDUHUHTXLUHGPDNHVXUHWKDW
WKHVHUYLFHWHFKQLFLDQKDVXVHGUHSODFHPHQWSDUWV
ZKLFKDUHVSHFL¿HGE\WKHPDQXIDFWXUHURUKDYHWKH
VDPHVSHFL¿FDWLRQVDVWKHRULJLQDORQH8QDXWKRULVHG
VXEVWLWXWLRQVPD\UHVXOWLQ¿UHHOHFWULFDOVKRFNRURWKHU
hazards.
Servicing
Warning: Risk of exposure to radiation from class 1/
class 3b visible and invisible laser beams. Do not open
the TV and stare directly into beam.
Warning:5LVNRIHOHFWULFVKRFNGRQRWDWWHPSWWR
UHSDLUVHUYLFHRUPRGLI\WKLV79\RXUVHOI&RQWDFWWKH
PDQXIDFWXUHUWKHLUDSSURYHGVHUYLFHDJHQWRUWKH
Customer Helpline: 0845 604 0105.
This equipment is a Class II or double insulated
electrical appliance. It has been designed in such a
way that it does not require a safety connection to
electrical earth.
Warning: To prevent the spread
RI¿UHNHHSFDQGOHVRURWKHU
RSHQÀDPHVDZD\IURPWKLV
product at all times.
Important - Please read these instructions fully before installing or operating
BUSH-LE-55GB2 (TI12421)_IM V01.indd 3 2012/10/22 15:13:33
4For any help concerning set up and use of your TV please call the Customer Helpline: 0845 604 0105
Getting Started
The Argos Technical Helpline is here to help
Technical experts are available 7 days a week
Simple help and advice on setting up your digital
equipment (image).
Guidance on connecting other devices to your
WHOHYLVLRQVXFKDVD'9'SOD\HU6N\KRPHFLQHPD
system or a games console.
2UGHUVSDUHSDUWVLQFOXGLQJWKDWORVWUHPRWH
control.
Any other technical issues you may need
DVVLVWDQFHZLWK
Call us today: 0845 604 0105
Local call rates applies*
Lines open 9am-8pm Monday to Saturday and 10am-4pm Sunday.
*Calls to Argos enquiry lines may attract a charge and set up fee from residential
OLQHVGHSHQGLQJRQ\RXUFDOOSODQWDULII0RELOHDQGRWKHUSURYLGHUVFRVWVPD\YDU\
see www.bt.com/pricing for details.
)RU6HFXULW\DQGWUDLQLQJSXUSRVHVWHOHSKRQHFDOOVWRDQGIURPFXVWRPHUVHUYLFH
centres maybe recorded and monitored. Calls from Republic of Ireland will attract
international call charges.
BUSH-LE-55GB2 (TI12421)_IM V01.indd 4 2012/10/22 15:13:33
5
For any help concerning set up and use of your TV please call the Customer Helpline: 0845 604 0105
Remote controlled colour LCD TV.
Fully integrated digital TV (DVB-T).
HDMI connectors for digital video and audio.
This connection is also designed to accept high
GH¿QLWLRQVLJQDOV
USB input.
SURJUDPPHVIURP9+)8+)DQDORJXH
400 programmes for digital mode (DTV).
OSD menu system.
6FDUWVRFNHWIRUH[WHUQDOGHYLFHVVXFKDVYLGHR
YLGHRJDPHVDXGLRVHWHWF
Stereo sound system.
7HOHWH[WIDVWH[W723WH[W
Headphone connection.
Automatic programming system.
Forward or backward manual tuning.
Sleep timer.
Child lock.
AVL (Automatic Volume Limiting).
PLL (Frequency Search).
PC input.
3OXJ3OD\IRU:LQGRZV0(;39LVWD
Getting Started
TV - Features Accessories included
TV
Stand Support
CH.LIST
P.MODE S.MODE
LANG
SUBPAGE
/HOLD
/REVEAL
INDEX
SIZE
X
/TTX
/CANCEL
/FAV
TV.RD
TIMESHIFT
SUBTITLE
Stand Base
Screw A (6PCS)
Screw B (6PCS)
Remote Control
Batteries: 2 x AAA
Instruction Book
BUSH-LE-55GB2 (TI12421)_IM V01.indd 5 2012/10/22 15:13:34

6For any help concerning set up and use of your TV please call the Customer Helpline: 0845 604 0105
Getting Started
Base Stand Assembly Instruction
1. Place the TV with the display side down on a
flat surface.Use a cloth to protect. Locate the
bottom at the stand.
2. Fix the bottom with turning the screw A
(6PCS) tightly on the stand.
3. Fix the stand base with turning the screw B
(6PCS) tightly on the stand support.
INSTALLATION NOTES
This TV can be connected to an AC 100-240 Volts,
50/60 Hz power supply. Never connect straight to a
DC power supply.
Locate the TV in a room where light does not strike
the screen directly. Total darkness or a reflection on
the screen can cause eyestrain. Soft and indirect
lighting is recommended for comfortable viewing.
Allow enough space between the TV and the wall
to permit ventilation.
Avoid excessively warm locations to prevent
possible damage to the cabinet or premature
component failure.
WALL MOUNTING INSTALLATION
GUIDELINES
This television can be wall mounted as follows:
1. Place the LCD Television onto a solid
surface. Please place some soft material over
the front of the screen to protect it from any
damage.
2. Remove the screws B (6PCS) from the lower
SDUWRIWKHWHOHYLVLRQZKHUHWKHEDVHMRLQV
WRWKH79DQGWDNHDZD\WKHVWDQGSXWWKH
stand somewhere safe for future use).
4. Use the four screws provided to fix the TV
onto a wall mounting bracket (not included)
via the four VESA standard holes on the
back of the television.
Installing / Removing the Base Stand
400 x 400mm VESA mount
400mm
400mm
BUSH-LE-55GB2 (TI12421)_IM V01.indd 6 2012/10/22 15:13:43

7
For any help concerning set up and use of your TV please call the Customer Helpline: 0845 604 0105
1.
Switches the TV between on and standby
mode.
2. MUTE
Mutes and restores your TV sound.
3. 0-9 Number Button
Press to select a programme. (ATV / DTV
mode)
4. CH.LIST
Display channel list. (ATV / DTV mode)
5.
Return to the previous viewing channel. (ATV
/ DTV mode)
6. P.MODE
Select picture mode: Dynamic / Standard /
Mild / Personal.
7. S.MODE
Select sound mode: Standard / Music / Movie
/ Sports / Personal.
8. TV.RD
Select TV program or Radio program. (DTV
mode).
9. LANG
Select DTV audio language. (DTV mode)
10.SOURCE
Select among the different input signal
sources: DTV / ATV /AV / SCART / YPbPr /
HDMI1 / HDMI2 / HDMI3 / PC / Media.
11.DISPLAY
Display the present screen information such
as the current channel and the input source.
12.CH+/-
Select a channel.
13. VOL+/-
$GMXVWWKHYROXPH
14. NICAM
Switch between different audio channels (only
applicable when the TV programme has this
feature).
15. ASPECT
Select from the following mode settings: 16:9
/ Zoom1 / Zoom2 / Auto / 4:3.
Getting Started
CH.LIST
P.MODE S.MODE LANG
SUBPAGE
/HOLD
/REVEAL
INDEX
SIZE
X
/TTX
/CANCEL
/FAV
TV.RD
TIMESHIFT
SUBTITLE
Viewing remote control - TV
21
3
45
69
78
10 11
12 13
15
14
BUSH-LE-55GB2 (TI12421)_IM V01.indd 7 2012/10/22 15:13:44

8For any help concerning set up and use of your TV please call the Customer Helpline: 0845 604 0105
16. SLEEP
Set the TV sleep timer.
17. EPG
Display the EPG (Electronic Program
Guide). (DTV mode)
18.
Allows you to navigate the OSD menus
DQGDGMXVWWKHV\VWHPVHWWLQJVWR\RXU
preference.
OK
Confirm the selection in the OSD menus.
Display a list of channels saved in the TV
tuner memory.
19. MENU
Display the OSD (On Screen Display) menu.
20. EXIT
Exit the OSD (On Screen Display) menu.
21.
Press once to stop. (Media mode)
FAV
Display the Favourite Channel list. ( ATV /
DTV mode)
22.
Record the current programme. (DTV mode)
23.
To start the timeshift playback. (DTV mode)
To start playback or pause. (Media mode)
24. TIMESHIFT
Start the time-shift function. (DTV mode)
25. TTX
Turn on and off the Teletext function. (ATV /
DTV mode)
To skip to the beginning of the previous
chapter / track / photo. (Media mode)
26. SUBTITLE
Display the subtitle which is broadcast with
the program. (DTV mode)
Getting Started
CH.LIST
P.MODE S.MODE LANG
SUBPAGE
/HOLD
/REVEAL
INDEX
SIZE
X
/TTX
/CANCEL
/FAV
TV.RD
TIMESHIFT
SUBTITLE
Viewing remote control - TV
16
18
19
21
23
20
22
17
25
24
26
BUSH-LE-55GB2 (TI12421)_IM V01.indd 8 2012/10/22 15:13:46

9
For any help concerning set up and use of your TV please call the Customer Helpline: 0845 604 0105
27. CANCEL
To exit the teletext mode. (ATV / DTV mode)
To reverse playback rapidly. (Media mode)
28. SIZE
To enlarge the picture on the TV in teletext.
(ATV / DTV mode)
29. HOLD
Freezes a multi-page passage on screen in
teletext. (ATV / DTV mode)
To skip to the beginning of the next chapter /
track / photo. (Media mode)
30. INDEX
To select the page number of the index from
teletext. (ATV / DTV mode)
31. REVEAL
Reveals hidden information such as the
answer to a quiz in teletext. (ATV / DTV
mode).
To advance playback rapidly. (Media mode)
32. SUBPAGE
Displays the subpage on the teletext screen.
(ATV / DTV mode)
33. RED/GREEN/YELLOW/BLUE
Press these buttons directly to select
corresponding function on the screen.
Getting Started
CH.LIST
P.MODE S.MODE LANG
SUBPAGE
/HOLD
/REVEAL
INDEX
SIZE
X
/TTX
/CANCEL
/FAV
TV.RD
TIMESHIFT
SUBTITLE
Viewing remote control - TV
27 28
29 30
32
31
33
BUSH-LE-55GB2 (TI12421)_IM V01.indd 9 2012/10/22 15:13:46

10 For any help concerning set up and use of your TV please call the Customer Helpline: 0845 604 0105
1. VOL+ button
Increases the volume.
2. VOL- button
Decreases the volume.
3. CH button
Moves up a channel.
4. CH button
Moves down a channel.
5. MENU button
Displays the OSD (on screen display) menu.
6. SOURCE button
Press to select among different input signal
sources: DTV / ATV / AV / SCART / YPbPr
/ HDMI1 / HDMI2 / HDMI3 / PC / Media.
Confirmed the selection on OSD menu.
7. ( ) button
Turns the TV on when in standby mode or turns
the TV off into standby mode.
Getting Started
Connect the “aerial” or “cable TV” plug to
AERIAL INPUT (ANT.) socket located on the
back of the TV (fig.1).
3OHDVHQRWHAfter unpacking, allow the TV
to reach ambient room temperature before
connecting the TV to the mains power socket.
Connect the power cord plug to the mains
power socket.
Aerial connection
Power connection
TV - Control buttons (Right side)
fig.1
1
2
3
4
5
6
7
BUSH-LE-55GB2 (TI12421)_IM V01.indd 10 2012/10/22 15:13:50

11
For any help concerning set up and use of your TV please call the Customer Helpline: 0845 604 0105
Remove the battery cover on the back of the
UHPRWHFRQWUROJHQWO\SXVKGRZQDQGSXOO
backwards at the same time as shown (fig.2a).
Insert two AAA/R3 or equivalent type batteries.
Ensure the batteries are inserted the correct
way and replace the battery cover (fig.2b).
Note: When the remote control is not going to
be used for long periods of time, the batteries
should be removed. Otherwise the remote
control may be damaged, caused by battery
leakage and corrosion.
Getting Started
6ZLWFKLQJWKH792Q
Switch on the POWER ON/OFF switch
which is located on the right of the TV.
With power cord plug connected to the mains
power socket and TV in ‘Standby’ mode.
To switch the TV on from standby mode, either:
a: The Remote control; Press the “ ” button.
b: The TV; Press the “ ” button on the right of
the TV.
6ZLWFKLQJWKH792II
Either press the “ ” button on the remote
control or press the “ ” button on the right
VLGHRIWKH79WKH79ZLOOWKHQVZLWFKWR
standby mode.
Switch off the POWER ON/OFF switch
which is located on the right of the TV.
¿J2a
¿J2b
AAA/R3 X2
Batteries
Remote control - Inserting batteries
Switching the TV On and Off
BUSH-LE-55GB2 (TI12421)_IM V01.indd 11 2012/10/22 15:13:50

12 For any help concerning set up and use of your TV please call the Customer Helpline: 0845 604 0105
The VOL+/VOL- buttons will function as volume
up/down as default. Even if you set other
IXQFWLRQVIRUWKHVHEXWWRQVWKHVOL+/VOL-
buttons will return to volume control after a short
while.
Volume Setting
Press VOL+/VOL- buttons to increase or
decrease volume.
Programme Selection
Press CH /CH buttons to select the next or
previous programme.
Getting Started
CH.LIST
P.MODE S.MODE LANG
TV.RD
The remote control is designed to control all the
functions of the model you selected.
Volume Setting
Press VOL+ button to increase the volume.
Press VOL- button to decrease the volume. A
volume level scale (slider) will be displayed on
the screen.
Programme Selection (Previous or Next
Programme)
Press CH- button to select the previous
programme.
Press CH+ button to select the next programme.
Programme Selection (Direct Access)
Press number buttons on the remote control to
select programmes between 0 and 9. The TV will
switch to the selected programme.
Operation using TV control buttons Operation using remote control
BUSH-LE-55GB2 (TI12421)_IM V01.indd 12 2012/10/22 15:13:51

13
For any help concerning set up and use of your TV please call the Customer Helpline: 0845 604 0105
1. Standby Connect one end of the RF coaxial
cable to the aerial socket on the wall and the
RWKHUHQGRIWKHFDEOHWRWKH5)ȍVRFNHW
at the rear left side of your TV.
2. Connect the mains cable to the mains socket
after you have completed all the connections.
3. Switch on the POWER ON/OFF switch which
LVORFDWHGRQWKHULJKWRIWKH79$WWKLVVWDJH
the TV switches to standby mode. The red
LED indicator will illuminate on the front
panel of the TV.
4. ,QVWDQGE\PRGHSUHVVWKH button at the
front right side of the TV or the button on
the remote control to turn the TV on. The red
LED indicator will turn blue.
5. 7KHILUVWWLPH\RXWXUQWKH79RQLWZLOOJR
straight into to First Time Installation .Press
the buttons to select Home Mode or
6WRUH0RGHWKHQSUHVVWKHOK buttton to
confirm. (fig.1)
6. Press the buttons to select OSD
LanguageWKHQSUHVVWKHOK buttton to
confirm. (fig.2)
7. Press the buttons to select Country
then press the OK buttton to confirm. (fig.3)
Getting Started
Initial setup
OK
Please select an OSD Language
Español Français
Português
English
fig.2
Country
Menu
UK
fig.3
Press the SOURCE button on the remote
control and select DTV to switch the TV to
Digital Terrestrial Television Broadcasting.
Information Banner
Whenever you change channel using the CH+/
CH-EXWWRQVRUWKHQXPEHUEXWWRQVWKH79
displays the broadcast picture along with an
information banner at the bottom of the screen
(available only in DTV/ATV mode).
The information banner can be displayed at any
time while watching TV by pressing the INFO
button on the remote control.
General operation
8. Channel tuning will commence. The display
will show the progress of the tuning and the
number of channels found. (fig.3)
9. ,I\RXZDQWWRVNLSWKH$79WXQLQJSUHVVWKH
MENU button to interrupt the tuning half way.
$SRSXSVFUHHQZLOOEHGLVSOD\HGSUHVV
the button to select “Yes” to confirm. You
will then go straight to DTV tuning. You may
repeat the above step if you also want to skip
the DTV tuning.
Channel Tuning
TV : 0 Programme
DTV : 0 Programme
Radio : 0 Programme
Data : 0 Programme
1 %... 471.25 MHz (TV)
Please press MENU key to exit
Initial setup
fig.3
OK
First Time Installation
Home Mode
fig.1
BUSH-LE-55GB2 (TI12421)_IM V01.indd 13 2012/10/22 15:13:51

14 For any help concerning set up and use of your TV please call the Customer Helpline: 0845 604 0105
1. COAXIAL
To connect to the audio socket on the digital/
standard 5.1 audio system.
2. USB Input
7RFRQQHFWGHYLFHVWRWKH79SURYLGLQJIDVWGDWD
exchange. USB will have function in Media/DTV
mode.
3. HDMI Input
Connects a device that has an HDMI socket.
The TV can display High Definition pictures
from devices such as a High Definition Satellite
Receiver or DVD Player. These devices must be
connected via the HDMI sockets or Component
Socket. No sound connection is needed for an
HDMI to HDMI connection.
4. CI Slot
Used to insert a CI card. A CI card allows you
to view all the channels that you subscribe to.
)RUPRUHLQIRUPDWLRQVHH³&RQGLWLRQDO$FFHVV´
section.
5. Video Input
To connect video signals of external devices.
Connect the video cable between the VIDEO IN
VRFNHWRQWKH79DQGWKH9,'(2287MDFNRQ
your device.
6. Audio Inputs
To connect audio signals of external devices.
Connect the audio cable between the AUDIO
INPUTS on the TV and the AUDIO OUTPUT
MDFNVRQ\RXUGHYLFH$OVRWRHQDEOH9,'(2
<3E3UVRXQGFRQQHFWLRQLQVXFKDFDVHXVHDQ
appropriate audio cable between the connected
device’s audio outputs and the TV’s audio
inputs.
1RWH If you connect a device to the TV via the
VIDEO or YPbPr cable, you should also use an
audio cable to connect your device to the TV
AUDIO INPUTS to enable audio.
7. YPbPr
&RQQHFWWRD'9'SOD\HU'LJLWDO6HW7RS%R[
or other AV devices with component (YPbPr)
video and audio output sockets.
Connections
Left side connections explained
5
3
2
7
1
4
6
BUSH-LE-55GB2 (TI12421)_IM V01.indd 14 2012/10/22 15:13:54

15
For any help concerning set up and use of your TV please call the Customer Helpline: 0845 604 0105
6&$57VRFNHW
Inputs or outputs for external devices. Connect
the SCART cable between the SCART socket
on the TV and the SCART socket on the
H[WHUQDOGHYLFHGHFRGHU9&5RU'9'SOD\HU
1RWH If an external device is connected via the
SCART socket, the TV will automatically switch
to SCART mode.
9. PC Input (VGA) / PC AUDIO
Connects a personal computer to the TV.
Connect the PC cable between the PC INPUT
on the TV and the PC output on the PC.
1RWH If you connect a device to the TV via the
PC cable, you should also use an audio cable to
connect your device to the PC AUDIO INPUT to
enable audio.
10. RF Input (ANT.)
Connects to aerial (antenna) or cable TV. If you
XVHDGHFRGHURUDPHGLDUHFRUGHU\RXVKRXOG
connect the aerial cable through the device to
the TV with an appropriate aerial cable.
Connections
Left bottom connections explained
8
9
2
10
BUSH-LE-55GB2 (TI12421)_IM V01.indd 15 2012/10/22 15:13:56

16 For any help concerning set up and use of your TV please call the Customer Helpline: 0845 604 0105
Connections
+'0,OHWV\RXHQMR\KLJKGHILQLWLRQGLJLWDO
images and high quality sound by connecting
WKH79WRH[WHUQDOGHYLFHVVXFKDV'9'SOD\HUV
set top boxes or gaming equipment (fig.1).
Power off both the TV and the device before
making any connections.
)RUPRUHLQIRUPDWLRQUHIHUWR\RXUGHYLFH¶VRZQ
instruction book.
:KHQFRQQHFWLQJVZLWFK³6RXUFH´WR³HDMI”.
6HH³,QSXW6HOHFWLRQ´VHFWLRQ
1RWH HDMI cable is not supplied.
Most devices support SCART connection. You
FDQFRQQHFWD'9'UHFRUGHU9&5RUGHFRGHUWR
the TV using the SCART socket (fig.2).
Power off both the TV and the device before
making any connections.
)RUPRUHLQIRUPDWLRQUHIHUWR\RXUGHYLFH¶VRZQ
instruction book.
1RWH The Scart cable is not supplied.
You can connect a computer (PC) to the TV to
display your computer’s screen image on the
TV.
Power off both computer and TV before making
any connections.
Use a 15-pin D-sub display cable to connect
a PC to the TV. Use an audio cable between
PC AUDIO inputs on the left side of the TV
and audio output on your PC to enable sound
connection (fig.3).
:KHQWKHFRQQHFWLRQLVPDGHVZLWFK³6RXUFH´
to “PC”. See “Input selection” section.
Set the resolution that suits your viewing
requirements. Resolution information can be
found in the “Appendix parts”.
1RWHThe VGA cable is not supplied.
VGA Connections
SCART Connections
HDMI Connections
fig.1
fig.2
fig.3
BUSH-LE-55GB2 (TI12421)_IM V01.indd 16 2012/10/22 15:13:59

17
For any help concerning set up and use of your TV please call the Customer Helpline: 0845 604 0105
Basic Features
1. Press SOURCE button at the front right side
of the TV or the SOURCE button on the
remote control to display the Input source list.
(fig.1)
2. Press buttons to select the input source
that you want: DTV / ATV / AV / SCART /
YPbPr / HDMI1 / HDMI2 / HDMI3 / PC /
Media.
3. Press OK button to confirm your selection.
Input Source
DTV
ATV
AV
YPbPr
HDMI2
SCART
HDMI1
PC
HDMI3
Meida
fig.1
This system has an Electronic Programme
Guide (EPG) to help you navigate through all
the possible viewing options.
The EPG supplies information such as
SURJUDPPHOLVWLQJVVWDUWDQGHQGWLPHVIRU
DOODYDLODEOHVHUYLFHV,QDGGLWLRQGHWDLOHG
information about the programme is often
available in the EPG (the availability and amount
RISURJUDPPHLQIRUPDWLRQZLOOYDU\GHSHQGLQJ
on the particular broadcaster).
This function can be used only when the EPG
information is broadcast by broadcasting
companies.
The EPG displays the programme details for the
next 7 days.
1. Press EPG button to switch on EPG. (fig.1)
2. Press EPG button or EXIT button again
to switch off EPG and return to normal TV
viewing.
7ARTE
13 LCP
20 France Ô
800 arte
PROGRAMME GUIDE
21:00-21:45 Ehe zu Dritt - Die Frauen des Grafen von Gleichen
5 France 5
2 France 2
3 France 3 21:45-23:15 Donna Leon - Sanft entschlafen
23:15-23:45 Lebensläufe
23:45-01:25 Genesung
801 MDR FERNSEHEN
02 Sep 2007 21:45 - 23:15 02 Sep 2007 21:56
Spielfilm Deutschiand 2004
Im Altenpflegeheim St. Leonardo, das auch Commissario Brunettis Mutter beherbergt, kommen Menschen offenbar nicht nur
auf natürliche Weise zu Tode.
02 Sep
Record
Move View
OK
Display Schedule Remind
Next Day Prev Day
fig.1
Info bar commands:
RED (Record)
Timer Programming
Press the RED button in the Schedule list to
delete the selected preset reminder.
YELLOW (Schedule)
Press the YELLOW button to view the preset
reminders or scheduled recordings in the
Schedule List. Press the YELLOW button
again to return to the EPG.
GREEN (Display)
Press the GREEN button to view the schedule
of the previous / next day. Press the GREEN
button again to return to the EPG.
BLUE (Remind)
Press the BLUE button while on the selected
SURJUDPPHWKHReminder setting menu will
be displayed. Press the EXWWRQVWRDGMXVW
the settings and then press the OK button to
FRQILUPWKHVHWWLQJV$IWHUFRQILUPDWLRQWKH
Schedule List will then be displayed with your
preset reminders shown. Press the YELLOW
button to return to the EPG. The TV will
automatically tune to the selected programme
when it starts.
Electronic programme guide (EPG) (DTV mode)
How to navigate menus - Selecting source
BUSH-LE-55GB2 (TI12421)_IM V01.indd 17 2012/10/22 15:13:59

18 For any help concerning set up and use of your TV please call the Customer Helpline: 0845 604 0105
Basic Features
Page HOLD
If the page of text you have selected contains
VXESDJHVWKHVHVXESDJHVZLOODXWRPDWLFDOO\EH
displayed in order with a delay to allow you to
have enough time to read the page.
7RVWRSWKHPRYLHWRWKHQH[WVXESDJHSUHVV
the HOLD button.
7RFRQWLQXHPRYLQJWKURXJKWKHVXESDJHV
press the HOLD button again.
Alternative: Press the SUBPAGE button, and
then use the 0-9 buttons to enter a 4-digit page
number.
To Reveal Information
Press the REVEAL button to reveal
concealed information (quiz answers etc.).
Press the REVEAL button again to conceal
the information again.
Fasttext
At the bottom of the teletext screen is a row of
VXEMHFWKHDGLQJVLQUHGJUHHQ\HOORZDQGEOXH
The remote control has a row of colour buttons
FRUUHVSRQGLQJWRWKHURZRIFRORXUHGVXEMHFWV
on the screen.
Pressing one of the colour buttons will take you
GLUHFWO\WRWKHSDJHFRUUHVSRQGLQJWRWKHVXEMHFW
heading.
Teletext is a free service broadcast by some
TV stations which gives up-to-the-minute
LQIRUPDWLRQRQQHZVZHDWKHUWHOHYLVLRQ
SURJUDPPHVVKDUHSULFHVDQGPDQ\RWKHU
topics. Using the Teletext control buttons you
can view pages of information that are listed in
the teletext index.
To Turn on Teletext Function
,Q$79PRGHSUHVVWKH TEXT button to
enter Teletext mode. Press the INDEX
button to display the index page.
Press the TEXT button once to exit and the
TV will return to the channel you were watching.
To select a page of text
Find the number of the page in the index and
enter it using the 0-9 buttons. The number of
the page will appear on the top left corner of the
screen.
The page counter will search for your page.
:KHQLWILQGVLWWKHSDJHZLOOEHGLVSOD\HG
7RPRYHWRWKHQH[WSDJHRIWH[WSUHVVWKH
button.
7RPRYHWRWKHSUHYLRXVSDJHSUHVVWKH
button.
7RUHWXUQWRWKHLQGH[SDJHHQWHUWKH³100” by
using the 0-9 buttons or press the INDEX
button.
Mix
To view a page of text while watching a TV
SURJUDPPHSUHVVWKH TEXT button twice.
The text will be superimposed over the TV
programme.
Double height text
If you have difficulty reading the text on the TV
you can double the height of the text.
Press the SIZE button. The top half of the
page will be displayed in double height text.
Press the SIZE button again. The bottom
half of the page will be displayed in double
height text.
Press the SIZE button again to return to the
full page.
Make sure the TV channel you are watching
transmits teletext.
“No Teletext” sign will show on the screen if
teletext is not available.
Teletext (ATV mode)
BUSH-LE-55GB2 (TI12421)_IM V01.indd 18 2012/10/22 15:14:00
Table of contents
Other Bush LED TV manuals

Bush
Bush LED19134HD Manual

Bush
Bush DLED32HDSC User manual

Bush
Bush LED24127FHD Manual

Bush
Bush DLED43UHDHDRSC User manual

Bush
Bush 50 User manual

Bush
Bush LED20265T2S User manual

Bush
Bush 529/9146 Manual

Bush
Bush LE-58GCL-B Manual

Bush
Bush 40/135O-WB-11B4-FEGP-UK User manual

Bush
Bush DLED48287FHD User manual

Bush
Bush Freeview DLED39HDS User manual

Bush
Bush LE-50GY15-M1 User manual

Bush
Bush DLED50273FHDCNTD Manual

Bush
Bush DLED43UHDSFIRE User manual

Bush
Bush LE-20GTG01 Manual

Bush
Bush LED24265HD Manual

Bush
Bush LED24127FHDDVDP User manual

Bush
Bush LED28167HDS Manual

Bush
Bush LE-40GCL-A-W Manual

Bush
Bush DLED40287FHD User manual