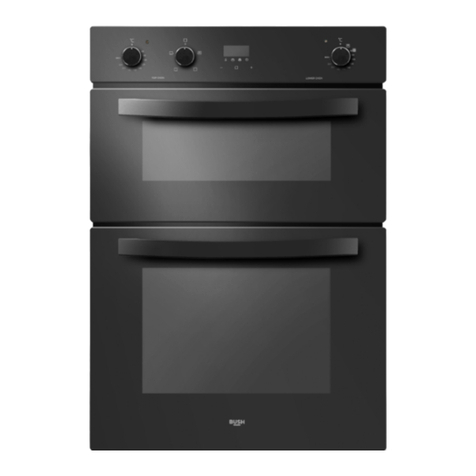
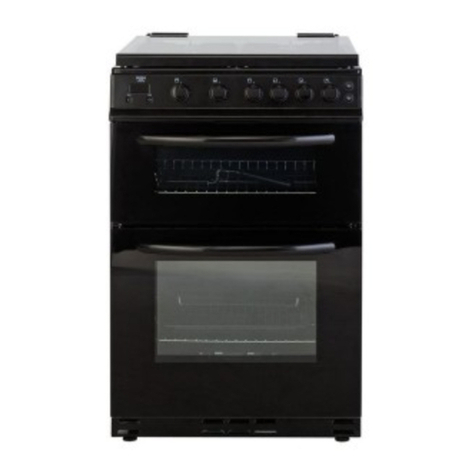
Bush AE66DCW Product guide

Electrical Double Oven
Operating & Installation Instructions -Please keep for future reference
Important - Please read these instructions fully before using
These instructions contain important information which will help you get the best from your
appliance and help to ensure safe and correct installation, use and maintanence.
AE66DCW
If you need help or have damaged or missing parts, call the Customer Helpline: 0845 600 4632
AE66DCA
AE66DCSS
0
0
0
0
50
50
100
100
150
150
200
200
250
250
MAX
MAX
0
0
200
200
MAX
MAX
150
150


Contents
Product codes
Parts
Safety Information
Installation
User instructions
Using the hob
Using the top oven
Using the main oven
Cleaning and Maintenance
Transporting the cooker
Trouble Shooting
Technical specifications
Guarantee
2
3
6-7
8-12
8
9
10
13-14
13
14
15
16
18
Customer Helpline 0845 600 4632
AE66DCW
AE66DCA
AE66DCSS
0
0
0
0
50
50
100
100
150
150
200
200
250
250
MAX
MAX
0
0
200
200
MAX
MAX
150
150
1

2
1. Cook top
2. Control panel
3. Top oven door handle
4. Top oven door
5. Main oven door handle
6. Main oven door
Accessories
Please familiarise yourself with the parts and accessories listed below
7.
8. Oven rack support
9. Oven rack
10. Oven light
Adjustable foot x 4
If you have damaged or missing parts, call the Customer Helpline 0845 600 4632
Grill pan and handle set
Parts
1
2
3
4
5
7
6
8
10
9
0
0
0
0
50
50
100
100
150
150
200
200
250
250
MAX
MAX
0
0
200
200
MAX
MAX
150
150
0
0
0
0
50
50
100
100
150
150
200
200
250
250
MAX
MAX
0
0
200
200
MAX
MAX
150
150

Safety Information
READ THESE INSTRUCTIONS CAREFULLY
AND COMPLETELY BEFORE USING YOUR
APPLIANCE, AND KEEP IT IN A CONVENIENT
PLACE FOR REFERENCE WHEN NECESSARY.
THIS MANUAL IS PREPARED FOR MORE
THAN ONE MODEL IN COMMON. YOUR
APPLIANCE MAY NOT HAVE SOME OF THE
FEATURES THAT ARE EXPLAINED IN THIS
MANUAL. PAY ATTENTION TO THE
EXPRESSIONS THAT HAVE FIGURES, WHILE
YOU ARE READING THE OPERATING
MANUAL.
General Safety Warnings
IMPORTANT- This appliance can
be used by children aged from 8
years and above and persons with
reduced physical, sensory or
mental capabilities or lack of
experience and knowledge if they
have been given supervision or
instruction concerning use of the
appliance in a safe way and
understand the hazards involved.
Children shall not play with the
appliance. Cleaning and user
maintenance shall not be made by
children without supervision.
WARNING- The appliance and its
accessible parts become hot
during use. Care should be taken
to avoid touching heating
elements. Children less than 8
years of age shall be kept away
unless continuously supervised.
WARNING- Unattended cooking
on a hob with fat or oil can be
dangerous and may result in fire.
NEVER try to extinguish a fire
with water, but switch off the
appliance and then cover flame
e.g. with a lid or a fire blanket.
WARNING- Danger of fire: do not
store items on the cooking
surfaces.
WARNING- If the surface is
cracked, switch off the appliance
to avoid the possibility of electric
shock.
IMPORTANT- For hobs
incorporating a lid, any spillage
should be removed from the lid
before opening. And also the hob
surface should be allowed to cool
before closing the lid.
IMPORTANT- The appliance is
not intended to be operated by
means of an external timer or
separate remote-control system.
WARNING- In order to prevent
tipping of the appliance, the
stabilizing brackets must be
installed.
IMPORTANT- During use, the
appliance becomes hot. Care
should be taken to avoid touching
heating elements inside the oven.
IMPORTANT- During use,
handles held for short periods in
normal use can get hot.
3
Important - Please read these instructions fully before installation
Customer Helpline 0845 600 4632
Safety Information
IMPORTANT-
IMPORTANT-
IMPORTANT-
IMPORTANT-
Do not use harsh
abrasive cleaners or sharp metal
scrapers to clean the oven door
glass and other surface since they
can scratch the surface, which
may result in shattering of the
glass or damage to the surface.
Do not use steam
cleaners for cleaning the
appliance.
WARNING- Ensure that the
appliance is switched off before
replacing the lamp to avoid the
possibility of electric shock.
CAUTION- Accessible parts may
be hot when the cooking or grilling
is in use. Young children should be
kept away.
IMPORTANT- Your appliance is produced in
accordance with all applicable local and
international standards and regulations.
Maintenance and repair work must
be made only by authorized service technicians.
Installation and repair work that is carried out by
unauthorised technicians may endanger you. It is
dangerous to alter or modify the specifications of
the appliance in any way.
Prior to installation, ensure that the
local distribution conditions (nature of the gas and
gas pressure or electricity voltage and frequency)
and the requirements of the appliance are
compatible. The requirements for this appliance
are stated on the label.
CAUTION- This appliance is designed only for
cooking food and is intended for indoor domestic
household use only and should not be used for
any other purpose or in any other application, such
as for non-domestic use or in a commercial
environment or room heating.
IMPORTANT-Do not try to lift or move the
appliance by pulling the door handle.
IMPORTANT-All possible security measures have
been taken to ensure your safety. Since the glass
may break, you should be careful while cleaning
to avoid scratching. Avoid hitting or knocking on
the glass with accessories.
IMPORTANT- Ensure that the supply cord is not
wedged during the installation. If the supply cord
is damaged, it must be replaced by the
manufacturer, its service agent or similarly
qualified persons in order to prevent a hazard.
IMPORTANT- While the oven door is open, do
not let children climb on the door or sit on it.
Installation Warnings
IMPORTANT- Do not operate the appliance
before it is fully installed.
IMPORTANT- The appliance must be installed by
an authorized technician and put into use. The
producer is not responsible for any damage that
might be caused by defective placement and
installation by unauthorized people.
IMPORTANT- When you unpack the appliance,
make sure that it is not damaged during
transportation. In case of any defect; do not use
the appliance and contact a qualified service
agent immediately. As the materials used for
packaging (nylon, staplers, styrofoam...etc) may
cause harmful effects to children, they should be
collected and removed immediately.
IMPORTANT- Protect your appliance against
atmospheric effects. Do not expose it to effects
such as sun, rain, snow etc.
IMPORTANT- The surrounding materials of the
appliance (cabinet) must be able to withstand a
temperature of min 100°C.
During usage
IMPORTANT- When you first run your oven a
certain smell will emanate from the insulation
materials and the heater elements. For this
reason, before using your oven, run it empty at
maximum temperature for 45 minutes. At the
same time you need to properly ventilate the
environment in which the product is installed.
4
Important - Please read these instructions fully before installation
Customer Helpline 0845 600 4632

Safety Information
IMPORTANT-
IMPORTANT-
IMPORTANT-
IMPORTANT-
IMPORTANT-
IMPORTANT-
IMPORTANT-
IMPORTANT-
IMPORTANT-
IMPORTANT-
IMPORTANT-
IMPORTANT-
IMPORTANT-
During usage, the outer and inner
surfaces of the oven get hot. While opening the
oven door, step back to avoid the hot steam
coming out of the oven. There may be a risk of
burns.
Do not put flammable or
combustible materials, in or near the appliance
when it is operating.
Always use oven gloves to remove
and replace food in the oven.
Do not leave the cooker while
cooking with solid or liquid oils. They may catch
fire on condition of extreme heating. Never pour
water on to flames that are caused by oil. Cover
the saucepan or frypan with its cover in order to
choke the flame that has occured in this case and
turn the cooker off.
Always position pans over the
centre of the cooking zone, and turn the handles
to a safe position so they cannot be knocked or
grabbed.
If you will not use the appliance for a
long time, plug it off. Keep the main control switch
off.
Make sure the appliance control
knobs are always in the "0" (stop) position when it
is not used.
The trays incline when pulled out.
Be careful not to let hot liquid spill over.
When the door or drawer of the
oven is open, do not leave anything on it. You may
unbalance your appliance or break the cover.
Do not put heavy things or
flammable or ignitable goods (nylon, plastic bag,
paper, cloth...etc) into the drawer. This includes
cookware with plastic accessories (e.g. handles).
Do not hang towels, dishcloths or
clothes from the appliance or its handles.
During cleaning and maintenance
Always turn the appliance off before
operations such as cleaning or maintenance. You
can do it after plugging the appliance off or turning
the main switches off.
Do not remove the control knobs to
clean the control panel.
TO MAINTAIN THE EFFICIENCY AND
SAFETY OF YOUR APPLIANCE, WE
RECOMMEND YOU ALWAYS USE
ORIGINAL SPARE PARTS AND TO CALL
ONLY OUR AUTHORIZED SERVICE AGENTS
IN CASE OF NEED.
5
Important - Please read these instructions fully before installation
Customer Helpline 0845 600 4632

Installation
Positioning
1. Make sure that there are no combustible or
flammable materials, such as curtains, in the
vicinity of the installation.
2. Furniture and cabinets surrounding the oven
must be of material resistant to temperatures
greater than 100 °C.
3. Surrounding furniture, cabinets and extractor
fans should be positioned in accordance with
the diagram shown in figure 1.
4. There must be at least 2cm of free space
between the back wall and the rear of the
appliance to allow for ventilation and air
circulation.
5. If fitted, the extractor fan must be at least 65cm
above the hob. If no fan is fitted the minimum
distance between the hob and any cabinet or
other structure must be 70cm.
Feet height adjustment
1. The height and level of the appliance can be
adjusted by rotating the feet located underneath
the appliance at each corner as shown in figure
2.
2. Rotate in a clockwise direction to decrease the
height and anti clockwise to increase the height.
3. Once the desired level has been achieved make
sure to lift the appliance into its location. Do not
drag it as this may cause damage to your floor
and the appliance.
Positioning & electrical connection
Customer Helpline 0845 600 4632
Figure 1
See detail A
Detail A
Figure 2
6

Installation
IMPORTANT - Electrical connections must be
carried out by a suitably qualified person and in
accordance with all relevant local building and
installation regulations.
Electrical connections
1. This appliance is designed to be connected to
an earthed electrical mains supply.
2. The appliance must be connected to a double
pole switched Fuse Connection Unit (FCU) with
a minimum rating of 32 A and a minimum
contact clearance of 3mm in accordance with
IEE regulations.
3. Make sure the switched FCU is located adjacent
to the appliance within a maximum distance of
2m. The switched FCU must not be located
above the appliance but should be easily
accessible in case of an emergency.
4. The switched FCU must be connected to the
mains consumer unit using a single spur. Do not
connect the switched FCU to the lighting or
socket spurs.
5. Connections should be made via an electrical
cable of H05V V-F specification or better.
6. Sufficient electrical cable should be used to
allow the appliance to be withdrawn from the
wall.
7. Make sure all electrical cabling is routed to
prevent trapping..
8. Make sure the electrical cable is not in contact
with any hot parts of the appliance once it is in
position to avoid danger of melting and
electrical short circuit.
9. The terminal box on the rear of the appliance
can be accessed by removing the cover using
suitable tools.
10. Connect one end of the electrical cable to the
terminals on the rear of the appliance following
the connection diagram shown in figure 3.
11. Connect the remaining end of the electrical
cable to the switched FCU following the
connection diagram shown in figure 4.
Positioning & electrical connection
Customer Helpline 0845 600 4632
Figure 3
Figure 4
7

Control of the hot plates
1. First identify the correct control knob by
checking the symbols above each knob, as
shown in figure 5.
2. There are four hot plate control knobs, one for
each hot plate.
3. When any of the hot plates are in use the hot
plate warning light will be illuminated.
4. The hot plate control knobs have seven
positions marked on them, as shown in figure
6. “0” is the off location, while the remaining 6
positions are shown below.
1 Keeping hot
2-3 Heating at low heat
4-5-6 Cooking
5. To turn the hot plate off, rotate the control knob
into the '0' position.
IMPORTANT - The hot plate warning light will
stay on after the hot plate is turned to indicate that
the hot plate is still hot. When the hot plate has
cooled sufficiently the hot plate warning light will
go off.
IMPORTANT - Cookware with rough bases
should not be used as they can damage the glass
ceramic surface. The undersides of the cookware
should be as thick and flat as possible. Before
use, make sure that the cookware bases are clean
and dry.
Performance tips
1. Always select pans that are correctly sized for
the hot plate on which it is positioned to avoid
unnecessary energy loss.
2. Saucepans with smooth bases increase the
efficiency of your cooker.
3. Ensure pans are centrally positioned and avoid
allowing handles to overhang to prevent
accidental spillage.
User Instructions Customer Helpline 0845 600 4632
Top oven thermostat light Hot plate warning light
Main oven thermostat light
Using the hob
0
0
0
0
50
50
100
100
150
150
200
200
250
250
MAX
MAX
0
0
200
200
MAX
MAX
150
150
Figure 5
Figure 6
8

User Instructions Customer Helpline 0845 600 4632
Using the Top and Main oven
Using the Top oven
Using the grill pan and handle set
WARNING - Always use an oven glove to protect
your hand when using the grill as all the metal
parts can become very hot!
The grill pan has a detachable handle. Ensure
when using the grill pan handle that it is
centralized and secure as shown in the figure.
IMPORTANT - Do not leave the handle in position
when grilling. If the handle is left in position when
grilling, it will get very hot.
Control of the Top oven
The top oven is a static oven. It has top, bottom
and grill heaters.
The top oven is controlled by the top oven control
knob, as shown in figure 9.
Static Cooking
To operate the static cooking function (top +
bottom heaters) turn the top oven control knob
anti clockwise to the temperature setting you
require.
The thermostat light will come on, as shown in
figure 5 on page 8.
When the temperature inside your top oven
reaches the set value, the thermostat will
switch off the heating elements and the
thermostat light will go off.
When the temperature falls below the set value,
the thermostat will be turned on the heating
element and the thermostat light will come on
again.
After cooking, turn the top oven control knob to
0 (off). Keeping the top oven door open to help
cool the oven. As the top oven will be hot,
keep away from the top oven until the
appliance has cooled down.
Grill heater only operation
The function is used for grilling and toasting
foods, use the upper shelves of oven.
To operate the grill turn the top oven control
knob clockwise to the grill symbol, as shown in
figure 9.
1.
2.
3.
4.
5.
1.
Figure 7
Figure 8
Grill Pan Handle
Grill Pan
0
0
200
200
MAX
MAX
150
150
Figure 9
9
WARNING- Fit
the grid correctly
into any
correspondent
rack in the oven
cavity and push it
to the end.

2. Put the food to be grilled in the oven. Lightly
brush the wire grid with oil to stop foods
sticking and place foods in the center of the
grid. Always place a tray beneath to catch any
drips of oil or fat.
3. When the food is grilled remove the food from
the oven.
4. Turn the top oven control knob to 0 (off).
WARNING - Top oven door must be kept open
during this function.
Top heater only operation
In this type of cooking, the heat emanating from
the top heater cooks the upper side of the food.
The upper heating function is ideal for frying the
upper side of already cooked food and heating
the food.
1. To operate the top heater turn the top oven
control knob clockwise to the top heater
symbol, as shown in figure 9.
2. Put the food to be fried in the oven and close
the door.
3. When the food is fried remove the tray from the
oven.
4. Turn the top oven control knob to 0 (off).
Bottom heater only operation
The lower heating function is ideal for baking
pizza, as the heat rises from the bottom of the
oven and warms the food up. This function is
appropriate for heating the food instead of
cooking.
1. To operate the bottom heater turn the top oven
control knob clockwise to the bottom heater
symbol, as shown in figure 9.
2. Put the food in the oven and close the door.
3. When the food is baked or heated remove the
tray from the oven.
4. Turn the top oven control knob to 0 (off).
User Instructions Customer Helpline 0845 600 4632
10

Main oven function control knob
1. Use the main oven function control as shown in
figure 10 to select the oven function you require
(see the Functions Table below).
Thermostat control knob
1. When you have selected the oven function you
must then set the temperature of the oven.
2. Turn the oven thermostat control knob as
shown in figure 11, to the temperature setting
you require. When the temperature inside your
oven reaches the set value, the thermostat will
switch off the heating elements and the
thermostat light will go off, as shown in figure 5
on page 8.
NOTE:
When the temperature falls below the set value,
the thermostat will be turned on the heating
elements and the thermostat light will come on
again.
Performance tips
1. Pre-heat the oven for 10 minutes.
2. After cooking, turn the oven function control
knob and the thermostat knob to 0.
3. To cool the oven, keep the oven door open. As
the oven will be hot, keep away from the oven
until the appliance is fully cooled.
11
User Instructions Customer Helpline 0845 600 4632
Using the Main oven
0
0
50
50
100
100
150
150
200
200
250
250
MAX
MAX
0
0
The oven light and fan will
be switched on. None
Top and
bottom of
the oven
Top and
bottom of
the oven
The oven's light, top and
bottom heaters
will be switched on.
The oven's light,
bottom heaters and
fan will be switched on.
top and
Figure 10
Figure 11

Defrost function
The fan can be used on its own without the
heating element. It can be used to defrost frozen
food.
IMPORTANT - Before using this method for
defrosting refer to food packaging for defrost
details.
1. To operate the fan turn the main oven control
knob clockwise to the fan symbol, as shown in
figure 11.
2. Put the food to be defrosted in the oven and
close the door.
3. When the food is defrosted remove the food
from the oven.Turn the main oven control knob
to 0 (off).
The static cooking function emits heat, ensuring
even cooking of the lower and upper food. This is
ideal for making pastries, cakes, baked pasta,
lasagne and pizza.
1.
2.
3.
4.
5.
Static Cooking
To operate the static cooking function turn the
main oven control knob to static cooking
symbol and set the thermostat control knob to
the desired temperature.
The main oven thermostat light will come on, as
shown in figure 5 on page 8.
When the temperature inside your top oven
reaches the set value, the thermostat will
switch off the heating elements and the
thermostat light will go off.
When the temperature falls below the set value,
the thermostat will be turned on the heating
element and the thermostat light will come on
again.
After cooking, turn the main oven and
thermostat control knob to 0 (off). Keeping the
oven door open to help cool the oven. As the
oven will be hot, keep away from the main
oven until the appliance has cooled down.
Static Cooking with fan
To operate this function turn the main oven
control knob to related symbol and set the
thermostat control knob to the desired
temperature.
The main oven thermostat light will come on, as
shown in figure 5 on page 8.
When the temperature inside your top oven
reaches the set value, the thermostat will
switch off the heating elements and the
thermostat light will go off.
When the temperature falls below the set value,
the thermostat will be turned on the heating
element and the thermostat light will come on
again.
After cooking, turn the main oven and
thermostat control knob to 0 (off). Keeping the
oven door open to help cool the oven. As the
oven will be hot, keep away from the main
oven until the appliance has cooled down.
This function is very good for obtaining results in
baking pastry.
1.
2.
3.
4.
5.
User Instructions Customer Helpline 0845 600 4632
Using the Main oven
12

Cleaning and Maintenance
13
CAUTION - Ensure the oven and hobs are turned
off prior to commencing any cleaning. Ensure all
parts have been allowed to cool to prevent the risk
of touching hot parts.
Interior cleaning
Do not use steam cleaners when cleaning the
oven.
• General cleaning of the interior surfaces may be
conducted using a wet cloth and soapy water.
• Avoid using harsh abrasive cream and/or
powder based cleaners.
• Use an approved oven cleaner periodically or if
the oven interior gets particularly dirty.
• In order to prevent damage to your appliance
always test cleaners on small section first and
follow the manufactures instructions for use.
Exterior cleaning
• Use a wet cloth and mild detergent on metallic
and enamelled surfaces.
• Use a glass cleaner on the exterior surfaces of
glass windows and doors.
• Always follow the cleaner manufacturer’s
instructions.
IMPORTANT – Do not use abrasive cleaners or
scouring pads as this may damage the enamel
surfaces and shorten the life of the appliance.
Cleaning the vitroceramic hob part
1. Before cleaning the hob, remove the plug from
the electrical supply socket.
2. Make sure that there is no residual heat stored
in the appliance. Vitroceramic glass is very
resistant to high temperatures and overheating.
If there is residual heat stored in the appliance,
the related residual heat indicator lamp should
be on. To avoid burns, allow the appliance to
cool down.
3. Remove all spilt food and fat with a suitable
scraper.
4. Wipe the hob with suitable washing up liquid
applied to a clean damp cloth. Rub the
appliance down using a clean dry cloth.
5. If aluminium foil or plastic items have melted on
the hob surface, they should be immediately
removed from the hot cooking area with a
suitable scraper. This also applies to sugar and
foods containing sugar that may have been
spilled on the hob. This will avoid possible
damage to the surface.
Changing the Oven Light
1. Before replacing the bulb disconnect the
appliance from the electricity supply.
2. Make sure that the oven has had sufficient time
to cool down before opening the oven door.
3. Remove the glass protective cover by twisting it
anticlockwise, taking care not to let it drop.
4. Remove the lamp by twisting it anticlockwise,
taking care not to let it drop.
5. The replacement lamp must conform to the
following rating:
• 25 Watt 230V, 50 Hz, E14 resistant to high
temperature (300°C)
• Part number 32011563 -Oven Light 230V.
6. This bulb can be purchased from your
authorised service agent.
7. Replace the lamp.
8. Replace the glass protective cover.
9. Check the light comes on when you use the
oven as normal.
Routine checks
1. Periodically inspect the electrical connections to
ensure there are no signs of wear.
2. In the event of any abnormality contact an
authorised service agent to carry out repairs.
Customer Helpline 0845 600 4632
Cleaning and Maintenance
Transporting the cooker
14
Important - before transporting the appliance
make sure the appliance has been disconnected
from the electrical supply.
1. Remove all accessories, wire grids, oven trays
and all other items which may become loose
during transit.
2. Tape the oven door closed to prevent it
opening.
3. Where possible, reuse the original packaging. If
this is not available, protect the appliance from
damage using suitable packaging materials..
4. Protect the external surfaces of the appliance
using cardboard or paper. Particular attention
should be paid to glass or painted surfaces.
Customer Helpline 0845 600 4632
15
Trouble Shooting Customer Helpline 0845 600 4632
Problem Possible cause Solution
- Oven does not turn on.
- Hot plate does not heat up.
- Power is turned off. - Ensure the electrical connections are
operational and that the
switches are set to the open/on
positions.
No heat or oven does not
warm up.
- Oven temperature control is
incorrectly set.
- Oven door has been left open.
- Check the oven temperature control
knob is set correctly.
- Ensure oven door is closed and
avoid opening frequently during cooking.
Oven light does not operate. - Lamp has failed.
- Electrical supply is
disconnected or switched off.
- Replace lamp according to the
instructions on page 13.
- Ensure the electrical supply is turned
on at wall socket outlet.
Cooking is uneven within
the oven.
- Oven shelves are incorrectly
positioned.
- Position the shelves towards the top or
bottom of the oven following cooking
guidelines. The top of the oven will be
hotter than the bottom.
IMPORTANT- If problems persist call an
authorised installation engineer or the
customer helpline 0845 600 4632.
Basic troubleshooting before contacting service

Technical Specifications
By ensuring this product is disposed of correctly,
you will help prevent potential negative
consequences for the environment and human
health, which could otherwise be caused by
inappropriate waste handling of this product. For
more detailed information about recycling of this
product, please contact your local city office, your
household waste disposal service or the shop
where you purchased the product.
The symbol on the product or on
its packaging indicates that this
product may not be treated as
household waste. Instead it shall
be handed over to the applicable
collection point for the recycling
of electrical and electronic
equipment.
Disposal information
We apologise for any inconvenience caused by any minor inconsistencies in these
instructions , which may occur as a result of product improvemenst and development.
Model/Item
Power supply
Maximum power
Size(H x W x D)
Oven Volume (Main Oven / Top Oven)
Electric cooker energy rating (Main Oven / Top Oven)
Energy consumption according to the EN50304:2009 (Main Oven / Top Oven)
We apologise for any inconvenience caused by minor inconsistencies in these instructions that may occur
as a result of product improvements and development.
Net weight
230-240V~
9700 W
900x600x600 mm
56 / 35 lt.
A / B
0.79 / 0.85
46 kg.
AE66DCW-AE66DCA -AE66DCSS
Customer Helpline 0845 600 4632
16

17

52090930 12/12 R000
This manual suits for next models
2
Table of contents
Other Bush Oven manuals

Bush
Bush BMFPROGSS Assembly Instructions

Bush
Bush BDBL60ELW User manual

Bush
Bush AG56SS User manual

Bush
Bush RLBFO User manual

Bush
Bush 5539284 BSOFTC User manual

Bush
Bush DHBETC50B User manual

Bush
Bush DHBES60WX User manual

Bush
Bush G56DW User manual

Bush
Bush BT60ELW User manual

Bush
Bush 5569144 User manual