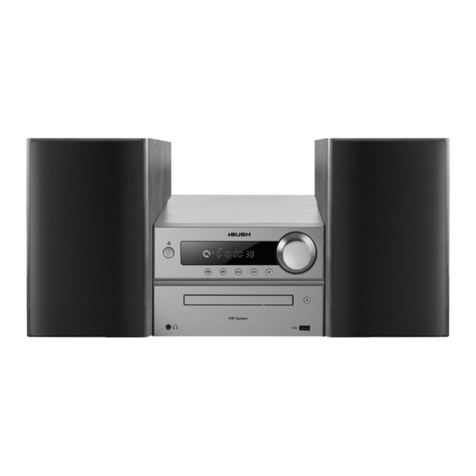
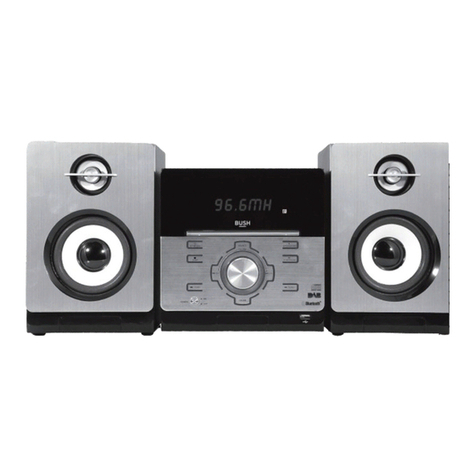
Bush BMS330BT User manual


ACCESSORIES ................................................................................................................................1
WARNING ........................................................................................................................................2
PANELS INSTRUCTION ................................................................................................................4
REMOTE CONTROL ......................................................................................................................5
CONNECTION WITH TV ...............................................................................................................6
CONNECTION WITH AMPLIFIER ...............................................................................................7
SYSTEM CONNECTION ...............................................................................................................8
.......................................................................................................................9
MENU SETUP ................................................................................................................................18
SPECIFICATION ............................................................................................................................23
TROUBLE SHOOTING .................................................................................................................24
BASIC OPERATION
CD RIPPING OPERATION............................................................................................................13
USB/BLUETOOTH OPERATION.................................................................................................16
RADIO OPERATION......................................................................................................................17
CONTENT

8. Do not install near any heat sources such as radiators, heat Registers, stoves, or
other apparatus (including amplifiers)that produce heat.
9. Do not defeat the safety purpose of the polarized or grounding -type plug. A
polarized plug has two blades with one wider than the other. A grounding prong.
The wide blade or the third prong are provided for your safety. When the provided
plug does not fit into your outlet, consult an electrician for replacement of the
obsolete outlet.
10. Protect the power cord from being walked on or pinched particularly at plugs,
convenience receptacles, and the point where they exit from the apparatus.
11. Only use attachments/accessories specified by the manufacturer.
12. Use only with a cart, stand, tripod, bracket, or table specified by the manu-
facturer, or sold with the apparatus. When a cart is used, use caution when
moving the cart/apparatus combination to avoid injury from tip-over.
13.Unplug the apparatus during lightning storms or when unused for long periods
of time.
14. Refer all serving to qualified service personnel. Servicing is required when the
apparatus has been damaged in any way, such as power-supply cord or plug is
damaged, liquid has been spilled or objects have fallen into the apparatus, the
apparatus has been exposed to rain or moisture.
15. Please keep the unit in a good ventilation environment.
16. These servicing instructions are for use by qualified service personnel only. To
reduce the risk of electric shock, do not perform any servicing other than that
contained in the operating instructions unless you are qualified to do so.
17. WARNING: The MAINS PLUG is used as disconnect device, the disconnect
device shall remain readily operable.
IMPORTANT SAFETY INSTRUCTION
1. Read these Instructions - All the safety and operating instructions should be read
before this product is operated.
2. Keep these Instructions - The safety and operating instructions should be retained
for future reference.
3. Heed all Warnings-All warnings on the appliance and in the operating instructions
should be adhered to.
4. Follow all instructions - All operating and use instructions should be followed.
5. Do not use this apparatus near water- The appliance should not be used near water
or moisture - for example, in a wet basement or near a swimming pool, and the like.
6. Clean only with a damp cloth.
7. Do not block any of the ventilation openings. Install in accordance with the
manufacturer’s instructions.
1

18. This equipment is a Class II or double insulated electrical appliance. It has
been designed in such a way that it does not require a safety connection to
electrical earth.
19.
-This lightning flash with arrowhead symbol within an equilateral
triangle is intended to alert the user to the presence of non-insulatd
20.
21. The batteries in remote control shall not be exposed or excessive heat such as
sunshine, fire or the like.
22. The apparatus shall not be exposed to dripping or slashing and that no objects
filled with liquids, such as vases, shall be placed on the apparatus.
23. Warning: To reduce the risk of fire or electric shock, do not expose this apparatus
to rain or moisture.
24. WARNING: The battery shall not be exposed to excessive heat such as sunshine,
fire or the like.
25.
dangerous voltage within the product’s enclosure that may be of sufficient
magnitude to constitute a risk of electric shock.
- Warning: To reduce the risk of electric shock, do not remove cover (or back) as
there are no user-serviceable parts inside. Refer servicing to qualified personnel.
- The exclamation point within an equilateral triangle is intended to alert the user
to the presence of important operating and maintenance in the literature
accompanying the appliance.
Invisible laser radiation when open and interlocks defeated.
Avoid exposure to beam of laser.
Correct Disposal of this product. This marking indicates that this product
should not be disposed with other household wastes throughout the EU.
To prevent possible harm to the environment or human health from uncontrolled
waste disposal, recycle it responsibly to promote the sustainable reuse of material
resources. To return your used device, please use the return and collection systems
or contact the retailer where the product was purchased. They can take this product
for environmental safe recycling.
This product complies with the European Commission on the Eco-design Directive
and its implementing Regulations- Energy related products. 15 minutes (approx.)
later without any input ( expect in FM mode), the system will automatically enter
standby mode. Follow up the instruction manual to assume the function operation.
ERP II note (Energy Related Products)
2

ACCESSORIES
Part 2: User Manual X1 Part 4: Six-headed Audio&
Video Lotus Wire X1
Part 1: Remote Control X1 Part 3: FM Antenna X1
+
-
DVD BT FM
LINE IN
USB 12
345
6 7 8
9 0
REPEAT
REP.AB CD RIP.
MENU TITLE SUB. DISPLAY
SETUP L/R/LANG
ENTER
CH+
CH-
VOL
SEARCH SAVE MO/ST
EQBASS+
TREBLE+
ZOOM BASS- TREBLE-
OK VOL- OK VOL+
OK ON/OFF
Please read and understand all the warnings provided below, as well as and those makred
on the unit. This unit has been designed and manufactured to assure personal safety.
Only use power source that is specified
in the User Manual or on the system.
Keep the unit and power plug
away from water.
Avoid placing the unit in direct
or sunshine or near a heat source.
Never open the cover and avoid dropping
anything into the unit, such as coins,
hairpins and needles for example.
Do not bend or pull the power cable
excessively, and do not apply pressure
to it by standing on it.
Unplug the unit from the main power
outlet when you do not use it for a long
time.
WARNING
3

PANELS INSTRUCTION
DISPLAY SCREEN
INDICATOR LIGHT
STANDBY
PLAY/PAUSE
FUNCTION
SEARCH
FAST REWIND
PREVIOUS
EARPHONE
R/L AUX IN
USB PORT
DISC TRAY
NEXT
STOP
TONE
FAST FORWARD
IR SENSOR
EJECT
DSP
VOLUME KNOB
LED LIGHT
L/R AUDIO OUTPUT
FM ANTENNA
POWER SWITCH
L/R SPEAKERS
POWER SUPPLY
MIC
Y, Pb/Cb, Pr/Cr
COMPONENT OUTPUT
VIDEO OUTPUT
COAXIAL OUTPUT
OPTICAL OUTPUT
BMS330BT
EARPHONE
4
~220-240V 50Hz
SPEAKERS(8Ω)
BMS330BT
~220-240V 50Hz
MINI HI-FI AUDIO SYSTEM
MODEL NO.:
70W
N14119
Made in China

REMOTE CONTROL
NOTE:
1. Turn on the player and have batteries installed in the remote control, put the emitter
against the sensor of player for remote control.
2. The distance of remote control should not exceed 7 meters, or else, it will be invalid.
3. If the sensor or remote controller emitter is stuck with foreign matters, it may result in
the malfunction in signal reception or not at all.
4. The remote control function may be affected under the strong interference signals,
such as power supply and other strong high-frequency signals.
STANDBY
DISPLAY
TITLE
DIRECTION
SETUP
FAST FORWARD
MENU
OK VOLUME+/-
OK ON/OFF
EQ
BASS+/-
EJECT
NUMBER
CD RIPPING
MUTE
PLAY/PAUSE/ENTER
LANG/R/L
VOLUME+/-
STOP
A-B REPEAT
BT
NEXT/CH+
DVD FM
TREBLE+/-
REPEAT
AUX
ZOOM
PREVIOUS/CH-
FAST REWIND
SUBTITLE
USB
+
-
DVD BT FM
AUX
USB 12
345
678
9 0
REPEAT
REP.AB CD RIP.
MENU TITLE SUB. DISPLAY
SETUP L/R/LANG
ENTER
CH+
CH-
VOL
SEARCH SAVE MO/ST
EQBASS+
TREBLE+
ZOOM BASS- TREBLE-
OK VOL- OK VOL+
OK ON/OFF
SAVE
SEARCH MONO/STEREO
TIME/FREQUENCY
5

SPEAKERS(8Ω)
CONNECTION WITH TV
1. If your TV-set has AV terminal, connect this unit to TV-set with A/V cables, and set
TV-set to be AV status after confirming the connection is correct. (Figure 1)
2. If your TV-set has chromatism output terminal, please use three connection cables to
connect the player and TV-set, this connection offers a more vivid image. (Figure 2)
Note:
1. Before connecting the player to the TV-set, turn off and unplug both the units.
2. You may adjust the corresponding system according to your TV system while watching
various discs.
3. If there are multiple connections between video player and TV, please select one and
unplug others so as not to affect the quality of images and sound.
4. Do not switch on and off or press power switch frequently, switching on and off each
time must have an interval of 3 seconds.
5. Do not connect the digital optical or coaxial output jack of this player with the analogue
signal input terminal for reception.
TV
AC Power
Audio R Audio L Video Input
Y Pb/Cb Pr/Cr
2
11
~220-240V 50Hz
6

CONNECTION WITH AMPLIFIER
Setup of Digital Audio Output
Connect the optical and coaxial output jack to the amplifier.
Video connecting cable
Connected to video input
Left channel Right channel
TV
( Select one of the two digital
connecting wires)
Dolby Amplifier
Coaxial output
Optical output
7
~220-240V 50Hz
SPEAKERS(8Ω)
BMS330BT
~220-240V 50Hz
MINI HI-FI AUDIO SYSTEM
MODEL NO.:
70W
N14119
Made in China

SYSTEM CONNECTION
Please refer to the following figure to connect your acoustic equipment.
To keep all the connection correctly and firmly.
Power supply should be connected finally.
Left Speaker
Right Speaker
TV
PC
FM Antenna
R/L AUX IN CONNECTION
BMS330BT
EARPHONE
8
~220-240V 50Hz
SPEAKERS(8Ω)
BMS330BT
~220-240V 50Hz
MINI HI-FI AUDIO SYSTEM
MODEL NO.:
70W
N14119
Made in China
21

BASIC OPERATION
PREPARATION
1). Before turning on, check whether all the connection are correct and reliable. Insert the power plug
into the corresponding power socket.
2). Press STANDBY button on the front panel to turn on the player.
3). Press EJECT button on the remote control or panel to carry the disc tray outside, put the disc into
the tray, press EJECT button again, this unit starts reading and playing.
FAST FORWARD & FAST BACKWARD
In play status, press 7button or 8, there will be different speeds of fast forward or fast rewind at
the speed X2, X4, X8, X16, X32.
PREVIOUS & NEXT
In play status, press 9 button, the song/item will skip to the previous one for playback, press :
button, the song/item will skip to the next one.
STANDBY
Press the Standby button on the remote control (or front panel)can switch on the unit or to the
standby mode.
In play status, press the STOP button once, the player will stop the playing; the stop point will be
memorized. Then press PLAY/PAUSE button, the disc will be played from the previous stop point.
If you press the Stop button twice, the stop point will not be memorized; press the PLAY/PAUSE
button, the disc will be played from the beginning.
STOP
In play status, press PLAY/PAUSE button on remote control, the player will pause, press again to
resume playback.
PLAY/AUSE
MUTE
In play status, if MUTE button is pressed, there will be no audio output, the sound is eliminated,
but the image will still be played normally. Then press this button again or press VOL. +/- button
to exit the mute status, the sound resumes to be its normal status.
VOLUME ADJUSTMENT
You can press the VOL-/+ button to turn up or down the volume of this unit.
NUMBER BUTTONS
Use NUMBER buttons to select tracks, frequency or stations etc. (eg. if you want to play track 12,
press the number button 1", then press 2".)" "
SOUND-FIELD SELECTION
Press the EQ button on the remote control or DSP button on the front panel to select different sound
fields: Jazz, Rock, Classic, Pop, Live, Dance and Off.
9

BASIC OPERATION
CHANNEL/LANGUAGE SELECTION
In playing VCD, DVCD, press L/R/LANG button to select the multiple output modes:
Mono L, Mono R, Mix-mono, Stereo. Press the button once to switch one soundtrack.
In playing DVD, press L/R/LANG button can select multiple languages for playback.
(Only applies to the discs like DVD recorded in multiple languages. )
MODES SELECTION
1) Correctly connect the outer equipment (e.g. PC) with this unit, then press the AUX (Audio)
button on the remote to enter the audio mode.
2) Press the DVD, USB, FM, BT buttons on the remote control to switch to corresponding modes.
3) Press the FUNCTION button repeatedly on the front panel to select different modes.
DIRECTION BUTTONS
Press the direction buttons3456to move the cursor to select pictures or menu.
ENTER
Press ENTER button to enable the selected items or start playback.
REPEAT
A-B REPEAT
In play status, press REP.AB button to realize the specific section repeat.
Press this button once at the beginning of the section (i.e A), and press it again at the end of the
section (i.e B), this player will automatically return to A and starts to repeat playing the section
from A to B. Press the button again to exit.
In play status, press Repeat button to separately select the different contents for repetition.
1). As for DVD, successively press Repeat button, the TV screen will separately display:
Chapter, Title, All, Repeat Off.
2). As for CD, VCD, CD-R, Successively press this button, the screen will separately display:
Track, All.
3). As for MP3, JPEG, there are options: Single, Repeat one, Repeat folder, Repeat Off.
TONE ADJUSTMENT
In any step of audio source, you can according to your hearing to adjust the volume, bass and treble
by pressing TONE button on the front panel.
E.g. Press TONE button to select required item, then use VOLUME KNOB to adjust the effect of
Volume, Bass or Treble.
Or, you can press the BASS+/-, TREBLE+/- buttons on remote control to directly adjust the levels.
ZOOM
In play mode, press the Zoom button, the TV screen will be zoomed in 2 times, 3 times, 4 times,
1/2, 1/3, 1/4.
10

BASIC OPERATION
STATUS DISPLAY
In play status, press DISPLAY button, the TV screen will display the following data:
VCDitems : single elapsed, TR(track remain), total elapsed, DR(directory remain), display off.
CD items:
DVD items : title elapsed, title remain, chapter elapsed, chapter remain, display off.
single elapsed, TR(track remain), total elapsed, DR(directory remain).
SUBTITLE SELECTION
When the played DVD disc records multiple subtitles, you can make selection of subtitle language
by pressing SUBTITLE button, they are: off, English, French, German, Spanish, Chinese, Japanese,
Korean, Thai and others.
MENU
Pressing MENU button on the remote controller can open or close PBC status.
Note: 1). The player will go into the root menu when play DVD discs.
2). Some pirate disc do not support this function.
TITLE
If the played DVD disc contains a directory column, press the TITLE button to take out the items
contained in this disc. Use the direction buttons to move the cursor to select the items you want to
play, or directly use the number button to select.
DVD TITLE MENU SELECTION FUNCTION
DVD disc features high capacity, records more than one movie, background data and songs. It is
hereby given a name of TITLE, while more sections will be given under each TITLE, which are
called Chapters. There are some songs in one chapter. During playing DVD discs, press the TITLE
button, the TITLE menu will appear on the TV screen. (Available for the DVD discs that contain
more than one title menu) You can use the direction buttons to move the cursor to the desired title
menu, press ENTER button to play it. If the title menu is represented by numbers, then press the
number buttons to select directly.
OK ON/OFF
Press the OK ON/OFF button on the remote control to set the microphone on or off.
Please do not point the microphone at the speakers when you set the microphone “on”.
OK VOLUME
Press the OK VOL+/- buttons to adjust the Mic Volume.
11
CD RIPPING
While playing the CD disc, press CD RIP. button, and the prompt of operation will appear on
the TV screen; follow the CD RIPPING STEPS to make operations, CD’s audio tracks that
you have selected will be ripped into MP3 format and stored in the USB device.
For details, refer to Page 13.

00:00 04:33
001/010
\
01
02
03
04
128Kbps
BASIC OPERATION
TIME SELECTION
In play status, press “-/--” button, the TV screen displays the data of playing disc. Such as:
VCD disc display: DVD disc display:
1) There are 5 items in VCD screen: Track, Disc time, Track time, Repeat, Time DISP (Display);
2) There are 9 items in DVD screen: Title, Chapter, Audio, Subtitle, Angle, TT(Total) time, CH
(Chapter) time, Repeat, Time DISP(Display).
Note: The optional time range depends on the volume of discs.
CD disc display:
--:--
T:--/xx
MP3 disc display:
---/xx
--:--
MPEG4 disc display:
SELECT:---
GO TO:-:--:--
While playing CD, MP3 or MPEG4, press Time button to switch between the “Time Selection
(current song/chapter)” and “Song/Charpter Selection”; then input the digital you want. The system
begins playing from the specified time/song/charpter.
MENU
COMPACT
DIGITAL VIDEO
BITRATE 72 TOTAL ELAPSED X:XX:XX
TRACK XX/XX
DISC TIME X:XX:XX
TRACK TIME X:XX:XX
REPEAT OFF
Current Playing Picture
MENU
BITRATE 72 TITLE ELAPSED X:XX:XX
TITLE XX/XX
CHAPTER XX/XX
AUDIO 2CH
SUBTITLE OFF
Current Playing Picture
DVD
VIDEO
You can press the direction key to move the cursor to the setting option according to the afore-
mentioned screen suggestions, then press ENTER to confirm and use number keys to input the
corresponding time numbers, after it is done, DVD player will start to play according to the
setting time. When press the DOWN direction button, you can see the next item in the screen.
Mp3 DISC PLAYING FUNCTION
1). Press the EJECT button on the panel or remote control to open the deck, put in an MP3 disc,
then press EJECT button to close the deck. This unit begins to read it, and the TV screen will
display the following figure,
Contents Area
2). Press the direction keys56to move the cursor to a certain directory, and press ENTER button
to enter the directory. Press the direction buttons to enter the subdirectory or the file area, select
a song with the cursor, press ENTER button to play the song.
• During playing, press : or 9 button to select other songs under the current directory.
• During playing, press the left direction button, the icon will skip to the directory symbol 1, press
the up/down direction button to select other directories, press Play/Enter button for confirmation.
Note: When play MP3 discs, this unit also has the functions such as mute, pause, previous and next
selection. The operations are identical with CD playing.
12

00:00 04:33
001/010
\
BMP
JPG
BASIC OPERATION
2). Press the direction button 56to move the cursor to the corresponding directory, press ENTER
button to enter the next layer, and so on, until the desired picture is found for play.
• During playing, number buttons or 9: button can be used to select pictures.
• JPEG pictures may distort at the edge to some TV sets, this is not the unit s fault.
• This unit can play the digital photo discs with extension name, JPEG and support the pictures that
made by Adobe Photoshop.(
• If you want to repeat playing some pictures, pressing the REPEAT button.
Press the ZOOM button then press the fast forward or fast rewind
button to zoom into the picture. During browsing, press STOP button to main menu. After go into
the subdirectory in playing MPEG4 disc, also you can do the operation such as fast rewind, fast
forward, pause etc.
MPEG4/JPEG PICTURE DISC PLAYING FUNCTION
1). Place the MPEG4/JPEG disc, this unit will begin to read. When the STOP button on the remote
control is pressed, the main directory will be displayed on the TV screen.
Root Directory Area
AUDIO CD RIPPING (ENCODING IN MP3 FORMAT)
OPTIONS TRACK
START EXIT SELECT ALL SELECT NONE
SELECTED TRACK 0
SELECTED TIME 00:00
SUMMARY
SPEED NORMAL
BITRATE 128kbps
DEVICE USB 1
track01 04:43
track02 05:07
track03 04:23
track04 04:57
track05 05:27
track06 04:55
track07 05:36
With this player, you can convert your audio CD to Mp3 format and save files on an USB device.
During CD music playback, insert an USB device, then press the CD RIP. button to enter the
ripping menu. This function needs Television to make operations.
SPEED: Select NORMAL or FAST recording speed.
BITRATE: Select 96/112/128/192/256/320 kbps.
DEVICE: The USB device is the storage medium.
SELECTED TRACK: Total number of selected tracks.
SELECTED TIME: Total time of selected tracks.
SELECT ALL: Select all the files.
SELECT NONE: Unselect all the files.
START: Start ripping.
EXIT: Exit the ripping menu.
Operations:
Press CD RIP. button on the remote control to enter ripping menu; press PLAY/ENTER button to
select SPEED and BITRATE, press PLAY/ENTER button to select CREATE ID3 or not; Use the
DIRECTION buttons to select tracks and press PLAY/ENTER to confirm. At last, select START to
start ripping the files. During the ripping, press PLAY/ENTER to CANCEL. Select EXIT to exit.
Note:
*The higher the bitrate, the better the quality. Please note that the file will be larger and
the difference is not that noticeable after 192 kbps.
*Sound remains active only if you select Normal ripping speed.
*The files stored in the USB device can only be deleted by computer operation.
CREATE ID3
CREATE ID3: the information of MP3 tracks.
Yes
13

Operation sample: Save Track 1&4 (CD disc) to the USB device.
1. Press CD.RIP button to enter CD RIPPING status. It shows:
OPTIONS TRACK
START EXIT SELECT ALL SELECT NONE
SELECTED TRACK 0
SELECTED TIME 00:00
SUMMARY
SPEED NORMAL
BIT RATE 128kbps
DEVICE USB 1
track01 04:43
track02 05:07
track03 04:23
track04 04:57
track05 05:27
track06 04:55
track07 05:36
CREATE ID3 Yes
2. Use the DIRECTION buttons to choose the contents as below:
Then press the ENTER button to cycle through the RIPPING SPEED: NORMAL, FAST.
When you stop at the speed e.g. NORMAL, it means the RIPPING SPEED is NORMAL SPEED;
Use the Direction to move to the BIT RATE selection.6
3456
3. When you finish choosing the SPEED, BIT RATE, CREATE ID3, we now go to choose the
track you would like to store in USB device.
OPTIONS TRACK
START EXIT SELECT ALL SELECT NONE
SELECTED TRACK 01
SELECTED TIME 04:43
SUMMARY
SPEED NORMAL
BIT RATE 128kbps
DEVICE USB 1
track01 04:43
track02 05:07
track03 04:23
track04 04:57
track05 05:27
track06 04:55
track07 05:36
CREATE ID3 Yes
Use the Direction 3456button to move to TRACK-SELETION status, it shows:
CD RIPPING STEPS
OPTIONS TRACK
START EXIT SELECT ALL SELECT NONE
SELECTED TRACK 0
SELECTED TIME 00:00
SUMMARY
BIT RATE 128kbps
DEVICE USB 1
track01 04:43
track02 05:07
track03 04:23
track04 04:57
track05 05:27
track06 04:55
track07 05:36
CREATE ID3 Yes
SPEED NORMAL
When you select track 01, press ENTER button to confirm and there will be a mark √ in the
When you confirm selecting the track 01, you can select other tracks you want to store,
every time you confirm choosing the tracks there will be a mark √ in front of the selected tracks.
If you don’t want to rip the track you have selected e.g.track 04, just move to track 04 and press
ENTER button to cancel selection, and the mark √ would disappear.
OPTIONS TRACK
START EXIT SELECT ALL SELECT NONE
SELECTED TRACK 02
SELECTED TIME 09:00
SUMMARY
SPEED NORMAL
BIT RATE 128kbps
DEVICE USB 1
track01 04:43
track02 05:07
track03 04:23
track04 04:57
track05 05:27
track06 04:55
track07 05:36
CREATE ID3 Yes
front of the track 01.
14

4. If you want to rip all the tracks in CD disc, you can choose SELECT ALL, and all the tracks
will be stored in the USB device. If you don’t want to rip any track finally, you can choose
SELECT NONE to clear all the selected tracks.
OPTIONS TRACK
START EXIT SELECT ALL SELECT NONE
SELECTED TRACK 02
SELECTED TIME 09:00
SUMMARY
SPEED NORMAL
BIT RATE 128kbps
DEVICE USB 1
track01 04:43
track02 05:07
track03 04:23
track04 04:57
track05 05:27
track06 04:55
track07 05:36
CREATE ID3 Yes
5. When you have finished all the selections, use the DIRECTION buttons to START, and press
ENTER button to enter RIPPING status, and the CD RIPPING from CD to USB begins.
In the CD disc is RIPPING to USB, you can only cancel the RIPPING process and no other
operation is available.
Press ENTER button to stop the ripping, then move to EXIT and press ENTER
to exit CD RIPPING.
OPTIONS TRACK
START EXIT SELECT ALL SELECT NONE
SELECTED TRACK 02
SELECTED TIME 09:00
SUMMARY
SPEED NORMAL
BIT RATE 128kbps
DEVICE USB 1
track01 04:43
track02 05:07
track03 04:23
track04 04:57
track05 05:27
track06 04:55
track07 05:36
CREATE ID3 Yes
RIPPING SELECTED TRACK
NOW RIPPING
TRACK 01/02
SUMMARY
TRACK PROGRESS
track01 8%
track04 04:57
TOTAL PROGRESS
CANCEL
The screen displays as below:
15

It is possible to listen to the music using the USB device interface of this unit.
1. Connect the USB device with this unit:
2. Press the USB button on the remote control to enter the USB mode. The player will play the
contents or menu of the USB file if it found the device.
3. When the folder appear on the TV screen; press the direction buttons to select the files, and press
ENTER button to confirm.
4. Press MENU to display the File browser, select the file you want and press ENTER button to start
playing.
5. Please check the BASIC OPERATION for more detailed operations.
Note:
1) USB-Extension cable should have a max. length of 0.5m.
2) Depending on the amount of data and media speed, it may take longer for system to read the
contents of media device. In some cases, reading time may be as long as 60 seconds. This is not
a malfunction.
3) Even when they are in a supported format, some files may not play or display depending on the
content.
BLUETOOTH OPERATION
Pair Operation
1. Press the BT button on the remote control to enter Bluetooth mode.
2. Turn on the bluetooth function on your device (e.g. mobilephone).
3. Place your device in bluetooth search mode. The bluetooth device will search for this unit.
4. Select BMS330BT from the list of found devices on the device.
5. Select OK or YES to pair the unit with your bluetooth device.
6. If prompted, enter 0000 for passkey (for some devices).
7. When successfully paired with your device, the indicator light flashes steadily.
8. The playback operation is control by your device and the buttons on the remote control.
To disconnect and pair with another device
a. Turn off the bluetooth function on your device to disconnect bluetooth. The unit will enter the
bluetooth pairing status automatically.
b. In this paired status, follow the steps 2-5 of PAIR OPERATION section to connect to another
device.
Phone call while playing music
*When playing music through a phone, and a call is coming, music will stop automatically.
*When call ends, it depends on the setting of your phone whether the current track will resume
playback or not.
Note:
1. Some devices, such as an iphone, connect immediately in pairing, some may take long to connect.
2. The unit can only be connected and playing content from one device at a time.
3. To connect to a different paired device, you have to turn off bluetooth or unpair from the currently
paired device and manually connect to the other device.
bluetooth
USB OPERATION
16

RADIO OPERATION
FM RADIO OPERATION
1. Enter FM Function
In the turn-on or play status, press the FM button on the remote control to enter FM mode.
2. Select stations
a) Directly input frequency: press the “-/--” button on the remote control, input frequency directly.
E.g.
c) Press or buttons to tune the frequency up or down on the step of 0.05 MHz.
Press and hold these buttons, the device will switch to search available stations from up or down
automatically. It stops tuning when it found a strong signal station.
3. Auto-Search
Press the SEARCH button to search stations from the low to high frequency automatically.
Meanwhile the searched stations are saved automatically. Press this button again to stop searching.
4. Save Stations
Press the SAVE button to save the frequency of band.
E.g. if you want to save 99.30MHz in 28th, please press “-/--” button, then press 2, 8 button to select
the preset station, then press “-/--” button and input 9, 9, 3, 0, at last press SAVE button to save
this frequency.
6. Soundtrack Selection
Press MO/ST button, you may select Stereo on or off in FM status. If the signal is not strong
enough, you can not select turn stereo on.
Remark: FM Frequency range : 87.5-108.0MHz
NOTE: You may adjust the best radio effect by adjusting the FM antenna.
1, to select 89.90, press “-/--” button, then press the number buttons 8, 8, 9, 0 and it enters
the FM 88.90MHz.
E.g. 2, to select 105.90, press “-/--” button, then press the number buttons 1, 5, 9, 0, and it will
enter the FM 105.90MHz.
b) Press the CH- or CH+ buttons to select the previous or next stations.
17

MENU SETUP
DVD Menu Setup
To access the DVD menu :
1. Press the SETUP button .
2. Press the direction buttons to switch between the different setup pages .
3. Press the direction button to move the cursor to the position you want, then press ENTER
button again to enter the subdirectory.
4. Press the ENTER buttons again to enter the next subdirectory.
Note: In any menu, you can press the up and down direction buttons to move the cursor and press
ENTER button to enter the selected items.
Pressing the SETUP button to exit the system setup.
Language Setup Page
OSD Language
This option is used to select the language of all the screen displays and setup menus.
The OSD language is English.
Audio Language
When playing DVD discs, the player will automatically play the built-in language of the disc. This
unit could play such languages as: English, French, German, Spanish, Chinese, Japanese, Korean,
Thai and others.
Subtitle Language
When playing DVD discs, the player will automatically play the built-in subtitle language of the disc.
This unit could play such built-in languages as: Off,
. You can select any one as the built-in subtitle or close the subtitle.
English, French, German, Spanish, Chinese,
Japanese, Korean, Thai and others
Disc Menu Language
This unit has the following menu language available: English, French, German, Spanish, Chinese,
Japanese, Korean, Thai and others.
OSD LANGUAGE ENG
AUDIO ENG
SUBTITLE
DISC MENU
ENG
ENG
LANGUAGE SETUP
GOTO LANGUAGE SETUP
18
Table of contents
Other Bush Stereo System manuals

Bush
Bush NE-8270 User manual

Bush
Bush CMC6DAB Assembly Instructions

Bush
Bush CMC1112BT User manual

Bush
Bush BD-618 AM/FM User manual

Bush
Bush CMN155DABBT User manual

Bush
Bush CD608 Installation and operating instructions

Bush
Bush BMS05DABIP User manual

Bush
Bush MC004DVD User manual

Bush
Bush BMS2015DABT User manual

Bush
Bush 426/9665 User manual