Bushman XD-200 User manual

1
Instruction Manual
Gas Freezer
Models
XD-160/XD-200
two way fridge
Warning:
FOR YOUR SAFETY
Do not store or use gasoline or other flammable vapors and liquids in the vicinity
of this or any other appliance.
If you smell gas:
1. Evacuate enclosure.
2. Call for professional help.
Read this manual carefully and be thoroughly acquainted with its contents before
operating this freezer

2
TABLE OF CONTENTS PAGE
Introduction ………………………………………………………………….……… 3
Important Safety Precautions …………………………………………..…………..4
Warning ……………………………………………………………...………..… 5
Parts and Features …………………………………………………...…………. 6
Installation instructions …………………………………………..…………......7
Operation Instructions …………………………………………………..…………..9
Cleaning ……………………………………………………………………………...11
Troubleshooting and Maintenance ………………………………………………12
Warranty……………………………………………………………………………....12
Installation instruction for handles…….........………………………………………14

3
INTRODUCTION
Thank you for purchasing our gas freezer. This unit is designed to improve your living and entertaining comfort.
The absorption system is totally silent that uses no compressors or fans. The freezer is ideal for installation in
homes, farms, Cottages, chalets or similar. With its silent operation and unique design, you will enjoy the
convenience and comfort for years to come.
Please read through these instructions carefully before operating this freezer. When using it, always exercise
basic safety precautions.
This easy-to-use manual will guide you to getting the best use of this freezer.
SAFETY INSTRUCTIONS
1. Do not allow children to play with the freezer, even when it is turned off;
2. Do not use store liquids such gasoline, kerosene, etc., inside your freezer, thus avoiding the risks of
explosions and fire;
3. Do not store toxic materials inside your freezer, as they could contaminate food items;
4. Your freezer should be used only by those who have read this manual or those that have been
adequately instructed by someone who has read it.
5. This appliance is not intended for use by persons (including children) with reduced physical,
sensory or mental capabilities, or lack of experience and knowledge, unless they have been
given supervision or instruction concerning use of the appliance by a person responsible for their safety.
6. Children should be supervised to ensure that they do not play with the appliance.
7. If the supply cord is damaged, it must be replaced by the manufacturer or its service agent or a similarly
qualified person in order to avoid a hazard.
8. These appliances use flammable insulation blowing gas, please dispose the appliance according to the local
regulation.
TRANSIT DAMAGE
Inspect the freezer for damage. Transit damage must be reported to whoever is responsible for delivery
not later than seven days after the freezer was delivered.
Power source requirements
Model XD-160,and XD-200 are two way freezers designed to operate on LPG and 230v energy sources
Propane Gas Operation 2.75 KPa
AC Operation 230V 50Hz
Operating in excess of these specifications can damage the freezer’s electrical circuit, related
components and voids the freezer’s warranty.

4
REFERENCE INFORMATION
Please complete the following information for future reference. You will need it to
obtain warranty service.
Model Name*: __________________________________
Serial Number *: __________________________________
Date of Purchase: __________________________________
Place of Purchase: _________________________________
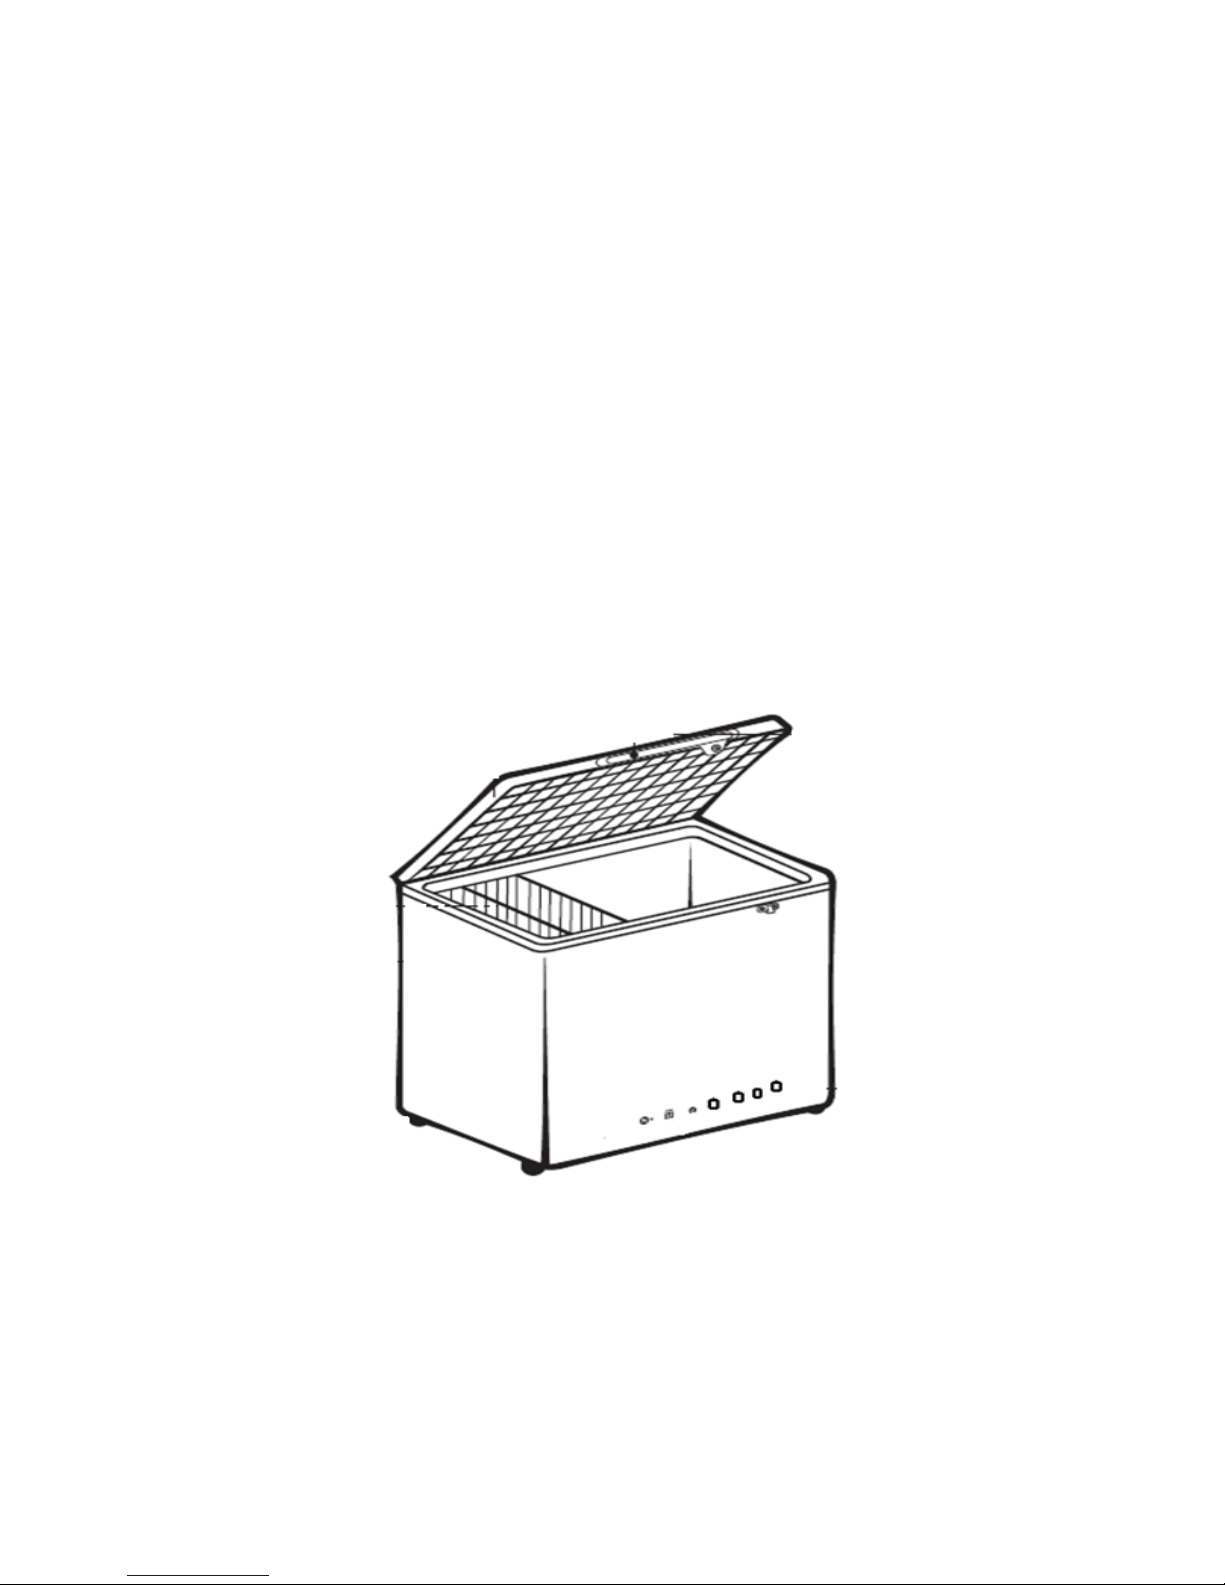
*The above information is written on the nameplate inside the cabinet. Retain this user manual with your sales
receipt as a permanent record of your purchase.
The manufacturer reserves the right to make changes to its products when considered necessary and
useful, without affecting the essential safety and operating characteristics. We are therefore not
responsible for any inaccuracies due to printing, transcription, or conversational errors, whether
contained in any printed source, or relayed in person.
IMPORTANT SAFETY PRECAUTIONS
l Before you use your absorption freezer, please read this instruction manual carefully.
l NEVER install gas appliances in unventilated (air tight) structures or sleeping rooms. Gas freezers
consume air (oxygen) when operated on gas power. When used in any inside area, provide a fresh air
opening of at least 3 square inches (20mm). Please note that an exterior flue is not required with "vent-
less" propane appliances like gas freezers, but you may choose to run an insulated 2 inch (min) inside
diameter vent pipe through the roof (straight up is best) or the wall (avoid 90 degree bends with 45's
spaced more than two feet apart). It is recommended that a carbon monoxide detector be installed in the
same room as the gas freezer.
l NEVER install a gas appliance on carpeting or against a flammable wall.
l NEVER leave your gas appliances running unattended while on vacation.
l NEVER run the electrical power and gas power at the same time. Backup electrical power 230 volt AC
operation is STANDARD equipment on the gas fridge. Should you ever run out of gas, it's very handy.
Just be certain to never run both heaters at the same time. Serious damage will result to the cooling unit
if you do.
l Never unplug your absorption freezer by pulling on the power cord. Always grasp the plug firmly
and pull straight out from the wall outlet.
l Repair or replace immediately, all electric service cords that have become frayed or otherwise damaged.
Do not use a cord that shows cracks or abrasion damage along its length, the plug or the connector end.
l Unplug your absorption freezer before cleaning or before making any repairs.
l The power supply must be properly grounded.
l Use this appliance only for its intended purpose as described in this user manual.
l This absorption freezer must be properly installed in accordance with the installation instructions before it
is used.
l Cut off the gas supply before cleaning or before making any repairs.
l Servicing shall be carried out only by authorized personnel.
l Do not operate your absorption freezer in the presence of explosive fumes.
l Do not use the unit in the immediate surroundings of a bath, shower or swimming pool.

5
l Before discarding or storing, we recommend that you remove the door and leave the shelves in place.
This will reduce the possibility of danger to children.
l The sealed cooling system must not be opened, since it contains corroding chemicals under high pressure.
l Check that the gas supplied to the freezer is at the correct pressure. See the pressure regulator on the
LP gas tank.
l Do not store explosive substances such as aerosol cans with flammable propellant in this
appliance.
l Do not use an adapter plug or extension cord.
l Remove any transit protection before use.
WARNING:
Electrical Grounding Instructions
This appliance is equipped with a three-prong (grounding) plug for your protection against shock
hazards and should be plugged directly into a properly grounded three-prong receptacle. Do not cut
or remove the grounding prong from this plug.
SAFE DISPOSAL
Contact your municipal department of public works to inquire about the procedures for collecting and
disposing of refrigerated appliances in your area.
NOTE: Do not attempt to remove refrigerant or compressors yourself. Improperly handled refrigerant may
result in physical harm. Only properly trained individuals using EPA-approved refrigerant recovery equipment
should attempt to remove refrigerant from appliances.

6

7
INSTALLATION INSTRUCTIONS
It is advisable to clean the inside of the absorption freezer with lukewarm water using a mild detergent
and then to dry it thoroughly prior to use.
LEVELLING AND VENTILATION
The refrigeration system of the cabinet is designed to operate with the cabinet located on a flat surface. Avoid
tilting the cabinet side.
If the cabinet must be tilted on an angle for handling or moving purposes, allow it to sit in an upright position
20 to 30 minutes prior to plugging it in and starting the cooling of the storage compartment.
For electrical models - Grounding plug and socket should be provided in accordance with local regulations
The cable-size should meet the freezer’s requirements. The unit must be connected to proper electrical
network, which is shown on the nameplate, through an omnipoplar circuit-breaker. To assure the proper
function of the freezer.
Please observe the following recommendations.
Clearance to combustibles: Side and Rear: 25mm, Top: 700mm
To ensure correct circulation, the unit should be kept 25mm away from the rear wall and possible side walls.
The clearance above the freezer should be at least 700 mm. Locate the unit away from direct sunlight. This
will enable you to obtain the best performance and save
energy.
Further the room should have a window (which can be opened) or a door to the outside.
It is important that the freezer is not subject to radiation of heat from a stove etc.
For best performance also at high ambient temperatures there must be a free air circulation over the cool
unit at the rear of the freezer.
The freezer is designed for a free-standing installation.
Ventilation must be in accordance with AS/NZS 5601 - Gas Installations. In general, the appliance should
have adequate ventilation for complete combustion of gas, proper flueing and to maintain temperature of
immediate surroundings within safe limits.

8
PROPANE GAS CONNECTION
The freezer is designed for operation on Propane Gas, the pressure of which must be 2.75kPa. Check that this
is stated on the dataplate. The freezer is NOT designed for operation on town gas or natural gas.
CAUTION! CHECK THAT THE GAS SUPPLIED TO THE FREEZER IS AT THE PROPER
PRESSURE. SEE THE PRESSURE REGULATOR ON THE PROPANE GAS CONTAINER.
This appliance shall be installed only by authorised persons and in accordance with the manufacturer's
installation instructions, local gas fitting regulations, municipal building codes, AS/NZS 5601 - Gas
Installations and any other statutory regulations.
The gas supply pipe should be connected to the gas inlet of the gas control valve by means of a suitable
threaded coupling. The appliance can be connected with rigid pipe as specified in AS/NZS5601 or with a
Flexible Hose, which complies with AS/NZS 1869 (Australian Certified), 8mm ID, class B or D, no more than
1.2m long and in accordance with AS/NZS 5601.
In making the connection to the freezer, a union gas cock of an approved bottled-gas type must be incorporated
in the supply line in a position which is readily accessible to the user. For eventual servicing purposes, the
union should be on the outlet side of the cock and the pipework should be positioned so as not to prevent the
freezer from being readily withdrawn.
AN APPROVED MANUAL SHUT-OFF VALVE MUST BE INSTALLED AT THE GAS INLET OF THE
FREEZER. THE SHUT-OFF VALVE MUST BE ACCESSIBLE TO THE USER WHEN THE
APPLIANCE IS IN THE INSTALLED POSITION.
BEFORE LEAVING –Check all connections for gas leaks with soap and water. DO NOT use a naked flame
for detecting leaks. Ignite the burner to ensure correct operation of gas valve, burner and ignition. Turn gas tap
to low flame position and observe stability of the flame. When satisfied, please instruct the user on the
correct method of operation. In case the appliance fails to operate correctly after all checks have been carried
out, refer to the authorised service provider in your area.

9
230V AC connection.
Check that the voltage stated on the data plate is the same as the mains voltage in use (230 V).
Plug the 230 V freezer power cord into an easily accessible earthed wall socket.
Electrical leads must be routed and secured so that they cannot come into contact with hot or sharp
parts of the freezer
OPERATION INSTRUCTIONS – Model XD-200 or XD-160
(Battery ignition)
Fig1
The freezer can be run on either 230V or Propane gas. Changing between these modes of operation is carried
out by turning the rotary switch F.
The freezer temperature is controlled by a thermostat (D). Please note that the thermostat has no "off"
position. The numbers 1 to 4 adjust the freezer temperature (1 is the warmest setting and 4 is the coldest
setting). THE THERMOSTAT CONTROL KNOB SHOULD NOT BE ROTATATED BEYOND THE NUMBER 1
WHICH IS LOCATED AT THE 10 O’CLOCK POSITION.
The freezer is fitted with a safety device which automatically shuts off the supply of gas if the flame goes
out. The safety device can be opened manually by depressing knob (C).
In the flame indicator (B), you can see a blue light when the flame is alight.
The Neon lamp (E) inside will light when the electric power is on.
GAS OPERATION
After initial installation, servicing, or changing gas cylinders etc., the gas pipes may contain some air which
should be allowed to escape by depressing the button (C). This will ensure that the flame lights immediately.
1. Make sure that all valves between the gas cylinder and the freezer are open.
2. Turn Power Control Knob (F) to the ‘GAS’ position.
3. Press and hold down the red Safety Valve Button (C) while pressing the igniter button (A).
4. Check the flame indicator (B) to see whether the flame is alight.
5. Continue holding down the red Safety Valve Button (C) for a 5 seconds.
6. Release the red Safety Valve Button (C) and again, check to see that the flame is alight.
To terminate gas operation, turn the Power Control Knob to the ‘OFF’, position then turn off the gas valve from
the gas cylinder.
If the burner has not lit after 4-5 attempts, turn off the gas tap, wait 5 minutes and then try to re-light. If the
burner still fails to light, please contact the authorised service provider in your area.
Note: If the battery ignition fails to spark, you might need to replace the battery.

10
220-240V OPERATION
1. Make sure that the gas valve is turned off.
2. Plug the power cord into the power socket.
3. Turn the Power Control Knob (F) to the ‘AC’ position. The green AC lamp will illuminate.
To terminate gas operation, turn off the gas valve from the gas cylinder and turn the Power Control Knob (F)
to the OFF position. To terminate AC operation, turn the Power Control Knob (F) to the OFF position.
Turning Off The Freezer
If the freezer will not to be used for some time:
1. Shut off any valve in the gas line to the freezer.
2. Turn the Power Control Knob to the ‘OFF’ position.
3. Empty the freezer. Defrost and clean it. It must be completely dry inside to avoid mold growth (if possible,
leave the door open).
RECOGNISING ABNORMAL OPERATION (Propane use)
Any of the following are considered to be abnormal operation and may require servicing:
l Yellow tipping of the burner flame.
l Burner not igniting properly.
l Burner failing to remain alight.
l Gas valves, which are difficult to turn.
In case the appliance fails to operate correctly, contact the authorised service provider in your area.

11
CLEANING THE FREEZER
Warning: To avoid electric shock always unplug your absorption freezer before cleaning. Ignoring this
warning may result in injury.
General: Do not use harsh chemicals, abrasives, ammonia, chlorine bleach, concentrated detergents,
solvents or metal scouring pads. SOME of these chemicals may dissolve, damage and/or discolor your
absorption freezer.
1) Remove the contents of the appliance
2) Wipe the inside and outside surfaces with a damp cloth. The addition of vinegar to the water is good for
the prevention of mold and fungus.
3) Wipe all parts thoroughly after the cleaning.
The cooling unit behind the freezer should be cleaned with a brush from time to time, but make sure that
the freezer is switched off when doing this.
The entire unit must be left for drying completely after cleaning with damp cloth
Cleaning the burner
Take off the protection hood and do the following:
1. Clean the openings and the burner screen with a toothbrush;
2. Clean and inspect the electrode and thermocouple. If either
is corroded, have it changed. Check that they are well
attached and if necessary tighten the screws;
3. Check that the spark is created by pressing the electric
piezo igniter button on the control panel.
4. Do not use thin objects to either clean or unblock the injector
Cleaning the Cooling System Flue
WARNING Carbon Monoxide can be hazardous to your health. Gas appliances may emit excessive Carbon
Monoxide if the freezer’s burner, burner orifice, and the flue tube are not regularly cleaned. To prevent
Carbon Monoxide, the burner, burner orifice, and the cooling system’s flue tube must be cleaned at least
once a year and after all prolonged (seasonal) shut-down periods. Refer to the following cleaning
procedures,
or contact a qualified installer, your dealer.
Before cleaning, Put a cloth on the burner to protect it from dirt;
1. Remove the freezer from its enclosure.
2. Remove the heat deflector cap from the flue.
3. Remove the spiral flue baffle from the flue tube.
4. Using a stiff brush or fine emery cloth, clean the spiral flue baffle of debris.

12
5. Clean the inside of the flue tube with a flue brush. Inspect burner after cleaning.
6. Re-install the spiral flue baffle. Insure the spiral flue baffle is securely in place. The spiral flue baffle is
required for efficient cooling while operating in the gas mode.
TROUBLE SHOOTING AND MAINTENANCE
If the freezer fails to work, check the following points before calling a service technician:
1. That the above installation and operating instructions have been followed.
2. The freezer is level.
3. If it is possible to start the freezer on any of the connected sources of energy.
4. If the freezer fails to work on gas, check:
- That the gas bottle is not empty.
- That all LP-gas valves are open.
5. If the freezer fails to work on 230 V, check:
- That the 230 V supply is connected to the freezer.
- That the fuse is intact.
If the freezer is not cold enough it may be because:
The ventilation of the cooling unit is inadequate.
The thermostat is set on the high temperature position.
The doors are opened frequently, or the gasket is not sealed properly.
Too much food at one time.
The gas pressure is incorrect - check the pressure regulator at the gas container.
If the freezer still does not work properly, call a service technician.
The sealed cooling system must not be opened, since it contains corroding chemicals under high
pressure.
MAINTENANCE
Inspect the gas hose periodically for cracks or deep chafing marks. Connections can be tested for leaks
using a soap solution.
WARNING: Do not use flame to check for leakage in the gas tubes.
DO NOT USE AN OPEN FLAME!
If there is any suspicion of damage, call for a service technician.
We recommend that a service technician check the freezer once a year

13
LIMITED WARRANTY
As a condition to any warranty service obligation, the consumer must present the Warranty Certificate along
with a copy of the original purchase invoice.
THIS WARRANTY DOES NOT COVER:
1) Damage, accidental or otherwise, to the absorption freezer while in the possession of a consumer not
caused by a defect in material or workmanship.
2) Damage caused by consumer misuse, tampering, or failure to follow the care and special handling
provisions in the instructions.
3) Damage to the finish of the case, or other appearance parts caused by wear
4) Damage caused by repairs or alterations of the absorption freezer by anyone other than those authorized
by the manufacturer.
5) Freight and Insurance cost for the warranty service
ALL WARRANTIES, INCLUDING ANY IMPLIED WARRANTY OF MERCHANT ABILITY ARE LIMITED TO
CLAIMED DURATION. THE MANUFACTURER DISCLAIMS ANY LIABILITY FOR CONSEQUENTIAL OR
INCIDENTAL DAMAGES
TECHNICAL DATA
Gas Type: Propane
Injector Size: Ø0.38mm
Nominal Gas Consumption: 1.62 MJ/h
Test Point Pressure: 2.75 kPa
Overall Dimensions: 830mm (H) × 1030mm (W) × 700mm (D)
Gas Inlet: The Gas Connection is male 5/8”-18 UNF and is situated at the right hand rear of the appliance
(when viewing from the front), 70mm from the side and 105mm from the floor.
SERVICE AND SPARE PARTS
For service and spare parts for your refrigerator, contact:
DP Refrigeration Pty Ltd - Head Office
Phone - (03) 9437 0737
info@bushman.com.au

14

15
This manual suits for next models
1
Table of contents
Other Bushman Refrigerator manuals

Bushman
Bushman DC190-L Training manual

Bushman
Bushman DC190-L Training manual

Bushman
Bushman DC-X Series System manual

Bushman
Bushman DC-X Series Training manual

Bushman
Bushman TLX4X4 User manual

Bushman
Bushman SC35 System manual

Bushman
Bushman DC230 Series System manual

Bushman
Bushman Roadie 15L System manual

Bushman
Bushman XCD-100 User manual

Bushman
Bushman SC 35 User manual