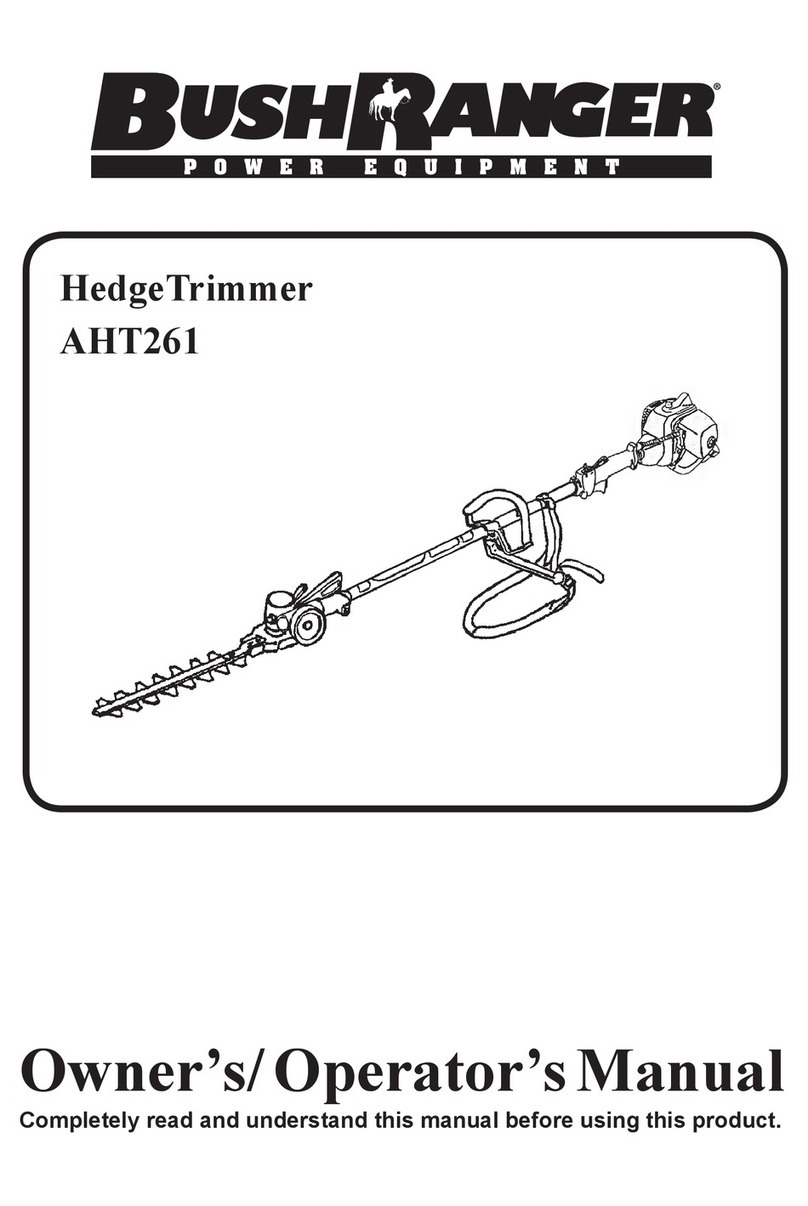
Bushranger HT2600 User manual

1
HEDGE TRIMMER
HT2600
OPERATOR’S MANUAL

2
Thank you for buying the Bushranger™ HT2600 Hedge Trimmer. This manual is mainly about the
proper method for operation, easy inspect and mending. Before operation, please read this book
carefully and understand fully, so that this manual can be used best. Please read the manual carefully
before using the machine, and save it for checking at any moment. Because the part structure of the
product may improve, the product will be difference from the manual, please understand.
INTRODUCTION .............................................................................................................................
ATTENTION STATEMENTS ...........................................................................................................
RIGHT USE METHOD .....................................................................................................................
TECHNICAL SPECIFICATION ........................................................................................................
MAIN STRUCTURE .........................................................................................................................
OPERATION OF ENGINE ...............................................................................................................
INSPECTION ...................................................................................................................................
DISPOSAL OF LONG STORAGE ...................................................................................................
TROUBLESHOOTING ....................................................................................................................
WARRANTY ....................................................................................................................................
IPL - HEDGE TRIMMER ENGINE ...................................................................................................
SPARE PARTS - HEDGE TRIMMER ENGINE ................................................................................
IPL - HEDGE TRIMMER ..................................................................................................................
SPARE PARTS - HEDGE TRIMMER ...............................................................................................
02
03
04 - 05
06
07
07 - 09
09 - 10
11
12
13
CONTENT
INTRODUCTION
14
11
15
16

3
ATTENTION STATEMENTS
This manual contains special “attention statements” preceded by the triangular Attention Symbol.
Please remember, safety rst. The precaution rule and the warning label on the machine, means the importance
of injury, please make sure obeying it.
WARNING
Not obeying warning recommendations may result in a serious accident and death.
CAUTION
Not obeying caution recommendations may result in injuries.
IMPORTANT
Not obeying the important recommendations may result in the damage of your machine.
SUPPLEMENT
Means necessary supplement instruction of other use
NOTE: A statement proceeded by word NOTE contains information that is handy to know and may make
Read and understand the Bushranger™Hedge Trimmer Operator’s Manual and Safety
Manual. Failure to do so could result in serious injury.
ALWAYS wear eye and ear protection during the operation of this machine.
The operational procedures described in this manual are intended to help you get the most from your
machine and to protect you and others from harm. These procedures are general guidelines only, and
are not intended to replace any safely rules/laws that may be in force in your area. If you have any
question regarding your HT2600 hedge trimmer, or if you do not understand something in this manual,
your local Bushranger™dealer will be glad to assist you.
WARNING
Do not make unauthorized modications to this machine.
This graphic accompanied by the words WARNING and DANGER calls attention to
an act of condition which can lead to serious or fatal personal injury
WARNING! Please take care and remember the blade is sharp. Improper use of any
hedge trimmer can cause serious or fatal personal injury.
Never use your Hedge Trimmer in bad weather.

4
RIGHT USE METHOD
Before using this product, please make sure
that you have rst read this manual, use it in the
proper method. In order to work best you should
also have to obey the instruction of the warning
label.
Before using the Machine
Before using, please read the user’s manual
carefully, and understand the caution rules
completely.
WARNING
The blade is very sharp, using this machine
innapropriately is extremely dangerous. Never
use this hedge trimmer, when under the inuence
of alcohol, when suffering from exhaustion or
lack of sleep, when suffering from drowsiness as
a result of having taken cold medicine or at any
time when the possibility exists that your judgment
might be impaired.
Never use your hedge-trimmer under
circumstances like those described below:
• When the ground is slippery or when other
conditions exist which might make it not
possible to maintain a steady posture while
using.
• At night, at times of heavy fog, or at any other
time when your eld of vision might be limited
and it would be difcult to gain a clear view of
the area.
• During rain storms, lightening storms, at times
of strong or gale force winds or at any other
times when weather conditions might make it
unsafe to use this product.
• When using this product for the rst time,
before beginning actual work, you should
practice in a wide, light place.
• Lack of sleep, tiredness or physical exhaustion
results in lower attention spans, and this in
time can lead to accidents and injury, limit the
amount of time which the hedge-trimmer is to
be used continuously to somewhere around
thirty to forty minutes. Ensure the user has
rest intervals for atleast least ten to twenty
minutes. Also try to keep the total amount
of work performed in a single day under two
hours or less.
• Be sure to keep this manual handy so
that you may refer to it later whenever any
questions arise.
• Always be sure to keep this manual while
selling, lending ,or otherwise transferring the
ownership of the product .
Working Gear and Clothing
When using your hedge-trimmer, you should
wear proper clothing proper for outside
operation, and protective equipment as follows:
• Helmet
• Protection goggles or facial protection
• Thick work gloves
• Non-slip-sole work boots
• Ear protectors
You should also carry:
• Attached tools and les
• Properly reserved fuel
• A steel brush for cleaning blade
Never use your hedge-trimmer when wearing
pants with loose cuffs, when wearing sandals, or
when barefoot.
Handling of Fuel
WARNING
The engine of this product is designed to run
on mixed fuel which contains highly ammable
gasoline. You should never store cans of fuel
or rell the tank in any place where there is a
boiler, stove, wood re, electrical sparks, welding
sparks or any other source of heat or re which
might ignite the fuel.

5
• Smoking while operating the hedge-trimmer or
relling its fuel tank is extremely dangerous.
• When relling the tank always turn off the
engine rst and take a careful look around to
make sure that there are no sparks or open
ames anywhere nearby before refueling.
• If any fuel spillage occurs during refueling, use
a dry rag to wipe up spills before turning the
engine back on.
• After refueling, screw the fuel cap back tightly
onto the fuel tank and then carry the hedge-
trimmer to a spot three meters or more away
from where it was.
Things to check before using your Hedge
Trimmer
IMPORTANT
Before beginning work, look around carefully to
get a feel for the shape of the land, or plants to be
trimmed, and whether or not there is any obstacle
which might get in the way while working, and
remove any obstacle which can be cleared away.
• The area within a perimeter of fty meter of
the person using the hedge-trimmer should
be considered a hazardous area into which
no one should enter while the hedge-trimmer
is in use. When work is to be performed
simultaneously by two or more persons,
always check the presence and location of
others so as to maintain a distance each
person sufcient to ensure safety.
• Before starting, please inspect the machine,
make sure that the fuel tank, blade, and
machine are in good condition. Be especially
careful to check that there is nothing wrong
with the blades or with the joints by which the
blades are attached to the hedge-trimmer.
• When the blades wear and the clutch
assembly is worn or damaged, please stop
and replace worn parts.
• Make sure that the handle and protective
cover are in good condition.
Starting the Engine
• While starting the engine make sure the area
around you is safe to do so.
• The machine has a centrifugal clutch, the
blades should not move at idle. Only if the
speed is up to a certain value and the blade
begin to rotor.
WARNING
Please do not put the throttle in the high speed
when starting.
Operation
• Keep your hand tight on the handle, and keep
in the correct position.
• If the blade starts to click, stop quickly, restart
machine after cleaning the blades.
• Do not touch the spark plug or while the
engine is running.
CAUTION
After using your hedge trimmers, never touch the
mufer, plug and other metal parts (these parts
will get to a high temperature) to prevent injury.
Maintenance
• Please do not make any changes to the
machine, this may cause damage to the hedge
trimmer and injury to yourself.
• Whilst removing the blade, please wear gloves
and other proper safety equipment.
• Please maintain the equipment regularly,
refer to the manual whilst maintaining your
machine.
• Whilst change the blade, fuel and/or grease
please use the product which our company
designated.
WARNING
It is very dangerous to change or modify the
machine yourself. Please understand that you will
not entitled to any protection if your machine has
been changed or modied in anyway which is not
addressed in your Owner Manual.


6
TECHNICAL SPECIFICATION
MODEL HT2600
Net Weight (kg) 5.4 kg
Overall Dimensions 1070 x 240 x 240
SHEARS
Type Double Blade
Number of Teeth 33 in total
Distance (mm) 35 mm
Trimmed Width (mm) 600
Rotation Mode Centrifugal type rubbing clutch
Reduction ratio 5.11
ENGINE
Type Air cooled 2 stroke gasoline
engine
Model 1E34FSA
Power 0.75kw / 7500 rpm
Discharge (cc) 25.4
Fuel - Mixed Oil (25:1)
-95 Octane
Tank Capacity (L) 0.65
Ignition Mode CDI
Carburettor Diaphragm
Spark plug RCJ6Y
Specications, descriptions and illustrative material in this manual are as accurate as known at
the time of publication, but are subject to change without notice. Illustrations may include optional
equipment and accessories, and may not include all standard equipment.

7
Fuel
DANGER
• Fuel can be easily ignited, when handling fuel
under any circumstance please take care.
• While mixing the fuel, be aware of your
surrounds. All fuel should be kept away from
any item that can cause sparks.
• Do not smoke whilst handling fuel, this could
lead to serious bodily harm and/or death.
• Do not put the machine and the tank near the
spark.
IMPORTANT
• Don’t use straight fuel (pure gasoline) will
result in engine damage. Ensure that the
correct fuel oil mixture is being used.
• Fuel will become stale if stored for a long
period of time. The inuence of UV and high
temperature, will lead to less effective fuel
which can lead to your machine not running
properly. Fuel should be used up within thirty
days.
• Any water in the fuel can lead to carburettor and
the engine corrosion. Please be cautious with the
use of water near your hedge trimmer.
• Never use oil for four stroke engine or water cooled
two stroke engine, it can cause spark plug fouling,
exhaust port blocking or piston ring sticking.
How to Mix Fuel
IMPORTANT
• Pay attention to agitation.
• Put the fuel and oil according to volume, the
correct ratio is 25:1.
• Place the fuel into a clean approved fuel container.
• Pour in all of the oil and agitate well.
• Pour remaining oil, and stir for at least one
minute, because the partion of the oil may be very
difcult to stir. Correctly mixing oil and fuel is very
important for the life of the machine.
• Please note that, not completely stirring the
mixture, may result piston ring sticking.
MAIN STRUCTURE
OPERATION OF ENGINE
Forward Handle
Safety Guard
Cutting Bar Nose Protector
Air Cleaner
Fuel Tank
Handle Lock
Throttle
Trigger
Starter
Ignition Switch
Safety Lever

8
IMPORTANT
• Ensure blade cover is removed before
starting.
Starting the Engine
1. Move ignition switch to
the on position which is
forward (Fig. 1).
2. Press primer bulb 3 - 4
times or until a ow of
fuel is visible inside the
fuel line (Fig. 2).
3. Set choke lever to
closed position if starting
from cold (Fig. 3) located
under air lter.
4. Pull the starter cord
until the engine starts
(or sounds like it wants
to start) then return the
choke to the position.
After the engine starts
allow it to warm for a
short time before using.
5. If the engine is ooded and your machine
does not start. Please remove the plug and
allow to dry and then attempt to start your
engine again.
Stopping the Engine
1. Return the throttle, and run on a low speed
to cool.
2. Move ignition switch to stop position. (Refer
to Fig. 1).
Operation of Engine
DANGER
Don’t use the machine near electrical wire,
cutting wire could result in severe injury or
death.
WARNING
The blades are very sharp, therefore they are
very dangerous, if used the wrong way it can
cause an accident. If you are unsure about
anything please refer back to this manual.
Adding Fuel
DANGER
• Choose a wide outside place to add fuel, do
not smoke whilst handling fuel and ensure
substances are kept away from any sparks.
• If fuel is needed whilst working, stop your
engine and wait until completely cooled.
• Remove the fuel tank cap. Fill fuel tank to
eighty percent of fuel tank capacity.
• If there is any fuel spillage in the process,
please thoroughly clean before you start the
engine again.
IMPORTANT
Fill fuel tank to eighty percent of the tank capacity,
if too much is added, the fuel will leak from the
tank, and result a possible accident.
• Loosen the tank cap, eliminate the pressure
difference between the outside and inside of
the tank.
• Wipe up the fuel tank cap and add the fuel to
eighty percent.
• After nishing adding fuel, tighten the tank cap
and ensure there is no leak.
Starting the Engine
DANGER
• After adding fuel, start the engine, remove the
machine three meters away to start.
• Don’t start the engine indoors or in areas with
poor air ventilation this will avoid breathing in
poisonous carbon monoxide.
• After starting the engine, squeeze the throttle
trigger, making sure the blades are working. If
not stop the engine and make sure carburettor
and throttle is in good condition.
• Before starting the machine, make sure that
there is no fuel leaking.
• Put the machine on even ground, there will
some accident when the blade too close to the
ground.
• Ensure both hands are place on your hedge
Fig. 1
Fig. 2
Fig. 3

9
• The machine should never be picked up by the blades.
• Never put the blade near the body.
• Clean the teeth of the blade, and make sure that the machine is stopped.
• While using the machine, ensure all correct safety clothing is worn.
• While the machine is not being use, make sure the blade cover is installed.
When using your machine, if the blade continuously stops, please see possible reasoning for this
below:
• The material is too large for the machine to cut.
• If the blade is not cutting properly, the blade may be worn, or the gap between the blades is too big
for the machines cutting power. Please contact your local Bushranger™ dealer
Use of Rotating Handle
While cutting branches, ease of use is achieved by rotating the handle to the most
comfortable position for the type of work being carried out.
Process as follows:
1. Free the handle by pulling back the locking lever, rotate the handle to suit. (Fig. 4).
2. When the handle is in a suitable position, loosen the handle locking lever. (Fig. 5).
3. Once the handle is in the correct position you may return to your work.
CAUTION
• While inspect the product, rst stop it.
• Please do not change the body and remove the engine.
• Please use quality products and appoint part while changing the machine.
Operating Points Before and After The Seizure
POINTS SEIZED ITEMS DISPOSAL
1Machine
Loosen of the assemble part
The big gap between blade
Blade wear
Tighten
Adjustment
Change or Repair
2Throttle
The distance is big
Not exible
Adjustment
Change for Repair
3Fuel Tank
Have loosen in xed place
Fuel pipe is wrong
The tank lid is damaged
Tighten
Change
Change
4Mufer Loosen off the assemble place Tighten
INSPECTION
Fig. 2
Fig. 5

10
Inspect in Time
POINTS SEIZED ITEMS
OPERATE THE DISTANCE
REMARKS
20h 25h 50h 100h
ENGINE
Deducting the cylinder fan cover
Clean the air cleaner lter element
Clean and adjust the plug Gap 0.6 - 0.7
Clean the fuel tank
The tightening of the cylinder screw
Tightening every part of the engine
Tidy up the mufer
MACHINE
Add grease to the gear case
Clean the clutch
Air Cleaner
Once the machine has been run for 25 hours, please remove the cleaner outside cover, and then clean
the inner dirt. When the lter element is dirty, please use warm water, clean, allow to dry completely
and re-assemble.
The obstructive cleaner will reduce the power of the engine. Never start or run the engine without an air
lter attached to the engine.
Fuel Filter
Once the machine has been run for 25 hours, take the cleaner from the fuel tank for cleaning.
The obstructive cleaner will reduce the engine speed. Remove the cleaner with clip, to prevent dust
and ber entering the fuel tank.
Spark Plug
It is easy for spark plugs to have carbon deposit, after the machine has run for 25 hours. Remove the
spark plug, and clean the electric pole with a steel brush the suitable clearance of sparking plug is 0.6 -
0.7mm.
Gear Case
Once the machine has been run for 20 hours, grease needs to be added to the gear case. Please use
a grease pump from the machines inlet.
Blade
Every 1 - 2 hours when the machine is in use, grease should be added to the blade.
For setting or sharpening please contact your Bushranger™ dealer.
Mufer
After the machine has been used for 50 hours, please remove the mufer, clear the inner carbon
deposit with screw driver, at the same time clean the carbon of the outlet pipe. Tighten every screw.
INSPECTION

11
DISPOSALS FOR LONG STORAGE
• Do not tighten the tank cap too much, this will cause damange to the sealing ring.
1. When cleaning the machine, inspect every part for damaged or loose parts, if any is found
please mend before next planned use.
2. Extract fuel from the tank and run the engine until it stops naturally.
3. Remove the spark plug and put two stroke oil in the engine. Pull the starting ropes two to three
times. Replace the plug and stop it at the contraction position.
4. Apply anti-rust oil to the metal parts such as the throttle wire to stop rust or corrosion. Put the
cover on the blade and keep it indoors or in a dry place when not in use to avoid the machine
rusting.
TROUBLESHOOTING
Problem Likely Cause Suggested Remedy
• Out, or almost out, of fuel.
• Spark plug dirty.
• Spark plug not connected.
• Fuel older than 3 months.
• Water in the fuel tank.
• Dirty air cleaner lter.
• Fill tank with fresh 2 stroke fuel (25:1).
• Clean or replace with a new spark plug.
• Press rmly on the terminal cover.
• Drain stale fuel and replace with fresh 2
stroke fuel.
• Contact an authorised Bushranger™
dealer.
• Clean or replace with a new
Bushranger™ air-lter.
• Dirty air lter.
• Blocked fuel supply.
• Fuel cap is not venting.
• Incorrect type of fuel.
• Clean or replace with a new
Bushranger™ air-lter.
• Ensure the fuel line is not pinched or
blocked.
• Ensure vent hole in the fuel tank cap is
clear.
• Drain tank and ll with 2 stroke fuel
(25:1).
• Dirty air cleaner lter.
• Blocked fuel cap vent holes.
• Clean or replace with a new
Bushranger™ air-lter.
• Ensure vent hole in the fuel tank cap is
clear.
Engine does not start
Engine stops often
Engine looses power
Often, a depleted, loose, or dirty spark plug is responsible for a Hedgetrimmer not being able to
start, but there can be a number of other reasons. Refer below to the list of potential problems you
may encounter, along with suggested remedies.
For servicing and all warranty work, contact your local authorised Bushranger™ dealer.

12
WARRANTY
1. Australian Consumer Law (REG. 90):
The benets to the consumer given by this warranty are in addition to other rights and remedies of the
consumer under a law in relation to the good or services to which this warranty relates.
Our goods come with guarantees that cannot be excluded under the Australia Consumer Law. You are
entitled to a replacement or refund for a major failure and for compensation for any other reasonably
foreseeable loss or damage. You are also entitled to have the good repaired or replaced if the goods fail to
be of acceptable quality and the failure does not amount to
major failure.
The text above applies notwithstanding anything else
expressed or implied to the contrary in this warranty document.
Powerup Lawn Care
a division of
Roy Gripske & Sons Pty. Ltd
11 Sodium St, Narangba QLD 4504
Telephone: 1300 363 027
Fax: 1800 332 213
Email: [email protected]
For more information please visit our website:
poweruplawncare.com.au

13
IPL - HEDGE TRIMMER ENGINE

14
SPARE PARTS - HEDGE TRIMMER ENGINE
Ref
No.PartNo.Description
Qty
Ref
No.PartNo.Description
Qty
1-1
02050030017
IGNITIONCOIL
1
1-31
03070010001
FLYWHEELKEY
1
1-2
02050030032
FLYWHEEL
1
1-32
02020020003
PISTONRING
2
1-3
02050020289
CARBIE
1
1-33
02010020005
PISTON
1
1-4
03130010006
SPARKPLUG
1
1-34
03090020018
NEEDLEBEARING
1
1-5
70070130023
CYLINDER
1
1-35
02020010004
GUDGEONPIN
1
1-6
02070010032
CYLINDERGASKET
1
1-36
02020150002
THRUSTWASHER
2
1-7
03040020019
FLATWASHER
6
1-37
02020030017
CIRCLIP
2
1-8
03050010014
SPRINGWASHER
6
1-38
02020120054
CRANKSHAFTCOMP
1
1-9
03010010061
CYLINDERBOLTS
4
1-39
02050100012
STARTERPAWLASSY
1
1-10
02070010019
CARBIEGASKETCYLINDERSIDE
1
1-40
02050070016
STARTERASSY
1
1-11
70030020016
INLETMANIFOLD
1
1-41
03020020043
BACKINGPLATESCREW
2
1-12
02070010071
GASKETCARBIESIDE
1
1-42
02090010011
AIRCLEANERELEMENT
1
1-13
03020020052
INLETMANIFOLDSCREW
6
1-43
70030040078
AIRFILTEROUTERCOVER
1
1-14
02050010015
MUFFLER
1
1-4470030180012
AIRFILTEROUTERCOVER
SCREW 1
1-15
03010010051
MUFFLERBOLTS
2
1-45
02110020026
FUELCAPASSY
1
1-16
02070010162
MUFFLERGASKET
1
1-46
70050030014
FUELTANK
1
1-17
70030030164
BRACKET
1
1-47
03040010009
SPRINGWASHER
3
1-18
03020020032
SCREW
1
1-48
03010060066
SCREW
1
1-19
03060010002
LOCATINGPIN
4
1-49
03020010011
SCREW
2
1-20
02020130001
CLUCHSTEPBOLT
2
1-50
02050120002
FUELFILTER
1
1-21
03040050042
CLUTCHWASHER
2
1-51
02080030025
FUELTANKGROMMET
1
1-22
02050160002
CLUTCHSHOECOMP
1
1-52
03010010088
STARTERSCREW
7
1-23
70070080018
CLUTCHSHOESEAT
1
1-53
70030030021
PLUGPLASTICCOVER
1
1-24
03040050052
SPACERWASHER
2
1-54
02050050018
STOPSWITCHWIRE
1
1-25
03010010010
BOLT
4
1-55
70030030148
ENGINECOVER
1
1-26
70070050039
FRONTHALFCRANKCASE
1
1-56
80010020025
FLYWHEELCOVER
1
1-27
70070050023
REARHALFCRANKCASE
1
1-57
03010040051
COVERSCREW
1
1-28
02070010119
CRANKCASEGASKET
1
1-58
03010040062
TAPPINGSCREW
2
1-29
03100010009
OILSEAL
2
1-5970080120007
AIRFILTERBACKING
PLATEASSY 1
1-30
03090010028
BEARING
2

15
SPARE PARTS - HEDGE TRIMMER ENGINE IPL - HEDGE TRIMMER

16
Ref
No.PartNo.DescriptionQty
Ref
No.PartNo.DescriptionQty
2-1 02020070064SAFEGUARDMETAL 1
2-29
70030030348
HANDLEANDGUARD
1
2-2 02020070066SETTLEPLATE 1
2-30
03020020033
SCREW
2
2-3 02020070063BLADESET 1
2-31
03010040010
SCREW
5
2-4 02020160144SPACER 7 2-3270030070251
CONTROLHANDLERIGHT
SIDE1
2-5 02020070065BLADEBACKSTOP 1
2-33
70030160014
SWIVELCONTROLLEVER
1
2-6 03010070010SCREW 4
2-34
02020110054
SPRINGSWIVELCONTROL
1
2-7 02020070069PLASTICSAFETYGUARD 1
2-35
03010040061
SCREW
1
2-8 03010110073SCREW 6
2-36
03040010013
WASHER
1
2-9 70070080064 GEARCASECOVER 1
2-37
02050050127
STOPSWITCH
1
2-1002020160021GUIDEPLATE 2
2-38
02050040100
THROTTLECABLE
1
2-1102070010105GASKET 1
2-39
70030070225
SAFETYLEVER
1
2-1202090030003FELT 1 2-4070030070258
CONTROLHANDLELEFT
SIDE1
2-1303010010010BOLT 2
2-41
70030070232
THROTTLETRIGGER
1
2-1403010010021SCREW 1
2-42
02020110055
THROTTLESPRING
1
2-1502020160215RETAINER 1
2-43
70030180177
SPRINGSEATLOCATOR
2
2-1602020090008TRANSMISSIONARM 2
2-44
02020110056
ANTIVIBRATIONSPRING
2
2-1703090010022BEARING 2
2-45
03020020052
SCREW
2
2-1802020090043CAMDRIVE 1
2-46
70030180184
FRAME
1
2-1902020090004GEARDRIVESHAFT 1
2-47
02020110053
ANTIVIBRATIONSPRING
2
2-2003010010026SCREW 4
2-48
03020020025
SCREW
2
2-2103120020003CIRCLIP 1
2-49
70030160072
SPRING/HOLDER
1
2-2203090010020BALLBEARING 2
2-50
03010010014
SCREW
3
2-2302020090045CAMDRIVEPIN 1
2-51
03050010012
WASHER
3
2-2402020160465PLATE 1
2-52
03040020015
WASHER
3
2-2503030060009NUT 5
2-53
03010040013
SCREW
1
2-2670070010019GEARCASE 1
2-54
03050010016
WASHER
4
2-2703010110043GREASENIPPLE 1
2-55
02020150013
WASHER
5
2-2802020050027CLUTCHDRUM 1
2-56
02020160893
BLADEENDPROTECTOR
1
SPARE PARTS - HEDGE TRIMMER

17
NOTES

18
NOTES

19
NOTES

20
Visit www.rgs.com.au or call 1300 363 027 for more information.
Copyright © Roy Gripske and Sons Pty. Ltd. 2016. All rights reserved. 222. Images are for illustrative purposes only.
Bushranger™is a trademark of Roy Gripske & Sons Pty Ltd. PLP shall not be liable for technical or editorial errors
or omissions contained herein, nor for incidental or consequential damages resulting from furnishing this material. The
information is provided “as is” without warranty of any kind and is subject to change without notice. PLP also reserves
the right to revise the content of this document at any time without prior notice. No part of this document may be
reproduced or transmitted in any form or by any means, electronic or mechanical, including photocopying, recording or
storing in a retrieval system, or translated into any language form without prior written permission of PLP.
Powerup Lawncare Products
Phone 1300 363 027
Fax: 1800 332 213
Email: [email protected]
Web: www.rgs.com.au
Table of contents
Other Bushranger Trimmer manuals

Bushranger
Bushranger B2600 User manual

Bushranger
Bushranger B2301 User manual

Bushranger
Bushranger HT241 Owner's manual

Bushranger
Bushranger HT231 Owner's manual

Bushranger
Bushranger AHT261 Owner's manual

Bushranger
Bushranger HT2601 User manual

Bushranger
Bushranger L2501 User manual

Bushranger
Bushranger BRU36v9101 User manual

Bushranger
Bushranger 85003 User manual

Bushranger
Bushranger 36V Battery powered Hedge Trimmer User manual