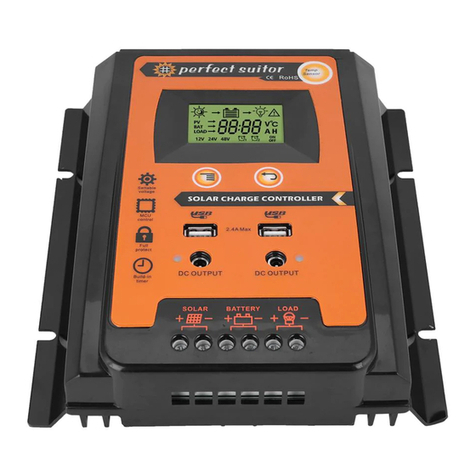
BYGD PV2420U User manual

OBRÁZEK PRODUKTU
Solar Charge Controller
PV2420U
User Manual • Uživatelský manuál •
Užívateľský manuál • Használati utasítás

2
English
3 –18
Čeština
19 –34
Slovenčina
35 –50
Magyar
51 –66

3
Dear customer,
Thank you for purchasing our product. Please read the following instructions carefully
before first use and keep this user manual for future reference. Pay particular attention
to the safety instructions. If you have any questions or comments about the device,
please contact the customer line.
www.alza.co.uk/kontakt
✆+44 (0)203 514 4411
Importer Alza.cz a.s., Jankovcova 1522/53, Holešovice, 170 00 Praha 7, www.alza.cz

4
The controller is for off-grid solar system and control the charging and discharging of
the battery. Main function is protecting battery. The intelligent charging process has
been optimized for long battery life and improved system performance.
Major Functions
The features are listed below:
•Automatic Identification System Voltage, 12V 24V auto recognition
•Humanized LCD displaying and double button operation of man-machine
interface.
•Completed technical data for setup and modify.
•High efficiency intelligent PWM 3stage charging The load control mode can be
selected, the timer.
•function can be reset for street light at night.
•Reliable over voltage protection . short circuit protection . over load protection .
overcharge protection. over-discharge protection.
•Accurate temperature compensation, correcting the charging and discharging
voltage automatically, improving the battery lifetime.
•Roundly reverse connected protection.
•Solar Panels, Battery, Solar Charge Controller positive poles are all connected
together, adopting negative MOSFET in series control circuit.
Important Safety Information
•BH It is better to install the controller in the room. If installed the controller
outside, please keep the environment dry, avoid direct sunlight.
•The controller will be hot in process of working, please keep the environment
ventilation, away from flammable.
•BH The open circuit voltage of solar panel is too high, (especially 24V system),
please take care.
•HB The battery has acidic electrolysis, please put on goggles during installation. If
you accidentally exposed to the electrolysis, please rinse with water.
•BH The battery has huge power, prohibit any conductor short circuit the positive
and negative pole of battery.
•Suggest to adding a fuse between battery and controller. (Slow motion type, the
action current of the fuse should be 1.5 times rated current of controller.)

5
The suggestion of using
•The controller could detect the temperature of environment to adjust the voltage
of charging, so that the controller should be closed to battery as near as possible.
•Recommend system current density of cables less than 3A/mm2.
•Try to use multi strand copper wire in order to connecting with the terminal
firmly. Loose power connection and for corroded wires may result in resistive
connections that melt wire insulation, burn surrounding materials, or even cause
fire.
•The battery should be full charged each month. Or the battery will be destroyed.
The feature of LCD graphic symbol
1. The default night display of controller: When the solar panel input voltage have been
detected by controller less than sensor identification point voltage, this graphic symbol
will be light.
2. The default daytime display of controller: When the solar panel input voltage have
been detected by controller more than sensor identification point voltage, this graphic
symbol will be light.
3. The indicator of PV array parameter: When the solar panels data was displaying, this
graphic symbol will be light. For example the voltage of solar panel.

6
4. The indicator of battery parameter: When the battery parameter was displaying, this
graphic symbol will be light. For example the voltage of battery, temperature of battery.
5. The indicator of load parameter: When the load parameter was displaying, this
graphic symbol will be light.
6. System Voltage: When the LCD shows different system voltage, the controller will
adjust the technical data automatically.
7. Numerical Display Area
8. Timer Setting Function
9. Switch Graphic Symbol.
10. Unit Symbol Value
11. Warning: When there is fault, this graphic symbol will be light.
12. The indicator of Load status: Load on, Load off.
13. The indicator of Output power: When the load terminal have output, this graphic
symbol will be light.
14. The indicator of capacity of battery: When the battery was in different capacity, the
strip-type will show.
15. The indicator of charge status: When the controller is charging, the symbol will be
light, float charge will be flash, no charging no display.
Installation Instructions
Controller Fixed
1) The controller should be installed well-ventilated place, avoid direct sunlight, high
temperature and do not install in location where water can enter the controller.
2) Please select correct screw to fix the controller on the wall or other platform. Screw
M4 or M5, Screw cap diameter less than 10mm.
3) Please reserve enough space between the wall and controller, to allow for cooling and
cable connection.
4) The mounting holes distance is 155.8mm*63mm, diameter of the hole is 5mm.

7
Controller Connection
•All terminals are in tight status after factory, in order to well connected, please
loose all terminals at first.
•The following order of connection please do not free change, or cause system
voltage recognition fault.
•As figure, first connected the battery to controller correct poles. In order to avoid
short circuit, please screw the cable of battery to the controller in advance, then
connected to battery poles secondly. If your connection is correct, the LCD
displaying will show battery voltage and other technical data. If LCD no indicate,
please check the fault. The length of cable between battery and controller as
shorter as possible.
•Suggest to 30CM -100CM.
Solar Panel
Battery
Load
Charger
Controller
Power Inverter

8
•If short circuit happened on the terminals of controller, it will be
result in fire or explode. Please be careful. (We strongly suggest to
connecting a fuse at the battery side 1.5time of rated current of
controller.)
•If the battery reverse connection, the output of controller also same with battery
polarity, please do not connect any load with controller at that time, or the load
and controller will be destroyed.
•As figure, connected solar panels with controller correctly, if the connection is
successful and sunshine is full, the LCD will show solar panel and an arrow from
solar panel to battery will be light.
•The voltage of solar panel is very high under sunshine, high voltage
can cause injury or destroy controller. As figure, connected loads
with controller correctly.
•In order to avoiding injury from load voltage, please close to the output of
controller with button at first, then connected the load on the
controller. The controller do not offer reverse connection
protection for load, so please take care, reverse connection for load
will be destroy bulb.
Operation and Indication
Main Interface
The controller will have 1s initialization interface after electrified, then go into main
interface.
If no operation at main interface inner 20s, the main interface will be auto exchange
during voltage of battery, voltage of solar panel, temperature of environment each
interface keep 3s. Long press “→”more than 5s at main interface, it will speed auto
exchange. Loose button will stop speed.

9
Press “→"under main interface could open or close the load output
Press “←” button could join into next menu under main
interface
Main interface
Float voltage
Load reconnect voltage
System voltage select
Load mode
Load disconnect voltage

10
a) Float Voltage Set up
This parameter is High Voltage Disconnection (HVD) voltage. (Boost state voltage will be
increase 0.6V base on HVD) The controller will be started PWM function at this point (HVD),
limited voltage rising.
Press “←" join in float voltage menu. Long press “←"button≥5S, the parameter on the
interface will be flash, here is set up state. Loose the button, press “←” button again could
operate plus data, press ”→” button could operate minus data. After finish the needed
technical data, long press “←" button again ≥5S , the parameter save and come out set up
state. If 20s no any operation, automatically back to main interface.
b) Low Voltage Reconnection Voltage (LVR)
When the voltage of battery is low the control will stop offer power to the load. If the
controller needs reconnected the output, the voltage voltage of battery must be higher than
LVD voltage or press “→” button force to release. The procedure is same with (a).
Load reconnect voltage
20S later
Float voltage
Long press 5S

11
c) Low Voltage Disconnection Voltage
When the voltage of battery is low, the load output will be cut off. When the controller
detected the battery voltage was less than LVD point, the cut off function will be
immediately working. At the same time, the status of controller is in lock. Users have to
charge the battery, when the battery voltage is higher than LVD voltage or press “→”
button force to release. The load output will be back. The procedure is same with (a).
Load disconnect voltage
Above a, b, c three parameter default data was fully considered by designer according
to the actual use. Generally users don’t need to adjust. Please must be refer to battery
supplier’s suggestion, or the battery will be damaged or Irreparable destroy.
d) Load Working Mode Selection
The control default load working 24hours. When the Load Working Time set to a on
24 hours, the load will keep Load mode working 24 hours in no fault status. When the
load working time set to ≤23H, it means the load start timer or sensor
function. If the battery capacity is enough, the load will be started at sunset. The load
will work under timer setting hours or stop working till sunrise.
Load mode
When the load join into timer or sensor mode, if the reset working
time more than actual night time, the load output will be closed at
sunrise, although the working time is not reach to setting hours. For
example, the local actual night time is 10hours, user reset the working
time at night is 12hours, but 10hours later the output will be closed automatically,
the balance hours will be back to zero. The load will be working with next sunset
signal.

12
e) System Voltage Select
This parameter designed for customers wide range voltage requiring. The default
display “UT0” system voltage 12/24v System voltage select auto.
System voltage select
When battery voltage is more than 18V, the controller will be auto change to 24V system
with 24V control data. When battery voltage is less than 18V, the controller will be auto
change to 12V system with 12V control data. If the system voltage is set to “1”the
controller will be work under 12V version forever. The battery voltage is not valid. The
reset data will be working after reconnection. If the system voltage is set to “2” the
controller will be work under 24V version forever. The battery voltage is not valid. The
reset data will be working after reconnection.
Protection Function
Battery Low Voltage Protection(LVD)
When the battery voltage less than 11V, the LVD protection started. The output cut off,
at the same time the battery symbol and warming flash. Please increase charge current
or increase charge time. When the battery voltage more than 12.8V, the protection will
be closed. The load output is come back or press “→”button force to unlock at main
interface.

13
Battery Over Voltage Disconnection (OVD)
When the voltage of battery more than 16.5V, the over voltage protection will be started.
The load cut off, at the same time the load and warning symbol flash. When the voltage
of battery was decreased to 15V, the protection will be release. The output of the load is
back.
Load Over Current Protection
When the load is short circuit or overload, the output cut off, at the same time the load
symbol and warning flash. Please confirm if there is short circuit on the load terminal,
decrease the power of the load. 30s later the controller will be auto restart with unlock,
or press “ ” button force to unlock at main interface.
High Voltage Disconnection Protection (HVD)
When the battery was charged to 13.8V, the PWM function will be started, the charge
symbol will be flash, and the voltage of battery has been limited.

14
Common Fault and Handling
Fault
Possible Reason
Solution
LCD no display
connected
with battery
Battery Low
Battery Reverse Connection
The connection cut off
Please confirm the voltage
of battery reconnect the
controller with battery
firmly and correctly.
Full of sunshine
vertical on solar
panel, no solar
symbol and no
charge symbol on
LCD.
The solar panel connection open
circuit, short circuit or reverse
connected
Please check the cable
solar panels if they are
correct connection and
firmly.
The controller
displaying LVD
The battery is over discharging
Please check the system
design is reasonable or
not. If there is discharging
capacity more than
charging.
The controller
displaying HVD
The voltage of battery is high
Please cut off the solar
panel and see if the
voltage get down normal
level. If the fault do not
finish, please cut off the
battery with controller and
reconnect again.
The controller
displaying Over
Current Protection
The load is short circuit, or over
load or high surge power
Please check the load
cables have short circuit,
the power of the load over
rated design, the surge
power of load too high

15
Technical Data
Model
PV2420U
System Voltage
12V/24V
Max. Input Voltage of solar panel
50V
Self-consumption
≤12mA
Max. charge current
20A
Max. discharge current
20A
LVD
11.0V ADJ 9V….12V, x2 24V
LVR
12.6V ADJ11V….13.5V, x2 24V
Float Voltage
13.8V ADJ 13V….15V, x2 24V
Boost charging
14,4V, x2 24V Battery Voltage less than
12V start boost charging 2 hours
Battery Over Voltage Protection
16.5V, x2 24V
Solar Reverse Connection Protection
Yes
Load Over Current Protection
Yes, each two minutes restart once
Charge Type
PWM
USB Output
5V 1.0A
Temperature Compensation
-24mV/°C for 12V system, x2 24V
Working Temperature
-20°C---+55°C
Terminal Scale
28-10 AWG
Waterproof grade
IP32
Size
168x92x42mm
Netweight
0.26kg

16
Warranty Conditions
A new product purchased in the Alza.cz sales network is guaranteed for 2 years. If you
need repair or other services during the warranty period, contact the product seller
directly, you must provide the original proof of purchase with the date of purchase.
The following are considered to be a conflict with the warranty conditions, for
which the claimed claim may not be recognized:
•Using the product for any purpose other than that for which the product is intended
or failing to follow the instructions for maintenance, operation, and service of the
product.
•Damage to the product by a natural disaster, the intervention of an unauthorized
person or mechanically through the fault of the buyer (e.g., during transport,
cleaning by inappropriate means, etc.).
•Natural wear and aging of consumables or components during use (such as
batteries, etc.).
•Exposure to adverse external influences, such as sunlight and other radiation or
electromagnetic fields, fluid intrusion, object intrusion, mains overvoltage,
electrostatic discharge voltage (including lightning), faulty supply or input voltage and
inappropriate polarity of this voltage, chemical processes such as used power
supplies, etc.
•If anyone has made modifications, modifications, alterations to the design or
adaptation to change or extend the functions of the product compared to the
purchased design or use of non-original components.

17
EU Declaration of Conformity
Identification data of the manufacturer's / importer's authorized representative:
Importer: Alza.cz a.s.
Registered office: Jankovcova 1522/53, Holešovice, 170 00 Prague 7
CIN: 27082440
Subject of the declaration:
Title: Solar Charge Controller
Model / Type: PV2420U
The above product has been tested in accordance with the standard(s) used to
demonstrate compliance with the essential requirements laid down in the
Directive(s):
Directive No. 2014/30/EU
Directive No. 2014/35/EU
Directive No. 2011/65/EU as amended 2015/863/EU
Prague, 27.06. 2023

18
WEEE
This product must not be disposed of as normal household waste in accordance with
the EU Directive on Waste Electrical and Electronic Equipment (WEEE - 2012/19 / EU).
Instead, it shall be returned to the place of purchase or handed over to a public
collection point for the recyclable waste. By ensuring this product is disposed of
correctly, you will help prevent potential negative consequences for the environment
and human health, which could otherwise be caused by inappropriate waste handling of
this product. Contact your local authority or the nearest collection point for further
details. Improper disposal of this type of waste may result in fines in accordance with
national regulations.

19
Vážený zákazníku,
Děkujeme vám za zakoupení našeho produktu. Před prvním použitím si prosím pečlivě
přečtěte následující pokyny a uschovejte si tento návod k použití pro budoucí použití.
Zvláštní pozornost věnujte bezpečnostním pokynům. Pokud máte k přístroji jakékoli
dotazy nebo připomínky, obraťte se na zákaznickou linku.
www.alza.cz/kontakt
✆+420 225 340 111
Dovozce Alza.cz a.s., Jankovcova 1522/53, Holešovice, 170 00 Praha 7, www.alza.cz

20
Řídicí jednotka je určena pro solární systém mimo síť a řídí nabíjení a vybíjení baterie.
Hlavní funkcí je ochrana baterie. Inteligentní proces nabíjení byl optimalizován pro
dlouhou životnost baterie a lepší výkon systému.
Hlavní funkce
Funkce jsou uvedeny níže:
•Automatický identifikační systém Napětí, 12 V 24 V automatické rozpoznání
•Humanizované zobrazení LCD a dvoutlačítkové ovládání rozhraní člověk-stroj.
•Vyplněné technické údaje pro nastavení a úpravy.
•Vysoce účinné inteligentní třístupňové nabíjení PWM Režim řízení zátěže lze
zvolit, časovač.
•Funkci lze přenastavit na noční pouliční osvětlení.
•Spolehlivá ochrana proti přepětí, ochrana proti zkratu, ochrana proti přetížení,
ochrana proti přebití, ochrana proti nadměrnému vybití.
•Přesná teplotní kompenzace, automatická korekce nabíjecího a vybíjecího napětí,
která zvyšuje životnost baterie.
•Ochrana proti zpětnému připojení.
•Solární panely, baterie, kladné póly regulátoru solárního nabíjení jsou spojeny
dohromady a v sériovém řídicím obvodu je použit záporný tranzistor MOSFET.
Důležité bezpečnostní informace
•BH Řídicí jednotku je lepší instalovat v místnosti. Pokud je ovladač nainstalován
venku, udržujte prostředí suché, vyhněte se přímému slunečnímu záření.
•Ovladač bude při práci horký, dbejte na větrání prostředí a chraňte jej před
hořlavinami.
•BH Napětí otevřeného obvodu solárního panelu je příliš vysoké (zejména 24 V
systém), dbejte na to.
•HB Baterie má kyselou elektrolýzu, při instalaci si nasaďte ochranné brýle. Pokud
se náhodou dostanete do kontaktu s elektrolýzou, opláchněte ji vodou.
•BH Baterie má obrovský výkon, zakažte zkratování kladného a záporného pólu
baterie jakýmkoli vodičem.
•Navrhujeme přidání pojistky mezi baterii a regulátor. (Typ Slow motion, akční
proud pojistky by měl být 1,5 násobek jmenovitého proudu regulátoru.)
Table of contents
Languages:
Other BYGD Controllers manuals