BYO Guitar Strat Instruction Manual

Strat Guitar Kit
Assembly
Instructions
WWW.byoguitar.com

Strat Guitar Instructions
- 1 -
California requires the following notice:
WARNING
Some dust created by power sanding, sawing, grinding,
drilling, and other construction activities contains
chemicals known to the State of California to cause
cancer, birth defects or other reproductive harm. Some
e amples of these chemicals are:
•Lead from lead-based paints.
•Crystalline silica from bricks, cement, and other
masonry products.
•Arsenic and chromium from chemically treated
lumber.
Your risk from these e posures varies, depending on how
often you do this type of work. To reduce your e posure
to these chemicals: work in a well ventilated area, and
work with approved safety equipment, such as those
dust masks that are specially designed to filter out
microscopic particles.

Strat Guitar Instructions
- 2 -
Warning
Always wear safety glasses or goggles when operating equipment. Everyday
glasses or reading glasses are not safety glasses. Be certain the safety glasses you
wear meet the appropriate standards of the American National Standards
Institute (ANSI). Because there are various ways to cut and join wood, you can
make substitutions for the methods stated in this manual. We try to suggest the
easiest methods possible. However, only you know your skills with each piece of
machinery. Never compromise your safety by using a cutting method with which
you are not comfortable. Instead, find an alternative approach that will yield the
same result.
Warning
These instructions assume that you are familiar with the safe operation and use of
woodworking machinery and woodworking tools, and understand the techniques
used to assemble this project. If you do not qualify for both of these criteria, STOP
building this project for your own safety. Read and understand the owner’s
manual for the machinery you intend to use, take a woodworking class or visit
your local library for more information. Woodworking machinery and tools are
inherently dangerous because they use sharp edges that can and will cause
serious personal injury including amputation and death. Do not underestimate
the ability of these tools and machinery to cause injury. Never operate any tool
without all guards in place and always wear approved safety glasses. For your
own safety, please heed this warning.

Strat Guitar Instructions
- 3 -
Contents
Contents .................................................................................................................................................... - 3 -
1 Introduction ...................................................................................................................................... - 4 -
1.1 Material Check List .................................................................................................................... - 6 -
1.2 Additional tools/materials required: ........................................................................................ - 8 -
2 Mockup and Fit Check ..................................................................................................................... - 10 -
2.1 Check Guitar Body & Neck mounting holes ............................................................................ - 10 -
2.1.1 Drilling the Mounting Holes in the Guitar Body .............................................................. - 10 -
2.2 Checking the Mounting Holes in the Neck .............................................................................. - 10 -
2.2.1 Drilling Mounting Holes in the Neck ............................................................................... - 10 -
2.2.2 Mount the Neck on the Body .......................................................................................... - 11 -
2.3 Checking the Bridge ................................................................................................................ - 11 -
2.3.1 Locating the Bridge (item 2 on the material list) ............................................................ - 11 -
2.4 Fit check & Alignment of the Pick Guard (with controls mounted) and Bridge (items 2 & 4 on
materials list)....................................................................................................................................... - 12 -
2.5 Re-check the Neck to the Body Fit .......................................................................................... - 12 -
2.6 Check Tremolo Claw Alignment and Fit Check (item #5 on material list) ............................... - 13 -
2.7 Fit check of the Tremolo cavity Cover (Fig 2.7) ....................................................................... - 13 -
2.8 Output Jack ............................................................................................................................. - 13 -
2.9 Check Strap Pins ...................................................................................................................... - 13 -
2.10 Check Tuner Alignment ........................................................................................................... - 14 -
2.11 String Tee Position .................................................................................................................. - 14 -
2.12 Mockup and Fit Check complete! ........................................................................................... - 14 -
3 Finish ............................................................................................................................................... - 15 -
3.1 The Body ................................................................................................................................. - 15 -
3.2 Solid Color Finish ..................................................................................................................... - 15 -
3.3 The Neck.................................................................................................................................. - 15 -
4 Assembly ......................................................................................................................................... - 16 -
4.1 Assemble Pick Guard, Bridge and Neck to Body ..................................................................... - 16 -
4.1.1 Bridge Installation ........................................................................................................... - 16 -

Strat Guitar Instructions
- 4 -
4.1.2 Pick Guard & Controls Installation .................................................................................. - 16 -
4.1.3 Neck Installation ............................................................................................................. - 17 -
4.1.4 Finishing Bridge and Pick Guard Installation ................................................................... - 17 -
4.1.5 Tremolo Claw, spring and ground installation ................................................................ - 18 -
4.1.6 Output Jack wiring & installation .................................................................................... - 18 -
4.2 Installing the Nut ..................................................................................................................... - 18 -
4.3 Installing the tuners ................................................................................................................ - 19 -
4.4 Install the Strings..................................................................................................................... - 19 -
4.5 Tremolo Claw Adjustment ...................................................................................................... - 20 -
4.6 Installing the Strap Pins ........................................................................................................... - 20 -
4.7 Installing the String Retainer................................................................................................... - 20 -
5 Setup ............................................................................................................................................... - 21 -
5.1 Adjust the Guitar Neck: Truss Rod .......................................................................................... - 21 -
5.2 String Lubrication .................................................................................................................... - 22 -
5.3 Adjusting the Action ................................................................................................................ - 22 -
5.4 Bridge Saddle Adjustment ...................................................................................................... - 23 -
5.5 Pickup Height .......................................................................................................................... - 23 -
5.6 Intonation ............................................................................................................................... - 23 -
5.7 …Other Hints ........................................................................................................................... - 24 -
1Introduction
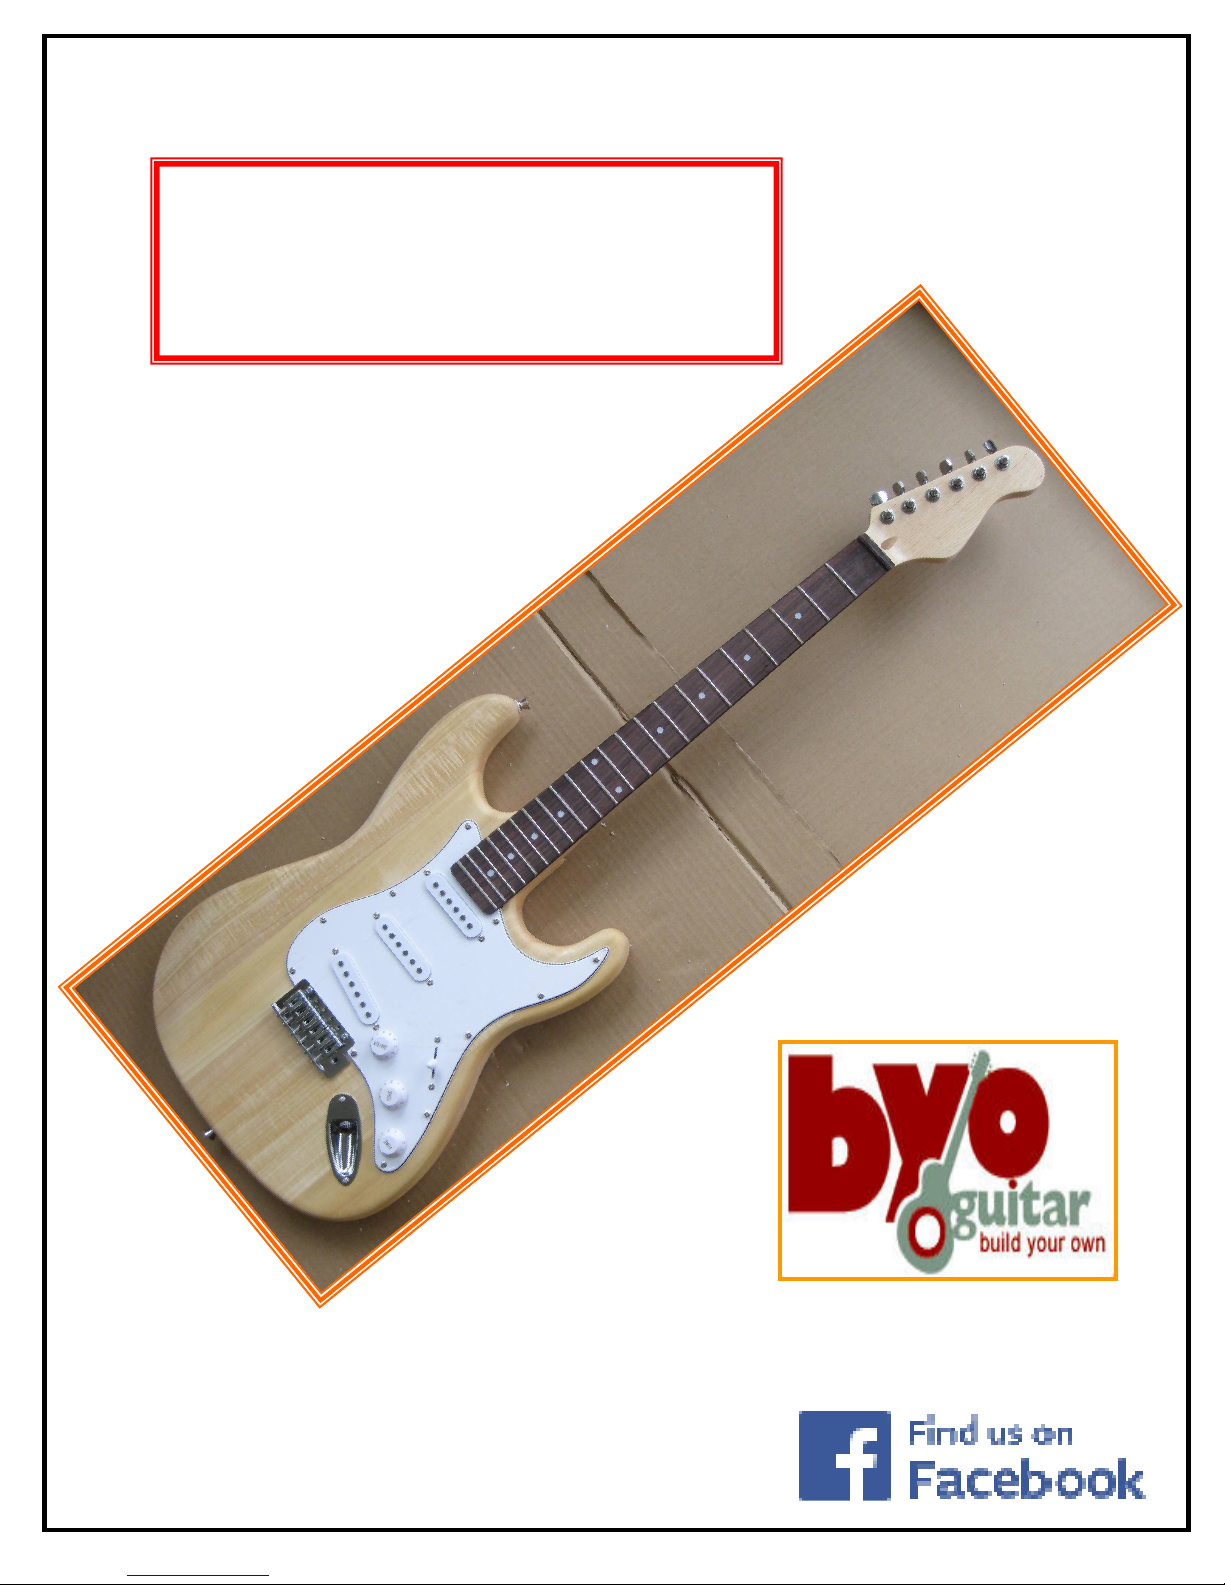
Thank you for purchasing a BYOGuitar.com guitar kit. This kit includes everything you need to build a
complete custom guitar. In addition to the construction of your guitar, you will need to consider the
finish – natural, solid color and possibly a design that will make your guitar unique. We suggest you do
some research to determine your finish preferences. Procuring the required finishing materials,
especially if they have to be ordered, will allow e pedite your guitar project.
We carry a full line of finishing products to give you the beautiful finish you are looking for, whether a
clear natural finish or a bold, colorful finish. We also carry an instructional DVD made by Behlen that will
give you step by step instructions to help you achieve the look you want for your custom guitar.
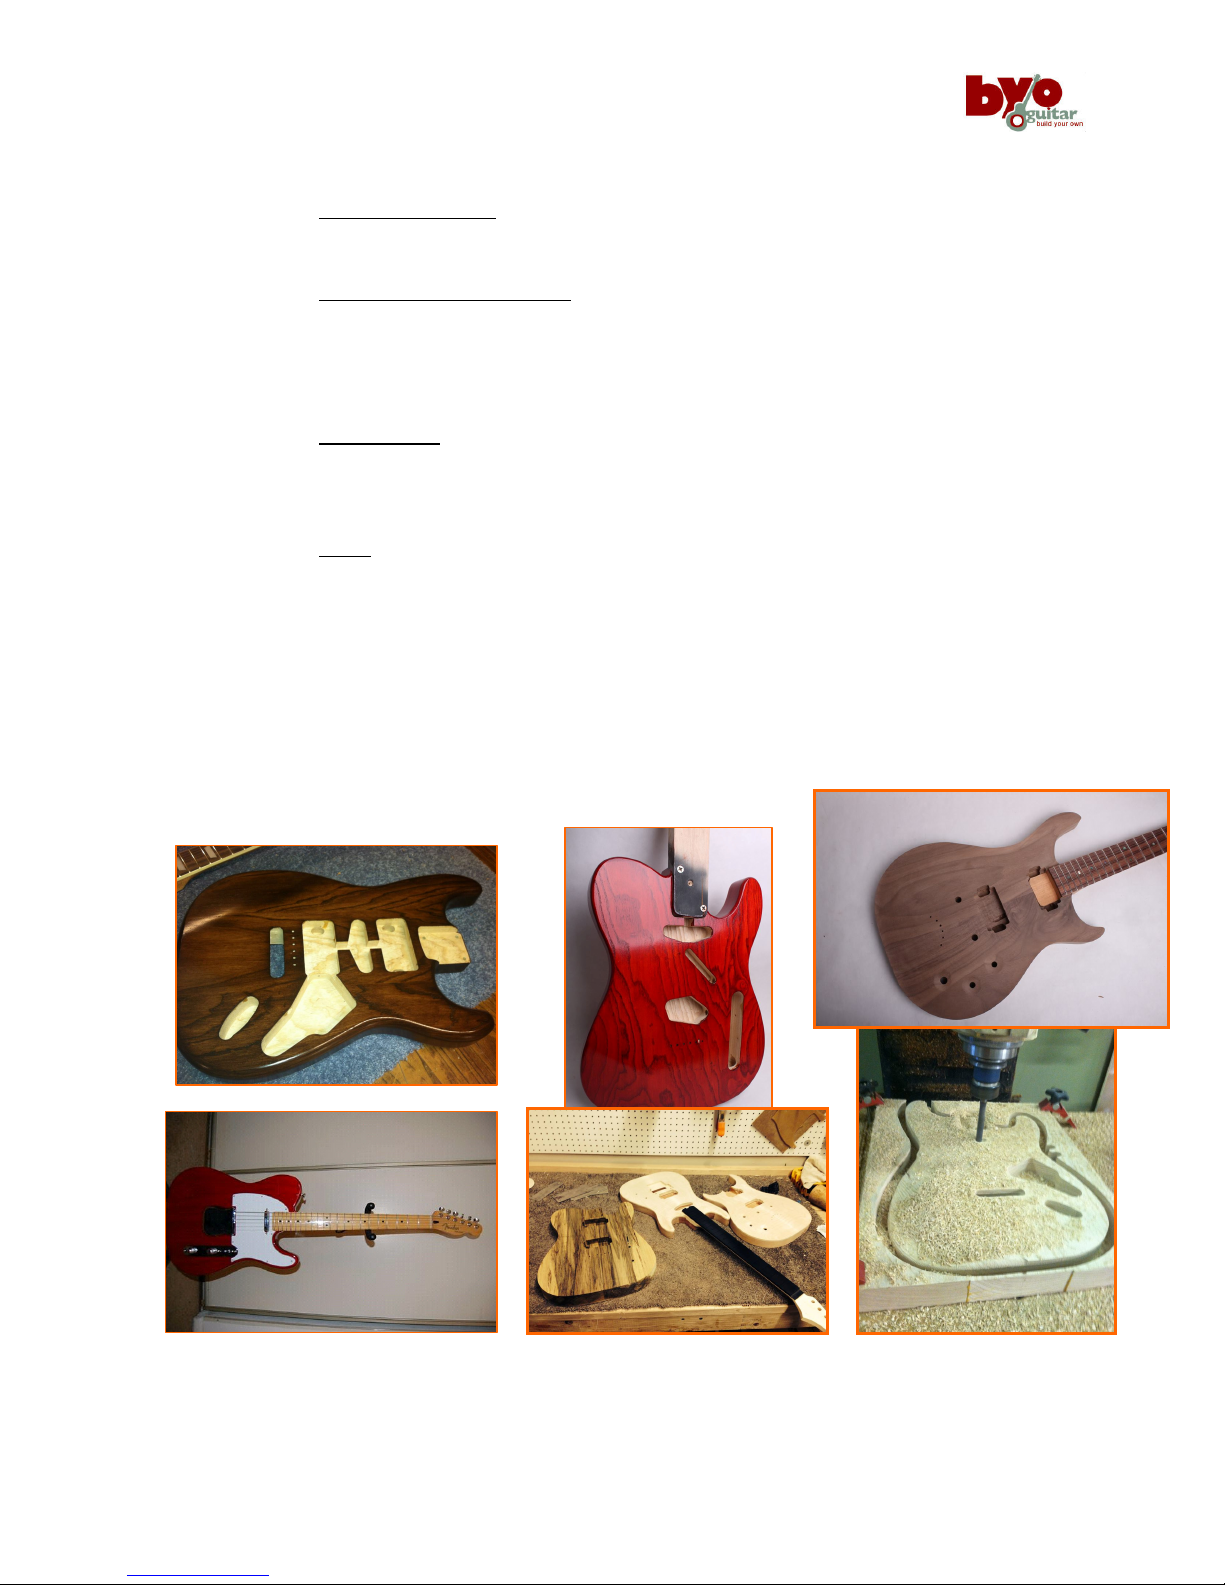
TIP:
Get some finishing ideas by visiting BYOGuitar.com and BYO Guitar on Facebook
(http://www.byoguitar.com/gallery/index.html)

Strat Guitar Instructions
- 5 -
Fig 1 Major Components in Your Strat Guitar Kit
These instructions assume you are familiar with the anatomy of a guitar. Refer to Figure
1 for many of the terms used in the assembly of your guitar.

Strat Guitar Instructions
- 6 -
1.1 Material Check List
In preparation for the building of your guitar, all required material should be checked both for type and
quantity. Use the following check list to ensure all piece parts are included. If you customized your
order (e . different tuners), ensure that these parts are accounted for. Please contact BYOGuitar if there
are any discrepancies.
Strat Material List
Item
Component Quantity Description
1
1 Strat Body
1 Strat Neck
Miscellaneous
materials (see
below)
BYO Strat
Guitar Kit
2
1
Strat
Pickguard with
pickups
3
20 screws
3/8”
+ spare
Mounting
screws for
Pickguard,
Audio Jack &
Back Plate
TIP:
use small interior packing
box to inventory and organize piece parts

Strat Guitar Instructions
- 7 -
4
1
6 mounting
screws, 1”
Tremolo
5
Tremlo Claw
Springs, 3
Screws, 2
Tremelo parts
6
Arm Tremolo arm
7
1 Plate
1 plastic base
4 screws, 1
3/4
”
Neck
Plate/mounting
materials
8
6 Tuning
Pegs
6 Washers
6 Nuts
6 screws, 3/8”
Tuning Pegs
Jack
Output Jack

Strat Guitar Instructions
- 8 -
10
2 Holders
2 plastic
washers
2 screws, 1”
Strap Pins
11
1 String
“Nut”/guide
2 Tees
2 sleeves
2 screws, ½”
1 pick
String Tees
and Nut
12
6 strings Strings
13
Output Cable
2 Allen
wrenches
Other
1.2 Additional tools/materials required:
Drill & drill bits #1 & #2 Phillips
screwdriver
Soldering iron/solder
Masking/painters tape
Finishing/painting
material
Sand paper 220 &
320 grit
Guitar strap Soap or candle Feeler gauge
ruler

Strat Guitar Instructions
- 9 -
The remainder of the assembly instructions is divided into four sections:
Section 2 – Mockup & Fit check: in this section, all components will be checked for proper
alignment and ensure that all holes have been drilled.
Section 3 – Finishing the Body and Neck: after fit check, the components are removed from the
neck & body to allow the selected finish to be applied. This will allow you to customize your guitars’
color(s). As the finishing will likely require several coats with sanding between each coat, ensure that
the finish is completely dry.
Section 4 – Construction: the final assembly is the ne t step - once the finish has been applied
and completely dried. In this section, all of the components are installed, internal wiring connected and
strings attached – your guitar will ready to go!
Section 5 – Setup: in this section, adjustments are made to your guitar such as the height of the
pickups.
Again, we thank you for your purchase of a BYO Guitar and we look forward to seeing pictures of your
unique guitar! We also look forward to providing you with the guitar for your ne t project from our
Custom Shop where you can select the wood for the body and neck as well as customizing all of the
other components.
Let us know if your music, school, church or scouting organization would like to undertake a group
project – BYO Guitar can supply multiple kits or custom guitars.
Some Ideas for Finishing Your Guitar and Examples of Our Custom Shop Produ ts

Strat Guitar Instructions
- 10 -
2 Mockup and Fit Check
The following steps will ensure that the body, neck, tuners,
pickups, etc. are properly aligned and that all screw holes have
been drilled.
2.1 Check Guitar Bod & Neck mounting holes
1. Check Neck pocket on the Body for pre-drilled (4)
mounting holes (Figure 2.1).
2. Skip to 2.2 if the holes are pre-drilled.
2.1.1 Drilling the Mounting Holes in the Guitar Bod
1. Use the neck plate as a template (#7 on material list)
to locate the mounting holes in the neck pocket. The
simplest way is to place the neck plate into the pocket
and properly position it so it is centered in the pocket.
2. Mark the holes, center punch your marks.
3. Drill the holes using a 3/16” drill bit.
2.2 Checking the Mounting Holes in the Neck
1. Check neck for pre-drilled (4) mounting holes.
2. Skip to 2.2.2 if the holes are pre-drilled.
2.2.1 Drilling Mounting Holes in the Neck
1. Place the neck in the pocket (…you should be able to fit the neck
in the neck pocket by hand).
a. Make sure the neck is aligned properly with the pickup
cavities and bridge.
b. Carefully clamp the neck in place – frets damage easily.
c. Using the same drill bit you drilled the holes in the body,
place the bit in the hole through the body and tap it a
few times to make a mark on the neck.
2. Remove the neck from the body.
3. Determine the neck mounting hole depth.
a. Place one of the neck mounting screws through the neck plate and body into the neck
pocket.
Figure 2.1 Body Cavity Lo ations
Tip
TipTip
Tip:
rubbing the threads
of the screw on a bar of soap or
candle will help prevent the wood
from splitting
.
TIP…
a
piece of masking tape
around the drill bit
works great as a depth
indicator
.

Strat Guitar Instructions
- 11 -
b. Measure the amount of the mounting screw that e tends up into the neck pocket, and
mark your drill bit.
c. Double check the depth by holding the marked drill bit to the side of the neck and be
certain the drill won’t go through the fingerboard.
4. Drill the holes in the neck with a 1/8” drill bit. Make sure you don’t drill through the
fingerboard!
2.2.2 Mount the Neck on the Bod
Temporarily attach the neck. Use caution, the last thing you want to do is snap the screw off in the
hole!
1. Insert the neck into the neck pocket and place the neck plate (with counter sunk holes facing
out) & plastic base on the body.
2. Align the mounting holes in the neck and body.
3. Fasten the Neck & Body with 4 #7 1
3/8
” screws (…see TIP above: use soap or wa on threads),
but do not tighten them.
4. Unscrew and remove the Neck from the Body.
2.3 Checking the Bridge
If the Body has 6 holes drilled to mount the Bridge (shown in Figure 2.1), skip to 2.4.
2.3.1 Locating the Bridge (item 2 on the material list)
To locate your bridge correctly, adjust the high E-string saddle to the last 1/16" of its travel toward the
neck (Figure 2.3.1). The centers of the bridge mounding screws are appro imately ¼” in front of the
saddle break point.
1. Measure 25 ¼” from the nut (“A” in Figure 2.3.2, the edge closest
to the fingerboard).
2. Make a light pencil mark on the body, parallel to the frets and the
nut.
3. Make another small mark, one corresponding to low E-string, and
connect the dots with one line.
This will help ensure that the line is parallel to the nut.
Figure 2.3.1 E-string saddle adjustment

Strat Guitar Instructions
- 12 -
Now you must locate the bridge laterally (side-to-side).
1. Place the bridge on the instrument and align it with the Bridge cavity and your length mark for the
mounting screws.
2. Make intersecting "cross-hair" marks for the mounting screw holes through the bridge plate.
3. Make sure the tremolo is moving freely and it's not binding on the edges of the rout.
4. Center punch your marks and pre-drill the Bridge mounting holes.
2.4 Fit check & Alignment of the Pick Guard (with controls mounted) and
Bridge (items 2 & 4 on materials list)
1. Mount the Bridge (item 4 on the material list) in the Bridge cavity using 2 of the mounting
screws, one in each end hole – tighten the two screws until they're flush with the top of the
bridge plate, allowing the Bridge Plate to pivot on the outside screws.
2. Place the Pick Guard in the Pick Guard Cavity (reference Figure 2.1), temporarily running all
wiring through the tunnel to the output jack cavity.
3. Carefully move the Pick Guard so that it is aligned with the Neck Pocket, the contours of the
body and the Bridge – ensuring that the Bridge is free to pivot. Mark & pre-drill 2 holes in the
Body for mounting the Pick Guard, one on each side of the Bridge. Using 3/8” screws (item 3 on
Material list), attach the Pick Guard (2 screws) – again ensuring that the Bridge can move.
4. Mark the remaining Pick Guard holes and drill starter holes with 1/16 drill bit. Ensure all holes
are pre-drilled.
2.5 Re-check the Neck to the Bod Fit
a. Insert the neck into the neck pocket and place the neck plate (with counter sunk holes facing
out) & plastic base on the body.
Figure 2.3.2 Nut to Bridge mounting holes

Strat Guitar Instructions
- 13 -
b. Align the mounting holes in the neck and body.
c. Fasten the Neck & Body with 4 #7 1
3/8
” screws (…see TIP above: use soap or wa on threads),
ensuring alignment of the Body, Pick Guard and Neck.
2.6 Check Tremolo Claw Alignment and Fit
Check (item #5 on material list)
Using the Tremolo claw as a template, start the mounting
screws (1 ¼") appro imately ½” into the Body - they should be
centered horizontally and vertically in the back Body pocket
(Figure 2.6). Skip to step 2.7 if the alignment is correct.
1. Using the claw as a template, mark the hole positions
and pre-drill 2 holes.
2. Start the mounting screws appro imately ½” into the
Body – ensure they are centered (Figure 2.6).
2.7 Fit check of the Tremolo cavit Cover (Fig 2.7)
Using the top and bottom elongated holes in the cover as a reference,
slide the plate over the string holes in the Tremolo block/Bridge.
1. When centered, if necessary slightly adjust the plate to be
parallel to the Neck.
2. Mark the holes and drill starter holes with 1/16 drill bit -
ensure all holes are pre-drilled
2.8 Output Jack
1. Check for pre-drilled holes (2) for the Output Jack (material
list #9), reference Figure 2.1 & 2.8.
2. If the holes are pre-drilled, skip to 2.9.
a. Insert Output Jack in Jack Cavity (Fig 2.1).
b. Mark the holes and drill starter holes with 1/16
drill bit.
2.9 Check Strap Pins
1. Check for pre-drilled holes for the Strap Pins (item 10 on
the material list), reference Figure 1.0.
Figure 2.6 Tremolo law Alignment
Figure 2.8 Output Ja k
Figure 2.7 Ba k Body Cover
Alignment

Strat Guitar Instructions
- 14 -
2. If the holes are pre-drilled, skip to 2.10.
a. Mark the rear Strap Pin hole so that it is centered on the Neck/Bridge and the forward
Pin on the most forward point on the top of the Body (see Figure 1.0).
b. Drill starter holes with a 1/16 drill bit.
2.10 Check Tuner Alignment
Each tuner consists of the tuner, washer, and a threaded bushing.
The tuners are attached to the headstock with a small wood screw
that attaches between the tuners.
1. Insert tuners, 6 each (item #8 on Material List), into the Neck
Headstock (Figure 2.8). Ensure that the Tuner shafts are
perpendicular to the Headstock (Fig.2.10).
2. Check alignment of set screw holes and tuner base.
3. If alignment is incorrect or holes are not drilled, mark hole locations and drill starter holes with
1/16 drill bit.
2.11 String Tee Position
The two (2) holes required for the installation of String Tees (2), Figure 2.11, will be during the guitar
final assembly.
2.12 Mockup and Fit Check complete!
Carefully disassemble the Mockup and move on to the
ne t step: applying the finish to your guitar!
Tuners (8)Tuners (8)
Figure 2.10 Tuner Alignment
String Tees (2)String Tees (2)
Figure 2.11 String Tees
TIP…
the
holes may need to be widened with a peghead reamer or a
round file. DO NOT widen the holes too much—the tuners should fit snug

Strat Guitar Instructions
- 15 -
3
Finish
Before starting the finish make sure all holes are drilled for any remaining hardware (pickguard, jack
plate, strap pins etc).
3.1 The Bod
Sand the body and neck with #220 dry sandpaper, followed by #320. If you are applying a finish other
than natural, you should consider using a grain filler on the body. This will fill in the valleys in the grain
and result in a nice flat surface allowing you to get a nice high gloss finish. An oil based grain filler is
recommended. For most finishes, use a natural colored filler. The dyes used in darker fillers may, over
time, find their way through the color coat. We carry a full line of Behlen Por-o-pac grain fillers that
work perfectly for smoothing out your guitar body.
Apply the filler by wiping across the grain. You can use a course cloth or your fingers to wipe the grain in.
After it has dried about ten to twenty minutes the e cess can be removed with a cloth dampened with
mineral spirits. After about an hour repeat the process and let dry overnight. If you have removed most
of the e cess with mineral spirits the remaining filler on the field of the wood can be sanded off (use
#220 again) in a few minutes. The body is now ready for a sand and sealer coating.
Vinyl sealer is used to give the final coat a level base. It is also helpful in filling scratches which are too
deep to sand out. We recommend Behlen’s Vinyl Sealer, available on our website.
3.2 Solid Color Finish
The last step before applying the color coats is to apply a white primer coat. We recommend Ohio Valley
Nitro’s White Primer, available on our website. This is a white pigmented shellac in an aerosol can that
will cover the grain and prevent any previous finishes from bleeding through. The white background will
also let you apply an opaque color coat with less paint. Spray on two coats. When dry you may notice
that the surface feels rough. Sand off the roughness with #320 dry and re-spray. Sand again. If the
surface now appears smooth and all grain is opaqued you are ready for the color coat.
3.3 The Neck
On a maple fingerboard you can apply a clear finish to the entire neck and fingerboard. Apply several
coats and remove buildup on the frets between coats. An easy way to remove the finish buildup on the
frets is to take a nail and file a half round slot in the head about the same size as the frets. You can then
use this to easily scrape any finish build up.
If the neck has a Rosewood or Ebony fingerboard be sure to tape off the fingerboard before applying the
finish. Behlen’s Fingerboard Oil is a great product for your fingerboard.
TIP… reopen any of the screw holes in the body. Use a toothpick or small drill held between
your fingers to clean out any filler in the holes.

Strat Guitar Instructions
- 16 -
4Assembl
After your finish has been applied and thoroughly dried, we can now assemble your guitar. In this
section we will permanently install all of the components and solder the wiring for the bridge and pick
guard pickup.
4.1 Assemble Pick Guard, Bridge and Neck
to Bod
Refer to Figure 4.1 during this section. Noted wiring colors
are typical and may vary.
4.1.1 Bridge Installation
1. Mount the Bridge (as done in the mockup Section
2.4) in the Bridge cavity using 2 of the mounting
screws, one in each end hole – tighten the two
screws until they're flush with the top of the bridge
plate.
2. Ensure Bridge Plate to pivot on the outside
screws.
4.1.2 Pick Guard & Controls Installation
Insert the Pick Guard into the Pick up Cavity (Figure
4.1):
1. with the Red & Black wires (typical) running
through the tunnel (Figure 4.1.2) between the
Control Cavity and the Jack Cavity, and
2. with the white wire (typical) running through the tunnel (Figure 4.1.2) between the Control
Cavity and the Tremolo cavity in the back of the Body.
TIP… use a blanket or large towel on your work area to protect your guitars’ finish
Figure 4.1 Body Assembly Referen e
Tip
TipTip
Tip…
……
…
if the wires are not red, black
& white, the 2 wires soldered to the
potentiometer case are the ground wires; the
remaining wire is the signal wire: run the signal
& 1 ground wire through the output jack tunnel
and the remaining wire through the tremolo
tunnel

Strat Guitar Instructions
- 17 -
3. Seat the Pick Guard around the Bridge – gently
pulling the wires to ensure they are through the
tunnels.
4. As done in the Mock up (Section 2.4), carefully
move the Pick Guard so that it is aligned with the
Neck Pocket, the contours of the body and the
Bridge – ensuring that the Bridge is free to pivot.
Using two 3/8” screws (item 3 on Material list),
attach the Pick Guard (one on each side of the
Bridge) – again ensuring that the Bridge can move.
4.1.3 Neck Installation
1. Insert the neck into the neck pocket and place the neck plate (with counter sunk holes facing
out) & plastic base on the body.
2. Align the mounting holes in the neck and body.
3. Fasten the Neck & Body with 4 #7 1
3/8
” screws ensuring
alignment of the Body, Pick Guard and Neck – do not over
tighten.
4.1.4 Finishing Bridge and Pick Guard Installation
Bridge (Figure 4.1.4 :
1. Insert the remaining 4 screws in the Bridge and tighten them
to appro imately 1/16” above the top of the bridge plate.
2. Tighten the two outside screws back down until they're flush
with the top of the bridge plate. The bridge will now pivot on
the outside screws, leaving the four inside screws in place for
bridge stability.
Pick Guard:
Using 3/8” screws (item 3 on Material list), complete the installation of the Pick Guard to the Body –
again ensuring that the Bridge can move.
Figure 4.1.2 Body Wiring
TIP…
remove the clear protective film from the Pick Guard & pickups
Figure 4.1.4 Tremolo Claw
Installation

Strat Guitar Instructions
- 18 -
4.1.5 Tremolo Claw, spring and ground installation
The tremolo claw, spring and grounding wire are installed in the back of the Body:
1. Install the claw in the front of the tremolo cavity; screw in
only about a ¼ of the way (Figure 4.1.5).
2. Solder the ground wire (from the control tunnel) to the
tab on the tremolo claw (Figure 4.1.5a).
3. Use pliers to stretch the springs into position (Figure
4.1.5a). Leave one space in between each one on the
block and the center 3 “claws”. CAUT ON: If you lose grip
of a spring it can fly hitting you, and cause damage to the
paint on the body. Ensure the spring hook is completely
down in the Tremolo block.
4. Tighten the screws on the spring claw so there is little play
in the block. The block still needs to be able to move if you
plan on using a whammy bar.
4.1.6 Output Jack wiring & installation
Insert the Output Jack wiring through the tunnel between the
Control cavity and the jack hole.
1. Solder the signal and ground wires to the jack (see Figure
4.1.6) (Note: if the signal wire is shielded, solder the shield
to the ground terminal on the jack).
2. Attach jack mounting plate to the body with the supplied
mounting screws (2).
4.2 Installing the Nut
The nut holds the strings at the peghead the correct distance above
the frets. It is not necessary to cut the string notches in the nut that
comes with this kit.
1. Use a chisel or razor blade to scrape any finish out of the nut slot. DO NOT remove any wood
from the nut slot.
2. Spread a thin layer of wood glue in the nut slot and center the nut in the nut slot.
Figure 4.1.6 Output Ja k Wiring
TIP… wipe away the excess glue before it sets up - allow the glue to thoroughly dry
Figure 4.1.5 Tremolo Claw Installation
Figure 4.1.5a Tremolo Spring Installation

Strat Guitar Instructions
- 19 -
4.3 Installing the tuners
Each tuner consists of the tuner, washer, and a threaded bushing. The tuners are attached to the
headstock with
3/8”
wood screws (refer to Section 2.8).
1. Place the si tuners into the holes on the back of the headstock.
2. Slide a washer over the tuner shaft and secure the threaded bushing onto the tuner.
3. Secure the machine heads to the guitar headstock with the supplied screws. Remove the
protective film if necessary.
4.4 Install the Strings
Like most projects, there often several tricks that will make the assembly easier and your guitar better.
Properly stringing your guitar is just one of those tricks. Please review the following video:
http://www.youtube.com/watch?v=tIfP3v-b wE
Although the video addresses restringing a guitar, the principles and techniques will help you string your
guitar – as well as provide a visual for the stringing of your guitar.
1. Carefully uncoil each of the strings (6), ensuring that the stings do not have a kink.
2. Run the low E string (largest diameter string) through the upper hole in the Tremolo block from
the Tremolo cavity (Figure 4.4). Carefully seat the string ball in the block.
3. Adjust the hole in the first tuner to be perpendicular to the
neck.
4. Run the string upward through the hole in the tuner till
snug on the neck; gently pull the string backward for a
length of about 2 frets (check the video).
5. Run the string forward (toward the end of the headstock) wrapping the around the tuner and
under the sting; bend over the string (toward the end of the headstock).
6. Tighten the string down the tuner; when the string is snug against the 1
st
slot in the nut, trim the
e cess string.
7. Repeat steps 2-6 using the ne t smaller diameter string & the tuner.
Figure 4.4 Tremolo String Installation
Tip
TipTip
Tip…
……
…
movement of the
corresponding saddle might be
required to pass the string completely
through the bridge.
Table of contents
Other BYO Guitar Musical Instrument manuals