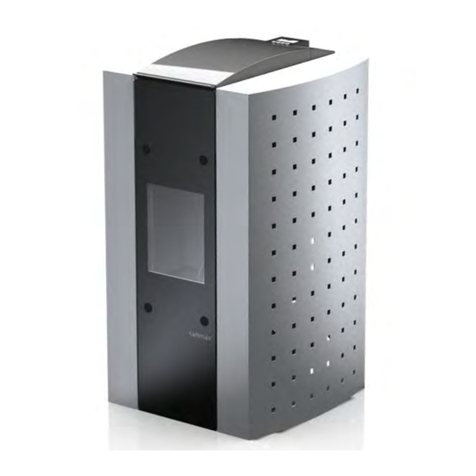
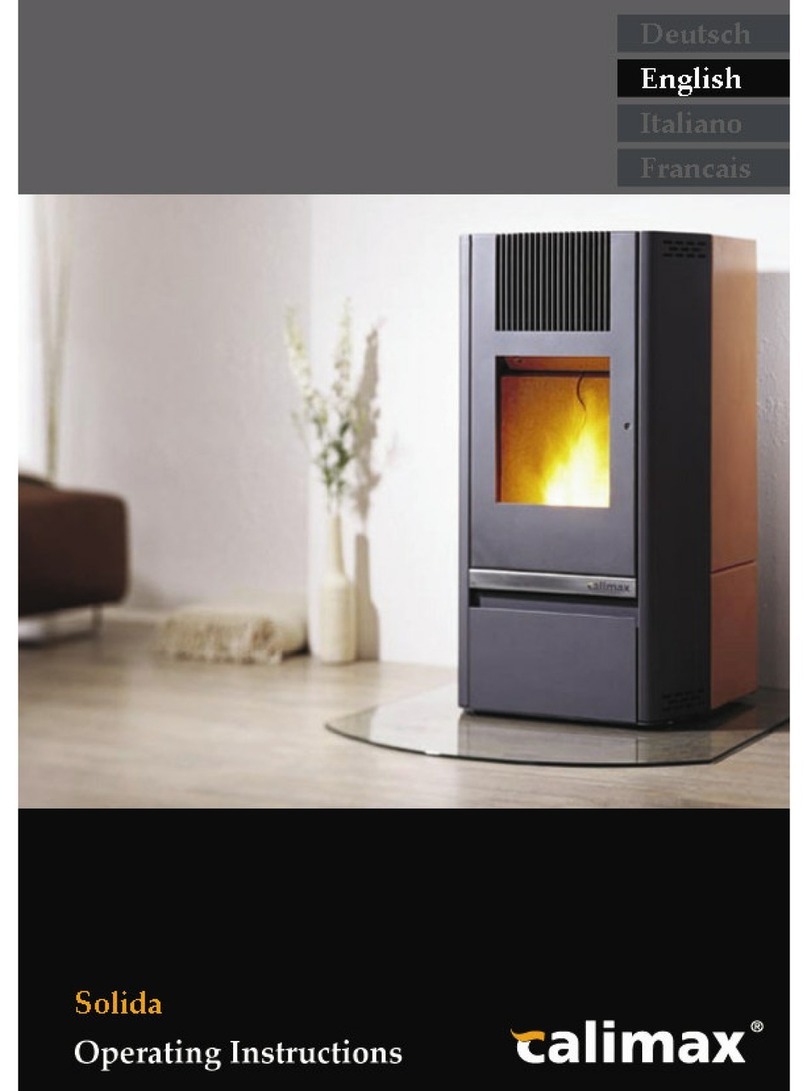
calimax Solida PR 08 02 01 User manual

English
Operating instructions
SOLIDA
(PR 080201 and PR 100301)


Page 3
Contents
1. General safety information ..............................................................5
2. General description of the device ..................................................5
2.1. General information about the Solida pellet stove ..................................... 6
2.2. Safety instructions.............................................................................................. 6
2.2.1. General ........................................................................................................ 6
2.2.2. Stove-specific dangers .............................................................................. 7
2.3. Liability................................................................................................................. 8
2.4. Identification ...................................................................................................... 9
2.5. Declaration of conformity................................................................................ 9
2.6. General information about the fuel ............................................................. 10
2.6.1. What are wood pellets? .......................................................................... 10
2.6.2. How can you recognise "good" wood pellets?................................... 10
3. Description of buttons and display overview ...............................11
4. Function features ............................................................................11
4.1. Switching on and off....................................................................................... 11
4.2. Setting the required temperature................................................................. 11
4.3. Stove operation with the timer...................................................................... 12
4.4. The operating phases ..................................................................................... 13
4.4.1. The start phase .......................................................................................... 13
4.4.2. The heating mode.................................................................................... 13
4.4.2.1. Setting the operating mode Automatic............................................ 13
4.4.2.2. Setting the operating mode Semi-automatic .................................. 13
4.4.3. The cooling phase .................................................................................... 14
4.4.4. Standby mode .......................................................................................... 14
4.5. Stove operation with external actuation..................................................... 14
4.6. Setting the date and time..............................................................................16
4.7. Safety equipment............................................................................................ 16
4.7.1. Power failure.............................................................................................. 16
4.7.2. No flame formation during the start phase.......................................... 16
4.7.3. Device overheating ................................................................................. 16
5. Assembly and installation ..............................................................17
5.1. Assembly ........................................................................................................... 17
5.1.1. Dimensions ................................................................................................. 17
5.1.2. Height-adjustment screws ....................................................................... 17
5.1.3. Room temperature sensor....................................................................... 17
5.1.4. Cladding .................................................................................................... 18
5.2. Installing the Solida pellet stove.................................................................... 19
5.2.1. Floor protection......................................................................................... 19
5.2.2. Distances from combustible materials .................................................. 19
5.2.3. Flue connection........................................................................................ 19
5.2.4. Chimney..................................................................................................... 20
Page 4
5.2.5. Pellet stove-chimney connection piece............................................... 20
5.2.6. External air inlet ......................................................................................... 20
5.2.7. Simultaneous operation of pellet stove and air-conditioning........... 20
5.2.8. Multiple configuration.............................................................................. 20
5.3. Initial commissioning ....................................................................................... 21
5.4. Setting the combustion air volume............................................................... 22
5.4.1. Fine adjustment of the combustion air volume................................... 22
6. Adapting the convection air volume to the room volume to be
heated .................................................................................................23
6.1. Setting the heating output/convection fan ............................................... 23
7. Cleaning and maintenance work.................................................24
7.1. Cleaning the stove surfaces..........................................................................24
7.2. Routine cleaning work.................................................................................... 24
7.2.1. Cleaning the burn grate and combustion chamber ........................24
7.2.2. Emptying the ash pan.............................................................................. 25
7.2.3. Cleaning the heat exchanger ............................................................... 25
7.2.4. Checking the pellet tank for fine residues............................................ 25
7.3. Maintenance work after 400 kg pellets or after one year ........................ 26
7.3.1. Cleaning the flues and the heat exchanger ....................................... 26
7.3.2. Cleaning the flue gas collector housing and flue gas fan ................27
8. Components....................................................................................28
8.1. Pellet tank ......................................................................................................... 28
8.2. Screw motor/Screw conveyor.......................................................................28
8.3. Burn grate ......................................................................................................... 28
8.4. Ceramic ignition .............................................................................................. 29
8.5. Ash slide and ash pan .................................................................................... 29
8.6. Flue gas fan ...................................................................................................... 29
8.7. Low temperature switch................................................................................. 29
8.8. High temperature switch................................................................................ 29
8.9. Convection air fan .......................................................................................... 29
8.10. Differential pressure monitor........................................................................ 29
8.11. Control system ............................................................................................... 30
8.12. Rear-ventilated pane ................................................................................... 30
8.13. Flue connection............................................................................................. 30
9. Technical data Solida.....................................................................31
9.1. System circuit diagram ................................................................................... 32
10. Troubleshooting - Tips ...................................................................33

Page 5
Pellet stove Solida
1. General safety information
The pellet stove Solida must only be installed and operated after the
operating instructions have been read and understood in full!
If you have any difficulty understanding the operating instructions, please contact
your Calimax sales partner.
Safety information
−The pellet stove may only be connected to the power supply after it has been cor-
rectly connected to the chimney.
−Ensure sufficient air supply in the room where the stove is installed when it is in op-
eration.
−The pellet supply is interrupted if there is a malfunction. Only restart the stove when
the source of error has been resolved.
−The safety grid fitted in the pellet hopper must not be removed.
−Objects that are not resistant to heat must not be placed on the stove or left within
the specified minimum distance.
−The mains plug socket must remain accessible after the stove has been installed.
−Never use liquid fuels to start up the stove or to reignite any embers.
−The combustion chamber door must not be opened during operation.
−The surfaces of the stove, the operating controls, the stove flue and the glass pane
may become extremely hot when the pellet stove is working. Only touch these
parts during operation with suitable protective clothing or aids.
−The device starts up automatically when in "standby mode". It must be ensured that
no persons unfamiliar with the operation of the pellet stove are left unsupervised in
the room due to the high temperatures that may be present on the glass.
−Make children and guests aware of these hazards.
−Waste must not be burnt in the stove.
−The stove may be transported by authorised specialists only.
2. General description of the device
The Solida pellet stove is designed for the clean and extremely efficient combustion
of standard 6 mm wood pellets. It is possible, even when using standard wood pel-
lets, that there may be variations in operation during combustion, ash and slag for-
mation.
Standard 8 mm wood pellets can also be used. How-
ever, any modifications must be carried out by the ser-
vice technician!

Page 6
2.1. General information about the Solida pellet stove
The Solida pellet stove may only be used in rooms suitable for living purposes. It en-
ables room temperature controlled and automatic combustion of wood pellets. The
pellet hopper can hold sufficient fuel for up to 60 hours of continuous operation (de-
pending on the heating output).
2.2. Safety instructions
2.2.1. General
State of the art
The pellet stove corresponds to the state of the art at the time of delivery. The relevant
standards are cited in the declaration of conformity.
Nevertheless, the pellet stove may give rise to hazards if the safety instructions in these
operating instructions are ignored.
Danger symbols
Dangers and important information are indicated by special symbols and signal words in
these operating instructions.
CAUTION!
The safety instruction CAUTION
- Indicates a possibly dangerous situation
- Refers to operating and cleaning procedures
- Warns about possible light or minor injuries
- Warns about possibly serious damage to the pellet stove
and other serious damage to property and consequential damage.
Note The NOTE
- Indicates a possibly harmful situation
- Refers to operating and cleaning procedures
- Warns about damage to the pellet stove or other
assets.
Intended use
WARNING!
The safety instruction WARNING
- Indicates a dangerous situation
- Refers to operating and cleaning procedures
- Warns about possible effects dangerous to health right up
to life-threatening injuries.

Page 7
Using the pellet stove for its intended use only is a prerequisite for safe operation.
The pellet stove is being used as intended
•When the pellet stove is used in rooms suitable for living purposes
•When the pellet stove is never exposed to moisture
•When the pellet stove is not operated or stored in cold rooms with condensing air
humidity
•When the applicable minimum distances to combustible materials are maintained
(see Page 15)
When the applicable national and European standards are complied with in addi-
tion to regional regulations
When the national and local operating conditions are complied with
When sufficient combustion air supply and extraction of the exhaust gases are en-
sured
When all safety instructions in these operating instructions are complied with
When all necessary safety equipment is present and functional.
Intended use also includes the timely and complete implementation of all necessary
cleaning and inspection work.
Any other additional use of the pellet stove without the written authorisation of the manu-
facturer is not the intended use.
The user is liable for any damages resulting from such use.
Note
Regulations
The various national regulations may also differ. The applicable
national regulations must be complied with.
2.2.2. Stove-specific dangers
Danger of burning
Various surfaces of the pellet stove can reach temperatures above 65°C in
operation.
These safety regulations and countermeasures protect against burning:
Avoid all contact with the hot exhaust pipe
Only carry out cleaning work when the pellet stove has cooled down
Only remove ash when completely cold (cooling time 20h)
Danger of fire
Various surfaces of the pellet stove can reach temperatures above 65°C in
operation.
It is absolutely prohibited to cover the pellet stove with blankets, cloth or
anything similar. These materials can ignite on hot surfaces.

Page 8
Danger of poisoning and suffocation
The flue gases from the pellet stove contain components dangerous
to health, including carbon monoxide.
Self-protection measures for rescuing unconscious persons:
Thoroughly air closed rooms before entering them.
Note
Carbon monoxide
- Blocks oxygen take-up and causes death
by suffocation
- Is a colourless and odourless gas
- Is produced in incomplete combustion processes
- Is heavier than air and collects on the floor.
Danger of electric shock
The following applies to main voltages with 50 Hz and an effective
duration of more than 1 second:
Currents over 50mA and voltages over 50V are life-threatening!
2.3. Liability
In the case of personal injury or damage to property, the manufacturer is only liable
for the construction standard and the safety of the machine if construction errors can
be proven.
No liability will be accepted in the case of:
•Unintended use
•Incorrect operation
•Insufficient maintenance
•Use of non-original spare parts
•Changes that are not authorised or according to regulations
WARNING!
Behaviour in case of a chimney fire!
Never pull the mains plug out. The integrated exhaust gas fan
prevents burn-back into the pellet stove.


Page 10
2.6. General information about the fuel
You have chosen to heat your home with CO2neutral wood as a fuel
. Pressing of waste wood into standardised wood pellets means that an inexpensive
fuel can be produced from untreated wood waste and converted cleanly and ex-
tremely efficiently into thermal energy when combusted.
2.6.1. What are wood pellets?
Wood pellets consist of 100% untreated wood waste (wood chips, sawdust, etc.). The
dry wood waste is shredded and pressed under high pressures to form wood pellets.
The addition of binders or other additives is not permitted.
The standards DIN 51731, ÖNORM M 7135 and DIN plus specify the following qualities
for wood pellets 6 mm in diameter:
Length: 10-33 mm
Diameter: 6 mm
Bulk weight: Approx. 650 kg/m3
Calorific value: 5 kWh/kg
Residual mois-
ture:
< 10%
Ash content: < 0.5 %
Density: 1.12 kg/dm3
2 kg wood pellets are equivalent in energy to approx. 1 litre of heating oil. Volumetri-
cally, 3 m³ wood pellets will replace approx. 1000 litres of heating oil.
Note
Wood pellets must be protected against moisture! They
will expand greatly if exposed to moisture and can no
longer be used as a fuel.
Keep wood pellets dry during transport and storage.
2.6.2. How can you recognise "good" wood pellets?
Differences in the quality of wood pellets can be due to the preparation and com-
pressing of the raw material. The following quality features can be used for a basic
visual check of wood pellets when purchasing them. Precise quality features can
only be determined with suitable technical analysis equipment.
Superior quality The surface is shiny and smooth. The wood pellets are uniform in
length and have a low dust content.
Inferior quality The surface has vertical and horizontal cracks. The wood pellets
have different lengths and a high dust content.

Page 11
3. Description of buttons and display overview
Menu navigation Changing values and parameters
Operating status display
Menu button Operating mode Room temperature Stove On/Off
Malfunction ac
knowledgement
4. Function features
The Solida pellet stove is designed for the automatic combustion of wood pellets in
residential dwellings. This means that the stove starts automatically after the set room
temperature has been reached and also stops automatically. The control system
selects one of 3 heating outputs dependent on the temperature difference between
the actual room temperature and the set maximum room temperature. This ensures
that the Solida pellet stove matches the thermal output with the actual requirements
as closely as possible.
4.1. Switching on and off
Press the On/Off button to start/stop the stove operation.
4.2. Setting the required temperature
Press the or buttons.
Use the and buttons to set the
required temperature.
Use the button to leave the menu and save the tempera-
ture setting.
The menu is automatically closed and the temperature
saved after 10 seconds.

Page 12
4.3. Stove operation with the timer
Setting the timer
Press the button.
Scroll to page K14 with the button.
Switch the timer on/off with the or buttons.
Scroll to page K15 with the
button.
The reduced temperature can be changed with the or
buttons.
Scroll to page K16 with the
button.
The 5 heating times can be checked or changed with the
button.
The heating times can be checked with the or buttons.
Programme 1: 6:00 – 22:00 Monday – Sunday
Programme 2: 0:00 – 0:00 OFF
Programme 3: 0:00 – 0:00 OFF
Programme 4: 0:00 – 0:00 OFF
Programme 5: 0:00 – 0:00 OFF
The heating times can be changed with the or buttons.
The time or the day (blinking) can be selected with the
or
buttons.
The selected time or day can be changed with the or
buttons.
Return to the heating times overview with the button.
Press the button again to close the overview.
Use the button to leave the customer menu and save the
parameters.
The menu is automatically closed and the parameters
saved after 60 seconds.

Page 13
4.4. The operating phases
4.4.1. The start phase
Wood pellets are fed into the burn grate for a specific time during the start phase.
The ceramic ignition is activated at the same time. The wood pellets normally ignite
after approx. 5 minutes with a visible flame. A precisely defined quantity of pellets is
then conveyed into the burn grate to build up and maintain the bed of glowing em-
bers. The pellet stove then starts the heating mode.
4.4.2. The heating mode
The control system allows the Solida pellet stove to be operated automatically or
semi-automatically. The stove is delivered with the automatic mode set as standard.
If it is necessary to limit the maximum heating output, the stove can be operated
semi-automatically.
4.4.2.1. Setting the operating mode Automatic
If it is switched on and the set room temperature is undershot by at least 1.2 °C, the
stove will start operation. If the set room temperature is exceeded by 0.6°C, the cool-
ing phase is initiated.
4.4.2.2. Setting the operating mode Semi-automatic
The semi-automatic mode allows the heating output to be set manually. This means
that the stove only starts operation, after the start phase, using the maximum heating
capacity set manually. The automatic start and switch-off when the maximum room
temperature is reached is also active in the semi-automatic mode.
Press the button.
Scroll to page K11 with the button.
Select Automatic/Semi-automatic with the or buttons.
Use the button to leave the customer menu and save the
parameters.
The menu is automatically closed and the parameters
saved after 60 seconds.

Page 14
4.4.3. The cooling phase
The screw conveyor is switched off when the cooling phase starts and no wood pel-
lets are conveyed into the burn grate.
4.4.4. Standby mode
Once the set temperature has been reached, the stove switches to the
cooling phase.
When the cooling phase is complete, the standby mode starts. The standby mode
signals that the stove will start heating again automatically when the switch-on tem-
perature is undershot.
4.5. Stove operation with external actuation
The Solida pellet stove offers the pos-
sibility of actuation via an external
thermostat or an external timer. Con-
nection can be implemented on the
rear using the terminal strip next to
the power supply inlet. To connect
the external control system, remove
the cable link (Fig. 6) and connect
the cable of the external control sys-
tem with the RT terminal of the termi-
nal strip.
Fig. 6: Terminal strip with cable link
The pellet stove must be actuated potential-free! Never
apply an input voltage! Only use shielded cables! The
room thermostat may only be connected by a special-
ist!
The external contact must be activated in the control system, simply removing the
cable link is not sufficient.
Activation of the external contact:
Press the button.
Scroll to page K17 with the button.
Activate/deactivate the external contact with the or
buttons.
Use the
button to leave the customer menu and save the
parameters.
The menu is automatically closed and the parameters
saved after 60 seconds.

Page 15
Combinations/Priority
If automatic operation of the stove is set (external contact and timer), the required
selection must be made after pressing the
button, using the or buttons.
A query appears in the display after switching on:
The stove starts immediately when Manual is selected, regu-
lating according to the set target temperature until it is
manually switched off again.
The external contact has priority over the timer with this se-
lection.
.
When the external contact is closed, the stove switches on even when the timer is set
to set-back mode.
If operation is activated simultaneously with the external contact and the time, the
following applies:
Timer
Day
Night
Ext. con-
tact
open
Normal operation
Regulated a ording to
set target temperature
and timer
Standby
Regulated a ording to
set-ba k temperature set
and timer
closed
Normal operation
Regulated a ording to
set target temperature
Timer not fun tional
Normal operation
Regulated a ording to
set target temperature
Timer not fun tional

Page 16
4.6. Setting the date and time
The Service menu is displayed with the
and or and buttons.
(Press and hold down any arrow key. Briefly press the Menu button and then release
the arrow key again).
The various menu items can be displayed with the or buttons.
Scroll to page S210 with the button.
Enter the menu with the button.
Use the and buttons to set the
required date.
Use the or buttons to scroll onward from Date to Time.
4.7. Safety equipment
The cooling phase starts immediately if there is a malfunction and the fire will go out
within several minutes. A restart is only possible manually after the malfunction has
been resolved (press the Start button).
4.7.1. Power failure
The control unit activates and maintains the cooling phase if there is a power failure.
The device will then start operating again by returning to the start phase, even if the
power failure only lasted a few seconds.
A slight amount of smoke may be produced during a power failure, but does not
pose any danger as it is produced by the small amount of fuel still in the burn grate.
4.7.2. No flame formation during the start phase
The stove switches off automatically if no flame is formed during the start phase and
if the exhaust gases do not reach a minimum temperature of 60°C (insufficient fuel
supply).
4.7.3. Device overheating
A high-temperature monitor is located in the pellet chute and the combustion
chamber, these can independently switch off the pellet supply if overheating occurs.
The exhaust and convection air fans continue operating in this case and ensure that
the stove cools down rapidly.
The stove switches off automatically if no flame is formed during the start phase and
if the exhaust gases do not reach a minimum temperature of 60°C (insufficient fuel
supply).

Page 17
5. Assembly and installation
5.1. Assembly
5.1.1. Dimensions
5.1.2. Height-adjustment screws
To function correctly, the Solida pellet stove must be absolutely levelled vertically.
The height adjustment screws can be used to compensate for minor unevenness.
5.1.3. Room temperature sensor
The integrated room temperature sensor
must be correctly fed through the rear wall
of the pellet stove before initial start up is
implemented (Fig. 1).
Fig. 1: Room temperature sensor

Page 18
5.1.4. Cladding
Remove the cladding from the packaging. Pass the room temperature sensor
through the rear panel. Push the lower lugs of the cladding into the lower bracket
(Fig. 2). Lift the cladding up and hang the upper retaining lugs into the upper
bracket (Fig. 3 and 4).
Fig. 2: Lower bracket, side panel
Fig. 4: Attaching the cladding
Fig. 3: Upper bracket, side panel
5.1.5. Cleaning tool
To hold the cleaning tool, mount the
supplied holder on the rear panel of
the stove (Fig. 5).
Fig. 5: Cleaning tool holder

Page 19
5.2. Installing the Solida pellet stove
The following specifications regarding floor protection, distances from flammable
materials and the flue pipe connection may differ from regional and official regula-
tions. Please contact your Calimax sales partner or appropriate local authority if
there are any questions.
5.2.1. Floor protection
For practical cleaning aspects, it is recommended that the pellet stove is set up on a
fireproof base plate that is at least 5 cm wider than the back and sides of the stove
and extends at least 15 cm at the front.
It is not absolutely essential to have a fireproof base under the stove as excessive
temperatures are not produced in the lower section of the stove during operation.
The combustion chamber door is for cleaning purposes only and is not an ignition
door. It must not be opened during operation!
Please note the local regulations in all events, as they
may differ from the above specifications!
5.2.2. Distances from combustible materials
The following minimum distances from
combustible materials must be complied
with:
Back: 5 cm
Sides: 15 cm
Front: 80 cm
5.2.3. Flue connection
The flue must be connected to the chimney according to local regulations. Please
contact your Calimax sales partner or appropriate local authority if there are any
questions.
Do not lay any cables over the flue pipe!
The minimum draught requirement in the chimney must be greater than 0 Pa!

Page 20
5.2.4. Chimney
The flue system must be calculated according to EN 13384-1. A positive chimney
evaluation must be present before the pellet stove can be used. Excessive pressure
must never be generated in the connection piece between stove and chimney.
The minimum draught requirement must lie between 0 Pa and 25 Pa.
5.2.5. Pellet stove-chimney connection piece
The connection piece between the pellet stove and chimney entry must be designed so that
the exhaust gases can enter the chimney with low pressure loss and low cooling (see DIN
18160). It must be accessible for checking and cleaning.
The connection piece must be gas-tight in design.
5.2.6. External air inlet
Connect a hose or other suitable air conduit to the air inlet on the back of the stove.
The end of this air conduit must be located in the open air or another well-ventilated
room in the building.
The following table shows the applicable air inlet dimensions:
Diameter:
Inlet conduit:
Maximum
length*
Maximum number of
90% elbows
50 mm 0.5 m 1
70 mm 1 m 1
100 mm 3 m 3
* The data are valid as applicable. If using a flat conduit or other shape, the cross-section must be selected accord-
ingly.
The combustion air volume may not be sufficient at full operating load if the dimensions are too small.
This will cause slag formation in the burn grate and accumulation of pellets.
Individual combustion air regulation for the pellet stove
is necessary if an external air supply is used.
5.2.7. Simultaneous operation of pellet stove and air-conditioning
The simultaneous operation of a pellet stove and an air-conditioning system (e.g.
controlled ventilation, air extraction, etc.) can lead to malfunctions during the start
up process and during pellet combustion. Please contact your Calimax sales partner
for any questions regarding simultaneous operation and about legal guidelines.
5.2.8. Multiple configuration
Multiple configuration refers to a chimney system where several stoves using different
fuels can be connected.
The pellet stove is not suitable for a multiple configuration.
This manual suits for next models
1
Table of contents
Other calimax Pellet Stove manuals
Popular Pellet Stove manuals by other brands

EdilKamin
EdilKamin BERING Installation, use and maintenance

Pyro Industries
Pyro Industries Quest Plus owner's manual

Breckwell
Breckwell Tradition P23FSL owner's manual

Palazzetti
Palazzetti INSERIMENTI A70 Installation, use and maintenance manual

HearthStone
HearthStone Heritage 8091 owner's manual

Quadra-Fire
Quadra-Fire SANTAFE-MBK Owner's manual installation and operation