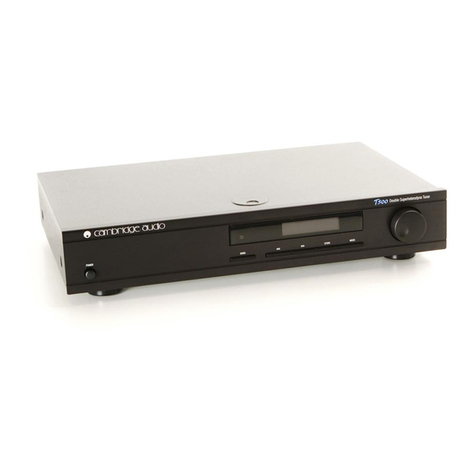
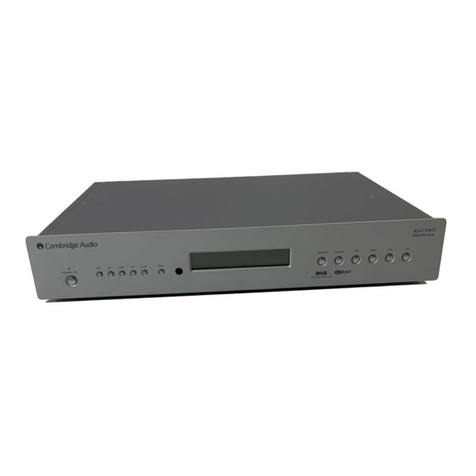
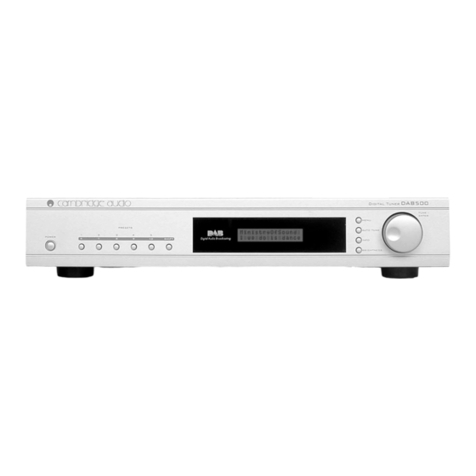
Cambridge Audio Azur 340T User manual

azur 340T
FM/AM Tuner / FM/AM Tuner / Syntoniseur FM/AM / Sintonizador FM/AM /
Sintonizzatore FM/AM / FM/AM-tuner / FM/AM-tuner / тюнер FM/АМ
User’s manual / Bedienungsanleitung / Mode d'emploi / Manual del usuario /
Manuale per l'utente / Gebruikershandleiding / Brugermanual / Руководство для пользователя

2 Azur FM/AM tuner
English ............................................................................................3
Deutsch........................................................................................13
Français........................................................................................23
Español ........................................................................................33
Italiano .........................................................................................43
Nederlands ..................................................................................53
Dansk ...........................................................................................63
Русский ........................................................................................73

340T FM/AM tuner
Azur FM/AM tuner 3
Thank
you
for
purchasing
this
Cambridge
Audio
Azur
340T,
a
newly
developed
FM/AM
tuner
to
compliment
the
Cambridge
Audio
Azur
range.
About
this
unit
The 340T incorporates sophisticated Alarm and Sleep timer functions
that can turn on and off connected Cambridge Audio amplifiers fitted
with Control Bus inputs/outputs. A specific version of the azur remote is
provided, giving full remote control of the tuner functions in an
attractive and easy to use handset.
The 340T can only be as good as the system it is connected to. Please
do not compromise on your amplifier, speakers or cabling. Naturally we
recommend amplification and cabling from the Cambridge Audio range,
connected to suitably revealing loudspeakers. The use of an external
FM/AM aerial is strongly recommended to get the best from your 340T.
Now we invite you to sit back, relax and enjoy!
Matthew Bramble
Technical Director
INTRODUCTION
Limited warranty . . . . . . . . . . . . . . . . . . . . . . . . . . . . . . . . . . . . . . . . . . 2
Introduction . . . . . . . . . . . . . . . . . . . . . . . . . . . . . . . . . . . . . . . . . . . . . 3
Safety precautions . . . . . . . . . . . . . . . . . . . . . . . . . . . . . . . . . . . . . . . . 4
Important safety instructions . . . . . . . . . . . . . . . . . . . . . . . . . . . . . . . . 5
Rear panel connections . . . . . . . . . . . . . . . . . . . . . . . . . . . . . . . . . . . . 6
Front panel controls . . . . . . . . . . . . . . . . . . . . . . . . . . . . . . . . . . . . . . . 7
Operating instructions . . . . . . . . . . . . . . . . . . . . . . . . . . . . . . . . . . . . . 8
Using the remote handset . . . . . . . . . . . . . . . . . . . . . . . . . . . . . . . . . . 10
Troubleshooting . . . . . . . . . . . . . . . . . . . . . . . . . . . . . . . . . . . . . . . . . . 11
Specifications . . . . . . . . . . . . . . . . . . . . . . . . . . . . . . . . . . . . . . . . . . . . 11
CONTENTS

4 Azur FM/AM tuner
Checking the Power Supply Rating
For your own safety please read the following instructions carefully before attempting
to connect this unit to the mains.
Check that the rear of your unit indicates the correct supply voltage. If your mains
supply voltage is different, consult your dealer.
This unit is designed to operate only on the supply voltage and type that is
indicated on the rear panel of the unit. Connecting to other power sources may
damage the unit.
This equipment must be switched off when not in use and must not be used
unless correctly earthed. To reduce the risk of electric shock, do not remove the
unit's cover (or back). There are no user serviceable parts inside. Refer servicing
to qualified service personnel. If the power cord is fitted with a moulded mains
plug the unit must not be used if the plastic fuse carrier is not in place. Should you
lose the fuse carrier the correct part must be reordered from your Cambridge
Audio dealer.
The lightning flash with the arrowhead symbol within an equilateral
triangle is intended to alert the user to the presence of uninsulated
‘dangerous voltage’ within the product’s enclosure that may be of
sufficient magnitude to constitute a risk of electric shock to
persons.
The exclamation point within an equilateral triangle is intended to
alert the user to the presence of important operating and
maintenance instructions in the service literature relevant to this
appliance.
This product complies with European Low Voltage (73/23/EEC)
and Electromagnetic Compatibility (89/336/EEC) Directives
when used and installed according to this instruction manual.
For continued compliance only Cambridge Audio accessories
should be used with this product and servicing must be referred
to qualified service personnel.
The crossed-out wheeled bin is the European Union symbol for
indicating separate collection for electrical and electronic
equipment. This product contains electrical and electronic
equipment which should be reused, recycled or recovered and
should not be disposed of with unsorted regular waste. Please
return the unit or contact the authorised dealer from whom you
purchased this product for more information.
Plug Fitting Instructions (UK Only)
The cord supplied with this appliance is factory fitted with a 13 amp mains plug
fitted with a 3 amp fuse inside. If it is necessary to change the fuse, it is important
that a 3 amp one is used. If the plug needs to be changed because it is not suitable
for your socket, or becomes damaged, it should be cut off and an appropriate plug
fitted following the wiring instructions below. The plug must then be disposed of
safely, as insertion into a 13 amp socket is likely to cause an electrical hazard.
Should it be necessary to fit a 3-pin BS mains plug to the power cord the wires
should be fitted as shown in this diagram. The colours of the wires in the mains
lead of this appliance may not correspond with the coloured markings identifying
the terminals in your plug. Connect them as follows:
The wire which is coloured BLUE must be
connected to the terminal which is marked
with the letter ‘N’ or coloured BLACK.
The wire which is coloured BROWN must be
connected to the terminal which is marked
with the letter ‘L’ or coloured RED.
The wire which is coloured GREEN/YELLOW
must be connected to the terminal which is
marked with the letter ‘E’ or coloured GREEN.
If your model does not have an earth wire,
then disregard this instruction.
If a 13 amp (BS 1363) plug is used, a 3amp fuse must be fitted, or if any other
type of plug is used a 3 amp or 5 amp fuse must be fitted, either in the plug or
adaptor, or on the distribution board.
SAFETY PRECAUTIONS

340T FM/AM tuner
Azur FM/AM tuner 5
Please take a moment to read these notes before installing your Azur tuner, they
will enable you to get the best performance and prolong the life of the product. We
advise you follow all instructions, heed all warnings and keep the instructions for
future reference.
This unit must be installed on a sturdy, level surface. Since the power transformers
generate a magnetic hum-field of moderate strength, a turntable should not be
located nearby.
Do not defeat the safety purpose of the polarized or grounding-type plug.
A polarized plug has two blades with one wider than the other. A grounding type
plug has two blades and a third grounding prong. The wide blade or the third
prong are provided for your safety. If the provided plug does not fit into your outlet,
consult an electrician for replacement of the obsolete outlet.
The unit must be installed in a manner that makes disconnection of a mains plug
from the mains socket outlet (or appliance connector from the rear of the unit) possible.
Do not plug your 340T directly into a power amplifier unless it has a variable
output level.
Do not route the power cable so that it can be walked upon or damaged by other
items near it.
The unit requires ventilation. Do not situate it on a rug or other soft surface and
do not obstruct any air inlets or outlet grilles.
Do not place in a sealed area such as a bookcase or in a cabinet. Any space open
at the back (such as a dedicated equipment rack) is fine however.
Do not install near any heat sources such as radiators, heat registers, stoves, or
other apparatus (including amplifiers) that produce heat.
When using for the first time it is advisable that it is left on, playing music, for at
least 36 hours prior to critical listening. For subsequent use, a warm up period of
10-15 minutes is recommended for maximum enjoyment.
If you do not intend to use this unit for a long period, switch it to standby and
unplug it from the mains socket. Also unplug the unit during lightning storms.
WARNING – To reduce the risk of fire or electric shock, do not expose this unit to
rain or moisture. This unit must not be exposed to dripping or splashing water or
other liquids. No objects filled with liquid, such as vases, shall be placed on the
unit. In the event of spillage, switch off immediately, disconnect from the mains
supply and contact your dealer for advice.
To clean the unit, wipe its case with a moist, lint-free cloth. Do not use any
cleaning fluids containing alcohol, ammonia or abrasives. Do not spray an aerosol
at or near your 340T.
Ensure that small objects do not fall through any ventilation grille. If this happens,
switch off immediately, disconnect from the mains supply and contact your dealer
for advice.
Refer all servicing to qualified service personnel. Servicing is required when the
unit has been damaged in any way, such as a damaged power-supply cord or plug,
liquid has been spilled or objects have fallen into the unit, the unit has been
exposed to rain or moisture, does not operate normally, or has been dropped.
If you have checked the troubleshooting guide in the manual with no improvement,
do not attempt to repair, disassemble or reconstruct the unit. A serious electric
shock could result if this precautionary measure is ignored.
IMPORTANT SAFETY INSTRUCTIONS

6 Azur FM/AM tuner
AC Power Socket
Once all connections have been made, plug the AC power cable into an
appropriate mains socket. Your 340T is now ready for use.
Audio Output
Connect to your amplifier using RCA/phono cables.
Control Bus
The Control Bus carries control information, in the form of demodulated
remote control signals, between the tuner and other Cambridge Audio
devices connected to it. The 340T will respond to appropriate commands,
as well as generating specific amplifier On/Off commands according to
the tuner’s Alarm and Sleep functions.
Audio
Output
Manufactured in an ISO9002 approved facility
This device complies with part 15 of FCC rules
FM 75Ω
FM 75Ω
AM 300Ω
AM 300Ω
Control Bus
Control Bus
Audio
Output
L
R
L
R
In
Out
In
Out
Power Rating: 230V AC 50Hz
Risk of electric shock
Do not open
Caution
Risque de choc electrique
Ne pas ouvrir
Avis
Vorm offnen des gerates
Netzstecker ziehen
Achtung
azur 340T FM/AM Tuner
Max Power Consumption:7W
Designed in London, England
www.cambridge-audio.com
REAR PANEL CONNECTIONS
FM Aerial
Connect an aerial to the FM 75 ohm socket (a simple wire aerial is
supplied for temporary use). Extend the lead and move the aerial around
until you get the best reception.
For continued use, we strongly recommened using a 75ohm outdoor
FM aerial.
AM Loop Aerial
Please note the supplied antenna wire is supplied for temporary indoor
use only. Connect each end of the single length antenna to the antenna
terminals. Place the antenna as far from the main system as possible to
prevent unwanted noise and to obtain optimum reception.
If the AM loop aerial provided does not receive sufficient reception, it
may be necessary to use an outdoor AM aerial.

340T FM/AM tuner
Azur FM/AM tuner 7
FM/AM Tuner
1/6 2/7 3/8 4/9 5/10 Shift
FM/AM Stereo/Mono Info Store/Mode
Standby / On
azur 340T
FRONT PANEL CONTROLS
Standby/On
Switches the 340T between Standby and On. When in Standby the front
panel display shows the current time in hours and minutes, as well as
the date if RDS clock mode is enabled.
Presets
The 340T can store up to 20 Presets for each of the FM and AM bands.
The Shift button alternates the 5 buttons between accessing Presets
1-5 and 6-10. To access Presets 11-20, hold down the Shift button. The
display will show which choice has been made.
FM/AM
This button switches between the FM and AM bands.
Stereo/Mono
Press this button to alternate between Stereo and Mono mode when
listening to FM broadcasts.
Info
Allows the user to select and view different information on the display.
When listening to the FM band, the display modes are Radiotext, RDS
Program Type, Signal Strength, Time, Stereo/Mono mode, and Info Off.
In AM mode, the user can see the Signal Strength and Time. RDS
information on the FM band is dependant on signal strength.
Store/Mode
Press the Store/Mode button once and the tuner will show the next
available Preset. Use the |<< >>| buttons to change the Preset number
as required, and press Store again to save the Preset. Holding down
Store/Mode changes the operation of the |<< >>| buttons between
Scan and Preset mode.
|<< >>|
Adjusts the tuner frequency when in Scan mode (the default setting).
Holding either button down will search for the next station. When in
Preset mode, the user can step through each of the stored Presets.

8 Azur FM/AM tuner
OPERATING INSTRUCTIONS
Tuning and Listening to the 340T
1. Press the Standby/On button on the front panel.
2. Select FM or AM by pushing the FM/AM button on front panel or
remote control.
3. Press the |<< >>| buttons to manually select the desired frequency,
or hold either button down to search for a station.
Automatic Tuning
To tune a station automatically, proceed as above, at step 3 press the
Store/Mode button once.
Press the Step |<< >>|button to select the station you want to listen to.
When a station is tuned in, the tuning process will stop automatically.
(Automatic selection).
Press |
<< >>|again to select another channel.
Setting Presets
Select the station you wish to store. Press the Store button once, then
use |<< >>| to select the slot where the station will be stored. Press
Store again to save it.
How to Select Preset Stations
1. Press the Standby/On button on the front panel.
2. Select FM or AM by pushing the FM/AM button on front panel or
remote control.
3. Press chosen preset button to listen to the corresponding station.
Alternately, hold down the Mode/Store button on front panel to enable
the preset tuning mode, then press the |<< >>| buttons to select a
preset station.
Setting the Clock
The user can either allow RDS transmissions to automatically set the
Clock Time/Date, or the Clock can be set manually. To change the Clock
mode, press and hold the Clock button on the remote control. Use the
|<< >>| buttons on the remote to change mode between RDS and
Manual. Press the Alarm button again to confirm your choice. If Manual
mode is selected, you can then set the time. Firstly, adjust the hour
using the |<< >>| buttons. When that is done, press Clock again to
adjust the minutes. Press Clock again to finish.
Setting the Alarm Time
The Alarm function will turn on the 340T at a chosen time. It will also
generate a command on the control bus that, when connected, will turn
on a Cambridge Audio azur series amplifier.
To set the Alarm time:
1. Press Alarm/Clock on your remote handset.
2. Use |<< >>| buttons to select if the alarm should be off, just work
once, or every day.
3. Press Clock.
4. Press | << >>| keys to alter the hour
5. Press Clock.
6. Press | << >>| keys to alter the minute
7. Press Clock to finish.

Azur FM/AM tuner 9
Setting the Sleep Time
The Sleep function will turn off the 340T at a chosen time. It will also
generate a command on the Control Bus that, when connected, will turn
off a compatible Cambridge Audio Azur series amplifier (such as the
540A V2.0, 640A V2.0 and 740A).
To set the Sleep time:
1. Press and hold Alarm/Clock and then press Standby on your
remote handset.
2. Press the | << >>| keys to alter the hour
3. Press Clock.
4. Press the | << >>| keys to alter the minute
5. Press Clock to finish.
Connecting the Control Bus
If it is desired to control a Cambridge Audio azur amplifier by the 340T’s
Alarm or Sleep timers, connect the two units via the orange Control Bus
sockets using the supplied orange RCA/phono lead as shown below:
340T FM/AM tuner
Custom Installation (C.I.) Use
The 340T has a Control Bus input/output that allow unmodulated remote
control commands (positive logic, TTL level) to be received electrically by
the unit and looped to another unit if desired. These control commands
are typically generated by custom installation (multi-room) systems.
The Control Bus sockets are colour coded orange and an appropriate
colour coded RCA/phono lead is provided for when this feature is used
(a plastic twist tie is also included for cable management). In addition
the 340T features direct IR/Control codes as well as toggle codes for
many of its features to simplify programming custom installation
systems. Special direct commands can be accessed on the supplied
remote control for teaching into C.I. systems as follows:
Specific power on/off commands – press and hold the Standby button.
The remote first generates it's usual amp and tuner standby (toggle)
commands (both are sent). Keep the button held down, after 12 seconds
an Amp On command will be generated, then if the button is kept held
down after a further 12 seconds an Amp off comand is generated, then
separated by 12 second pauses, Tuner On, and finally Tuner Off.
Specific band selection commands – press and hold the FM/AM key.
The usual band toggle command is first, then the FM Mode command,
followed by the AM Mode command is generated.
Specific Preset/Scan mode commands – Press and hold the Mode key.
The usual mode toggle command is first, then the Scan Mode
command, followed by the Preset Mode command.
Specific Mute On/Off commands – press and hold the Mute key. The
usual mute toggle command is first, followed by the Mute On command,
and then the Mute Off command.
A full code table for this product is available on the Cambridge Audio
website at www.cambridge-aaudio.com.
Audio
Output
Manufactured in an ISO9002 approved facility
This device complies with part 15 of FCC rules
FM 75Ω
FM 75Ω
AM 300Ω
AM 300Ω
Control Bus
Control Bus
Audio
Output
L
R
L
R
In
Out
In
Out
Power Rating: 230V AC 50Hz
Risk of electric shock
Do not open
Caution
Risque de choc electrique
Ne pas ouvrir
Avis
Vorm offnen des gerates
Netzstecker ziehen
Achtung
azur 340T FM/AM Tuner
Max Power Consumption:7W
Designed in London, England
www.cambridge-audio.com
Impedance 4 - 8 ohms
Loudspeaker Terminals
Important
Please ensure that loudspeaker terminals are fully tightened
Veuillez s'assurer que les bornes de l'enceinte sont entièrement serrées
Impedance 4 - 8 ohms
Right Left Right Left
Left
BA
LeftRight Right
BA
IR1
IR2 IR4
IR3
Keypad 1 Keypad 2
Pre-Out Tape In Rec Out 1 Rec Out 2 AV / MD DVD Tuner / DAB CD Aux
Pre-Out
Tape In
Rec Out 1
Rec Out 2
AV / MDDVD
Tuner / DAB
CD
Aux
Right
Left
Right
Left
Power AC
Max Power Consumption:600W
Off
Power
Mains Voltage Selector Switch (50 / 60Hz)
In Out
Control Bus
Caution Risk of electric shock. Do not open. Avis Risque de choc electrique. Ne pas ouvrir. Achtung Vorm öffnen des gërates. Netzstecker ziehen.
Multi-Room
IR Emitter
In
PSU
In
Designed in London, England
www.cambridge-audio.com
Manufactured in an
ISO9002 approved facility
Fault requiring
service (DC)
Over temperature
Temporary overload
Loudspeaker short
Protection LED
indicators:
Please refer to
your User's Manual
for more information
CAP5
Clipping
Vol Auto
On
340T
540A
V2.0

The 340T is supplied with a system remote control that operates both
this tuner and Cambridge Azur amplifiers.
Power
Switches the 340T between On and Standby mode. The
blue LED on the front panel of the 340T indicates that
it is On when bright and in Standby mode when dim.
1– 10 keys
These allow access to any stored presets you might
have saved in the 340T.
10 + key
Allows access to preset stations 11-20.
Store
To store a preset with the remote press Store then
use the |
<< >>|buttons to select the desired preset
location. Press store again to confirm.
FM/AM
This button switches between the FM and AM bands
that the 340T is capable of receiving.
|
<< >>|
For use with Tuning, Alarm and Clock settings.
Mode
Toggles between Scan and Preset modes, thereby
changing the functionality of the |<< >>| buttons.
10 Azur FM/AM tuner
USING THE REMOTE HANDSET
CD Tuner
DAB
DVD
Aux
Phono
AV
MD
Tape
Mon
Mode
Store FM/AM
i
Vol
Vol
Clock
This button is used to access the Alarm menu as discussed in the
Operation Instructions section of this manual.
i(Info)
Switches between the Display modes described in the Front Panel
Controls section. The RDS information on the FM band is dependant on
the strength of the signal.
Bright
Alters the brightness of the display backlight. There are three levels of
brightness: Bright, Normal, and Off.
Please note that the following buttons will only operate a matching
Cambridge Audio azur amplifier:
Volume +/-
Volume buttons to increase or decrease the Volume of the amplifier
output.
Source Select
The five Source Select buttons and the Tape Monitor Select button are
used to change the input source (CD, DVD etc).
Mute
This button mutes the audio on the amplifer. The Mute mode is indicated
by the channel LED flashing.

Azur FM/AM tuner 11
There is no Power
Ensure the AC power cord is connected securely.
Ensure the plug is fully inserted into the wall socket and is switched on.
Check fuse in the mains plug or adaptor.
There is no sound
Ensure that the amplifier is set correctly.
Check that the interconnects are inserted correctly.
The sound is distorted or garbled
Check aerial connections and placements.
There is a hum coming from the speaker
Ensure that all cable connections are secure.
There is unwanted background noise and interference
Move the tuner away from other electrical equipment that is likely to
cause interference.
The remote handset will not function
Check that the batteries have not expired.
Ensure that nothing is blocking the remote sensor.
TROUBLESHOOTING SPECIFICATIONS
Frequency
Range FM (87.5–108MHz) Europe
FM (88–108MHz) US
AM (531–1602kHz) Europe
AM (530–1710kHz) US
Aerial
Inputs 75 ohms unbalanced (FM)
50 ohms unbalanced (AM)
FM
Sensitivity -25dBm typical
Signal
to
Noise 50 dB typical (FM)
47dB typical (AM)
FM
Frequency
Response
(±3dB) 20Hz - 15KHz
Distortion <0.3%, @ 1KHz, 50KHz deviation (FM)
<0.9%, @ 1KHz (AM)
Stereo
Separation
@
1KHz >50dB (FM)
Maximum
Power
Consumption 7W
Standby
Power
Consumption 6.5 W
Dimensions
–
H
x
W
x
D70 x 430 x 305mm (2.75 x 17 x 12”)
Weight 4.10kg (9 lbs)
340T FM/AM tuner

12 Azur FM/AM tuner
Cambridge Audio warrants this product to be free from defects in
materials and workmanship (subject to the terms set forth below).
Cambridge Audio will repair or replace (at Cambridge Audio’s option)
this product or any defective parts in this product. Warranty periods may
vary from country to country. If in doubt consult your dealer and ensure
that you retain proof of purchase.
To obtain warranty service, please contact the Cambridge Audio
authorised dealer from which you purchased this product. If your dealer
is not equipped to perform the repair of your Cambridge Audio product,
it can be returned by your dealer to Cambridge Audio or an authorised
Cambridge Audio service agent. You will need to ship this product in
either its original packaging or packaging affording an equal degree
of protection.
Proof of purchase in the form of a bill of sale or receipted invoice, which
is evidence that this product is within the warranty period, must be
presented to obtain warranty service.
This warranty is invalid if (a) the factory-applied serial number has been
altered or removed from this product or (b) this product was not
purchased from a Cambridge Audio authorised dealer. You may call
Cambridge Audio or your local country Cambridge Audio distributor to
confirm that you have an unaltered serial number and/or you
purchased from a Cambridge Audio authorised dealer.
This warranty does not cover cosmetic damage or damage due to acts of
God, accident, misuse, abuse, negligence, commercial use, or modification
of, or to any part of, the product. This warranty does not cover damage
due to improper operation, maintenance or installation, or attempted
repair by anyone other than Cambridge Audio or a Cambridge Audio
dealer, or authorised service agent which is authorised to do Cambridge
Audio warranty work. Any unauthorised repairs will void this warranty.
This warranty does not cover products sold AS IS or WITH ALL FAULTS.
REPAIRS OR REPLACEMENTS AS PROVIDED UNDER THIS WARRANTY
ARE THE EXCLUSIVE REMEDY OF THE CONSUMER. CAMBRIDGE
AUDIO SHALL NOT BE LIABLE FOR ANY INCIDENTAL OR
CONSEQUENTIAL DAMAGES FOR BREACH OF ANY EXPRESS OR
IMPLIED WARRANTY IN THIS PRODUCT. EXCEPT TO THE EXTENT
PROHIBITED BY LAW, THIS WARRANTY IS EXCLUSIVE AND IN LIEU OF
ALL OTHER EXPRESS AND IMPLIED WARRANTIES WHATSOEVER
INCLUDING, BUT NOT LIMITED TO, THE WARRANTY OF MERCHANTABILITY
AND FITNESS FOR A PRACTICAL PURPOSE.
Some countries and US states do not allow the exclusion or limitation of
incidental or consequential damages or implied warranties so the
above exclusions may not apply to you. This warranty gives you specific
legal rights, and you may have other statutory rights, which vary from
state to state or country to country.
LIMITED WARRANTY

340T FM/AM Tuner
FM/AM Tuner der Azur Serie 13
Der 340T ist ein neu entwickelter FM/AM Tuner, der die Azur
Produktreihe von Cambridge Audio ergänzt.
Der 340T verfügt über anspruchsvolle Weck- und Schlummerzeitfunktionen,
welche die angeschlossenen und mit Kontrollbus-Ein-/Ausgängen
ausgestatteten Cambridge Audio Verstärker ein- und ausschalten können.
Die spezielle Version der Azur Fernbedienung ist für alle Funktionen des
Tuners ausgelegt, und zeichnet sich durch ihr attraktives Design und ihre
leichte Handhabung aus.
Jedes Gerät ist nur so gut, wie das System, an das es angeschlossen ist. Das
gilt auch für den 340T. Gehen Sie deshalb beim Verstärker, bei den
Lautsprechern oder bei den Kabeln keine Kompromisse ein. Wir empfehlen
daher, Verstärker und Kabel aus dem Sortiment von Cambridge Audio mit
hochwertigen Lautsprechern zu verwenden. Der Einsatz einer UKW/MW-
Außenantenne ist für beste Empfangsleistung des 340T notwendig.
Jetzt möchten wir Sie dazu einladen, sich zurückzulehnen, zu entspannen
und zu genießen!
Matthew Bramble
Technischer Direktor
EINLEITUNG
Einleitung . . . . . . . . . . . . . . . . . . . . . . . . . . . . . . . . . . . . . . . . . . . . . . . . . . . 13
Sicherheitsvorkehrungen . . . . . . . . . . . . . . . . . . . . . . . . . . . . . . . . . . . . . . 14
Wichtige Sicherheitshinweise . . . . . . . . . . . . . . . . . . . . . . . . . . . . . . . . . . . 15
Anschlüsse an der Rückseite des Geräts . . . . . . . . . . . . . . . . . . . . . . . . . . 16
Bedienelemente an der Vorderseite . . . . . . . . . . . . . . . . . . . . . . . . . . . . . . 17
Anweisungen zur Bedienung . . . . . . . . . . . . . . . . . . . . . . . . . . . . . . . . . . . . 18
Verwendung der Fernbedienung . . . . . . . . . . . . . . . . . . . . . . . . . . . . . . . . . 20
Fehlersuche und Fehlerbehebung . . . . . . . . . . . . . . . . . . . . . . . . . . . . . . . 21
Technische Daten . . . . . . . . . . . . . . . . . . . . . . . . . . . . . . . . . . . . . . . . . . . . 21
Haftungsbeschränkung . . . . . . . . . . . . . . . . . . . . . . . . . . . . . . . . . . . . . . . . 22
INHALTSVERZEICHNIS

14 FM/AM Tuner der Azur Serie
Kontrolle
der
Netzanschlussleistung
Bitte lesen Sie zu Ihrer eigenen Sicherheit die folgenden Anweisungen sorgfältig
durch, bevor Sie dieses Gerät an das Stromnetz anschließen.
Kontrollieren Sie, dass an der Rückseite des Gerätes die richtige Netzspannung
angegeben ist. Wenn Ihre Netzspannung von der angegebenen Spannung
abweicht, nehmen Sie bitte Kontakt mit Ihrem Händler auf.
Dieses Gerät funktioniert nur mit der Netzspannung und dem Spannungstyp,
die/der auf der Rückseite des Gerätes angegeben ist. Wenn das Gerät an eine
anders ausgelegte Stromversorgung angeschlossen wird, kann es beschädigt
werden.
Schalten Sie das Gerät aus, wenn es nicht verwendet wird, und benutzen Sie es
nicht ohne eine entsprechende Erdung. Um die Gefahr eines elektrischen Schlags
zu verringern, darf die Abdeckung (oder die Rückseite) des Geräts nicht entfernt
werden. Im Gerät befinden sich keine Teile, die vom Benutzer gewartet bzw.
repariert werden können. Überlassen Sie die Wartung qualifiziertem
Fachpersonal.
Das Symbol mit dem Blitz und der Pfeilspitze in einem gleichseitigen
Dreieck weist den Benutzer auf das Vorhandensein von nicht
isolierter "gefährlicher Spannung" im Inneren des Produkts hin, die
ausreichend stark sein kann, um die Gefahr eines elektrischen
Schlags für Personen darzustellen.
Das Ausrufungszeichen in einem gleichseitigen Dreieck weist den
Benutzer darauf hin, dass die mit diesem Produkt gelieferte
Dokumentation wichtige Betriebs- und Wartungsanweisungen für
das Gerät enthält.
SICHERHEITSVORKEHRUNGEN
Dieses Produkt erfüllt die europäische
Niederspannungsrichtlinie (73/23/EU) und die Richtlinien über
die Elektromagnetische Verträglichkeit (EMV) (89/336/EU),
wenn es in Übereinstimmung mit diesem Handbuch verwendet
und installiert wird. Damit das Produkt diese Richtlinien auch in
Zukunft erfüllt, darf bei diesem Gerät nur Zubehör von
Cambridge Audio verwendet werden, und die Wartung muss von
qualifizierten Kundendienstmitarbeitern ausgeführt werden.
Die durchgestrichene Abfalltonne auf Rädern ist das Symbol der
Europäischen Union, das das getrennte Sammeln von Elektro- und
Elektronikgeräten anzeigt. Dieses Gerät enthält elektrische und
elektronische Teile, die wiederverwendet, recycelt oder
wiederhergestellt werden können und nicht mit unsortiertem
normalem Restabfall entsorgt werden dürfen. Bitte geben Sie das
Gerät zurück oder wenden Sie sich für weitere Informationen an
Ihren Fachhändler, von dem Sie dieses Gerät gekauft haben.

Bitte nehmen Sie sich einen Moment Zeit und lesen Sie diese Hinweise durch,
bevor Sie Ihren Azur Tuner installieren; dadurch erhalten Sie die optimale
Leistung, und Sie verlängern die Lebensdauer Ihres Gerätes. Wir empfehlen
unbedingt, alle Anweisungen gut durchzulesen, alle Warnhinweise genau zu
beachten, und das Handbuch für spätere Zwecke sicher aufzuheben.
Dieses Gerät muss auf einer festen, ebenen Oberfläche aufgestellt werden. Da
die Netztransformatoren ein magnetisches Streufeld von mittlerer Stärke
erzeugen, sollte ein Plattenspieler nicht in der Nähe aufgestellt werden.
Das Gerät muss in einer Art und Weise installiert werden, die ein Abziehen des
Netzsteckers von der Netzsteckdose (oder einem Gerätestecker an der Rückseite
des Gerätes) ermöglicht.
Verbinden Sie den 340T nicht direkt mit einem Leistungsverstärker, wenn dieser
keine regelbare Ausgangsleistung aufweist.
Verlegen Sie das Stromkabel nicht so, dass jemand darauf treten kann, oder dass
es durch andere in der Nähe befindliche Gegenstände beschädigt werden kann.
Stellen Sie das Gerät nicht in einen abgeschlossenen Hohlraum, also nicht in
einen Bücherschrank oder in eine Vitrine. Jedes an der Rückseite offene Teil der
Wohneinrichtung (zum Beispiel ein speziell für Anlagen entworfenes Regal) ist
jedoch gut geeignet.
Das Gerät darf nicht in der Nähe von Wärmequellen wie Heizungen,
Heizspeichern, Öfen oder anderen Wärme ausstrahlenden Quellen (wie z.B.
Verstärkern) installiert werden.
Lassen Sie das Gerät nach der ersten Inbetriebnahme mindestens 36 Stunden
lang laufen (z.B. mit Musiksendungen), bevor Sie die Wiedergabeleistung kritisch
beurteilen. Das Gerät muss sich erst "einspielen". Rechnen Sie danach immer mit
einer Anlaufzeit von ca. 10-15 Minuten, bis die Wiedergabe optimal klingt.
Wenn Sie dieses Gerät über einen längeren Zeitraum nicht benutzen möchten,
schalten Sie es auf Standby und ziehen Sie den Stecker aus der Steckdose. Auch
bei einem Gewitter sollten Sie das Gerät immer von der Stromversorgung trennen.
WARNHINWEIS - Dieses Gerät darf nicht mit Regen oder Feuchtigkeit in Kontakt
kommen, da sonst die Gefahr eines Brands oder eines elektrischen Schlags
besteht. Tropfwasser, Spritzwasser oder andere Flüssigkeiten dürfen nicht an das
Gerät gelangen. Mit Flüssigkeit gefüllte Gegenstände, wie z.B. eine Vase, dürfen
deshalb nicht auf dem Gerät abgestellt werden. Sollte dennoch Flüssigkeit in das
Gerät gelangt sein, schalten Sie es sofort aus, trennen Sie es von der
Stromversorgung, und fragen Sie Ihren Händler um Rat.
Sie reinigen das Gerät, indem Sie das Gehäuse mit einem feuchten, nicht
fusselnden Tuch abwischen. Verwenden Sie keine Reinigungsflüssigkeiten, die
Alkohol, Ammoniak oder Scheuermittel enthalten. Verwenden Sie bei oder in der
Nähe Ihres 340T keine Spraydosen.
Bitte überlassen Sie alle Wartungs- und Reparaturarbeiten qualifizierten
Fachkräften. Solche Wartungs- und Reparaturarbeiten sind erforderlich, wenn das
Gerät beschädigt wurde (z.B. am Netzstecker oder am Netzkabel), wenn
Flüssigkeit oder ein Gegenstand in das Gerät gelangt ist, wenn das Gerät Regen
oder Feuchtigkeit ausgesetzt war, wenn es nicht normal funktioniert, oder wenn
es fallen gelassen wurde.
Wenn die Anleitung zur Fehlersuche und Fehlerbehebung in diesem Handbuch
nicht zu einer Verbesserung führt, sollten Sie nicht versuchen, das Gerät selbst zu
reparieren, zu zerlegen oder umzubauen. Wenn diese Sicherheitsmaßnahme
nicht beachtet wird, kann dies einen gefährlichen elektrischen Schlag zur Folge
haben.
WICHTIGE INFORMATIONEN FÜR IHRE SICHERHEIT
340T FM/AM Tuner
FM/AM Tuner der Azur Serie 15

16 FM/AM Tuner der Azur Serie
Netzanschluss
Nachdem Sie alle Anschlüsse am Gerät vorgenommen haben, stecken Sie
das Netzkabel in eine geeignete Steckdose. Jetzt ist Ihr 340T einsatzbereit.
Audio-Ausgang
Schließen Sie hier Ihren Verstärker mit RCA/Phonokabeln an.
Kontrollbus
Der Kontrollbus überträgt Steuerinformationen in Form von demodulierten
Fernbedienungssignalen zwischen Tuner und anderen Cambridge Audio
Geräten, die daran angeschlossen sind. Der 340T reagiert auf entsprechende
Befehle und generiert bestimmte Ein-/Aus-Befehle für den Verstärker gemäß
den Weck- und Schlummerzeitfunktionen des Tuners.
Audio
Output
Manufactured in an ISO9002 approved facility
This device complies with part 15 of FCC rules
FM 75Ω
FM 75Ω
AM 300Ω
AM 300Ω
Control Bus
Control Bus
Audio
Output
L
R
L
R
In
Out
In
Out
Power Rating: 230V AC 50Hz
Risk of electric shock
Do not open
Caution
Risque de choc electrique
Ne pas ouvrir
Avis
Vorm offnen des gerates
Netzstecker ziehen
Achtung
azur 340T FM/AM Tuner
Max Power Consumption:7W
Designed in London, England
www.cambridge-audio.com
ANSCHLÜSSE AN DER RÜCKSEITE DES GERÄTS
UKW-Antenne
Schließen Sie eine Antenne an die Buchse FM 75 Ohm an (eine einfache
Drahtantenne ist für kurzfristigen Gebrauch im Lieferumfang enthalten).
Verlängern Sie die Leitung und bewegen Sie die Antenne umher, bis Sie den
besten Empfang erhalten.
Für langfristigen Gebrauch empfehlen wir die Verwendung einer 75-Ohm-
UKW-Außenantenne.
MW-Ringantenne
Bitte beachten Sie, dass die mitgelieferte Drahtantenne nur für kurzfristigen
Gebrauch in der Wohnung ist. Verbinden Sie die Enden der Antenne mit den
Antennenanschlüssen am Gerät. Stellen Sie die Antenne so weit weg von der
Hauptanlage wie möglich, um unerwünschte Störgeräusche zu vermeiden
und optimalen Empfang sicherzustellen.
Wenn die MW-Ringantenne keinen guten Empfang bietet, kann die
Verwendung einer MW-Außenantenne Abhilfe schaffen.

Info
Damit können Sie die verschiedenen Informationen auf dem Display
anzeigen und auswählen. Bei UKW-Empfang stehen die Display-Modi
„Radiotext“, „RDS-Programme“, „Signalstärke“, „Zeit“, „Stereo/Mono“ und
„Info aus“ zur Verfügung. Bei MW-Empfang können Sie die Signalstärke und
Zeit sehen. Der Empfang von RDS-Daten im UKW-Band ist von der
Signalstärke abhängig.
Store/Mode (Speichern/Modus)
Drücken Sie die Taste „Store/Mode“ (Speichern/Modus) einmal und der
Tuner zeigt den nächsten verfügbaren Senderplatz an. Mit den Tasten
|<< >>| können Sie die Nummer des Senderplatzes nach Bedarf ändern.
Drücken Sie dann die Taste „Store“ (Speichern) erneut, um den Senderplatz
zu speichern. Wenn Sie die Taste „Store/Mode" (Speichern/Modus) gedrückt
halten, wechselt die Funktion der Tasten |<< >>| zwischen „Scan“
(Suchlauf) und „Preset“ (Senderplatz).
|<< >>|
Sie können die Tuner-Frequenz im Standardmodus „Scan“ (Suchlauf)
ändern. Halten Sie eine der beiden Tasten gedrückt, um den nächsten
Sender zu suchen. Im Modus „Preset“ (Senderplatz) können Sie durch die
gespeicherten Senderplätze blättern.
340T FM/AM Tuner
FM/AM Tuner der Azur Serie 17
FM/AM Tuner
1/6 2/7 3/8 4/9 5/10 Shift
FM/AM Stereo/Mono Info Store/Mode
Standby / On
azur 340T
BEDIENELEMENTE AN DER VORDERSEITE
Standby/On (Standby/Ein)
Mit dieser Taste können Sie zwischen Standby und ON (Ein) wechseln. Im
Standby-Betrieb wird am Frontdisplay die aktuelle Zeit in Stunden und
Minuten sowie das Datum angezeigt, Letzteres nur sofern die RDS-Uhrzeit
aktiviert ist.
Presets (Senderplätze)
Der 340T kann bis zu 20 Sender pro UKW- und MW-Band speichern. Mit der
Taste „Shift“ (Umschalten) wechseln Sie zwischen den Senderplätzen
1-5 und 6-10. Halten Sie die Taste „Shift“ (Umschalten) gedrückt, um zu den
Senderplätzen 11-20 zu gelangen. Die aktuelle Auswahl wird am Display
angezeigt.
FM/AM
Mit dieser Taste können Sie zwischen den Bändern UKW und MW wechseln.
Stereo/Mono
Mit dieser Taste können Sie bei UKW-Sendern zwischen der Wiedergabe in
Mono und Stereo wechseln.

18 FM/AM Tuner der Azur Serie
ANWEISUNGEN ZUR BEDIENUNG
Einstellen des Senders am 340T
1. Drücken Sie die Taste „Standby/On“ (Standby/Ein) am vorderen
Bedienfeld des Geräts.
2. Wählen Sie UKW oder MW, indem Sie die Taste „FM/AM“ (UKW/MW)
vorn am Gerät oder an der Fernbedienung drücken.
3. Drücken Sie die Tasten |<< >>|, um die gewünschte Frequenz von Hand
einzustellen, oder halten Sie eine der beiden Tasten gedrückt, um nach
einem Sender zu suchen.
Automatische Senderwahl
Für einen automatischen Suchlauf gehen Sie wie oben vor. Bei Schritt 3
drücken Sie die Taste „Store/Mode" (Speichern/Modus) einmal.
Drücken Sie die Taste |<< >>|, um den gewünschten Sender auszuwählen.
Sobald ein Sender gefunden wurde, wird der Suchlauf automatisch
gestoppt. (Automatischer Suchlauf).
Drücken Sie die Tasten |<< >>|erneut, um einen anderen Kanal zu wählen.
Speichern von Senderplätzen
Wählen Sie den Sender, den Sie speichern möchten. Drücken Sie einmal die
Taste „Store“ (Speichern) und verwenden Sie dann die Tasten |<< >>|, um
den Senderplatz zu wählen, auf dem der Sender gespeichert werden soll.
Drücken Sie die Taste „Store“ (Speichern) erneut, um zu speichern.
Aufrufen von gespeicherten Sendern
1. Drücken Sie die Taste „Standby/On“ (Standby/Ein) am vorderen
Bedienfeld des Geräts.
2. Wählen Sie UKW oder MW, indem Sie die Taste „FM/AM“ (UKW/MW)
vorn am Gerät oder an der Fernbedienung drücken.
3. Drücken Sie die Taste „Preset“ (Senderplatz), um den entsprechenden
Sender aufrufen.
Sie können auch die Taste „Store/Mode“ (Speichern/Modus) auf dem
vorderen Bedienfeld des Geräts drücken, um die Senderwahl zu aktivieren.
Drücken Sie dann die Tasten |<< >>|, um einen gespeicherten Sender
auszuwählen.
Stellen der Uhr
Sie können entweder RDS-Übertragungen automatisch Uhrzeit/Datum
einstellen lassen oder die Uhr von Hand stellen. Drücken und halten Sie die
Taste „Wecker“ auf der Fernbedienung, um die Uhr stellen zu können.
Verwenden Sie die Tasten |<< >>| auf der Fernbedienung, um zwischen
„RDS“ und „Manual“ (von Hand einstellen) zu wechseln. Drücken Sie erneut
die Taste „Wecker“, um Ihre Wahl zu bestätigen. Wenn Sie „Manual“ (von
Hand einstellen) gewählt haben, können Sie nun die Uhrzeit einstellen.
Stellen Sie dazu zuerst die Stunde mit Hilfe der Tasten |<< >>| ein. Drücken
Sie danach die Taste „Wecker“ erneut, um nun die Minuten einzustellen.
Drücken Sie die Taste „Wecker“ noch einmal, um den Einstellvorgang zu
beenden.
Einstellen der Weckzeit
Mit der Weckfunktion wird der 340T zur eingestellten Zeit eingeschaltet. Sie
generiert auch einen Befehl auf dem Kontrollbus, der den Cambridge Audio
Verstärker der Azur Serie einschaltet, sofern ein solcher (z.B. der 540A V2.0,
640A V2.0 oder 740A) angeschlossen ist.
Einstellen der Weckzeit:
1. Drücken Sie die Taste „Alarm/Clock“ (Wecker) auf der Fernbedienung.
2. Wählen Sie mit Hilfe der Tasten |<< >>|, ob der Wecker ausgeschaltet,
einmal ausgelöst oder täglich ausgelöst werden soll.
3. Drücken Sie die Taste „Wecker“.
4. Drücken Sie die Tasten | << >>|, um die Stunde zu ändern.
5. Drücken Sie die Taste „Wecker“.
6. Drücken Sie die Tasten | << >>|, um die Minuten zu ändern.
7. Drücken Sie die Taste „Wecker“ noch einmal, um den Einstellvorgang
zu beenden.

FM/AM Tuner der Azur Serie 19
Einstellen der Schlummerzeit
Mit der Schlummerfunktion wird der 340T zur eingestellten Zeit
ausgeschaltet. Sie generiert auch einen Befehl auf dem Kontrollbus, der den
Cambridge Audio Verstärker der Azur Serie ausschaltet, sofern ein solcher
(z.B. der 540A V2.0, 640A V2.0 oder 740A) angeschlossen ist.
Einstellen der Schlummerzeit:
1. Drücken und halten Sie die Taste „Alarm/Clock“ (Wecker) und dann die
Taste „Standby“ auf der Fernbedienung.
2. Drücken Sie die Tasten | << >>|, um die Stunde zu ändern.
3. Drücken Sie die Taste „Wecker“.
4. Drücken Sie die Tasten | << >>|, um die Minuten zu ändern.
5. Drücken Sie die Taste „Wecker“ noch einmal, um den Einstellvorgang zu
beenden.
Anschließen des Kontrollbus
Verbinden Sie den Cambridge Audio Verstärker der Azur Serie und den 340T
über die orangefarbenen Kontrollbus-Buchsen „Control Bus“ mit Hilfe des im
Lieferumfang enthaltenen orangefarbenen RCA/Phonokabels, (siehe unten),
wenn Sie den Verstärker über den Wecker- oder Schlummer-Timer des 340T
steuern möchten:
340T FM/AM Tuner
Verwendung mit kundenspezifischen Systemen
Der 340T hat einen Kontrollbus-Ein-/Ausgang, mit dem unmodulierte
Fernbedienungsbefehle (positive Logik, TTL-Ebene) elektrisch vom Gerät
empfangen und bei Bedarf an ein anderes Gerät weitergeleitet werden kann.
Diese Steuerbefehle werden normalerweise von kundenspezifischen Systemen
(Mehrraumsystemen) generiert.
Die Buchsen „Control Bus“ (Kontrollbus) sind orange farbcodiert und ein
entsprechend farbcodiertes RCA/Phonokabel ist im Lieferumfang für den Fall
enthalten, dass diese Funktion verwendet werden soll. Darüber hinaus verfügt der
340T über direkte Infrarot-/Steuercodes sowie Umschaltcodes für viele seiner
Funktionen, um das Programmieren von kundenspezifischen Systemen zu
vereinfachen. Direkte Sonderbefehle können auf der mitgelieferten
Fernbedienung folgendermaßen aufgerufen werden, um den Umgang mit den
kundenspezifischen Systemen zu erlernen:
Spezifische Ein-/Ausschaltbefehle – Drücken und halten Sie die Taste „Standby“.
Die Fernbedienung generiert zuerst die normalen Standby-Befehle (Umschalten)
für den Verstärker und den Tuner (beide werden gesendet). Halten Sie die Taste
gedrückt. Nach 12 Sekunden wird ein Befehl „Amp On“ (Verstärker ein) generiert.
Wenn die Taste weitere 12 Sekunden gedrückt gehalten wird, wird ein Befehl
„Amp off“ (Verstärker aus) generiert. Nach einer Pause von jeweils 12 Sekunden
werden die Befehle „Tuner On“ (Tuner ein) und schließlich „Tuner off“ (Tuner aus)
gesendet.
Spezifische Bandwahlbefehle – Drücken und halten Sie die Taste „FM/AM“
(UKW/MW). Zuerst wird der übliche Bandumschaltbefehl, dann der UKW- und
schließlich der MW-Befehl generiert.
Spezifische Senderplatz-/Suchlaufbefehle – Drücken und halten Sie die Taste
„Mode“ (Modus). Zuerst wird der übliche Modusumschaltbefehl, dann der
Suchlauf- und schließlich der Senderplatz-Befehl generiert.
Spezifische Stumm-Ein-/Ausschaltbefehle – Drücken und halten Sie die Taste
„Stummschalten“. Zuerst wird der übliche Stummumschaltbefehl, dann der
Stumm-Ein- und schließlich der Stumm-Ausschalt-Befehl generiert.
Eine vollständige Tabelle für dieses Gerät finden Sie auf der Cambridge Audio
Website unter wwwwww..ccaammbbrriiddggee-aauuddiioo..ccoomm.
Audio
Output
Manufactured in an ISO9002 approved facility
This device complies with part 15 of FCC rules
FM 75Ω
FM 75Ω
AM 300Ω
AM 300Ω
Control Bus
Control Bus
Audio
Output
L
R
L
R
In
Out
In
Out
Power Rating: 230V AC 50Hz
Risk of electric shock
Do not open
Caution
Risque de choc electrique
Ne pas ouvrir
Avis
Vorm offnen des gerates
Netzstecker ziehen
Achtung
azur 340T FM/AM Tuner
Max Power Consumption:7W
Designed in London, England
www.cambridge-audio.com
Impedance 4 - 8 ohms
Loudspeaker Terminals
Important
Please ensure that loudspeaker terminals are fully tightened
Veuillez s'assurer que les bornes de l'enceinte sont entièrement serrées
Impedance 4 - 8 ohms
Right Left Right Left
Left
BA
LeftRight Right
BA
IR1
IR2 IR4
IR3
Keypad 1 Keypad 2
Pre-Out Tape In Rec Out 1 Rec Out 2 AV / MD DVD Tuner / DAB CD Aux
Pre-Out
Tape In
Rec Out 1
Rec Out 2
AV / MDDVD
Tuner / DAB
CD
Aux
Right
Left
Right
Left
Power AC
Max Power Consumption:600W
Off
Power
Mains Voltage Selector Switch (50 / 60Hz)
In Out
Control Bus
Caution Risk of electric shock. Do not open. Avis Risque de choc electrique. Ne pas ouvrir. Achtung Vorm öffnen des gërates. Netzstecker ziehen.
Multi-Room
IR Emitter
In
PSU
In
Designed in London, England
www.cambridge-audio.com
Manufactured in an
ISO9002 approved facility
Fault requiring
service (DC)
Over temperature
Temporary overload
Loudspeaker short
Protection LED
indicators:
Please refer to
your User's Manual
for more information
CAP5
Clipping
Vol Auto
On
340T
540A
V2.0

Mode (Modus)
Mit dieser Taste können Sie zwischen „Scan“ (Suchlauf) und „Preset“
(Senderplatz) wechseln, was die Funktion der Tasten |<< >>| beeinflusst.
Wecker
Mit dieser Taste rufen Sie das Menü „Alarm“ (Wecken) auf. Näheres dazu
finden Sie unter „Anweisungen zur Bedienung“ in diesem Handbuch.
i(Info)
Mit dieser Taste können Sie zwischen den im Abschnitt „Bedienelemente an
der Vorderseite“ beschriebenen Display-Modi wechseln. Der Empfang von
RDS-Daten im UKW-Band ist von der Signalstärke abhängig.
Sonne (Helligkeit)
Mit dieser Taste ändern Sie die Helligkeit der Hintergrundbeleuchtung des
Displays. Es stehen Ihnen drei Helligkeitsstufen zur Verfügung: Hell, normal
und aus.
Hinweis: Die anschließend aufgeführten Tasten funktionieren nur, wenn
ein entsprechender Verstärker aus der Azur Serie von Cambridge Audio
angeschlossen ist.
Volume +/- (Lautstärke)
Mit den Tasten „Volume +/-“ können Sie die Lautstärke am Ausgang des
Verstärkers einstellen.
Signalquellen-Auswahltasten
Mit den fünf Signalquellen-Auswahltasten und der Taste „Tape Monitor“
(Bandüberwachung) können Sie das Signaleingangsgerät (CD, DVD usw.)
festlegen.
Mute (Stummschalten)
Mit dieser Taste können Sie den Ton am Verstärker stummschalten. Die
Stummschaltung wird durch ein Blinken der Kanal-LED angezeigt.
Dem 340T liegt eine Fernbedienung bei, die sowohl für die Bedienung dieses
Tuners als auch für Verstärker aus der Cambridge Azur Serie geeignet ist.
Ein/Aus
Mit dieser Taste können Sie zwischen Standby und ON (Ein)
wechseln. Die blaue LED an der Vorderseite des 340T
leuchtet bei ON (Ein) hell und im Standby-Betrieb
schwach.
Tasten 1– 10
Mit diesen Tasten können Sie direkt auf die im 340T
gespeicherten Senderplätze zugreifen.
Taste 10 +
Mit dieser Taste können Sie auf die gespeicherten
Senderplätze 11-20 zugreifen.
Store (Speichern)
Zum Speichern eines Senders mit Hilfe der
Fernbedienung drücken Sie einfach die Taste „Store“
(Speichern) und verwenden dann die Tasten |<< >>|,
um den gewünschten Senderplatz zu wählen, auf dem
der Sender gespeichert werden soll. Drücken Sie die
Taste „Store“ (Speichern) noch einmal, um zu
bestätigen.
FM/AM (UKW/MW)
Mit dieser Taste können Sie zwischen den UKW- und
MW-Bändern wählen, die der 340T empfangen kann.
|<< >>|
Diese Tasten werden bei der manuellen Einstellung des
Senders, der Weckzeit und der Uhrzeit verwendet.
20 FM/AM Tuner der Azur Serie
VERWENDUNG DER FERNBEDIENUNG
CD Tuner
DAB
DVD
Aux
Phono
AV
MD
Tape
Mon
Mode
Store FM/AM
i
Vol
Vol
Other manuals for Azur 340T
3
Table of contents
Languages:
Other Cambridge Audio Tuner manuals

Cambridge Audio
Cambridge Audio Azur 640T Administrator guide

Cambridge Audio
Cambridge Audio Azur 640T User manual

Cambridge Audio
Cambridge Audio DAB300 User manual

Cambridge Audio
Cambridge Audio DAB500 User manual

Cambridge Audio
Cambridge Audio Azur 640T V2 User manual

Cambridge Audio
Cambridge Audio AZUR 651T User manual

Cambridge Audio
Cambridge Audio T Series User manual

Cambridge Audio
Cambridge Audio Azur 340T Administrator guide

Cambridge Audio
Cambridge Audio Azur 550T User manual

Cambridge Audio
Cambridge Audio Azur 340T User manual