Campbell PS150 User manual

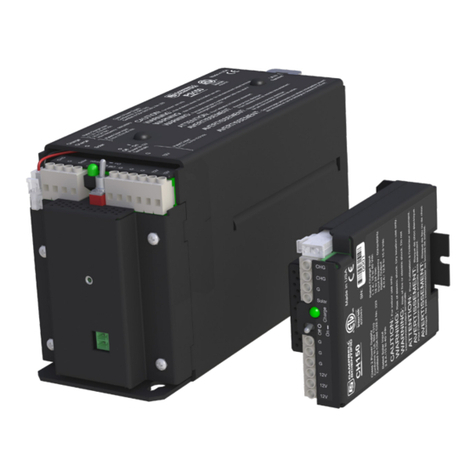
PS150/CH150
12 V Charging Regulators
Revision: 20/6/19
Copyright © 2000 – 2019
Campbell Scientific


Guarantee
This equipment is guaranteed against defects in materials and workmanship.
We will repair or replace products which prove to be defective during the
guarantee period as detailed on your invoice, provided they are returned to us
prepaid. The guarantee will not apply to:
Equipment which has been modified or altered in any way without the
written permission of Campbell Scientific
Batteries
Any product which has been subjected to misuse, neglect, acts of God or
damage in transit.
Campbell Scientific will return guaranteed equipment by surface carrier
prepaid. Campbell Scientific will not reimburse the claimant for costs incurred
in removing and/or reinstalling equipment. This guarantee and the Company’s
obligation thereunder is in lieu of all other guarantees, expressed or implied,
including those of suitability and fitness for a particular purpose. Campbell
Scientific is not liable for consequential damage.
Please inform us before returning equipment and obtain a Repair Reference
Number whether the repair is under guarantee or not. Please state the faults as
clearly as possible, and if the product is out of the guarantee period it should
be accompanied by a purchase order. Quotations for repairs can be given on
request. It is the policy of Campbell Scientific to protect the health of its
employees and provide a safe working environment, in support of this policy a
“Declaration of Hazardous Material and Decontamination” form will be
issued for completion.
When returning equipment, the Repair Reference Number must be clearly
marked on the outside of the package. Complete the “Declaration of
Hazardous Material and Decontamination” form and ensure a completed copy
is returned with your goods. Please note your Repair may not be processed if
you do not include a copy of this form and Campbell Scientific Ltd reserves
the right to return goods at the customers’ expense.
Note that goods sent air freight are subject to Customs clearance fees which
Campbell Scientific will charge to customers. In many cases, these charges are
greater than the cost of the repair.
Campbell Scientific Ltd,
80 Hathern Road,
Shepshed, Loughborough, LE12 9GX, UK
Tel: +44 (0) 1509 601141
Fax: +44 (0) 1509 270924
Email: support@campbellsci.co.uk
www.campbellsci.co.uk


PLEASE READ FIRST
About this manual
Please note that this manual was originally produced by Campbell Scientific Inc. primarily for the North
American market. Some spellings, weights and measures may reflect this origin.
Some useful conversion factors:
Area: 1 in2(square inch) = 645 mm2
Length: 1 in. (inch) = 25.4 mm
1 ft (foot) = 304.8 mm
1 yard = 0.914 m
1 mile = 1.609 km
Mass: 1 oz. (ounce) = 28.35 g
1 lb (pound weight) = 0.454 kg
Pressure: 1 psi (lb/in2) = 68.95 mb
Volume: 1 UK pint = 568.3 ml
1 UK gallon = 4.546 litres
1 US gallon = 3.785 litres
In addition, while most of the information in the manual is correct for all countries, certain information
is specific to the North American market and so may not be applicable to European users.
Differences include the U.S standard external power supply details where some information (for
example the AC transformer input voltage) will not be applicable for British/European use. Please note,
however, that when a power supply adapter is ordered it will be suitable for use in your country.
Reference to some radio transmitters, digital cell phones and aerials may also not be applicable
according to your locality.
Some brackets, shields and enclosure options, including wiring, are not sold as standard items in the
European market; in some cases alternatives are offered. Details of the alternatives will be covered in
separate manuals.
Part numbers prefixed with a “#” symbol are special order parts for use with non-EU variants or for
special installations. Please quote the full part number with the # when ordering.
Recycling information
At the end of this product’s life it should not be put in commercial or domestic refuse but
sent for recycling. Any batteries contained within the product or used during the
products life should be removed from the product and also be sent to an appropriate
recycling facility.
Campbell Scientific Ltd can advise on the recycling of the equipment and in some cases
arrange collection and the correct disposal of it, although charges may apply for some
items or territories.
For further advice or support, please contact Campbell Scientific Ltd, or your local agent.
Campbell Scientific Ltd, 80 Hathern Road, Shepshed, Loughborough, LE12 9GX,
UK Tel: +44 (0) 1509 601141 Fax: +44 (0) 1509 270924
Email: support@campbellsci.co.uk
www.campbellsci.co.uk


Safety
DANGER —MANY HAZARDS ARE ASSOCIATED WITH INSTALLING, USING, MAINTAINING, AND WORKING ON
OR AROUND TRIPODS, TOWERS, AND ANY ATTACHMENTS TO TRIPODS AND TOWERS SUCH AS SENSORS,
CROSSARMS, ENCLOSURES, ANTENNAS, ETC. FAILURE TO PROPERLY AND COMPLETELY ASSEMBLE,
INSTALL, OPERATE, USE, AND MAINTAIN TRIPODS, TOWERS, AND ATTACHMENTS, AND FAILURE TO HEED
WARNINGS, INCREASES THE RISK OF DEATH, ACCIDENT, SERIOUS INJURY, PROPERTY DAMAGE, AND
PRODUCT FAILURE. TAKE ALL REASONABLE PRECAUTIONS TO AVOID THESE HAZARDS. CHECK WITH YOUR
ORGANIZATION'S SAFETY COORDINATOR (OR POLICY) FOR PROCEDURES AND REQUIRED PROTECTIVE
EQUIPMENT PRIOR TO PERFORMING ANY WORK.
Use tripods, towers, and attachments to tripods and towers only for purposes for which they are designed. Do not
exceed design limits. Be familiar and comply with all instructions provided in product manuals. Manuals are
available at www.campbellsci.eu or by telephoning +44(0) 1509 828 888 (UK). You are responsible for conformance
with governing codes and regulations, including safety regulations, and the integrity and location of structures or land
to which towers, tripods, and any attachments are attached. Installation sites should be evaluated and approved by a
qualified engineer. If questions or concerns arise regarding installation, use, or maintenance of tripods, towers,
attachments, or electrical connections, consult with a licensed and qualified engineer or electrician.
General
•Prior to performing site or installation work, obtain required approvals and permits. Comply with all
governing structure-height regulations, such as those of the FAA in the USA.
•Use only qualified personnel for installation, use, and maintenance of tripods and towers, and any
attachments to tripods and towers. The use of licensed and qualified contractors is highly recommended.
•Read all applicable instructions carefully and understand procedures thoroughly before beginning work.
•Wear a hardhat and eye protection, and take other appropriate safety precautions while working on or
around tripods and towers.
•Do not climb tripods or towers at any time, and prohibit climbing by other persons. Take reasonable
precautions to secure tripod and tower sites from trespassers.
•Use only manufacturer recommended parts, materials, and tools.
Utility and Electrical
•You can be killed or sustain serious bodily injury if the tripod, tower, or attachments you are installing,
constructing, using, or maintaining, or a tool, stake, or anchor, come in contact with overhead or
underground utility lines.
•Maintain a distance of at least one-and-one-half times structure height, or 20 feet, or the distance
required by applicable law, whichever is greater, between overhead utility lines and the structure (tripod,
tower, attachments, or tools).
•Prior to performing site or installation work, inform all utility companies and have all underground utilities
marked.
•Comply with all electrical codes. Electrical equipment and related grounding devices should be installed
by a licensed and qualified electrician.
Elevated Work and Weather
•Exercise extreme caution when performing elevated work.
•Use appropriate equipment and safety practices.
•During installation and maintenance, keep tower and tripod sites clear of un-trained or non-essential
personnel. Take precautions to prevent elevated tools and objects from dropping.
•Do not perform any work in inclement weather, including wind, rain, snow, lightning, etc.
Maintenance
•Periodically (at least yearly) check for wear and damage, including corrosion, stress cracks, frayed cables,
loose cable clamps, cable tightness, etc. and take necessary corrective actions.
•Periodically (at least yearly) check electrical ground connections.
WHILE EVERY ATTEMPT IS MADE TO EMBODY THE HIGHEST DEGREE OF SAFETY IN ALL CAMPBELL
SCIENTIFIC PRODUCTS, THE CUSTOMER ASSUMES ALL RISK FROM ANY INJURY RESULTING FROM IMPROPER
INSTALLATION, USE, OR MAINTENANCE OF TRIPODS, TOWERS, OR ATTACHMENTS TO TRIPODS AND TOWERS
SUCH AS SENSORS, CROSSARMS, ENCLOSURES, ANTENNAS, ETC.



i
Contents
PDF viewers: These page numbers refer to the printed version of this document. Use the
PDF reader bookmarks tab for links to specific sections.
1. Introduction................................................................1
2. Precautions and Tips.................................................2
3. Quick Start .................................................................3
3.1 Connecting Power................................................................................4
3.1.1 Solar Panel....................................................................................5
3.1.2 AC/DC Power...............................................................................5
3.2 Plug In the Battery ...............................................................................6
3.3 Hook Up Power to Datalogger.............................................................8
3.4 Turn On the Charging Source ..............................................................8
3.5 Turn On Power to the Datalogger ........................................................8
3.6 LED Indicator ......................................................................................8
4. Specifications ............................................................9
4.1 Specifications.......................................................................................9
4.2 Battery Packs .....................................................................................10
4.3 Charging Sources...............................................................................10
5. Operational Overview..............................................11
6. Charging Details ......................................................13
6.1 Charging Algorithm...........................................................................13
6.2 Maximum Power Point Tracking.......................................................13
7. A100 Null Modem Adapter.......................................14
8. A105 Additional 12 V Terminals Adapter ...............16
9. References ...............................................................16
Figures
3-1. The PS150 connected to a CR1000 and AC power..............................3
3-2. The PS150 connected to a CR1000 and solar panel.............................4
3-3. CH150 connected to BP24 battery pack and CR1000 .........................4
3-4. Solar panel connections on PS150.......................................................5
3-5. AC power connections on PS150.........................................................6
3-6. Lift latch up on PS150 .........................................................................7
3-7. Slide PS150 lid off...............................................................................7
3-8. Wiring harness plugged into battery connector....................................8
5-1. PS150/CH150 Schematic ……………………………………………12
6-1. 70 W solar panel I –V and power characteristics..............................14
7-1. Null modem connections ...................................................................14
7-2. Installing the A100.............................................................................15
7-3. A100 mounting screw ………………………………………………..15
8-1. A105 adapter......................................................................................16

ii

1
PS150/CH150 12V Charging Regulators
1. Introduction
The PS150 is a 12 VDC power supply that includes a rechargeable 7 Ah valve-
regulated lead-acid (VRLA) battery and charging regulator. The CH150 is a
charging regulator for an external rechargeable 12 V VRLA battery such as the
BP12 or BP24 offered by Campbell Scientific. Charging power for these charging
regulators is typically supplied by an unregulated solar panel, AC/AC transformer,
or AC/DC converter.
The PS150/CH150 are smart chargers that provide charging with temperature
compensation for optimal charging and battery life. A maximum power point
tracking algorithm is incorporated for solar inputs to maximize available solar
charging resources.
The PS150/CH150 are compatible with the A100 null-modem adapter and the
A105 adapter for additional 12 V output terminals. The A100 Null Modem
Adapter connects and powers two Campbell Scientific peripherals via two CS I/O
9-pin connectors configured as a null modem. This is useful in linking different
communications technologies; e.g., telephone to radio, at sites that do not have a
datalogger. The A105 adapter may be used to provide additional 12 V and ground
terminals where the power supply is used to power several devices. See Section 7,
A100 Null Modem Adapter and Section 8, A105 Additional 12 V Terminals
Adapter for more information.
The PS150/CH150 charging regulators are termed series regulators, because the
regulators are placed in series between the charging source and the load. As
batteries become closer to fully charged, series regulators reduce the current
drawn from the charging source, to where the charging source may be completely
unloaded if full-charge is reached. While this unloading of the charging source is
acceptable for solar panels, AC/AC transformers and AC/DC converters, it is
undesirable for wind turbines because of the resulting free spinning when
unloaded. Consequently, series charging regulators, including the PS150/CH150,
should not be used to regulate the output of wind turbines without the inclusion of
a way to load the turbine when the batteries require little or no charging current.
The PS150/CH150 chargers have several safety features intended to protect the
charging source, battery, charger, and load devices. Both the SOLAR –G and
CHARGE –CHARGE input terminals incorporate hardware current limits and
polarity reversal protection. There is a 5 A fuse in series with the CHARGE –
CHARGE inputs in the event of a catastrophic AC/AC or AC/DC charging source
failure. There is a 4.7 A solid-state breaker in series with the 12 V output
terminals of the charger in the event of an output load fault. The PS150/CH150
incorporate battery reversal protection, which is catastrophic for most chargers.
ESD and surge protection are incorporated on all inputs and outputs of the
PS150/CH150.

PS150/CH150 12V Charging Regulators
2
2. Precautions and Tips
For indoor use only.
Risk of electric shock. Dry location use only.
Risk of fire or electric shock. Do not interconnect output
terminals.
Permanent damage to rechargeable cells may result if
discharged below 10.5 V.
Under normal charging conditions with sealed VRLA batteries, hydrogen and
oxygen gasses are produced in relatively small quantities, most of which later
recombines back into water. Aggressive overcharging produces excess hydrogen
and oxygen gasses, resulting in gas venting by means of a pressure activated
valve. Hydrogen gas emitted from VRLA batteries must not be allowed to
accumulate, as it could form an explosive mixture. Fortunately, hydrogen gas is
difficult to contain in anything but a metal or glass enclosure.
Never put VRLA batteries in an enclosure that does not
allow emitted hydrogen gas to be dispersed.
VRLA batteries are capable of providing high surge currents. The 12 V output
terminals of the PS150/CH150 are fused with a 4 A self-resettable thermal fuse,
but there is no fusing for inadvertent bridging of the battery terminals. Accidental
shorting of battery terminals by metallic objects, such as watchbands, can cause
severe burns due to rapid heating and is also a fire hazard.
VRLA battery manufacturers state that “Heat Kills Batteries”. While the
PS150/CH150 can operate from –40° to +60°C, optimum battery life is achieved
with battery operating temperatures ranging from 5° to 35°C
i
, per manufacturer’s
recommendations1. The PS150/CH150 offer temperature compensation of the
battery charging voltage based on a temperature measurement inside the
PS150/CH150 cases. The CH150 internal temperature measurement likely will
not accurately represent battery temperature for charge voltage compensation
unless the battery is in close proximity to the CH150.
With rechargeable batteries, a charge discharge re-charge event is termed a
cycle. In general the most important factor for the service life of a battery is depth
of discharge1. For example, decreasing the depth of each discharge from 100% to
50% approximately doubles the number of useful cycles available from the
battery1.
Leaving a lead-acid battery in a discharged state for
prolonged periods of time results in the undesirable growth of
large sulphate crystals (sulphating) that are detrimental to
battery performance.
i
Genesis Application Manual –Genesis NP and NPX Series US-NP-AM-002,
June 2006.
CAUTION
WARNING
WARNING
WARNING
WARNING
CAUTION

User Manual
3
VRLA batteries self-discharge at approximately 3% of rated capacity per month at
room temperature1. A 3% of rated capacity per month self-discharge results in
100% discharge in approximately 33 months (3 years) for a battery stored at
room temperature. Self-discharge increasing with increasing storage temperature.
Periodic recharging of stored batteries every few months is
recommended to prevent irreversible sulphation due to prolonged
time in a discharged state.
3. Quick Start
The PS150/CH150 modules are designed to handle extreme conditions. The
modules have been designed with mounting holes on one inch centres for
mounting to a standard Campbell Scientific enclosure back plate —see the
enclosure manual for mounting suggestions. See Figure 3-1 through Figure 3-3
for typical enclosure installations using a PS150/CH150.
Figure 3-1. The PS150 connected to a CR1000 and AC power
NOTE

PS150/CH150 12V Charging Regulators
4
Figure 3-2. The PS150 connected to a CR1000 and solar panel
Figure 3-3. CH150 connected to BP24 battery pack and CR1000
3.1 Connecting Power
Although the power supply and battery are low voltage,
they do have the ability to supply a high current and
could potentially heat up a metal ring, watch band, or
bracelet enough to burn skin or melt metal when shorted.
Remove rings, watches, or bracelets before hooking up
power and connecting a battery.
WARNING

User Manual
5
Unlike earlier Campbell Scientific power supplies, the CH/PS150 can have both
solar and AC power hooked up simultaneously.
Flip the power supply switch to “Off” before hooking up power to the power
supply.
The switch on the CH/PS150 only controls power going to the
“12V” and “G” terminal blocks. The battery is continuously
charged regardless of the switch setting as long as a charging
voltage is present.
3.1.1 Solar Panel
To prevent sparking while wiring up the solar panel,
either lay the solar panel face down on its packing box or
cover it with something fairly opaque to block the
sunlight while wiring up the panel.
Connect the black (negative) lead from the solar panel to the terminal block
marked “G” that is directly adjacent to the “SOLAR” terminal block. Connect the
red (positive) lead from an unregulated solar panel to the terminal block marked
“SOLAR”. See Figure 3-4.
Figure 3-4. Solar panel connections on PS150
3.1.2 AC/DC Power
Double check the input voltages coming in to the charger/regulator with a volt
meter.
AC Input Voltage: 14 to 24 VAC RMS
DC Input Voltage: 15 to 40 VDC
Exceeding the voltages listed above will damage the
power supply.
Disconnect the primary side of the AC/DC power before connecting wires to the
PS150.
NOTE
WARNING
WARNING

PS150/CH150 12V Charging Regulators
6
Connect the secondary power supply leads to the two terminal blocks marked
“CHG”. There is no polarity on the “CHG” terminal blocks, so it does not matter
which wire goes to which “CHG” terminal block, but make sure there is only
ONE wire per block. See Figure 3-5.
Figure 3-5. AC power connections on PS150
3.2 Plug In the Battery
The battery used with the PS150 is shipped inside of the PS150 case if the power
supply is NOT installed inside an enclosure. If the PS150 is mounted inside an
enclosure then the battery will be located separately packed in one of the packing
boxes. This is done to minimize any damage that could occur if the power supply
should get loose from its mounts inside the enclosure during shipment. The
battery will NOT be plugged into the PS150. This is done to minimize
discharging the battery.
To remove the lid from the PS150, pull up on the PS150 lid latch and slide the lid
off as shown in Figure 3-6 and Figure 3-7.
Do not remove the tape holding the battery wiring
harness to the top of the battery! The tape is used to
keep the battery wiring harness out of the way of the
rubber bumpers on the inside of the lid.
WARNING

User Manual
7
Figure 3-6. Lift latch up on PS150
Figure 3-7. Slide PS150 lid off
Plug the battery into the connector marked “BATT”. This connector is polarized
and will only allow the mating connector to be plugged in one way. Push the
connector all the way in until it locks in place.
Latch
Lift latch up.
Slide lid off.

PS150/CH150 12V Charging Regulators
8
Figure 3-8. Wiring harness plugged into battery connector
3.3 Hook Up Power to Datalogger
Both the PS150 and the CH150 come with a 1 foot black wire attached to one of
the Gterminal blocks and a 1 foot red wire attached to one of the 12V terminal
blocks. Attach the red wire from the power supply to the datalogger Power
terminal block marked 12V (Campbell Scientific part number 3768). Attach the
black wire from the power supply to the datalogger Power terminal block marked
“G”.
3.4 Turn On the Charging Source
Turn on the power going to the charging source or uncover the solar panel. The
green “Charge” LED will flash approximately once a second if all incoming
connections are correct and there is an adequate charging voltage present.
3.5 Turn On Power to the Datalogger
Flip the switch on the PS150/CH150 supply to “On”. Verify voltage to the
datalogger with a volt meter, or use a key pad display, or connect to the datalogger
with a laptop or PDA to make sure the datalogger is running correctly.
3.6 LED Indicator
The green “Charge” LED will flash approximately once a second if all incoming
connections are correct and there is an adequate charging voltage present.

User Manual
9
4. Specifications
4.1 Specifications
(CHARGE - CHARGE terminals)
AC or DC Source:
AC –(18 to 24) VRMS internally
limited to 1.2 ARMS
DC –(16 to 40) VDC internally limited
to 0.85 Adc
(SOLAR - terminals)
Solar Panel or Other DC Source1:
15 to 40 VDC
Maximum Charging Current:
4.0 Adc typical
3.2 Adc to 4.9 Adc
depending upon individual charger
Battery Charging
FLOAT Charging: Vbatt(T) =
13.65 –(24 mV)•(T – 25) +
(0.24 mV)•(T – 25)2
1% Accuracy on charging voltage over
–40° to +60C range
Operational Temperature Range2:
–40° to +60C
Power Out (+12 terminals)
Voltage:
Unregulated 12 V from Battery
4.65 A solid-state circuit breaker
Quiescent Current
No Charge Source Present:
160 A at 13.7 VDC
No Battery Connected:
930 A at 30 volt input voltage (AC or
DC)
Rated UL Class 2 Power Supply
Physical Specifications
PS150:
10.6 cm (4.2 in) tall, 19.3 cm (7.5 in)
long, 7.6 cm (3 in) wide
CH150:
10.0 cm (3.9 in) tall, 7.5 cm (3 in) long,
3.7 cm (1.5 in) wide
Compliance:
View the EU Declaration of Conformity
at www.campbellsci.eu/ps150
1. Battery voltages below 8.7 V may result in < 3.0 A current limit because of
foldback current limit.
2. VRLA battery manufacturers state that “heat kills batteries” and recommend
operating batteries 50C.

PS150/CH150 12V Charging Regulators
10
4.2 Battery Packs
Battery
Pack
Model
Amp-Hour
Capacity (Ah)
*Operating
Temperature
Range (ºC)
Battery Family
PS150
7
Charge: –15 to +50
Discharge: –20 to +60
EnerSys/Genesis/YUASA
BP12
12
Charge: –15 to +50
Discharge: -20 to +60
EnerSys/Genesis/YUASA
BP24
24
Charge: –15 to +50
Discharge: –20 to +60
EnerSys/Genesis/YUASA
* Battery specifications shown are from the manufacturer. The PS150/CH150
contains charging algorithms that optimize battery charging over the range of
–40°C to +50°C. Battery usage outside of manufacturer specifications could have
unknown effects on the life of the battery.
Battery life is shortened if the battery is allowed to
discharge below 11.5 V.
4.3 Charging Sources
SP5
SP10
SP30
SP60
SP100
Peak Power
4.5 W
10 W
30 W
60 W
100 W
Voltage @ Peak Power
16.5 V
16.8 V
17.5 V
17.5 V
18.0 V
Current @ Peak Power
0.27 A
0.57 A
1.68 A
3.43 A
5.56 V
Notes:
1. Specifications assume a 1 kilowatt per square metre illumination and a solar
panel temperature of 25C (77F).
2. Individual panels may vary up to 10%.
3. The output panel voltage increases as the panel temperature decreases, which
is in the same direction as the recommended VRLA battery charging voltage
change with temperature.
4. Higher latitudes and less sun hours during winter months might require a
larger panel than what is required to keep the battery charged during the
summer.
WARNING
Other manuals for PS150
1
This manual suits for next models
1
Table of contents
Other Campbell Controllers manuals

Campbell
Campbell PS12LA User manual

Campbell
Campbell CH201 User manual

Campbell
Campbell SDM-CD16AC User manual

Campbell
Campbell SDM-CD16AC User manual

Campbell
Campbell SDM-CD16ACA User manual

Campbell
Campbell CH150 User manual

Campbell
Campbell CR10 PROM Use and care manual

Campbell
Campbell DCDC18R User manual

Campbell
Campbell PS150 User manual

Campbell
Campbell SDM-CD16AC User manual