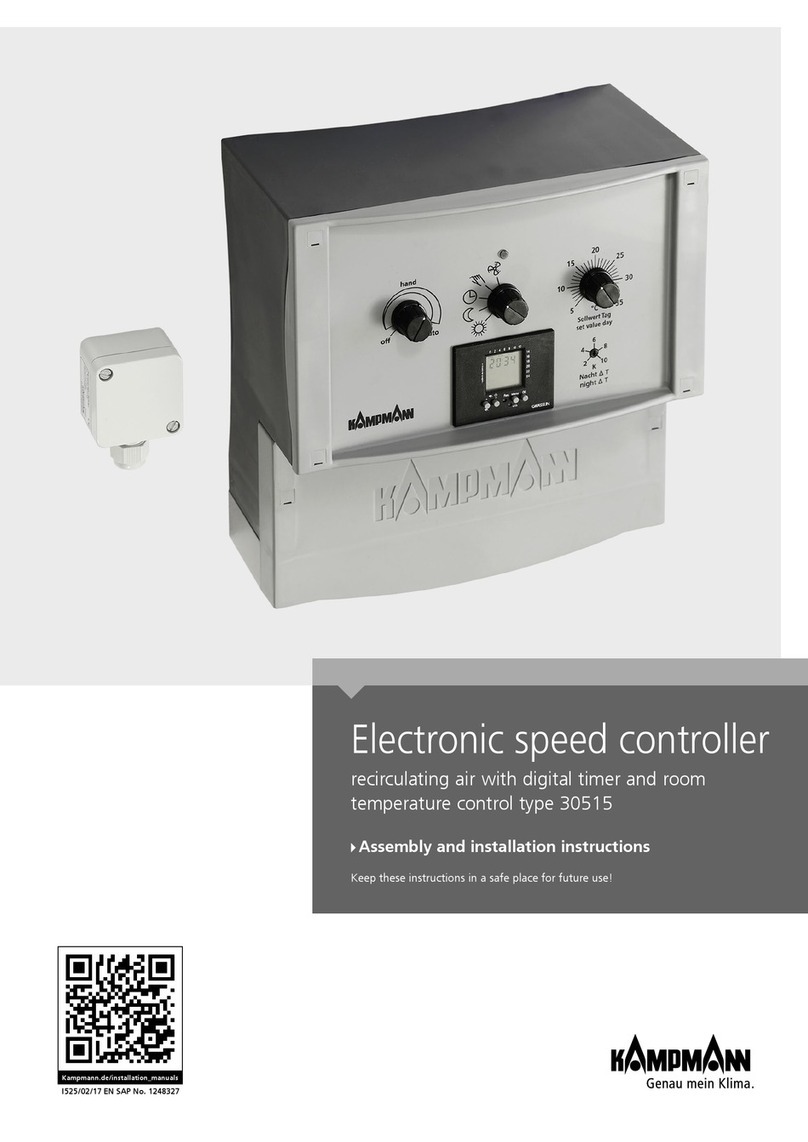
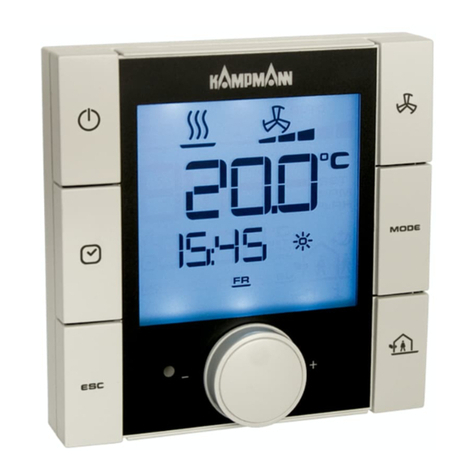
Kampmann 196000148925 User manual

Sicherheitshinweis!
Dieses Gerät darf nur durch eine Elektrofachkraft geöffnet und gemäß dem
entsprechenden Schaltbild im Gehäusedeckel / auf dem Gehäuse / in der
Bedienungsanleitung installiert werden. Dabei sind die bestehenden
Sicherheitsvorschriften zu beachten. Achtung! Der Betrieb in der Nähe von
Geräten, welche nicht den EMV-Richtlinien entsprechen, kann zur
Beeinflussung der Gerätefunktionen führen. Nach der Installation ist der
Betreiber, durch die ausführende Installationsfirma, in die Funktion und
Bedienung der Regelung einzuweisen. Die Bedienungsanleitung muss für
Bedien- und Wartungspersonal an freizugänglicher Stelle aufbewahrt werden.
Übersicht
1. Anwendung
2. Funktion
2.1 Regeleigenschaften im Betrieb, neutrale Zone, Leuchtanzeigen
2.2 Fühlerauswahl intern / extern
2.3 Ventilatorfunktion
2.4 Ein/Aus-Funktion
3. Installation / Montage
3.1 Einengung des Temperatur-Einstellbereiches
4. Zubehör
5. Technische Daten
6. Fühlertabelle (Kennlinie) für externe Fühler
7. Anschluss-, Maßzeichnungen und Schalter-Positionszeichnung
8. Gewährleistung
1. Anwendung
Dieser Klimaregler wurde speziell zur Ansteuerung von Gebläsekonvektoren,
Fancoilgeräten und anderen lüfterunterstützten Klimaanlagen im 4-Rohr-
leitungssystem mit stromlos geschlossenen Ventilen entwickelt. Hierbei wird der
Regler als Einzelraum-Temperaturregler mit internem Fühler oder als externes
Regelgerät mit Fernfühler verwendet. Für andere vom Hersteller nicht
vorherzusehende Einsatzgebiete sind die dort gültigen Sicherheitsvorschriften
zu beachten. Eignung hierfür siehe Punkt 8.
2. Funktion
Die Schaltdifferenz des Reglers beträgt ca. 0,5K. In den nachfolgenden
Beispielen der Regeleigenschaften, wird mit einer zu erwartenden
Regelabweichung der Regelstrecke von 1K gerechnet.
2.1 Regeleigenschaft im Betrieb, neutrale Zone,
Leuchtanzeigen
Die Neutrale Zone ist einstellbar zwischen 0,5K und 6K (Werkseinstellung 2K)
und beginnt mit dem Ausschaltpunkt der Heizung. Bei einer neutralen Zone von
2K und eingestellten 22°C wird im Heizbetrieb auf größer 22°C und im
Kühlbetrieb auf kleiner 26°C geregelt. Die Schaltdifferenz beträgt sowohl im
Heiz- als auch im Kühlbetrieb ca. 1K. So befindet sich bei eingestellten 22°C
der Abschaltpunkt der Heizung bei ca. 23°C und der Abschaltpunkt der Kühlung
bei ca. 25°C. Solange der Heizausgang aktiv ist leuchtet die Einstellmarke rot.
Nach dem Abschalten des Heizausganges bleibt der Lüfter noch für etwa eine
Minute aktiv. Während dieser Zeit blinkt die Einstellmarke rot. Bei aktivem
Kühlausgang leuchtet die Einstellmarke blau.
2.2 Fühlerauswahl intern / extern
Mit dem Schalter S2 (vgl. Punkt 7.) wird die Verwendung des internen
(Werkseinstellung) oder externen Fühlers gewählt. Bei Verwendung eines
externen Fühlers wird dieser an den Klemmen 12 und 13 angeschlossen.
Fühlerauswahl siehe Punkt 4. Zubehör.
2.3 Ventilatorfunktion
Dieser Regler verfügt über einen 3-stufigen Schalter mit dem die Lüfterstufe
gewählt wird. Mit dem Schalter S1 (vgl. Punkt 7.) wird die Lüfterfunktion „An“
(Werkseinstellung) oder „Aus“ in der neutralen Zone eingestellt. Um die Raum-
temperatur mit dem internen Fühler optimal zu erfassen, wird bei Temperiersys-
temen mit lüfterunterstützter Konvektion, die Lüfterfunktion „An“ in der neutralen
Zone empfohlen. Dabei ist der Lüfter permanent aktiviert. In der Funktion „Aus“ in
der neutralen Zone wird der Lüfter im Temperaturbereich zwischen
Ausschaltpunkt Heizen, nach einer Verzögerung von etwa einer Minute, und dem
Ausschaltpunkt Kühlen (neutrale Zone) deaktiviert. (vgl. Diagramm Schaltpunkte)
Die Ventilatoransteuerung ist potentialfrei ausgeführt, um sowohl einen Lüfter-
motor mit getrennten Wicklungen, als auch einen Lüftermotor unter Verwendung
eines Stufentrafos anzusteuern. Achtung! Es dürfen keine Lüfter oder andere
Verbraucher der Schutzklasse III angeschlossen werden.
2.4 Ein/Aus-Funktion
Mit dem Ein/Aus-Schalter wird die Regelung aktiviert bzw. deaktiviert.
3. Installation / Montage
Je nach Gerätetyp oder Verpackungsgröße, wird das Gerät entweder
geschlossen oder der schnelleren Montage wegen geöffnet ausgeliefert. Nach der
Montage auf der Wand, dem elektrischem Anschluss und der Herstellung der
sicheren Trennung zwischen Netzspannung und Sicherheitskleinspannung mittels
beiliegender Trennwand (vgl. Punkt 7.), wird der Gehäusedeckel zum Schließen
mit den unteren Haken eingehängt und bis zum Einrasten nach oben
zugeschwenkt. Anschließend wird der Gehäusedeckel mit der beiliegenden
Schraube gesichert. Das Öffnen des Gerätes erfolgt in umgekehrter Reihenfolge.
Achtung! Bei Verwendung externer Fühler ist darauf zu achten, dass die
Fühlerleitung nicht parallel zu netzspannungsführenden Leitungen verlegt wird. Ist
die Parallelverlegung nicht zu vermeiden, geschirmte Leitung verwenden und
Schirm auf Klemme 13, 15 bzw. 17 legen. Um einen Austausch eines defekten
Fühlers zu gewährleisten, muss der Fühler reversibel in einem Leerrohr verbaut
werden. Der Regler ist zur Montage auf die Wand oder UP-Dose bestimmt und
darf nicht direkt Wärme- oder Kältequellen ausgesetzt werden. Es ist darauf zu
achten, dass der Regler auch rückseitig keiner Fremderwärmung oder -kühlung,
z.B. bei Hohlwänden durch Zugluft oder Steigleitungen ausgesetzt wird.
3.1 Einengung des Temperatur-Einstellbereiches
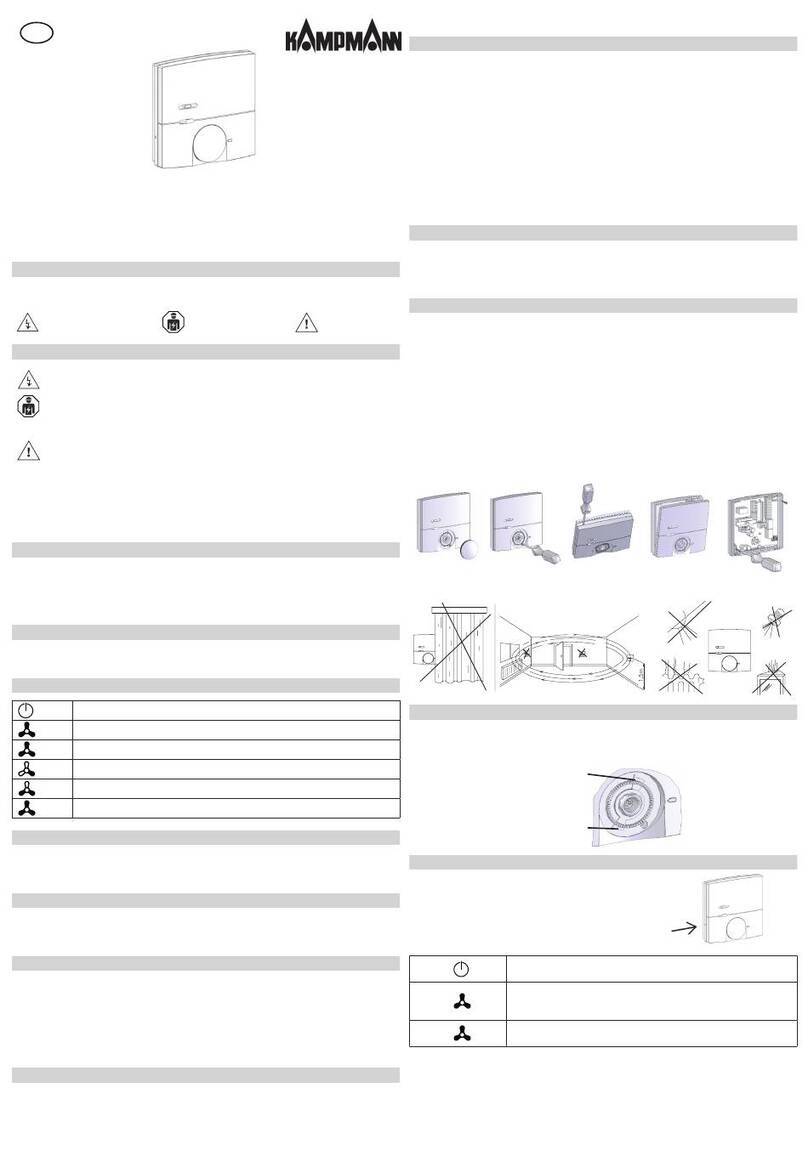
Mittels der Einstellfahnen unter dem Einstellknopf kann der Einstellbereich des
Reglers mechanisch begrenzt werden. Hierzu muss der Knopf abgezogen und
nach verstellen der Anschläge (rot für Maximaltemperatur, blau für
Minimaltemperatur) wieder aufgesteckt werden.
4. Zubehör
Externer Temperaturfühler zum Einsatz im Luftkanal oder Raum: LF-2 (Luftfühler
als Kabelfühler) oder HF-2 (Hülsenfühler) oder GFL-2 (Luftkanalfühler zur
Direktmontage an den Luftkanal) oder BTF-2 (Raumfühler Aufputz)
Typ196000148925
ElektronischerKlimaregler
Stand 2.2015 (15/015)
5 21 896 00

5. Technische Daten
Betriebs- und Schaltspannung: 230V~ 50/60Hz
Ausgänge:
Heizen: Relais-Schließerkontakt max. 5(1)A
Kühlen: Relais-Schließerkontakt max. 1(0,2)A
Ventilator: 3- Stufenschalter,
Relais-Schließerkontakt max. 3(1)A
Regelbereich: 18 … 26°C
Hysterese: 0,5K bei Temperaturänderung von 4K/h
Neutrale Zone: einstellbar 0,5 … 6K (Werkseinstellung 2K)
Fühlertoleranz interner Fühler: ca.1K
optionaler externer Fühler: NTC 47K / 25°C
Leistungsaufnahme: < 1W / < 2VA
Schutzklasse: II, nach entsprechender Montage
Schutzart: IP30, nach entsprechender Montage
Zulässige Umgebungstemperatur: 0 … 45°C
Lagertemperatur: -20 … 70°C
Zulässige Feuchte: max. 95%r.H. nicht kondensierend
Montage: Aufputz- / Wandmontage
Gehäusematerial und -Farbe: Kunststoff ABS, reinweiß ähnlich RAL 9010
Farben der Bedruckung:
Beschriftung / Logo: blaugrau ähnlich RAL 7031
Knopf: signalrot ähnlich RAL 3001,
lichtblau ähnlich RAL 5012
Ausstattung: - Schalter Ein / Aus
- Ventilatorschalter 3-stufig
- mechanische Bereichseinengung des
Sollwertstellers
- innenliegender Schalter zur Auswahl
interner (Werkseinstellung) / externer
Temperaturfühler
- innenliegender Schalter zur Auswahl
Lüfter an (Werkseinstellung) / aus in der
neutralen Zone.
- zweifarbig hinterleuchtete Einstellmarke
6. Fühlertabelle (Kennlinie) für externe Fühler
Die Fühlertabelle gilt für den optionalen externen Temperaturfühler.
7. Anschluss- und Maßzeichnungen und Schalter- Positionszeichnung
Achtung!
Trennwand zur sicheren
Trennung zwischen
Netzspannung und
Sicherheitskleinspannung
entsprechend montieren.
8. Gewährleistung
Die von uns genannten technischen Daten wurden unter Laborbedingungen nach allgemein gültigen Prüfvorschriften, insbesondere DIN-Vorschriften, ermittelt. Nur
insoweit werden Eigenschaften zugesichert. Die Prüfung der Eignung für den vom Auftraggeber vorgesehenen Verwendungszweck bzw. den Einsatz unter
Gebrauchsbedingungen obliegt dem Auftraggeber; hierfür übernehmen wir keine Gewährleistung. Änderungen vorbehalten.

Raumtherm
Safety information!
Expert electricians only may open this device in due compliance with the wiring
diagram shown in the housing cover / on the housing / represented in the
corresponding operating instructions. All expert electricians charged with the
execution of such works must comply with the relevant safety regulations
currently operative and in force. Caution: The operation of the controller in the
vicinity of other devices that do not comply with the EMC directives may affect
its functions. The company charged with the installation of the device must,
after the completion of the installation works, instruct the user of the control
system into its functions and in how to operate it correctly. These operating
instructions must be kept at a place that can be accessed freely by the
operating and/or servicing personnel in charge.
Contents
1. Application
2. Functional description
2.1 Control characteristics during operation / neutral zone /
luminous indications
2.2 Option to select between internal or external sensor-based operation
2.3 Fan function
2.4 ON/OFF function
3. Installation / mounting
3.1 Limitation of the temperature setting range
4. Accessories
5. Technical data
6. Data table with external sensor data (characteristic curve)
7. Wiring diagrams and dimensioned drawings / overview of switch positions
8. Warranty
1. Application
The air-conditioning controller desribed in these instructions has been specially
devised for the control and triggering of fan coils, fan coil units and other air-
supported air conditioning systems used with valve-equipped 4-pipe systems
(normally closed valve types). The device is suited for use as internal sensor-
equipped single room temperature controller or, in combination with a remote
sensor, as external control device. Regarding other applications not to be
foreseen by the manufacturer of this device, the safety standards concerning
these applications need to be followed and adhered to. Regarding the suitability
of the device for such applications, please refer to section 8. herein.
2. Functional description
The switching difference of the controller comes to approx. 0.5K. The
calculation of the control characteristics specified hereafter by way of example
bases on an expected control deviation of the controlled system of 1K.
2.1 Control characteristics during operation
neutral zone / luminous indications
The neutral zone can be set within a range from 0.5 to 6K (factory setting 2K). It
corresponds to 2K and begins at the heating switch-off point. If set to 22°C, the
heating will be set to a temperature above 22°C while operating in heating
mode and down to a temperature below 25°C while operating in cooling mode.
In both heating and cooling mode, the switching difference comes to approx.
1K. If set to 22°C, the heating switch-off point is thus at approx. 23°C and the
cooling switch-off point at approx. 26°C. As long as the heating output is active,
the lamp behind the setting mark lights red. After deactivation of the heating
output the fan will continue operating for approx. one minute. The lamp behind
the setting mark blinks red during this time. Once the cooling output is activated,
the lamp in the setting mark blinks blue.
2.2 Option to select between internal or external
sensor-based operation
The selector switch S2 (see section 7.) enables to set the device for either the
utilisation of the internal (factory setting) or the external sensor. The terminals
12 and 13 have been provided for the connection of the external sensor. For a
selection of suitable sensors, please refer to section 4., "Accessories".
2.3 Fan function
The controller is equipped with a 3-speed switch for the selection of the desired
fan level. The switch S1 (see section 7.) enables to set the fan ON (factory
setting) or OFF within the neutral zone. In order to enable the internal sensor to
detect the room temperature in an optimal manner, we recommend setting the fan
in the neutral zone to ON when controlling temperature equalization systems that
feature a fan-assisted convection of the ambient air. The fan is permanently
activated in this case. If setting the fan to OFF within the neutral zone, it remains
deactivated across the entire temperature range, i.e. between the switch-off points
"heating" and "cooling" (= neutral zone, see diagram "Switch-points"). The
triggering of the fan takes place in a potential-free manner, which enables to
control fan motors with separated windings or fan motors using a step trans-
former. Caution: No protection class III fans or consumers must be connected!
2.4 ON/OFF function
The ON/OFF switch enables to activate or deactivate the control system.
3. Installation / mounting
The device is, depending on its size, either delivered in closed, or, in order to
facilitate its installation, in opened condition. After its installation, its electrical
connection and the safe separation between mains voltage and safety extra low
voltage using the enclosed partition (see section 7.), the housing cover needs to
be closed by hooking the lower hooks in the housing and folding the cover upward
until it clicks into place. Following this, the housing cover should be secured using
the accompanying screw. For opening it, proceed in inverse order to closing.
Caution: When using an external sensor, care must be taken to ensure that the
sensor line is not laid in parallel to line voltage carrying cables or lines. Where
parallel laying cannot be avoided, a shielded line is to be used and the shielding to
be connected to the terminal 13, 15 or 17. In order to ensure the easy
replacement of a defective sensor, the sensor including its line needs to be laid
inside an empty conduit in a replaceable manner. The controller is determined for
wall mounting or installation on an UP box and must not be exposed to direct heat
or cold sources. Also care must be taken to ensure that the device is not exposed
to the influence of foreign heat or cold sources that warm or cool the device at its
back (through air flows in cavity walls or the temperatures radiated by ascending
pipelines, f. ex.).
3.1 Limitation of the temperature setting range
The mobile setting elements underneath of the control knob enable to delimit the
setting range of the controller mechanically. For this purpose, remove the control
knob and set the stops as required (red stop for maximum temperature and blue
stop for minimum temperature). Once this has been done, the control knob can be
put on again.
4. Accessories
External temperature sensor for use in air ducts or conduits or inside of rooms:
LF-2 (cable design air sensor) or HF-2 (sleeve sensor) or GFL-2 (air conduit or air
duct sensor for direct installation at the conduit or duct) or BTF-2 (ambient
temperature sensor for surface installation).
Typ196000148925
Electronic Air-conditioning
Controller

5. Technical data
Operating and switching voltage: 230V~ 50/60Hz
Outputs:
Heating: relay make contact, max. 5(1)A 5(1)A
Cooling: relay make contact, max. 1(0.2)A
Fan: 3 speed switch,
relay make contact, max. 3(1)A
Control range: 18 …26°C
Switching difference: 0.5K at a temperature change of 4K/h
Neutral zone: settable within a range from 0.5 to 6K
(factory setting 2K)
Tolerance of internal sensor: approx. 1K
Optional external sensor: NTC 47K / 25°C
Power consumption: < 1W / < 2VA
Protection class: II (after conforming installation)
Degree of protection: IP30 (after conforming installation)
Admissible ambient temperature: 0 …45°C
Storage temperature: -20 …70°C
Admissible moisture: max. 95% RH, non-condensing
Mounting: surface or wall mounting
Housing material and colour: plastic (ABS), pure white,
similar to RAL 9010
Imprint colours:
Labelling / Logo: - Blue grey, similar to RAL 7031
Control knob: - signal red, similar to RAL 3001
and light blue, similar to RAL 5012
Equipment: - ON/OFF switch
- 3-speed fan switch
- Reference setter with mechanical range
limitation
- Internal switch for selection between
internal (factory setting) / external
temperature sensor
- Internal switch for selection between "fan
ON" (factory setting) or "fan OFF" within the
neutral zone.
- Setting mark backlit (two colours)
6. Data table with external sensor data
(characteristic curve)
The table shown below applies to the optional external temperature sensor.
7. Wiring diagrams and dimensioned drawings / overview of switch positions
Caution:
Make sure to mount
the partition for the safe
separation between mains
voltage and safety extra low
voltage accordingly.
8. Warranty
The technical data specified in these instructions have been determined under laboratory conditions and in compliance with generally approved test regulations, in
particular DIN standards. Technical characteristics can only be warranted to this extent. The testing with regard to the qualification and suitability for the client’s
intended application or the use under service conditions shall be the client’s own duty. We refuse to grant any warranty with regard thereto. Subject to change without
notice.
Table of contents
Languages:
Other Kampmann Controllers manuals