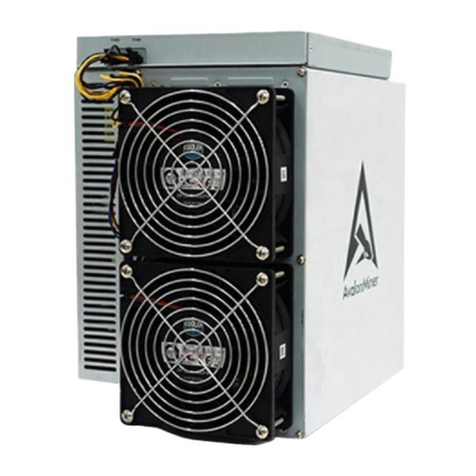
Canaan Avalon Made 1346 User manual

Avalon Miner
User Manual
1346 / 1366

Avalon Miner
User Manual
1346 / 1366

Avalon Miner 1346 / 1366

Thank you for choosing Avalon Miners. To ensure correct operation and installation of the product, please read through
this user manual carefully. For future reference, we would advise for the manual to be kept.
The operation and troubleshooting manuals of 1346 and 1366 are basically the same. This manual is mostly about 1346
operations. For 1366, it can be used for reference.
Device Name Avalon Miner 13 Serial-A1346 Avalon Miner 13 Serial-A1366
Hash Rate Power Efficiency PowerHash Rate Power Efficiency Power
High-Performance Mode(25℃)*1
113TH/s±5% 29.9J/T±5% 3380W±10%
127TH/s±5%
27.8J/T±5% 3530W±10%
Power Mode2(45℃,55℃]*2 95TH/s±5% 27.6/T±5% 2630W±10%
109TH/s±5%
26.3J/T±5% 2870W±10%
Power Mode4(55℃,60℃]*2 80TH/s±5% 25.6/T±5% 2050W±10%
95TH/s±5% 24.6J/T±5% 2340W±10%
Smart Controller Canaan Kendryte K210 Artificial Intelligence SOC
Connection RJ45 Ethernet 10/100M
PSU Model PSU3400
Power Supply AC Input 200V~300V AC 50/60Hz 16A Max
Power Cable Model IEC C19, ≥16A
Cooling 2 * 12050 FAN
Airflow 380CFM(Max)
Noise 75dB (Max)
Operating Temperature -5℃~35℃
Net Dimensions L271mm x W192mm x H292mm
Net Weight 13kg
Gross Dimensions L390mm x W290mm x H395mm
Gross Weight 14.1kg
Warranty 360 days Warranty from the date of the delivery
*1 By default, the miner is set to High-performance mode,Test environment: ambient 25℃
*2 Customer can also select other power mode according to the ambient humidity.
Safety Regulations
Caution: Failure to install and use the miners in accordance with the user manual may result in severe incidents.
Modification to the miners, which are not limited to the following, tweaks to power/ hash rate/ replacement of internal
components, are strictly prohibited.
●Do not any power supply beyond the rated voltage range.
●Do not place miners on unstable surfaces.
Safety Regulations
Overview
Product Specification

●When inspecting, repairing the miners or the power supply, please ensure professional assistance is sought.
Should there be any abnormal occurrence when using the miners or the accompanied power supply unit, please switch
the miner off immediately and contact Canaan's technical team: support@canaan.io.

CONTENT
Chapter 1 Hardware Connection 01
Chapter 2 Button and Light Indicators 03
Chapter 3 Operating Modes 04
Chapter 4 System Settings 06
Chapter 5 Firmware Upgrades 08
Chapter 6 Restoring to Factory Default 09
Chapter 7 Basic Assembly 10
Chapter 8 Warranty 14
Chapter 9 Troubleshooting 15
APPENDIX 18
Appendix I Restoring factory settings 18
Appendix II Checking the firmware version 19
Appendix III Firmware batch upgrade via FMS 20
Appendix IV Log parameters 22
Appendix V LED status 25
Appendix VI Power Mode 26
Contact 33

01
①Network port
②Connect the fans with four 4-pin fan extension cables, which are fan 1, fan 2, fan 3, and fan 4
Open the upper panel and you would see the miner management boards. The internal interfaces are shown in the photo
below:
CHAPTER 1
HARDWARE CONNECTION
Control panel
Connection of miner management board

02
③Connect the PSU communication cable between the PSU and MM board (using the 4PIN connector).
④Connect the PSU AUX power cable between the PSU and MM board (using the 6PIN connector)
⑤Connect the JAMLINK cables between the hash boards and MM board (using the 2x7PIN connector).

03
RST System reset button: Please note that any system reset will not affect the network connection.
FUNC Function button: It can be used to reset the miner back to the factory settings, enter the configuration mode,
and switch status while in operation, etc.
●When powering-on, indicator lamp would flash in RED several times.
●After the miner has been powered-on, the indicator lamp would change to YELLOW for about three secs. During this
period, press the FUNC key and the miner would enter configuration mode.
●Under normal operating circumstances, indicator lamp would remain GREEN.
●During system preparation stage, indicator lamp would remain YELLOW.
●If the miner is overheated, indicator lamp would be RED.
●When the miner is running, use the FMS software or manually press the FUNC key, the indicator lamp would blink
and alternate between yellow and green. Press again to restore the miner to its original state.
Resetting miner to factory settings: Press the FUNC button (before the RED indicator lamp flashes) when powering
on for five seconds or till the red indicator flickers, which means setup has been completed. Subsequent to that, press
the RST button or power to restart.
CHAPTER 2
BUTTON AND LIGHT INDICATORS
Buttons
Indicator lamp

04
The miner supports three modes: “Idle mode”, “Mining Mode” and “Configuration Mode”.
In this mode, the hash board is in a non-working state, and the control board is in a monitoring state, responding to API
commands at any time. This mode consumes the lowest power.
The miner has 3 modes: 1) power mode, 2) High-performance mode, and 3) Normal mode.
By default, the miner is set to perform in high-performance mode.
Normal mode has lower power consumption and hash rate compared with high performance mode. It's an older mining
strategy, the new Power mode is a more flexible mining mode that offers more power and hash rate options.
Power mode (see Appendix VI for detailed operation) offers more power level choices. It is divided into two directions,
one is to reduce power consumption, the other is to increase power consumption in pursuit of greater computing
performance. Users can choose different directions and power levels according to specific requirements.
Users have the flexibility to choose the right working mode according to their own needs. The relevant parameters of
the different modes are reflected in the product specification table.
●After powering-on the miner and when the second red light flashes (about three seconds after powering-on), press
the FUNC key and the device will enter configuration mode.
●While in configuration mode, the IP address is static (address: 192.168.168.168, subnet mask: 255.255.255.0). The
built-in web service of the miner can be accessed through a PC browser to configure the network, mining pool,
password, and other information.
●Do remember to set the PC with a static IP address:
192.168.168.100 (or any Other non-conflicting address with the
same segment), subnet mask:255.255.255.0 and connect to the
same network with the miner ( under the same switch or router, or
directly connect the miner to the network).
CHAPTER 3
OPERATING MODES
Mining Mode
Configuration mode
Idle Mode

05
To set the PC with astatic IP address:
— Please right click to open network & internet settings.
— Head to “change adapter options” to disable WLAN and enable Ethernet.
Do access http://192.168.168.168/ on your PC browser to configure the device (Modify static IP,etc.). After
configuration, the miner would need to be rebooted, for the settings to take effect. To reboot the miner, users are
required to click the Reboot key, on the left of the interface or manually power offthe miner.
Note: Do ensure that the internet connection is powered on, to ensure that the miner is able to connect to the internet.
Upon reboot, please input the new IP address into the PC browser. When the miner is operating correctly, the indicator
lamp would turn green.

06
Access the miner's built-in web service through your PC browser to enter the miner configuration interface.
Default username: root, default password: root
Upon login, user would enter the “Overview” page.
Click the in the configuration menu and set it to DHCP (dynamic acquisition) or IP(Static).
Note: After clicking the button, please remember to restart the miner to make sure your network settings are
effective. To restart the miner, users can click on the left, or press RST button (on the miner) to power off
and on.
CHAPTER 4
SYSTEM SETTINGS
Network Setting
User Login

07
The below image shows the factory settings. There are three modes here: Normal, High-performance, and Ultra High-
performance mode. To prevent damage to the miner when operating in high-performance mode and above, please
ensure a suitable power supply output is used.
Note: After pressing the button, please remember to restart the miner for your mining pool configurations to
take effect. To restart the miners, users are required to click on the menu, press RST key (on the miner) or
restart the miner physically.
Default username: root.
Default password: root.
Click on the menu to set a new password and save it
.
Mining pool setting

08
The upgrade package file's format is *. aup, which can be downloaded through Canaan's official website or obtained
from our customer service team.
Click on the menu and select Firmware to upgrade.
The firmware upgrade of this device can be carried out using FMS software (See Appendix III).
CHAPTER 5
FIRMWARE UPGRADES

09
To reset the miner to factory configurations, press the FUNC button for five to ten seconds when the power is on, and
the system will automatically clear the saved configurations, including network, mining pool, password, and other
information.
After all configurations are cleared, the red-light indicator lamp will flash constantly indicating that the factory reset is
successful. After releasing the FUNC button, press the RST button to restart, or cut offthe power supply to restart, and
the system will revert to the default factory configuration.
CHAPTER 6
RESTORING TO FACTORY DEFAULT

10
1.The assembled hash components and chassis shell are shown in the figure:
2. Install the power supply as shown in the figure, tighten the four screws, and the
screw tightening torque is recommended 6kgf.cm:
CHAPTER 7
BASIC ASSEMBLY

11
3. Position the chassis vertically, push the three hash board components into the rails
of the chassis, and pay attention to the assembly direction of the hash board
components, as shown in the figure:
4. Assemble the hash component in place as shown in the figure:
5. Assemble the rear panel to the chassis, pay attention to the assembly direction, the
screw tightening torque is recommended 3kgf.cm, as shown in the figure:

12
6. Assemble the MM board according to the direction shown, pay attention to the
position of the positioning pin, the screw tightening torque is recommended 3kgf.cm,
and connect the 4Pin power signal line; Connect the power supply to the control board
with a 6Pin cable, as shown in the figure:
7. Place the positive and negative poles of the conductive aluminum strip in the
position shown in the figure, tighten the screw, and the screw tightening torque is
recommended 15kgf.cm as shown in the figure:
8. HASH lines are connected as shown in the figure:

13
9. Put the upper shell, use flat head screws to fix the upper shell, the screw
tightening torque is recommended 3kgf.cm, as shown in the figure:

14
Given the frequent use of the miners, wear and tear to components may occur. With regards to that, users are free to
troubleshoot the miners by themselves. Nonetheless, should you require any assistance, our professional engineers are
readily available.
During normal operations, should any product failure occur within the warranty period, do contact our after-sales
personnel for assistance.
We provide a 360-day warranty for our miners; from the date customers take ownership of it. Notwithstanding the
above, the following events will void the warranty:
● Any physical damage caused by self-disassembly of the products or other causes (including but not limited to
breakage, fragmentation, parts, or components missing, etc.)
● Damage caused by lightning, voltage surge, or act of gods, etc.
● Burn marks on the PCB or burnt chips.
● Damage caused by water intake and immersion PCBs are damped and corroded.
In the unfortunate event that any of the above scenario occur, or should any faults occur out of the warranty period,
Canaan would provide a quotation for the necessary repair work to be undertaken. Alternatively, should users wish to
repair the miner by themselves, they can contact our after-sales personnel to purchase the replacement parts.
CHAPTER 8
WARRANTY
This manual suits for next models
1
Table of contents
Other Canaan Network Hardware manuals