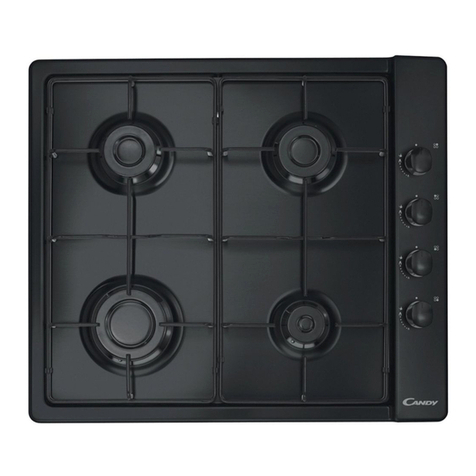
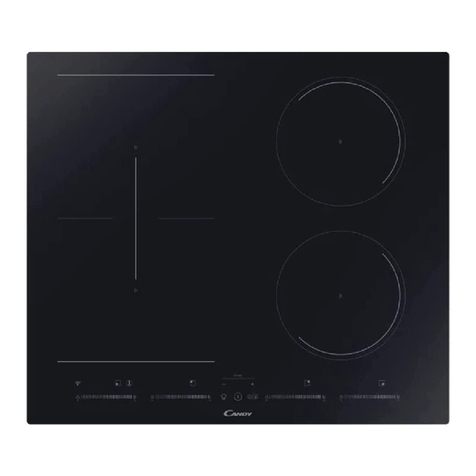
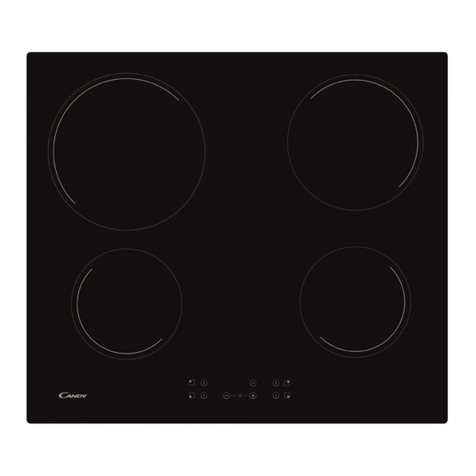
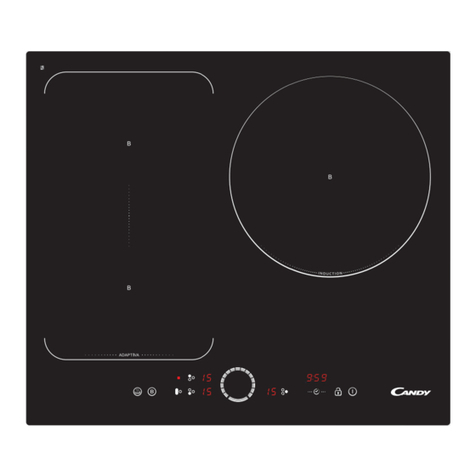
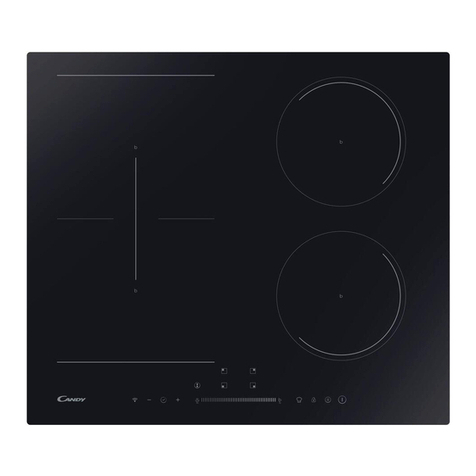
Candy CEH6DXECTT/1 User manual

Instruction Manual For Ceramic Hob ENGLISH
Bedienungsanleitung für Glaskeramikkochfelder DEUTSCH
Руководство по эксплуатации керамической варочной панели РУССКИЙ
Návod k obsluze sklokeramické varné desky ČEŠTINA
Návod na obsluhu pre sklokeramickú varnú dosku SLOVENČINA
Navodila za uporabo za steklokeramično kuhalno ploščo SLOVENŠČINA
Priručnik s uputama za uporabu keramičke ploče za kuhanje HRVATSKI
Thank you for purchasing the CANDY ceramic hob. Please read this instruction manual carefully before using the hob and
keep it in a safe place for future reference
MODEL: CEH6DXECTT/1
.

EN-1
Safety Warnings
Your safety is important to us. Please read this
information before using your cooktop.
Installation
Electrical Shock Hazard
•Disconnect the appliance from the mains
electricity supply before carrying out any work
or maintenance on it.
•Connection to a good earth wiring system is
essential and mandatory.
Alterations to the domestic wiring system must
only be made by a qualified electrician.
•
•Failure to follow this advice may result in
electrical shock or death.
Cut Hazard
•Take care - panel edges are sharp.
•Failure to use caution could result in injury or
cuts.
Important safety instructions
•Read these instructions carefully before
installing or using this appliance.
No combustible material or products should be
•
EN-2
placed on this appliance at any time.
• Please make this information available to the
person responsible for installing the appliance
as it could reduce your installation costs.
• In order to avoid a hazard, this appliance must
be installed according to these instructions for
installation.
• This appliance is to be properly installed and
earthed only by a suitably qualified person.
• This appliance should be connected to a circuit
which incorporates an isolating switch
providing full disconnection from the power
supply.
• Failure to install the appliance correctly could
invalidate any warranty or liability claims.
Operation and maintenance
Electrical Shock Hazard
• Do not cook on a broken or cracked cooktop. If
the cooktop surface should break or crack, switch
the appliance off immediately at the mains power
supply (wall switch) and contact a qualified
technician.
• Switch the cooktop off at the wall before
cleaning or maintenance.
• Failure to follow this advice may result in
electrical shock or death.
Health Hazard
• This appliance complies with electromagnetic

EN-3
safety standards.
Hot Surface Hazard
• During use, accessible parts of this appliance
will become hot enough to cause burns.
• Do not let your body, clothing or any item other
than suitable cookware contact the Induction
glass until the surface is cool.
• Metallic objects such as knives, forks, spoons
and lids should not be placed on the hob surface
since they can get hot.
• Keep children away.
• Handles of saucepans may be hot to touch.
Check saucepan handles do not overhang other
cooking zones that are on. Keep handles out of
reach of children.
• Failure to follow this advice could result in
burns and scalds.
Cut Hazard
• The razor-sharp blade of a cooktop scraper is
exposed when the safety cover is retracted. Use
with extreme care and always store safely and
out of reach of children.
• Failure to use caution could result in injury or
cuts.
Important safety instructions
• Never leave the appliance unattended when in
use. Boilover causes smoking and greasy
spillovers that may ignite.
• Never use your appliance as a work or storage
surface.
• Never leave any objects or utensils on the
EN-4
appliance.
•Never use your appliance for warming or
heating the room.
•After use, always turn off the cooking zones
and the cooktop as described in this manual (i.e.
by using the touch controls).
• Do not allow children to play with the appliance
or sit, stand, or climb on it.
• Do not store items of interest to children in
cabinets above the appliance. Children climbing
on the cooktop could be seriously injured.
• Do not leave children alone or unattended in
the area where the appliance is in use.
• Children or persons with a disability which
limits their ability to use the appliance should
have a responsible and competent person to
instruct them in its use. The instructor should be
satisfied that they can use the appliance without
danger to themselves or their surroundings.
• Do not repair or replace any part of the
appliance unless specifically recommended in the
manual. All other servicing should be done by a
qualified technician.
• Do not use a steam cleaner to clean your
cooktop.
• Do not place or drop heavy objects on your
cooktop.
• Do not stand on your cooktop.
• Do not use pans with jagged edges or drag pans
across the Induction glass surface as this can

EN-5
scratch the glass.
• Do not use scourers or any other harsh
abrasive cleaning agents to clean your cooktop,
as these can scratch the Induction glass.
• If the supply cord is damaged, it must be
replaced by the manufacturer, its service agent
or similarly qualified persons in order to avoid a
hazard.
•This appliance is intended to be used in
household and similar applications such as:
-staff kitchen areas in shops, offices and other
working environments; -farm houses; -by
clients in hotels, motels and other residential
type environments ; -bed and breakfast type
environments.
•WARNING: The appliance and its accessible
parts become hot during use.
Care should be taken to avoid touching heating
elements.
Children less than 8 years of age shall be kept
away unless continuously supervised.
•This appliance can be used by children aged
from 8 years and above and persons with
reduced physical, sensory or mental capabilities
or lack of experience and knowledge if they have
been given supervision or instruction concerning
use of the appliance in a safe way and
understand the hazards involved.
•Children shall not play with the appliance.
Cleaning and user maintenance shall not be
made by children without supervision.
EN-6
•WARNING: Unattended cooking on a hob with
fat or oil can be dangerous and may result in fire.
NEVER try to extinguish a fire with water, but
switch off the appliance and then cover flame e.g.
with a lid or a fire blanket.
•WARNING: Danger of fire: do not store items on
the cooking surfaces.
• Warning: If the surface is cracked, switch off
the appliance to avoid the possibility of electric
shock, for hob surfaces of glass-ceramic or
similar material which protect live parts
•A steam cleaner is not to be used.
•The appliance is not intended to be operated by
means of an external timer or separate
remote-control system.
Congratulations on the purchase of your new Ceramic Hob.
We recommend that you spend some time to read this Instruction / Installation
Manual in order to fully understand how to install correctly and operate it.
For installation, please read the installation section.
Read all the safety instructions carefully before use and keep this Instruction /
Installation Manual for future reference.

EN-7
Product Overview
Top View
Control Panel
1. max. 2200/1000 W zone
2. max. 1200 W zone
3. max. 2000/1100 W zone
4. max. 1200 W zone
5. Glass plate
6. Control panel
1. Heating zone selection controls
2.Timer control
3. Power / Timer regulating controls
4. keylock control
5. ON/OFF control
6. Dual/Oval zone control
EN-8
Product Information
The microcomputer ceramic cooker hob can meet different kinds of cuisine
demands because of resistance wire heating, micro-computerized control and
multi-power selection, really the optimal choice for modern families.
The ceramic cooker hob centers on customers and adopts personalized design.
The hob has safe and reliable performances, making your life comfortable and
enabling to fully enjoy the pleasure from life.
Before using your New Ceramic Hob
•Read this guide, taking special note of the ‘Safety Warnings’ section.
•Remove any protective film that may still be on your ceramic hob.
Using the Touch Controls
•The controls respond to touch, so you don’t need to apply any pressure.
•Use the ball of your finger, not its tip.
•You will hear a beep each time a touch is registered.
•Make sure the controls are always clean, dry, and that there is no object (e.g. a
utensil or a cloth) covering them. Even a thin film of water may make the
controls difficult to operate.
Choosing the right Cookware
Do not use cookware with jagged edges or a curved base.
Make sure that the base of your pan is smooth, sits flat against the glass, and is
the same size as the cooking zone. Always centre your pan on the cooking zone.

EN-9
Always lift pans off the ceramic hob – do not slide, or they may scratch the glass.
Using your Ceramic Hob
To start cooking
1. Touch the ON/OFF control.
After power on, the buzzer beeps once, all displays show
“ – “ or “ – – “, indicating that the induction hob has entered
the state of standby mode.
2. Place a suitable pan on the cooking zone that
you wish to use.
• Make sure the bottom of the pan and the surface
Of the cooking zone are clean and dry.
3. Touching the heating zone selection control, and
a indicator next to the key will flash.
4. Set a power level by touching the “-” or “+” control.
• If you don’t choose a heat setting within 1
minute, the ceramic hob will automatically
switch off. You will need to start again at
step 1.
• You can modify the heat setting at any time
during cooking.
5. When zone 1 or 3 is working, touch the heating zone selection
control then activate double zone or oval zone by pressing .
When double zone or oval zone is working, touch the heating zone selection
control then turning off the double zone or oval zone by pressing .
EN-10
When you have finished cooking
1. Touching the heating zone selection control that you
wish to switch off.
2. Turn the cooking zone off by touching the “-” and scrolling down
to “0”, or holding the “+” and “-” button at the same time for 1 second, it will cut
down to ”0” directly.
Make sure the power display shows “0”, then shows “H”.
and then
3. Turn the whole cooktop off by touching the “ON/OFF” control.
4.Beware of hot surfaces
“H” will show which cooking zone is hot to touch. It will disappear when the
surface has cooled down to a safe temperature. It can also be used as an energy
saving function if you want to heat further pans, use the hotplate that is still hot.
Locking the Controls
•You can lock the controls to prevent unintended use (for example children
accidentally turning the cooking zones on).
•When the controls are locked, all the controls except the ON/OFF control are
disabled.
To lock the controls
Touch the keylock control. The timer indicator will show “Lo”.
To unlock the controls
1. Make sure the ceramic hob is turned on.
2. Touch and hold the keylock control for a while.
3. You can now start using your ceramic hob.
When the hob is in the lock mode, all the controls are disable except the
ON/OFF , you can always turn the ceramic hob off with the ON/OFF
control in an emergency, but you shall unlock the hob first in the next
Operation

EN-11
Over-Temperature Protection
A temperature sensor equipped can monitor the temperature inside the ceramic
hob. When an excessive temperature is monitored, the ceramic hob will stop
operation automatically.
Over-spillage Protection
Over-spillage protection is a safety protection function. It switch off the hob
automatically within 10s if the water flow to the control panel, while buzzer will
beep 1 second.
Residual Heat Warning
When the hob has been operating for some time, there will be some residual
heat. The letter “ H ”appears to warn you to keep away from it.
Auto Shutdown
Auto shut down is a safety protection function for your ceramic hob. It shut down
automatically if ever you forget to turn off your cooking. The default working times
for various power levels are shown in the below table:
Power level
1
2
3
4
5
6
7
8
9
Default working timer (hour)
8
8
8
4
4
4
2
2
2
Using the Timer
You can use the timer in two different ways:
•You can use it as a minute minder. In this case, the timer will not turn any
cooking zone off when the set time is up.
•You can set it to turn one cooking zone off or more than one after the set time is
up.
•You can set the timer for up to 99 minutes.
Using the Timer as a Minute Minder
If you are not selecting any cooking zone
1. Make sure the cooktop is turned on.
Note: you can use the minute minder even if you’re not selecting any cooking
zones.
2. Touch timer control, the minder indicator will start flashing
EN-12
and “30” will show in the timer display.
3. Set the time by touching the “-” or “+” control
Hint: Touch the “-” or “+” control of the timer
once to decrease or increase by 1 minute.
Touch and hold the “-” or “+” control of the timer to decrease or
increase by 10 minutes.
If the setting time exceeds 99 minutes, the timer will automatically
return to 0 minute.
4. Cancel the time by touching the timer control and the”00” will show in the
minute display.
5. When the time is set, it will begin to count down
immediately. The display will show the remaining
time and the timer indicator will flash for 5 seconds.
6. Buzzer will beep for 30 seconds and the timer indicator
shows “- -” when the set time finished.
Setting the timer to turn one cooking zone off
Cooking zones set for this feature will:
1. Touching the heating zone selection control
that you want to set the timer for. (e.g. zone 1#)
2. Touch timer control , The minder indicator will start flashing and
“30” will show in the timer display.
3. Set the time by touching the “-” or “+” control.
Hint: Touch the “-” or “+” control of the timer
once will decrease or increase by 1 minute.
Touch and hold the “-” or “+” control of the timer will decrease or
increase by 10 minutes.

EN-13
If the setting time exceeds 99 minutes, the timer will automatically
return to 0 minute.
4. When the time is set, it will begin to count down
immediately. The display will show the remaining time and
the timer indicator flash for 5 seconds.
NOTE: The red dot next to power level indicator
will illuminate indicating that zone is selected.
5. To cancel the timer, touch the heating zone selection control, and then touch
the timer control, the timer is cancelled, and the “00” will show in the minute
display, and then “--”.
6. When cooking timer expires, the corresponding cooking zone will
be automatically switch off and show “H”.
Other cooking zone will keep operating if they are turned on previously.
Setting the timer to turn more than one cooking zone
off
1. If more than one heating zone use this function, the timer indicator will show
the shortest time.
(e.g. zone 1# setting time of 2 minutes, zone 2# setting time of 5 minutes,
the timer indicator shows “2”.)
NOTE: The flashing red dot next to power level indicator means the timer
indicator is showing time of the heating zone.
If you want to check the set time of other heating zone, touch the heating
zone selection control. The timer will indicate its set time.
(set to 5 minutes)
(set to 2 minutes)
EN-14
2. When cooking timer expires, the corresponding cooking zone
will be switch off automatically and show “H” .
NOTE: If you want to change the time after the timer is set, you have to start
from step 1.
Care and Cleaning
What?
How?
Important!
Everyday soiling on glass
(fingerprints, marks,
stains left by food or
non-sugary spillovers on
the glass)
1. Switch the power to the
cooktop off.
2. Apply a cooktop cleaner
while the glass is still warm
(but not hot!)
3. Rinse and wipe dry with a
clean cloth or paper towel.
4. Switch the power to the
cooktop back on.
•When the power to the cooktop is
switched off, there will be no ‘hot
surface’ indication but the
cooking zone may still be hot!
Take extreme care.
•Heavy-duty scourers, some nylon
scourers and harsh/abrasive
cleaning agents may scratch the
glass. Always read the label to
check if your cleaner or scourer is
suitable.
•Never leave cleaning residue on
the cooktop: the glass may
become stained.
Boilovers, melts, and
hot sugary spills on
the glass
Remove these immediately
with a fish slice, palette knife or
razor blade scraper suitable for
ceramic glass cooktops, but
beware of hot cooking zone
surfaces:
1. Switch the power to the
cooktop off at the wall.
2. Hold the blade or utensil at a
30° angle and scrape the
soiling or spill to a cool area
of the cooktop.
3. Clean the soiling or spill up
with a dish cloth or paper
towel.
4. Follow steps 2 to 4 for
‘Everyday soiling on glass’
above.
•Remove stains left by melts and
sugary food or spillovers as soon
as possible. If left to cool on the
glass, they may be difficult to
remove or even permanently
damage the glass surface.
•Cut hazard: when the safety
cover is retracted, the blade in a
scraper is razor-sharp. Use with
extreme care and always store
safely and out of reach of children.
EN-15
Spillovers on the
touch controls
1. Switch the power to the
cooktop off.
2. Soak up the spill
3. Wipe the touch control area
with a clean damp sponge or
cloth.
4. Wipe the area completely
dry with a paper towel.
5. Switch the power to the
cooktop back on.
• The cooktop may beep and turn
itself off, and the touch controls
may not function while there is
liquid on them. Make sure you
wipe the touch control area dry
before turning the cooktop back
on.
Hints and Tips
Problem
Possible causes
What to do
The cooktop cannot
Be turned on.
No power.
Make sure the cooktop is connected
to the power supply and that it is
switched on.
Check whether there is a power
outage in your home or area. If
you’ve checked everything and the
problem persists, call a qualified
technician.
The touch controls are
unresponsive.
The controls are locked.
Unlock the controls. See section
‘Using your ceramic cooktop’ for
instructions.
The touch controls are
difficult to operate.
There may be a slight film of
water over the controls or you
may be using the tip of your
finger when touching the
controls.
Make sure the touch control area is
dry and use the ball of your finger
when touching the controls.
The glass is being
scratched.
Rough-edged cookware.
Unsuitable, abrasive scourer or
cleaning products being used.
Use cookware with flat and smooth
bases. See ‘Choosing the right
cookware’.
See ‘Care and cleaning’.
Some pans make
crackling or clicking
noises.
This may be caused by the
construction of your cookware
(layers of different metals
vibrating differently).
This is normal for cookware and
does not indicate a fault.
EN-16
Technical Specification
CEH6DXECTT/
Cooking Hob 1
Cooking Zones 4 Zones
Supply Voltage 220-240V~, 50-60Hz
Installed Electric Power 6039-7186W
Product Size L×W×H(mm) 590X520X52
Built-in Dimensions A×B (mm) 560X490
Weight and Dimensions are approximate. Because we continually strive to
improve our products we may change specifications and designs without prior
notice.
Installation
Selection of installation equipment
Cut out the work surface according to the sizes shown in the drawing.
For the purpose of installation and use, a minimum of 5 cm space shall be
preserved around the hole.
Be sure the thickness of the work surface is at least 30mm. Please select
heat-resistant work surface material to avoid larger deformation caused by
the heat radiation from the hotplate. As shown below:
L(mm) W(mm) H(mm) D(mm) A(mm) B(mm) X(mm)
590 520 52 48 560+5 490+5 50 mini
Under any circumstances, make sure the ceramic cooker hob is well ventilated
and the air inlet and outlet are not blocked. Ensure the ceramic cooker hob is in
good work state. As shown below

EN-17
Note: The safety distance between the hotplate and the cupboard above
the hotplate should be at least 760mm.
A(mm) B(mm) C(mm) D E
760 50 mini 30 mini Air intake Air exit 10 mm
Before you install the hob, make sure that
•the work surface is square and level, and no structural members interfere with
space requirements
•the work surface is made of a heat-resistant material
•if the hob is installed above an oven, the oven has a built-in cooling fan
•the installation will comply with all clearance requirements and applicable
standards and regulations
•a suitable isolating switch providing full disconnection from the mains power
supply is incorporated in the permanent wiring, mounted and positioned to
comply with the local wiring rules and regulations.
The isolating switch must be of an approved type and provide a 3 mm air gap
contact separation in all poles (or in all active [phase] conductors if the local
wiring rules allow for this variation of the requirements)
•the isolating switch will be easily accessible to the customer with the hob
installed
•you consult local building authorities and by-laws if in doubt regarding
installation
•you use heat-resistant and easy-to-clean finishes (such as ceramic tiles) for the
wall surfaces surrounding the hob.
EN-18
When you have installed the hob, make sure that
•the power supply cable is not accessible through cupboard doors or drawers
•there is adequate flow of fresh air from outside the cabinetry to the base of the
hob
•if the hob is installed above a drawer or cupboard space, a thermal protection
barrier is installed below the base of the hob
•the isolating switch is easily accessible by the customer
Before locating the fixing brackets
The unit should be placed on a stable, smooth surface (use the packaging). Do not
apply force onto the controls protruding from the hob.
Fix the hob on the work surface by screw 4 brackets on the bottom case of hob
(see picture) after installation.
A B C D
screw bracket Screw hole base
Cautions
1. The ceramic cooker hob must be installed by qualified personnel or technicians.

EN-19
We have professionals at your service. Please never conduct the operation by
yourself.
2. The ceramic cooker hob shall not be mounted to cooling equipment,
dishwashers and rotary dryers.
3. The ceramic cooker hob shall be installed such that better heat radiation can be
ensured to enhance its reliability.
4. The wall and induced heating zone above the work surface shall withstand heat.
5. To avoid any damage, the sandwich layer and adhesive must be resistant to
heat.
6. A steam cleaner is not to be used.
7. This ceramic can be connected only to a supply with system impedance no more
than 0.427 ohm. In case necessary, please consult your supply authority for
system impedance information.
Connecting the hob to the mains power supply
The power supply should be connected in compliance with the relevant standard,
or a single-pole circuit breaker. The method of connection is shown below.
1. If the cable is damaged or needs replacing, this should be done by an
after-sales technician using the proper tools, so as to avoid any accidents.
2. If the appliance is being connected directly to the mains supply, an omnipolar
circuit breaker must be installed with a minimum gap of 3mm between the
contacts.
3. The installer must ensure that the correct electrical connection has been made
and that it complies with safety regulations.
4. The cable must not be bent or compressed.
5. The cable must be checked regularly and only replaced by a properly qualified
person.
220-240V~
Black
Brown
Grey
Blue
Yellow/Green
Input
Power Cord
LN
220-240V~
220-240V~
400V~
Black
Brown
Grey
Blue
Yellow/Green
Input
Power Cord
L1 L2 N
EN-20
This appliance is labelled in accordance with European Directive 2012/19/EU
regarding electric and electronic appliances (WEEE). The WEEE contain both
polluting substances (that can have a negative effect on the environment) and
base elements (that can be reused). It is important that the WEEE undergo
specific treatments to correctly remove and dispose of the pollutants and
recover all the materials. Individuals can play an important role in ensuring
that the WEEE do not become an environmental problem; It is essential to
follow a few basic rules:
-the WEEE should not be treated as domestic waste;
-the WEEE should be taken to dedicated collection areas managed by the town council or a
registered company.
In many countries, domestic collections may be available for large WEEEs. When you buy a
new appliance, the old one can be returned to the vendor who must accept it free of charge as
a one-off, as long as the appliance is of an equivalent type and has the same functions as the
purchased appliance.

EN-21
Product Information for Domestic Electric Hobs Compliant to Commission Regulation (EU) No
66/2014
Position Symbol Value Unit
Model identification CEH6DXECTT/1
Type of hob: Electric Hob
Number of cooking
zones and/or areas
zones 4
areas
Heating technology
(induction cooking
zones and cooking
areas, radiant
cooking zones, solid
plates)
Induction cooking
zones
Induction cooking
cooking areas
radiant cooking
zones X
solid plates
For circular cooking zones or areas:
diameter of useful surface area per
electric heated cooking zone, rounded to
the nearest 5mm
Rear left Ø 16,5 cm
Rear central Ø - cm
Rear right Ø - cm
Central left Ø - cm
Central
central Ø - cm
Central right Ø - cm
Front left Ø 23,0 cm
Front central Ø - cm
Front right Ø 16,5 cm
For non-circular cooking zones or areas:
length and width of useful surface area
L
per electric heated cooking zone or area,
rounded to the nearest 5mm
Rear left W- cm
L
Rear central W- cm
L
Rear right W
16,5
27,0 cm
L
Central left W- cm
EN-22
Central
central
L
W - cm
Central right L
W - cm
Front left L
W - cm
Front central L
W - cm
Front right L
W - cm
Energy consumption for cooking zone or
area calculated per kg
Rear left ECelectric
cooking 186,0 Wh/kg
Rear central ECelectric
cooking - Wh/kg
Rear right ECelectric
cooking 176,9 Wh/kg
Central left ECelectric
cooking - Wh/kg
Central
central
ECelectric
cooking - Wh/kg
Central right ECelectric
cooking - Wh/kg
Front left ECelectric
cooking 167,0 Wh/kg
Front central ECelectric
cooking - Wh/kg
Front right ECelectric
cooking 186,0 Wh/kg
Energy consumption for the hob
calculated per kg ECelectric
hob 184,0 Wh/kg
Standard applied : EN 60350-2 Household electric cooking appliances - Part 2: Hobs -
Methods
for measuring performance
Suggestions for Energy Saving:
• To obtain the best efficiency of your hob, please place the pan in the centre of the cooking zone.
•Using a lid will reduce cooking times and save energy by retaining the heat.
• Minimise the amount of liquid or fat to reduce cooking times.
• Start cooking on a high setting and reduce the setting when the food has heated through.
• Use pans whose diameter is as large as the graphic of the zone selected.

DE-23
Sicherheitshinweise
Ihr Sicherheit liegt uns am Herzen. Lesen Sie
vor der Benutzung des Kochfelds bitte diese
Hinweise.
Montage
Stromschlaggefahr
•Trennen Sie das Gerät von der
Netzstromversorgung ab, bevor Sie Arbeiten
oder Wartungsmaßnahmen daran
durchführen.
•Der Anschluss an eine zuverlässige
Masseverbindung ist wesentlich und
zwingend vorgeschrieben.
•Veränderungen der hauseigenen
Elektroanlage dürfen nur von einem
qualifizierten Elektriker vorgenommen
werden.
•Andernfalls besteht Stromschlag- oder sogar
Lebensgefahr.
Schnittgefahr
•Seien Sie vorsichtig – die Platten haben
scharfe Kanten.
DE-24
•Bei Unvorsichtigkeit besteht Schnitt- oder
Verletzungsgefahr.
Wichtige Sicherheitshinweise
•Lesen Sie aufmerksam diese Hinweise, bevor
Sie das Gerät installieren oder benutzen.
•Legen Sie niemals brennbare Materialien
oder Produkte auf dem Gerät ab.
•Geben Sie diese Hinweise an den
Verantwortlichen für die Geräteinstallation
weiter, weil das Ihre Installationskosten
verringern könnte.
•Um Gefahren zu vermeiden, muss dieses
Gerät anweisungsgemäß installiert werden.
•Dieses Gerät muss von einer qualifizierten
Person fachgerecht installiert und geerdet
werden.
•Dieses Gerät muss an einen Stromkreis mit
einem Trennschutzschalter angeschlossen
werden, so dass es vollständig von der
Spannungsversorgung abgetrennt werden
kann.
•Die nicht fachgerechte Installation des
Geräts kann zum Erlöschen von Garantie-
oder Haftungsansprüchen führen.
Betrieb und Instandhaltung
Stromschlaggefahr
•Kochen Sie nie auf einer gebrochenen oder
gesprungenen Kochfeldoberfläche. Sollte die

DE-25
Kochfeldoberfläche gebrochen oder
gesprungen sein, schalten Sie sofort die
Netzstromversorgung aus und wenden sich
an einen Elektriker.
•Schalten Sie das Kochfeld aus, bevor Sie
Reinigungs- oder Instandhaltungsarbeiten
durchführen.
•Andernfalls besteht Stromschlag- oder sogar
Lebensgefahr.
Gesundheitsgefahr
•Dieses Gerät erfüllt die
Sicherheitsvorschriften für
elektromagnetische Vorrichtungen.
Gefahr durch heiße Flächen
•Bei der Benutzung werden zugängliche Teile
dieses Geräts so heiß, dass sie
Verbrennungen verursachen können.
•Achten Sie darauf, ihren Körper, ihre
Kleidung oder sonstige Gegenstände (außer
geeignetem Kochgeschirr) vom
Induktionsglas fernzuhalten, bis sich die
Oberfläche wieder abgekühlt hat.
•Metallobjekte wie Messer, Gabeln, Löffel und
Deckel dürfen nicht auf der Kochfläche
abgelegt werden, weil sie heiß werden
können.
•Halten Sie Kinder fern.
DE-26
•Die Griffe an Kochtöpfen können zu heiß
sein, um berührt werden zu können. Achten
Sie darauf, dass Kochtopfgriffe nicht auf
andere, eingeschaltete Kochfelder
überstehen. Achten Sie darauf, dass sich
Griffe außerhalb der Reichweite von Kindern
befinden.
•Andernfalls besteht die Gefahr von
Verbrennungen und Verbrühungen.
Schnittgefahr
•Wenn die Schutzkappe eines
Kochfeldreinigers zurückgeschoben ist, liegt
dessen rasiermesserscharfe Klinge frei.
Benutzen Sie einen Kochfeldreiniger mit
größter Vorsicht und bewahren Sie ihn
immer sicher und für Kinder unzugänglich
auf.
•Bei Unvorsichtigkeit besteht Schnitt- oder
Verletzungsgefahr.
Wichtige Sicherheitshinweise
•Lasen Sie das Gerät nie unbeaufsichtigt,
wenn es in Betrieb ist. Überkochendes
Gargut kann zu Rauchbildung führen, und
übertretendes Fett kann sich entzünden.
•Benutzen Sie das Gerät nie als Arbeits- oder
Ablagefläche.
•Lassen Sie nie Gegenstände oder
Arbeitsgeräte auf dem Gerät liegen.

DE-27
•Benutzen Sie das Gerät niemals, um den
Raum aufzuwärmen oder zu heizen.
•Schalten Sie die Kochzonen und das
Kochfeld wie in dieser Anleitung beschrieben
ab (d. h. mit Hilfe der Berührungstasten).
•Achten Sie darauf, das Kinder weder mit
dem Gerät spielen noch darauf sitzen,
stehen oder klettern.
•Bewahren Sie in Schränken über dem Gerät
keine Sachen auf, die für Kinder interessant
sein könnten. Kinder, die auf das Kochfeld
klettern, könnten ernsthafte Verletzungen
erleiden.
•Lassen Sie Kinder nie allein oder
unbeaufsichtigt in dem Bereich, in dem das
Gerät in Betrieb ist.
•Kinder oder Personen mit einer
Beeinträchtigung, die deren Fähigkeit zur
Benutzung des Geräts einschränkt, müssen
von einer verantwortlichen und kompetenten
Person in deren Benutzung eingewiesen
werden. Dieser Verantwortliche muss sich
davon überzeugen, dass sie das Gerät ohne
jede Gefahr für sich selbst oder ihre
Umgebung benutzen können.
•Reparieren oder ersetzen Sie Komponenten
des Geräts nur dann, wenn dies ausdrücklich
in der Bedienungsanleitung empfohlen wird.
Alle sonstigen Wartungsmaßnahmen sind
DE-28
von einem qualifizierten Techniker
durchzuführen.
•Reinigen Sie das Kochfeld keinesfalls mit
einem Dampfreiniger.
•Achten Sie darauf, keine schweren
Gegenstände auf dem Kochfeld abzustellen
oder darauf fallen zu lassen.
•Stellen Sie sich keinesfalls auf das Kochfeld.
•Achten Sie darauf, weder scharfkantige
Töpfe auf dem Kochfeld zu benutzen noch
Töpfe über die Induktionsglasfläche zu
ziehen, weil dadurch das Glas verkratzen
kann.
•Benutzen Sie keine Topfreiniger oder andere
scheuernden Reinigungsmittel, um das
Kochfeld zu reinigen, weil diese das
Induktionsglas verkratzen können.
•Ein beschädigtes Netzkabel muss vom
Hersteller, dem zugelassenen Kundendienst
oder ähnlichem Fachpersonal ausgewechselt
werden, um Gefahren vorzubeugen.
•Dieses Gerät ist für den Einsatz im Haushalt
und ähnliche Anwendungen vorgesehen, wie
z.B.:
•Personalküchen in Geschäften, Büros und
anderen Arbeitsumgebungen; Bauernhöfe;
Gäste von Hotels, Motels und anderen
Wohneinrichtungen; Bed and Breakfast
Einrichtungen.

DE-29
•ACHTUNG: Das Gerät und dessen
zugängliche Teile werden während des
Betriebs heiß.
•Es muss darauf geachtet werden, die
Heizelemente nicht zu berühren.
•Kinder unter 8 Jahren dürfen sich nicht
unbeaufsichtigt in der Nähe des Gerätes
aufhalten oder spielen.
•Dieses Gerät darf von Kindern ab 8 Jahren
und Personen mit eingeschränkten
körperlichen, sensorischen oder geistigen
Fähigkeiten oder ohne Erfahrung und Wissen
nur benutzt werden, wenn sie beaufsichtigt
werden oder Anweisungen für den sicheren
Gebrauch des Geräts erhalten und die damit
verbundenen Gefahren verstanden haben.
•Kinder dürfen keinesfalls mit dem Gerät
spielen. Kinder dürfen das Gerät nur unter
Beaufsichtigung reinigen und instandhalten.
•ACHTUNG: Unbeaufsichtigtes Kochen auf
einem Kochfeld mit Fett oder Öl kann
gefährlich sein und zu einem Brand führen.
Versuchen Sie NIEMALS, einen Brand mit
Wasser zu löschen, sondern schalten Sie das
Gerät aus und ersticken Sie die Flamme
dann (z. B. mit einem Deckel oder einer
Feuerlöschdecke).
DE-30
•WARNUNG: Brandgefahr: Keine
Gegenstände auf der Kochfläche liegen
lassen!
•Achtung: Wenn die Oberfläche Risse
aufweist, schalten Sie das Gerät aus, um die
Gefahr eines eventuellen Stromschlags zu
vermeiden. Für Kochfeldoberflächen aus
Glaskeramik oder einem ähnlichen Material,
das unter Strom stehende Bauteile schützt
darf
•kein Dampfreiniger verwendet werden.
•Das Gerät ist nicht dafür vorgesehen, mit
Hilfe einer externen Zeitschaltuhr oder einer
separaten Fernsteuerung betrieben zu
werden.
Herzlichen Glückwunsch zum Kauf Ihres neuen
Glaskeramikkochfelds.
Wir empfehlen, dieses Gebrauchs-/Montageanleitung aufmerksam zu lesen, um
sich umfassend damit vertraut zu machen, wie das Gerät korrekt installiert und
bedient wird.
Hinweise zur Montage entnehmen Sie bitte dem entsprechenden Abschnitt.
Lesen Sie alle vor der Benutzung aufmerksam alle Sicherheitshinweise und
bewahren Sie diese Gebrauchs-/Montageanleitung sicher auf.

DE-31
Produktübersicht
Draufsicht
1. Max. 2200/1000 W-Zone
2. max. 1200 W-Zone
3. Max. 2000/1100 W-Zone
4. max. 1200 W-Zone
5. Glaskeramikfläche
6. Bedienfeld
Bedienfeld
1. Taste Kochzonenauswahl
2. Taste Zeitschaltuhr
3. Taste Leistungs-
/Zeiteinstellung
4. Tastensperre
5. Taste EIN/AUS
6. Dual-/Oval-Zonen-Steuerung
Produktinformation
Das Mikrocomputer-Glaskeramikkochfeld kann aufgrund der Widerstandsdraht-
Heizung, der mikrocomputergesteuerten Steuerung und der Multi-Power-
Auswahl verschiedene Arten von Küchenanforderungen erfüllen - tatsächlich die
optimale Wahl für moderne Familien.
Das Glaskeramikkochfeld stellt den Kunden in den Mittelpunkt und nimmt ein
individuelles Design an. Das Kochfeld bietet eine sichere und zuverlässige
Leistung, die Ihr Leben bequem machen und es Ihnen ermöglichen, die Freude
am Leben voll zu genießen.
DE-32
Vor Benutzung des neuen
Glaskeramikkochfelds
•Lesen Sie aufmerksam diese Anleitung unter besonderer Beachtung des
Abschnitts „Sicherheitshinweise“.
•Entfernen Sie sämtliche Schutzfolien, die sich eventuell noch am
Glaskeramikkochfeld befinden.
Benutzung des Bedienfelds
•Die Elemente des Bedienfelds reagieren auf leichte Berührung, so dass
kein Druck ausgeübt werden muss.
•Benutzen Sie die gesamte Fingerkuppe, nicht nur die Fingerspitze.
•Jede erfasste Berührung wird mit einem Piepton quittiert.
•Achten Sie darauf, dass die Berührungstasten stets sauber und trocken
und keine Gegenstände (z. B. Kochutensilien oder Lappen) darauf abgelegt
sind. Schon ein kleiner Wasserfilm kann dazu führen, dass die
Berührungstasten nicht einwandfrei reagieren.
Wahl des geeigneten Kochgeschirrs
Benutzen Sie kein Kochgeschirr mit scharfen Kanten oder gewölbtem Boden.
Achten Sie darauf, dass der Boden des Kochtopfs eben ist, vollflächig auf der
Kochfläche aufliegt und dieselbe Größe wie das Kochfeld hat. Stellen Sie den
Kochtopf immer in die Mitte des Kochfelds.
Heben Sie Kochtöpfe stets vom Kochfeld ab, anstatt sie davon
herunterzuziehen, weil dies zu Kratzern in der Glaskeramikfläche führen kann.

DE-33
Benutzung des Glaskeramikkochfelds
Kochfeld einschalten
1. Drücken Sie auf EIN/AUS.
Nach dem Einschalten ertönt der Summer einmal,
alle Anzeigen zeigen
" - " oder " - - - ", was anzeigt, dass das
Glaskeramikkochfeld in den Bereitschaftsmodus
übergegangen ist.
2.
Stellen Sie einen geeigneten Kochtopf auf die
gewünschte Kochzone.
•Achten Sie
darauf, dass der Boden des Kochtopfs
und die Kochzone sauber und trocken sind.
3.
Wenn Sie nun die Zonenauswahl berühren, beginnt
eine Anzeige neben der Berührungstaste zu blinken.
4. Wählen Sie mit dem Schieberegler durch Berühren
der “-” oder “+” Steuerung.
•Falls innerhalb von 1 Minute keine Einstellung
gewählt wird, schaltet sich das Kochfeld
automatisch wieder ab. Sie müssen dann wieder
mit Schritt 1 anfangen.
•Die Leistungseinstellung kann jederzeit während
des Kochvorgangs geändert werden.
5. Wenn Zone 1 oder 3 in Betrieb ist, berühren Sie die
Heizzonen-Auswahlsteuerung und aktivieren Sie
dann die Doppelzone oder ovale Zone durch Drücken
von .
Wenn die Doppel- oder Ovalzonen in Betrieb sind, berühren Sie die Heizzonen-
Auswahlsteuerung und schalten Sie dann die Doppelzone oder ovale Zone
durch Drücken von aus.
Wenn Sie mit dem Kochen fertig sind
1.
Drücken Sie auf die Leistungseinstellung der
Kochzone, die Sie ausschalten wollen.
2. Schalten Sie die Kochzone aus, indem Sie “-” drücken und nach unten
ziehen auf "0", oder wenn Sie die Tasten "+" und "-" gleichzeitig 1
Sekunde lang gedrückt halten, wird direkt auf "0" heruntergefahren.
DE-34
Stellen Sie sicher, dass die Leistungsanzeige "0" und dann "H" anzeigt.
und dann
3.
Schalten Sie das gesamte Kochfeld aus, indem Sie
auf EIN/AUS drücken.
4. Vorsicht bei heißen Oberflächen
Im Display wird „H“ angezeigt, wenn die Kochzone
noch zu heiß ist, um berührt werden zu können. Die
Anzeige verschwindet, sobald sich die Oberfläche auf
eine gefahrlose Temperatur abgekühlt hat. Dies kann
auch als Energiesparfunktion genutzt werden,
beispielsweise, um auf einer noch heißen Kochzone
weitere Töpfe zu erwärmen.
Berührungstasten sperren
•Sie können die Berührungstasten sperren, um eine unbeabsichtigte
Benutzung zu verhindern (beispielsweise das Einschalten der Kochzonen
durch Kinder).
•Bei aktivierter Sperre sind bis auf die Funktion EIN/AUS alle
Berührungstasten funktionslos.
Sperre aktivieren
Drücken Sie auf die Tastensperre. Die Zeitschaltuhr zeigt „Lo“.
Sperre deaktivieren
1. Achten Sie darauf, dass das Kochfeld eingeschaltet ist.
2. Halten Sie die Tastensperre längere Zeit gedrückt.
3. Anschließend können Sie das Glaskeramikkochfeld wieder normal
benutzen.
Wenn das Kochfeld gesperrt ist, sind bis auf die Funktion EIN/AUS alle Berührungstasten
deaktiviert. Im Notfall können Sie das Glaskeramikkochfeld über die Funktion jederzeit
ausschalten, müssen es bei der nächsten Inbetriebnahme dann aber erst wieder entsperren.
Überhitzungsschutz
Ein Temperatursensor überwacht die Temperatur im Glaskeramikkochfeld.
Beim Auftreten einer übermäßigen Temperatur wird der Betrieb des
Glaskeramikkochfelds automatisch gestoppt.

DE-35
Überkochschutz
Der Überkochschutz ist eine Sicherheitsfunktion. Diese Funktion schaltet das
Kochfeld innerhalb von 10s automatisch ab, wenn das Wasser zum Bedienfeld
fließt, während der Summer 1 Sekunde lang piept.
Restwärme-Alarm
Wenn das Kochfeld länger verwendet wird, könnte Restwärme vorhanden sein.
Der Buchstabe "H" auf dem Display warnt davor, die Oberfläche zu berühren.
Automatische Abschaltung
Die automatische Abschaltung ist eine Sicherheitsfunktion für Ihr
Glaskeramikkochfeld. Sie schaltet das Kochfeld automatisch ab, falls Sie
vergessen, es auszuschalten. Die Tabelle unten zeigt die standardmäßigen
Betriebszeiten für die verschiedenen Leistungsstufen:
Leistungsstufe
1
2
3
4
5
6
7
8
9
Standard-Betriebsdauer
(Std.)
8 8 8 4 4 4 2 2 2
Benutzung der Zeitschaltuhr
Die Zeitschaltuhr bietet zwei verschiedene Nutzungsmöglichkeiten:
•Sie können sie als Erinnerungsfunktion nutzen. In diesem Fall schaltet die
Zeitschaltuhr nach Ablauf der eingestellten Zeitdauer keine Kochzone aus.
•Oder Sie benutzen sie, um eine oder mehrere Kochzone(n) nach Ablauf der
eingestellten Zeitdauer auszuschalten.
•Die maximale Einstelldauer beträgt 99 Minuten.
Benutzung der Zeitschaltuhr als Erinnerungsfunktion
Ohne Auswahl einer Kochzone
1. Achten Sie darauf, dass das Kochfeld eingeschaltet ist.
Hinweis: Sie können die Erinnerungsfunktion auch benutzen, ohne eine
Kochzone auszuwählen.
2. Drücken Sie auf die Taste „Timer“. Die
Erinnerungsanzeige beginnt zu blinken, und im
Display wird „30“ angezeigt.
DE-36
3. Wählen Sie mit der “-” oder “+”-Steuerung die
gewünschte Zeiteinstellung
Hinweis: Bei jeder Berührung der Taste „-“ oder
„+“ wird der Einstellwert um 1 Minute
erhöht oder verringert.
Halten Sie die an der Zeitschaltuhr „-“
bzw. „+“ gedrückt, um die Zeit um
10 Minuten zu verringern oder zu erhöhen.
Wenn die eingestellte Zeit 99 Minuten
überschreitet, wird die Zeitschaltuhr
automatisch auf „0“ Minuten
zurückgestellt.
4. Brechen Sie die Zeit durch Berühren der Timer-Steuerung ab, und die
"00" wird in der Minutenanzeige angezeigt.
5. Wenn die Zeit eingestellt ist, beginnt sofort der
Countdown. Das Display zeigt die verbleibende Zeit,
und die Erinnerungsanzeige blinkt 5 Sekunden lang.
6. Nach Ablauf der eingestellten Zeitdauer ist 30
Sekunden lang ein Piepton zu hören und das Display
zeigt „- -“.
Abschaltung einer Kochzone mittels Zeitschaltuhr
Für diese Funktion eingerichtete Kochzonen werden:
1.
Drücken Sie auf die Leistungseinstellung der
Kochzone, für die Sie die Zeitschaltuhr einstellen
wollen. (z. B. Zone #1)
2.
Drücken Sie auf die Taste „Timer“. Die
Erinnerungsanzeige beginnt zu blinken, und im
Display wird „30“ angezeigt.
3. Wählen Sie mit der “-” oder “+”-Steuerung die gewünschte Zeiteinstellung
Hinweis: Bei jeder Berührung der Taste „-“ oder „+“ wird der Einstellwert
um 1 Minute erhöht oder verringert.
Halten Sie die Taste „-“ oder „+“ gedrückt, um den Einstellwert
um 10 Minuten zu erhöhen bzw. zu verringern.
Wenn die eingestellte Zeit 99 Minuten überschreitet, wird die
Zeitschaltuhr automatisch auf „0“ Minuten zurückgestellt.
4. Wenn die Zeit eingestellt ist, beginnt sofort der
Countdown. Das Display zeigt die verbleibende Zeit,
und die Erinnerungsanzeige blinkt 5 Sekunden lang.

DE-37
HINWEIS: Der rote Punkt neben der
Leistungsstufenanzeige leuchtet als Hinweis darauf, dass
die Zone ausgewählt wurde.
5.
Um den Timer abzubrechen, berühren Sie die Kochzonen-
Auswahlsteuerung und dann die Timer-Steuerung, der Timer wird
abgebrochen und die "00" wird in der Minutenanzeige angezeigt und
dann "--".
6. Nach Ablauf der vorgegebenen Kochzeit zeigt das
Kochfeld „H“ an und die entsprechende Kochzone
wird automatisch ausgeschaltet.
Andere Kochzonen bleiben weiterhin eingeschaltet, sofern sie bereits
vorher eingeschaltet worden waren.
Abschaltung mehr als einer Kochzone mittels
Zeitschaltuhr
1. Wenn mehr als eine Kochzone diese Funktion verwendet, zeigt die Timer-
Anzeige die kürzeste Zeit an.
(z.B. Zone 1# Einstellzeit von 2 Minuten, Zone 2# Einstellzeit von 5
Minuten, die Timer-Anzeige zeigt "2" an).
HINWEIS: Der blinkende rote Punkt neben der Leistungspegelanzeige bedeutet,
dass die Timeranzeige die Zeit der Kochzone anzeigt.
Wenn Sie die eingestellte Zeit einer anderen Kochzone überprüfen möchten,
berühren Sie den Kochzonen-Auswahlregler. Die Zeitschaltuhr zeigt die
eingestellte Zeit an.
(auf 5 Minuten
geschaltet)
(auf 2 Minuten
geschaltet)
2. Nach Ablauf der vorgegebenen Kochzeit zeigt das
Kochfeld „H“ an und die entsprechende Kochzone
wird automatisch ausgeschaltet.
HINWEIS: Wenn Sie die Zeit nach der Einstellung des Timers ändern
möchten, müssen Sie mit Schritt 1 beginnen.
DE-38
Instandhaltung und Reinigung
Was?
Wie?
Wichtig!
Normale
Gebrauchsspuren auf
Glas (Fingerabdrücke,
Rückstände von
Lebensmitteln oder
übergekochtem
zuckerlosem Gargut auf
der Glasfläche)
1. Schalten Sie das Kochfeld
aus.
2. Reinigen Sie das noch
warme (aber nicht zu
heiße!) Glas mit einem
Kochfeldreiniger.
3. Spülen Sie mit Wasser nach
und wischen Sie das Feld
mit einem sauberen Lappen
oder Papiertuch trocken.
4. Schalten Sie das
Induktionskochfeld wieder
ein.
•Wenn das Kochfeld
ausgeschaltet ist, gibt es
keinen Hinweis „Heiße
Oberfläche“, obwohl die
Kochzone noch heiß sein
kann! Seien Sie daher
besonders vorsichtig.
•Topfreiniger sowie einige
Nylon-Reiniger und
Scheuermittel können die
Glasoberfläche zerkratzen.
Lesen Sie stets die
Produkthinweise, um zu
prüfen, ob ein Reiniger
geeignet ist.
•Beseitigen Sie stets
Reinigungsrückstände vom
Kochfeld, weil die
Glasoberfläche sonst fleckig
werden kann.
Reste von
übergekochtem,
geschmolzenem und
zuckerhaltigem Gargut
auf der Glasoberfläche
Beseitigen Sie diese sofort mit
einem Pfannenwender, einem
Spachtel oder einer für
Glaskeramikkochfelder
geeigneten Reinigungsklinge;
achten Sie dabei auf noch heiße
Kochzonen:
1. Schalten Sie das
Induktionskochfeld aus.
2. Halten Sie die Klinge (oder
ein anderes geeignetes
Instrument) in einem Winkel
von 30° und schaben Sie die
Verschmutzung in Richtung
eines kühlen
Kochfeldbereichs ab.
3. Spülen Sie mit etwas
Wasser nach und trocknen
Sie die Glasfläche dann mit
einem sauberen Lappen
oder Papiertuch.
4. Befolgen Sie die Schritte 2
bis 4 unter „Normale
Gebrauchsspuren auf Glas“
oben.
•Beseitigen Sie Rückstände
von geschmolzenen und
zuckerhaltigen Lebensmitteln
oder übergekochtem Gargut
möglichst umgehend. Wenn
es auf dem Glas abkühlt,
kann es schwer zu entfernen
sein oder die Glasoberfläche
dauerhaft beschädigen.
•Schnittgefahr: Wenn die
Schutzkappe eines
Kochfeldreinigers
zurückgeschoben ist, liegt
dessen rasiermesserscharfe
Klinge frei. Benutzen Sie
einen Kochfeldreiniger mit
größter Vorsicht und
bewahren Sie ihn immer
sicher und für Kinder
unzugänglich auf.
Table of contents
Languages:
Other Candy Hob manuals

Candy
Candy CHW6LBX/4U User manual

Candy
Candy CHG7 User manual

Candy
Candy CHW6LBX User manual

Candy
Candy CI633CTT User manual

Candy
Candy DT-01220 User manual

Candy
Candy CID 30/G3 User manual

Candy
Candy CHG6L User manual

Candy
Candy PVI 7500 User manual

Candy
Candy ICS36X User manual

Candy
Candy CETPS64SCWIFITT User manual

Candy
Candy CPG64SGBA JV User manual

Candy
Candy CDH 30 Specification sheet

Candy
Candy CIES642MCTT User manual

Candy
Candy CI642CTTWIFI User manual

Candy
Candy CEL7P4WX User manual

Candy
Candy CI642CBB/1 User manual

Candy
Candy CH63TVT User manual

Candy
Candy CFID36 User manual

Candy
Candy CHK64C User manual

Candy
Candy CLG64PX User manual