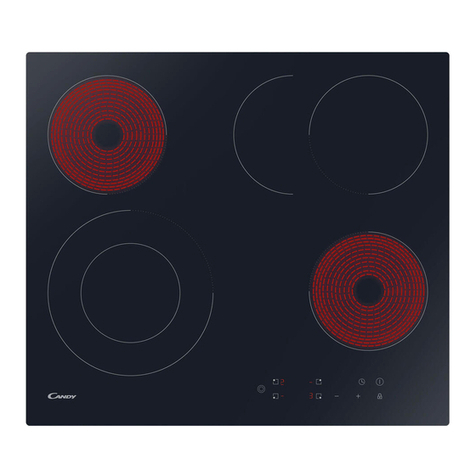
Candy DOMINO Series User manual

DOMINO COOKING HOBS
INSTALLATION ADVICES - INSTRUCTIONS FOR THE USE
GB
VARNÉ DESKY DOMINO
POKYNY PRO INSTALACI - NÁVOD K POUŽITÍ
CS
PLACAS DE COCCIÓN DOMINO
CONSEJOS DE INSTALACIÓN - INSTRUCCIONES DE USO
ES
DOMINO PLOČE ZA KUHANJE
SAVJETI ZA UGRADNJU - UPUTE ZA UPOTREBU
HR
PLACAS DOMINO
CONSELHOS DE INSTALAÇÃO - INSTRUÇÕES DE UTILIZAÇÃO
PT
PLITE DOMINO
RECOMANDĂRI DE INSTALARE - INSTRUCȚIUNI DE UTILIZARE
RO
VARNÉ DOSKY DOMINO
RADY NA INŠTALÁCIU - POKYNY NA POUŽÍVANIE
SK
KUHALNE PLOŠČE DOMINO
NASVETI ZA NAMESTITEV –NAVODILA ZA UPORABO
SL
PIANI COTTURA DOMINO
CONSIGLI PER L'INSTALLAZIONE - ISTRUZIONI PER L'USO
IT
•CHW23X
CANDY HOOVER GROUP S.R.L. • Via Comolli 16 • 20861 Brugherio (MB) Italy

22
Dear Customer,
Thank you for having purchased and given your preference to
our product.
The safety precautions and recommendations reported below
are for your own safety and that of others. They will also provide
a means by which to make full use of the features offered by your
appliance.
Please preserve this booklet carefully. It may be useful in future,
either to yourself or to others in the event that doubts should
arise relating to its operation.
This appliance must be used only for the task it has
explicitly been designed for, that is for cooking foodstuffs.
Any other form of usage is to be considered as inappropriate
and therefore dangerous.
The manufacturer declines all responsibility in the event
of damage caused by improper, incorrect or illogical use of
the appliance.
DECLARATION OF CE CONFORMITY
• This appliance has been designed to be used only for cooking. Any other use (such as
heating a room) is improper and dangerous.
• This appliance has been designed, constructed, and marketed in compliance with:
-Safety requirements of the “Gas” Regulation (EU) 2016/426;
-Safety requirements of the “Low voltage” Directive 2014/35/EU;
-Safety requirements of the “EMC” Directive 2014/30/EU;
-Requirements of EU Directive 93/68/EEC;
-Requirements of EU Directive 2011/65/EU.

33
IMPORTANT SAFETY PRECAUTIONS AND RECOMMENDATIONS
IMPORTANT: This appliance is designed and manufactured
solely for the cooking of domestic (household) food and is
not suitable for any non domestic application and therefore
should not be used in a commercial environment.
The appliance guarantee will be void if the appliance is used
within a non domestic environment i.e. a semi commercial,
commercial or communal environment.
Read the instructions carefully before installing and using
the appliance.
•This appliance has been designed and manufactured in
compliance with the applicable standards for the household
cooking products and it fulfills all the safety requirements shown
in this manual, including those for surface temperatures.
Some people with sensitive skin may have a more pronounced
temperature perception with some components although these
parts are within the limits allowed by the norms.
The complete safety of the appliance also depends on the correct
use, we therefore recommend to always pay a extreme attention
while using the product, especially in the presence of children.
•After having unpacked the appliance, check to ensure that it is
not damaged.
In case of doubt, do not use it and consult your supplier or a
professionally qualified technician.
•Packing elements (i.e. plastic bags, polystyrene foam, nails,
packing straps, etc.) should not be left around within easy reach
of children, as these may cause serious injuries.
•Some appliances are supplied with a protective film on steel and
aluminium parts. This film must be removed before using the
appliance.
•IMPORTANT: The use of suitable protective clothing/gloves is
recommended when handling or cleaning this appliance.

44
• Do not attempt to modify the technical characteristics of
the appliance as this may become dangerous to use. The
manufacturer declines all responsibility for any inconvenience
resulting from the inobservance of this condition.
• CAUTION: this appIiance must only be installed in a permanently
ventilated room in compliance with the applicable regulations.
• Do not operate your appliance by means of an external timer or
separate remote-control system.
• Do not carry out cleaning or maintenance operations on the
appliance without having previously disconnected it from the
electric power supply.
• Do not use a steam cleaner because the moisture can get into
the appliance therefore making it unsafe.
• Do not cover the hob with aluminium foils.
• Do not touch the appliance with wet or damp hands (or feet).
• Do not use the appliance whilst in bare feet.
• If you should decide not to use this appliance any longer (or
decide to substitute another model), before disposing of it, it
is recommended that it be made inoperative in an appropriate
manner in accordance to health and environmental protection
regulations, ensuring in particular that all potentially hazardous
parts be made harmless, especially in relation to children who
could play with unused appliances.
• The various components of the appliance are recyclable. Dispose
of them in accordance with the regulations in force in your country.
If the appliance is to be scrapped, remove the power cord.
• After use, ensure that the knobs/controls are in the off position.
• Children less than 8 years of age shall be kept away unless
continuously supervised.
• This appliance can be used by children aged from 8 years and
above and persons with reduced physical, sensory or mental
capabilities or lack of experience and knowledge if they have
been given supervision or instruction concerning use of the
appliance in a safe way and understand the hazards involved.
Children shall not play with the appliance. Cleaning and user
maintenance shall not be made by children without supervision.
55
•The manufacturer declines all liability for injury to persons or
damage to property caused by incorrect or improper use of the
appliance.
•WARNING: During use the appliance and its accessible parts
become hot; they remain hot for some time after use.
–Care should be taken to avoid touching heating elements on
the hob.
–To avoid burns and scalds, young children should be kept
away.
•Make sure that electrical cables connecting other appliances in
the proximity of the cooktop cannot come into contact with the
hob.
•WARNING: Unattended cooking on a hob with fat or oil can be
dangerous and may result in fire. NEVER try to extinguish a fire
with water, but switch off the appliance and then cover flame e.g.
with a lid or a fire blanket.
•WARNING: Danger of fire: do not store items on the cooking
surfaces.
•WARNING: When correctly installed, your product meets all
safety requirements laid down for this type of product category.
However special care should be taken around the underneath
of the appliance as this area is not designed or intended to be
touched and may contain sharp or rough edges, that may cause
injury.
•CAUTION: The cooking process has to be supervised. A short
term cooking process has to be supervised continuously.
•If the power supply cable is damaged, it must be replaced only
by an authorized service agent in order to avoid a hazard.
•If the appliance is not fitted with a supply cord and a plug, or with
other means for disconnection from the supply mains having a
contact separation in all poles that provide full disconnection under
overvoltage category III conditions, means for disconnection
must be incorporated in the fixed wiring in accordance with the
wiring rules.

66
•WARNING: The appliance and its accessible parts become hot
during use.
Care should be taken to avoid touching heating elements.
Children less than 8 years of age shall be kept away unless
continuously supervised.
•WARNING: Use only hob guards designed by the manufacturer
of the cooking appliance or indicated by the manufacturer of the
appliance in the instructions for use as suitable or hob guards
incorporated in the appliance. The use of inappropriate guards
can cause accidents.
ENERGY LABELLING/ECODESIGN
•Commission regulation (EU) No 66/2014 (implementing Directive 2009/125/EC of the
European Parliament and of the Council).
Reference to the measurement and calculation methods used to establish compliance with
the above requirements:
• Standard EN30-2-1 (hobs: gas fired burners).
USE OF THE APPLIANCE, ENERGY SAVING TIPS
HOB
GAS FIRED BURNERS
•It is important that the diameter of the pot be suitable to the potentiality of the burner
so as not to compromise the high output of the burners and therefore energy waste.
A small pot on a large burner does not give you a boiling point in a shorten amount of
time since the capacity of heat absorption of a liquid mass depends on the volume and
the surface of the pot.
• Avoid keeping a burner on without something on it (without pot).
IMPORTANT INFORMATION FOR CORRECT DISPOSAL OF THE PRODUCT
IN ACCORDANCE WITH EC DIRECTIVE 2012/19/UE.
At the end of its working life, the product must not be disposed of as
urban waste. It must be taken to a special local authority differentiated
waste collection centre or to a dealer providing this service.
Disposing of a household appliance separately avoids possible negative
consequences for the environment and health deriving from inappropriate
disposal and enables the constituent materials to be recovered to obtain
significant savings in energy and resources. As a reminder of the need to
dispose of household appliances separately, the product is marked with
a crossed-out wheeled dustbin.

77
IMPORTANT :
•The appliance is designed and approved for domestic use only and should not be
installed in a commercial, semi commercial or communal environment.
Your product will not be guaranteed if installed in any of the above environments
and could affect any third party or public liability insurances you may have.
•This appliance is to be installed, regulated and adapted to function only by an authorized
person in compliance with the current local regulations in force and in observation of
the instructions supplied by the manufacturer.
Failure to comply with this condition will render the guarantee invalid.
•The appliance must be installed in compliance with regulations in force in your country
and in observation of the manufacturer’s instructions.
•Installation technicians must comply to current laws in force concerning ventilation and
the evacuation of exhaust gases.
•Incorrect installation, for which the manufacturer accepts no responsibility, may cause
personal injury or damage.
• This appliance shall only be serviced by authorized personnel.
•Always disconnect the appliance from mains power supply before carrying out any
maintenance operations or repairs.
•Important: The use of suitable protective clothing/gloves is recommended when
handling or cleaning of this appliance.
•These tops are designed to be embedded into kitchen fixtures measuring 600
mm in depth, working surface 30 to 40 mm thick.
•The appliance must be housed in heat-resistant units.
•The walls of the units must not be higher than work top and must be capable of
resisting temperatures of 105°C above room temperature.
•We would point out that the adhesive which bonds the plastic laminate to the
furniture must withstand temperatures not less than 150°C to avoid delamination.
•Do not install the appliance near inflammable materials (eg. curtains).
WARNING!
When correctly installed, your product meets all safety requirements laid down for
this type of product category. However special care should be taken around the
underneath of the appliance as this area is not designed or intended to be touched
and may contain sharp or rough edges, that may cause injury.
Advice for
the installer

88
TECHNICAL INFORMATION FOR
THE INSTALLER
In order to install the cooker top into
the kitchen fixture, a hole with the
dimensions shown in fig. 1.1 has to be
made, bearing in mind the following:
•A 30mm ventilation gap must be
provided between the bottom of the
appliance and any cabinetry, draw
unit or appliance.
•If the base of the cooktop is
accessible through a cupboard or
drawer space after installation, a
thermal protection barrier is not
required.
•If the cooktop is installed above
an oven, the two appliances shall
be connected to the gas and/or
electrical supply with independent
connections.
•The cooker top must be kept no less than 100 mm away from any side wall (from side
edge of cutout - fig. 1.1).
•The hob must be installed at least 50 mm from the wall (from rear edge of cutout - fig.
1.2).
•There must be a distance of at least 650 mm between the hob and any wall cupboard
or extractor hood positioned immediately above (see fig. 1.1).
Do not install the appliance near inflammable materials (eg. curtains).
650 mm
450 mm
min 100 mm
Fig. 1.2
INSTALLATION
1
490
510
270
– 2
288
50
42
Fig. 1.1

99
FASTENING THE COOKTOP (figs. 1.3a, 1.3b, 1.3c)
Each cooktop is provided with an installation kit including brackets and screws for fastening
the cooktop to benches from 30 to 40mm thick.
The kit includes 4 tabs “A” and 4 selfthreading screws “B”.
• Cut the unit.
•Stretch gasket “G” over the edge of the hole made, being careful to overlay the junction
edges (fig. 1.3b).
•Turn the cooktop over and put tabs “A” (fig. 1.3a) into the mountings, only tighten
screws “B” a few turns. Make sure that the tabs are mounted correctly as shown in the
figure 1.3c. Turn the tabs so that the cooktop can be put into the hole.
• Put the cooktop into the hole cut into the unit and position it correctly.
• Put tabs “A” into place, tooth “C” of the tabs should go into the hole.
• Tighten screws “B” until the cooktop is completely secured.
•Using a sharp tool cut off the part of gasket “G” which protrudes from the cooktop.
Take care not to damage the benchtop.
Fig. 1.3c
Fig. 1.3a
G
Fig. 1.3b
A
A
AA
30 mm min.
40 mm max.
B
D
A
C
AA
AA
G

1010
VENTILATION REQUIREMENTS
The appliance must be installed in compliance with applicable local regulations
concerning ventilation and the evacuation of exhaust gases.
Intensive and prolonged use may require extra ventilation, e.g. opening a window,
or more efficient ventilation increasing the mechanical suction power if this is fitted.
CHOOSING SUITABLE SURROUNDINGS
The room where the gas appliance is to be installed must have a natural flow of air so that
the gas can burn (in compliance with applicable local regulations).
The flow of air must come directly from one or more openings made in the outside walls
with a free area of at least 100 cm2 (or refer to applicable local regulations).
The openings should be near the floor and preferably on the side opposite the exhaust for
combustion products and must be made so that they cannot be blocked from either the
inside or the outside.
When these openings cannot be made, the necessary air can come from an adjacent
room which is ventilated as required, as long as it is not a bed room or a danger area (in
compliance with applicable local regulations).
In this case, the kitchen door must allow the passage of the air.
DISCHARGING PRODUCTS OF COMBUSTION
Extractor hoods connected directly to the outside must be provided, to allow the products
of combustion of the gas appliance to be discharged (fig. 1.4).
If this is not possible, an electric fan may be used, attached to the external wall or the
window; the fan should have a capacity to circulate air at an hourly rate of 3-5 times the
total volume of the kitchen (fig. 1.5).
The fan can only be installed if the room has suitable vents to allow air to enter, as described
under the heading “Choosing suitable surroundings”.
H min 650 mm
Extractor hood
for products of
combustion
Air vent Air vent
Electric fan to
extract products of
combustion
Fig. 1.5Fig. 1.4

1111
GAS SECTION
2
GAS INSTALLATION REQUIREMENTS
Important !
• This appliance must be installed and serviced only by a suitably qualified,
registered installer. The installer shall refer to the local standards in force.
• Failure to install the appliance correctly could invalidate any manufacturer’s
warranty.
• Before installation, make sure that the local distribution conditions (gas type and
pressure) and the adjustment of this appliance are compatible. The appliance
adjustment conditions are given on the plate or the label.
• If the gas pressure (for which the appliance is to be used) is variable or if it is
not within the values indicated on the rating plate, it is mandatory to install a
proper gas pressure regulator which must be adjusted to guarantee the correct
operating pressure to the appliance (as per rating plate).
The regulator must be installed, adjusted and tested by a qualified technician.
• WARNING: Using the appliance with a wrong and/or variable gas pressure may
be extremely dangerous and may result in serious injury to the user. Damage to
the appliance could occur if not observing this condition.
The manufacturer declines every responsibility for any inconvenience resulting
from the inobservance of this condition.
This appliance is supplied for use on Natural gas or LPG (check the gas regulation label
attached on the appliance).
• Appliances supplied for use on Natural gas: they are adjusted for this gas only and
cannot be used on any other gas (LPG) without modification. The appliances are
manufactured for conversion to LPG.
• Appliances supplied for use on LPG: they are adjusted for this gas only and cannot
be used on any other gas (Natural gas) without modification. The appliances are
manufactured for conversion to Natural gas.
If the Natural gas/LPG conversion kit is not supplied with the appliance this kit can be
purchased by contacting the After-Sales Service.

1212
CONNECTING THE COOKTOP TO THE GAS SUPPLY
The gas connection fitting (fig. 2.1) is made up of:
• the floating nut;
• the elbow;
• the gaskets;
• the conical pipe fitting - to be used for the United Kingdom only or if requested by the
applicable local regulations. In this case, before connecting the appliance to the gas
supply, fit the conical pipe fitting to the elbow interposing the gasket. If the conical pipe
fitting is not supplied with the appliance it can be purchased by contacting the After-
Sales Service.
The gas connection must be carried out by an authorised person according to the
relevant local standards.
• If using a flexible hose, make sure it does not come into contact with moving parts.
• The rear of the chassis is recessed to provide a channel for the appliance inlet pipe.
• The gas connection fitting can be turned in the direction required (but never in a vertical
or horizontal position) after loosening the elbow and floating nut connection.
• Never attempt to turn the elbow without having first loosened the floating nut.
•The supplied gaskets guarantee a good seal for the gas connection. We recommend
that you replace the gaskets on the slightest sign of wear, deformation or imperfection.
•After connecting to the gas mains, check that the couplings are correctly sealed, using
soapy solution, but never a naked flame.
IM P OR TANT !
T he c onic a l pipe fitting m us t be
us ed for the United K ingdom only
or if re que s ted by the applic a ble
loc al re gula tions .
If this c onic a l a da ptor is no t s upplie d
with the a pplia nc e it c a n be purc ha s ed
by c onta c ting the After- S a les S e rvic e.
E lbow
Gas ket Floating nut
Applianc
e
inlet
pipe
C onic al
pipe
fitting
IS O 228-1 (female)
1/2” G cylindrical
IS O 7-1 (male)
1/2” G conical
Gas ket
IS O 228-1 (male)
1/2” G cylindrical
IS O 228-1 (male)
1/2” G cylindrical
R igid pipe
or flexible hos e
Fig. 2.1
Gasket Floating nut
Gasket
Elbow
ISO 228-1 (male)
1/2” cylindrical
ISO 228-1 (male)
1/2” cylindrical
Rigid pipe or
flexible hose
Appliance
inlet pipe
ISO 7-1 (male)
1/2” G conical
ISO 228-1 (female)
1/2” G cylindrical
Conical pipe
fitting
IMPORTANT !
The conical pipe fitting must be used
for the United Kingdom only or if
requested by the applicable local
regulations.
If this conical adaptor is not
supplied with the appliance it can be
purchased by contacting the After-
Sales Service.

1313
ADDITIONAL GAS CONNECTION REQUIREMENTS
When connecting the cooktop to the gas supply with rigid pipes or a flexible hose, make
sure that:
• You use rigid pipes or a flexible hose compliant with applicable local regulations. The
flexible hose shall be of the correct construction for the type of gas being used and of
the correct size to maintain the heat output of the appliance.
• The connection with rigid metal pipes does not cause stress or pressure to the gas
piping.
• The flexible hose is not under tension, twisted, kinked, or too tightly bent, neither while
the cooktop is in use nor while it is being connected or disconnected.
• The flexible hose is not longer than 2000 mm (or refer to applicable local regulations)
and does not come into contact with sharp edges, corners, or moving parts, as these
may cause abrasion. Use a single flexible hose only; never connect the cooktop with
more than one flexible hose.
• The flexible hose can easily be inspected along its entire length to check its condition;
if it has an expiry date, it should be replaced before that date.
• If using a flexible hose which is not entirely made of metal, make sure that it does not
come into contact with any part of the cooktop with a surface temperature of 70°C or
above (or refer to applicable local regulations).
• The rigid pipe or flexible hose is replaced if it shows signs of damage.
• The flexible hose is not subject to excessive heat by direct exposure to flue products
or by contact with hot surfaces.
• The socket into which the plug of the flexible hose fit is permanently attached to a firmly
fixed gas installation pipe and is positioned so that the hose hangs freely downwards.
• The plug of the flexible hose is accessible after installation, so that it can be
disconnected for service or removal.
• You inform the customer that the rigid pipe or flexible hose should not be subjected to
corrosion by cleaning agents.

1414
LUBRICATION OF THE GAS TAPS
In case of difficulty in the gas taps operation, call Service.
IMPORTANT
All intervention regarding installation, maintenance and conversion of the appliance
must be fulfilled with original factory parts.
The manufacturer declines any liability resulting from the non-compliance of this
obligation.
TABLE FOR THE CHOICE OF THE INJECTORS
Cat: II 2H 3+
(Countries IT-ES-PT-GB-SI-CZ)
G30/G31
28-30/37 mbar
G20
20 mbar
Cat: II 2E+3+
(Countries FR)
G30/G31
28-30/37 mbar
G20/G25
20/25 mbar
Cat: II 2H3B/P
(Countries HR-RO-SI-CZ)
G30/G31
30/30 mbar
G20
20 mbar
BURNERS
Nominal
Power
[kW]
Reduced
Power
[kW]
Ø injector
[1/100 mm]
Ø injector
[1/100 mm]
Semi-rapid (SR) 1,75 0,45 66 101
Rapid (R) 3,00 0,75 87 129
Double-ring (DR) 3,80 1,50 98 141
AIR VENT NECESSARY FOR GAS COMBUSTION = (2 m3/h x kW)
BURNERS Air necessary for combustion [m3/h]
Semi-rapid (SR) 3,50
Rapid (R) 6,00
Double-ring (DR) 7,60
For the gas category check the data label attached on the appliance
GAS MAINTENANCE

1515
J
REPLACEMENT OF THE INJECTORS
Select the injectors to be replaced
according to the “Table for the choice of the
injectors”.
The nozzle diameters, expressed in
hundredths of a millimetre, are marked on
the body of each injector.
If the injectors are not supplied they can
be obtained from the “Service Centre”.
REPLACEMENT OF THE
INJECTORS OF THE COOKTOP
BURNERS
To replace the injectors proceed as follows:
•Remove pan supports and burners
from the cooktop.
•Using a wrench, substitute the nozzle
injectors “J” (figs. 2.2, 2.3) with those
most suitable for the kind of gas for
which it is to be used.
The burners are conceived in such a
way so as not to require the regulation
of the primary air.
ADJUSTING OF THE MINIMUM OF
THE TOP BURNERS
In the minimum position the flame must
have a length of about 4 mm and must
remain lit even with a quick turn from the
maximum position to that of minimum.
The flame adjustment is done in the
following way:
• Turn on the burner.
•Turn the tap to the MINIMUM position.
• Take off the knob.
• With a small flat screwdriver turn the
screw “A” to the correct regulation
(figs. 2.4).
Normally for G30/G31 (LPG), the
regulation screw is tightened up.
Fig. 2.2
Semi-rapid
and rapid
burners
Double-ring
burner
Fig. 2.3
J
A
Fig. 2.4

1616
IMPORTANT: The appliance must be
installed by a qualified technician
according with the current local
regulations and in compliance with
the manufacturer instructions.
Incorrect installation might cause
harm and damage to people, animals
or objects, for which the manufacturer
accepts no responsibility.
Connection to a good earth wiring
system is absolutely essential.
The manufacturer accepts no
responsibility for any inconvenience
caused by failure to comply with this
rule.
Before carrying out any work on the
electrical section of the appliance,
it must be disconnected from the
mains.
GENERAL
•Connection to the electric power
supply must be carried out by a
qualified technician and following the
appropriate safety regulations.
•The appliance must be connected to
the mains checking that the voltage
corresponds to the value given in the
rating plate and that the electrical
cable sections can withstand the load
specified on the plate.
• If the hob is supplied without plug, fit a
standard plug which is suitable for the
power absorbed by the appliance and in
conformity with the local rules in force.
•The colours of the wires in the appliance
power cable may not correspond with
the colours marked on the terminals of
your electrical plug. The plug should
always be wired as follows:
–connect the green/yellow wire to
the terminal marked with the letter
“E” or the earth symbol “ ” or
coloured green/yellow;
–connect the blue wire to the
terminal marked with the letter “N”
or coloured black;
–connect the brown wire to the
terminal marked with the letter “L”
or coloured red.
•The plug must be connected to an
outlet connected to the grounding unit
in conformity to security norms.
•If the appliance is to be connected
directly to the mains, it must be placed
with an omnipolar switch with minimum
opening between the contacts of 3 mm
between the appliance and the mains.
•The power supply cable must not touch
the hot parts and must be positioned
so that it does not exceed 50°C above
ambient.
•Once the appliance has been installed,
the power switch or power plug must
always be in a accessible position.
•If the power supply cable is damaged it
must be substituted by a suitable cable
available in the after sales service.
•The appliance must have its own
supply; any other appliances installed
near it must be supplied separately.
–N.B. For connection to the mains,
do not use adapters, reducers or
branching devices as they can
cause overheating and burning.
–If the hob surface is cracked
disconnect the appliance from the
mains and contact the After-Sales
Service.
In the event that installation should
require modifications to the mains supply
wiring system, it is recommended that a
qualified technician be called to carry out
substitution.
The technician will also have to verify that
the cross-section of the electric cables
on the power point match the appliance’s
power rating.
ELECTRICAL SECTION
3

1717
REPLACING THER POWER SUPPLY CABLE
WARNING: If the power supply cable is damaged, it must be replaced only by an
authorized service agent in order to avoid a hazard.
Use the same type of power supply cable.
This cable must be connected to the terminal block following the diagram in fig. 3.1.
NOTE: The earth conductor must be left about 3 cm longer than the others.
The operations must be executed by a qualified technician.
SECTION OF THE SUPPLY CABLE
TYPE “H05V2V2-F”
(resistant to temperatures of 90°C)
220-240 V 50-60 Hz 3 x 0,75 mm2 (*) (**)
(*) Connection possible with plug and outlet
(**) Connection with wall box connection.
Fig. 3.1
L1 N(L2)PE
220-240 V ac
E

1818

1919
Advice for
the users

2020
Fig. 1.1a
Fig. 1.2a
FEATURES
1
6
5 4
1
2
3
5 4
1
2
6
3
Fig. 1.1b
Fig. 1.2b
NOTE:
The knobs and symbols may vary.
Caution!
Do not cover the hob with aluminium
foils.
This manual suits for next models
1
Table of contents
Languages:
Other Candy Hob manuals

Candy
Candy CHW7 User manual

Candy
Candy CVG75SWGNX User manual

Candy
Candy CHG7WLWE User manual

Candy
Candy PVI 630 Operation manual

Candy
Candy HOBS User manual

Candy
Candy CIFS85MCTT/1 User manual

Candy
Candy PL2D40NX User manual

Candy
Candy CH74BVT User manual

Candy
Candy CTP6SC4/E14U User manual

Candy
Candy CH64DVT User manual

Candy
Candy PL 604 Parts list manual

Candy
Candy CI642CBB User manual

Candy
Candy CDHC30 Specification sheet

Candy
Candy CPG 64 SPX User manual

Candy
Candy CI642MCBB User manual

Candy
Candy CEH6DXECTT/1 User manual

Candy
Candy CVG6DPB User manual

Candy
Candy CLG 64 SPN User manual

Candy
Candy CIB636SCTP User manual

Candy
Candy PGF 640 SDXC GH User manual