Candy P 604/1 User manual

1
93786156
GB INSTRUCTIONS FOR THE INSTALLATION
AND OPERATION OF THE ELECTRIC HOB
~~~
P 604/1

2
Unpackingtheappliance .......................................................................3
Recommendations ................................................................................3
• INSTALLATION
Safetyinstructions.................................................................................4
Electricalconnection......................................................................... 4/6
Fitting the hob......................................................................................7
• USING THE APPLIANCE
Hobfeatures.........................................................................................8
Technicaldata ......................................................................................8
The hot plate........................................................................................9
Using the hot plate ...............................................................................9
Cooking with the hot plate..................................................................10
Generalmaintenance ..........................................................................11
CONTENTS

3
UNPACKING THE APPLIANCE
Inside the appliance you will find a plastic bag containing the fixing brackets required for
installing the hob in the worktop.
TO GET THE BEST FROM YOUR APPLIANCE, PLEASE READ THE FOLLOWING
CAREFULLY.
Pleasekeeptheoperating and installationinstructionsina safe placeforfuturereference.
Before fixing the hob, note the serial number of the appliance just in case you should
requirerepairs from ouraftersales service organisationat some timein the future.
. Rating plate (located under the lower casing of the hob)
• All accessible parts of the hob will become hot while in operation. Always keep
children away from it.
• The hob should be given a quick clean after each use, to avoid the accumulation of
spillagesand grease.If spillages are not removed, they willharden, andcould causethe
productionofsmokeandunpleasantsmells.
•Whencooking with fats oroils,never leave hot platesunattented.Overheated fats oroils
canquickly catch fire.
RECOMMENDATIONS

4
INSTALLATION
Installing a domestic appliance can be a complicated operation which, if not
carried out correctly, can seriously affect consumer safety.
It is for this reason that the task should be undertaken by a professionally
qualified person who will carry it out in accordance with the technical regulations
in force.
In the event that this advice is ignored and the installation is carried out by an
unqualified person, CANDY declines all responsibility for any technical failure
of the product whether or not it results in damage to goods or injury to
individuals.
INSTALLATION: "ELECTRICAL CONNECTION"
Themains electricity supply connected to the appliance should complywith thenorms in
force in the country of installation.
Candy declines all responsibility for any damage that may be caused by unsuitable or
unreasonableuse.
Warning :
•Alwayscheckbeforeanyelectricaloperation,thesupplyvoltageshownonthe
electricity meter, the adjustment of the circuit-breaker, the continuity of the
connectiontoearthoftheinstallationandthatthefuseissuitable.
•Theelectricalconnectiontotheinstallationshouldbemadeviaasocketwithaplug
withearth, or via an omnipolecut-out switch with an opening gap ofat least 3 mm.
• The yellow/green wire of the power supply cable must be connected to the earth
ofbothpowersupplyandapplianceterminals.
•Candycannotbeheldresponsibleforanyaccidentsresultingfromtheuseofan
appliancewhichisnotconnectedtoearth,orwithafaultyearthconnectioncontinuity.
•Any queries regarding the power supply cordshould be referred to After Sales
Serviceoraqualifiedtechnician.
The hob "P 604/1" is supplied with a terminal block which enables you to choose the
correct connection for the particular power supply.
Theterminalblockpermitsdifferent connections :
• 220-240 V~
• 220-240 V2~
• 380-415 V2N~
• 220-240 V3~
• 380-415 V3N~

5
To proceed to the new connection, you must adhere to the following instructions.
•Beforemaking theconnection,make sure thatthe installation isprotectedby asuitable
fuse, see table on next page, and that it is fitted with wires of a large enough section to
supplytheappliancenormally.
1 - Operations to be carried out in order to make a connection :
.Choosethesupplycordinaccordancewiththerecommendationsinthetableonthe
nextpage.
. Turn the hob against the worktop.
. Unscrew the cover (Fig.1).
.Pass thesupply cordinto thecable clamp(Fig. 2).
.Unscrew theshunt bars fixedon theearth terminal.
.Striptheendofeachconductorofthesupplycordtoa10mmlength,bytakinginto
account the required length of the cord for the connection on the terminal block.
. According to the installation and with the help of shunt bars, fix the conductor as
shownon thechart.
.Engagetheearthwireyellow/greenontheearthterminal,tightenthenutandverify
the continuity of the earth.
.Securethecableclamp.
. Fix the cover.
Cable
clamp
Terminal
block
Earth
Terminal
Fig. 1 Fig. 2

6
INSTALLATION: "ELECTRICAL CONNECTION"
For connection to the terminal block,
you must :
. respect the n° 1, 2, 3, 4 and 5,
.tightenthe screws,
. do not forget to fix the earth wire (yellow/
green) on the earth terminal n° 6.
ExampleofconnectionThreephase
220-240V3~ :
Theearth wire must be clippedat thisplace.
Tighten the nut fully home.................................
IMPORTANT : Blue wire = Neutral Yellow/green wire = Earth
esahponoM
~V042-022
sesahpowT
~2V042-022
sesahpowT
lartueN+
~N2V514-083
sesahpeerhT
~3V042-022
sesahpeerhT
lartueN+
~N3V514-083
ESUF A52A52A61A52A61
ELBAC
epyT roF-VV50H
F-RR50H
roF-VV50H
F-RR50H
roF-VV50H
F-RR50H
roF-VV50H
F-RR50H
roF-VV50H
F-RR50H
areA 5,2G35,2G35,1G45,2G45,1G5
noitcennoC
ehtot
lanimret
kcolb
:tnuhsoT
egdirbaekam
tnuhsahtiw
rab
1stphase
shunt 1-2
shunt 2-3
2ndphase
shunt 4-5
Earth
1stphase
shunt 1-2
shunt 2-3
2nd neutral
shunt 4-5
Earth
1st phase 1-2
2nd phase 3
3rd neutral
shunt 4-5
Earth
1stphase
shunt 1-2
2ndphase
shunt 3-4
3rd phase 5
Earth
1st phase 1
2nd phase 2
3rd phase 3
4th neutral
shunt 4-5
Earth
12345 E
PH PH
E
12345 E
PH N
E
12345 E
PH PH
E
N
12345 E
PH PH PH
E
12345 E
P
H PH PH
E
N

7
Both the worktop where the hob will be fitted and any adjacent kitchen furniture must be
madefromheatresistantmaterialandfixedwithheatresistantadhesive.
If,wheninstallingthehob,thelowerhobfaceisadjacenttoanareanormallyaccessiblewhen
handling or cleaning, fit a heatproof partition 1 cm below the base of the hob, with a
10x10cmopeningintherearright-handcorner,toavoidanyriskofscorchingordamage.
Thereshouldalsobea5cmgapbetweentheapplianceandalladjacentverticalsurfaces.
Afoamadhesivesealissuppliedwiththehob.Stickthissealundertheedgeofthebodyas
nearaspossibletotheouteredgeofthehob.Pressroundtheedgesofthehob,sothatthe
sealflattensoutandensuresanairtightseal.
Fittingtheseal Building-inaccordingtoTYPEY
Topviewofthehob (Norm EN 335-2-6)
The body of the hob is fitted with 4 location holes to take the fixing brackets that secure
the intended to fix the hob in the unit. Place the 4 fixing brackets in such a way that the
hobsurfaceisplacedperfectlyin the support unit.
Locationforfixingbrackets
Fixing
bracket
INSTALLATION
SEAL
560 mm
480 mm
30 mm
Opening 10 X 10 cm

8
Overalldimensions (cm):
Width : 59 Depth : 51
Building-indimensions(cm)-(seechapter"Installation"):
Width : 56 Depth : 48
Totalelectricalpower: 7 kW
In order to improve the quality of the products, CANDY may carry out modifications
linkedtotechnicalimprovements.
Appliance meeting with the standard CEE 89/336, and 73/23.
HOB FEATURES / TECHNICAL DATA
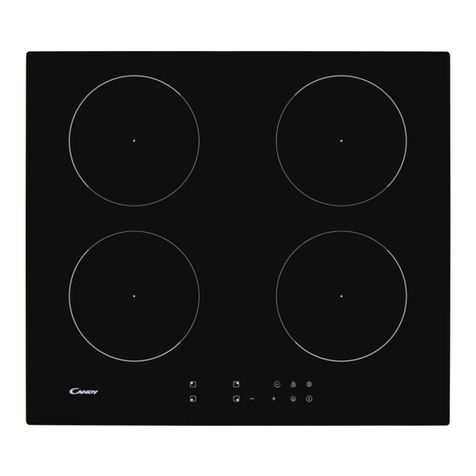
P 604/1 4ELECTRICAL HOT PLATES
Speed protected
hot plate
1500 W - Ø 145
Speed protected
hot plate
2000 W - Ø 180
Speed protected
Hot plate
2000 W - Ø 180
Speed protected
Hot plate
1500 W - Ø 145
Power-on
indicator lights

9
THE HOT PLATE
THE RAPID SELF-PROTECTING ELECTRIC HOT PLATE
This is a cast-iron hot plate, controlled by a 7 position switch.
Eachpositioncorrespondstoapermanentandprogressivetemperature
accordingtothemarks1,2,3,4,5and6.Aninternalthermostatcuts
offofthepowersupplyifoverheatingoccurs.(If,forexample,ahotplateisworkingwithout
a pan on it).
BEFORE USING THE ELECTRIC HOT PLATE :
• Before using the electric hot plate for the first time, let it heat up for a few minutes,
without a pan, at maximum temperature to let the protective coating harden.
HOW TO USE :
• For best results, it is advisable to start on the maximum heat and then turn back to
an intermediate temperature taking into account the type and volume of the food.
• The power-on indicator light comes on to show that the hot plate is working.
• To switch off, turn back the knob to position " ".
THE DIFFERENT TEMPERATURE SETTINGS : below are a few examples which
aregivenasguidelines.Whenyoubecomemorefamiliarwiththeappliance,youwill
beabletochoosesettingstosuityourownpersonaltastesandrequirements.
snoitisoP .....spitemoS
1wolyreV ....etalocohcdnarettubtlem,tohhsidapeekoT
2woL ...sggedehcaop,gniddupecir,swets,secuas,gnikoocwolS
3yletaredoM ....retawgniliob,tiurf,sdoofnezorf,snaeB
4muideM ....hsif,seperc,atsap,selbategevhserf,selppademaetS
5hgiH ....skaets,settelemo,gnikoocesnetnieroM
6hgihyreV ...gniyrf,spohc,skaetS

10
Cooking with the electric hot plate
To gest the best results from your appliance it is important to observe the following :
•Use thick, flat-based cooking vessels, a completely flat base prevents overheating
tocertainparts which causesfoodtostick. Thick metalallowsforgood heat distribution.
•Make sure that the base of the pan is dry : this will prevent sticking to the hot plate
causedbyofmoisture.
• Use pans with a diameter large enough to completely cover the hot plate, otherwise
energywillbewastedandanyspillageswillcausethehotplatetobecomestainedandwill
become difficult to maintain (rust, etc).
• Never leave a hot plate switched on without a pan on it : it can be damaged, which
wouldreduceitsefficiency.
• When cooking with fat or oil, do not remove the pan from the hob. Very hot fats and
oilscanquicklycatchfire.
• When the hot plate is hot, avoid any contact with materials made of plastic or
aluminium foil.
Warning : keep children away from the hot plate when in operation.
Hotplate powerlevels vary accordingto thesize andthe control knobsetting.
LACIRTCELELACIRTCELE LACIRTCELE LACIRTCELELACIRTCELE
ETALPTOHETALPTOH ETALPTOH ETALPTOHETALPTOH SNOITISOPSNOITISOP SNOITISOP SNOITISOPSNOITISOP
snoitisop7snoitisop7 snoitisop7 snoitisop7snoitisop7 00
0
00 11
1
11 22
2
22 33
3
33 44
4
44 55
5
55 66
6
66
W0051-541Ø
tfelraer
thgirtnorf
S
T
O
P
5315610520050570051
W0002-081Ø
tfeltnorf
thgirraer
57102200305805110002

11
MAINTENANCE
Before cleaning or removing the hob, it is imperative to :
. disconnect the hob from the mains supply.
. let all parts of the hob cool down.
Never use :
. harsh abrasives, scouring pads or sharp object to clean the hob.
• GENERAL MAINTENANCE
THE ENAMELLED HOB
.Enamelledsteelhob:whenthehobhascooledcompletelysimplycleantheenamelled
hobwithsoapywater,rinseandwipewithacleandrycloth.Ifyoucleantheenamelledhob
when it is hot, you may tarnish it.
.Stainlesssteel:cleanwithsoapywater,rinseanddry.Youcanuseaspecialproducttoclean
stainlesssteelwhichisavailablefromvariousretailoutlets.
THE KNOBS
Only clean with soapy water and dry well.
THE HOT PLATE
To burn off any cooking deposits heat the hob for a short time.
After switching off and the hot plate has cooled down, wipe it with absorbent paper. It is
important that the hot plate is protected from moisture.
Donotuseabrasiveproducts.
Tomaintainandpreserveitsappearance,rubadropofneutraloil,suchassewingmachine
oil into the surface of the hot plate.
Thehotplateshouldalwaysbedry,orslightlygreasy.Ifitisnottobeusedforsometime,
removeanyrustusingemerypaperfollowedbyasuitablecommerciallyavailableproduct.

12
CANDY ELETTRODOMESTICI S.R.L.
BRUGHERIO (MILANO)
ITALIA
Table of contents
Other Candy Hob manuals

Candy
Candy PVS 604 HL Operation manual

Candy
Candy PVL6SL User manual

Candy
Candy CH64XB User manual

Candy
Candy CHK46C User manual

Candy
Candy CI640C User manual

Candy
Candy CDHC30 Specification sheet

Candy
Candy CDI32B User manual

Candy
Candy CHG6BR4WX User manual

Candy
Candy CTP6SC4/E14U User manual
Candy
Candy CHW7AV4WGT User manual

Candy
Candy CH64CCW User manual

Candy
Candy CIB636SCTP User manual

Candy
Candy CIFS85MCTT User manual

Candy
Candy CJ2D46TKT User manual

Candy
Candy CHG7WLWEX User manual

Candy
Candy ICS36X User manual
Candy
Candy TRIO 501 User manual

Candy
Candy PVI 7500 User manual

Candy
Candy PVS 640 User manual

Candy
Candy CI642CBB User manual