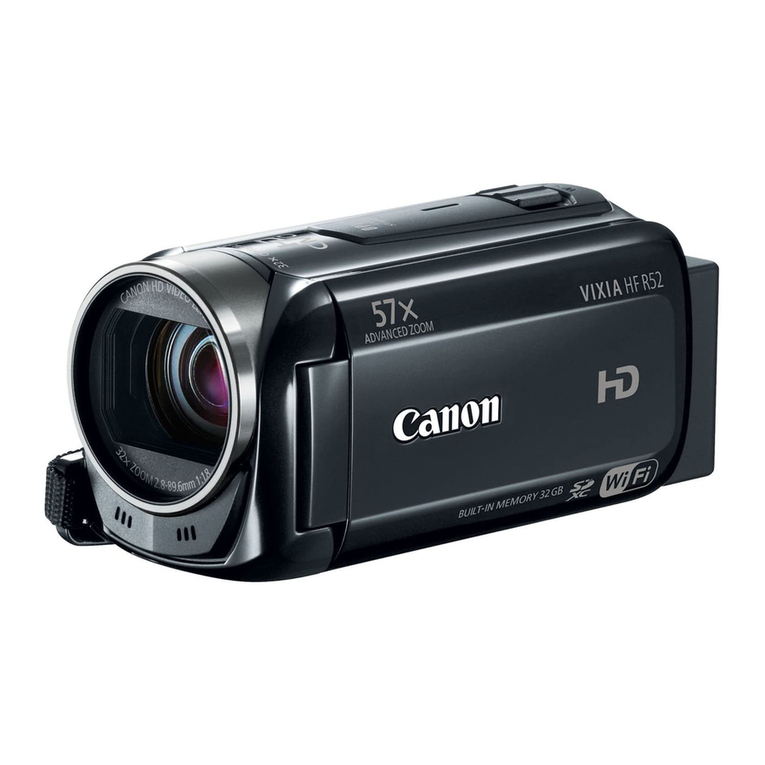
Canon VIXIA HF R40 User manual


AdvancedPlaybackandEditing
In this chapter, you can learn how to use functions related to
playback and editing, such as capturing video snapshot scenes
and photos from your movies and playing back your movies
with background music.
CapturingVideoSnapshotScenesandPhotosfrom a Movie
You can capture video snapshot scenes or photos from a previously
recorded scene. For example, you may want to print photos from video
recorded at a party or create a small video clip using video snapshot
scenes from the highlights of an event.
For details on playback, refer to Playing Back Video Snapshot Scenes
([_ 94) for AVCHD movies and Playing Back Video ([_ 50) for MP4
video snapshot scenes.
Capturing a Video Snapshot Scene
Operating modes: I J
1 Play back the scene from which you want to capture the video
snapshot scene ([_j_50).
2 Press [_TAR_iS_6F;IIto capture the video snapshot scene.
The camcorder captures the video snapshot scene for about
4 seconds (the blue frame serves as a visual progress bar), and then
enters playback pause mode.
3 Touch the screen and then touch Ira] to stop the playback.
(_) NOTES
You can change the length of the video snapshot scenes you capture to
2 or 8 seconds with the _" #} _ #} [Video Snapshot Length] set-
ting.
A video snapshot scene can be captured only during playback; it can-
not be captured during playback pause mode.
The captured video snapshot scene is saved to the same memory that
contains the source scene.
92 • Advanced Playback and Edtng

Video snapshot scenes cannot be captured from scenes shorter than
1 second.
When the source scene is itself a video snapshot scene, you may not
be able to capture a video snapshot scene depending on the length of
the source scene and the length currently selected for video snapshot
scenes.
When you start capturing a video snapshot scene less than 1 second
from the end of the scene, the video snapshot scene will be captured
starting from the beginning of the following scene.
During the playback of video snapshot scenes captured from a previ-
ously recorded movie, you may notice some anomalies in the picture/
sound at the point where the playback switches to a new scene.
Capturing Photos
Operating modes:
.... I I
1 Play back the scene from which you want to capture the photo
(1_ 50).
2 Pause the playback at the point you want to capture.
3 Touch [PHOTO].
4 Touch [m] to stop the playback.
NOTES
The size of captured photos will be 1920xl 080.
The data code of the photos will reflect the date and time of recording of
the original scene.
Photos captured from a scene with a lot of fast movement may be
blurred.
Photos will be recorded on the memory selected for recording photos.
PlayingBack Scenesin the BabyAlbum
The baby album contains, in chronological order, only the movies
recorded in mode so you can conveniently play those movies
back and enjoy watching baby's growth. You can also play back those
movies from the [%_. Movie Playback] index screen ([1_ 50).
Advanced Playback and Edtng * 9:3

Operatingmodes: 1 1
1 Open the baby album.
{_ i¢'I [@ Baby Album]
2 Select the scene you want to play back.
Drag your finger left/right to bring the desired scene to the front.
3 Touch the scene's thumbnail to start the playback.
The camcorder will play back the scene selected and continue until
the end of the last scene in the index screen.
Playback controls are the same as when playing back scenes from
the [_ Movie Playback] index screen (C[] 50).
O IMPORTAI/T
Observe the following precautions while the ACCESS indicator is on or
flashing. Failing to do so may result in permanent data loss.
- Do not open the memory card slot cover.
- Do not disconnect the power source or turn off the camcorder.
- Do not press [_[[}.
PlayingBackVideoSnapshotScenes
When you record video snapshot scenes in AVCHD, you can play back
only those scenes to create an entertaining montage. You can also play
back those scenes from the [ba Movie Playback] index screen ([Z] 50).
Video snapshot scenes recorded in MP4 can be played back only from
the [ba Movie Playback] index screen (CJ_50).
Operating modes:
1 Open the [lll_ Video Snapshot] index screen for AVCHD scenes.
[_ Vide0 SnaPSh°!]
94 • Advanced Playback and Edtng

2 Select the scene you want to play back.
Drag your finger left/right to bring the desired scene to the front.
3 Touch the scene's thumbnail to start the playback.
• The camcorder will play back the scene selected and continue until
the end of the last scene in the index screen.
• Playback controls are the same as when playing back scenes from
the [_a Movie Playback] index screen (CJ_50).
IMPORTANT
• Observe the following precautions while the ACCESS indicator is on or
flashing. Failing to do so may result in permanent data loss.
- Do not open the memory card slot cover.
- Do not disconnect the power source or turn off the camcorder.
- Do not change the camcorder's operating mode.
Playbackwith BackgroundMusic
You can play back movies (or a photo slideshow) using one of the sup-
plied music tracks as background music.
Operating modes:
.... I [
The supplied VlXIA CD-ROM contains 3 music tracks you can use as
background music. IJ_/l_l"_'_ii :The music files come preqnstalled in
the built-in memory.
You can mix the original audio and the background music and adjust
the background music mix balance to your preference.
_ POINTSTOOHEOK
• To play back scenes or a slideshow of photos recorded on the memory
card, you will need to transfer the music tracks to the memory card in
advance. See the NOTES section (CJ_97).
1 Open the desired index screen (CJ_50, 93, 94).
Advanced Playback and Edtng * 95

2 Select the music track.
%
Select the desired music track.
Adjust the background music balance.
Play back the original sound (no background music).
Delete the music track selected.
Listen to the music track selected. Touch again (m) to
stop the playback.
3 Adjust the mix balance between the original sound and the
background music.
Touch [%_,](more of the original sound) or [,!1] (more of the background
music) or drag your finger along the [Music Balance] bar to adjust the
background music balance as desired.
4 Touch IX] and then touch a scene to start the playback with the
selected background music.
To adjust the background music balance during playback
1 During playback, touch the screen to display the playback controls.
2 Touch [_1,a], drag your finger along the [Music Balance] bar to adjust
the background music balance as desired and touch [2_].
To delete amusic track
In the [Select Music] screen, touch [A] or [Y] to select the track you
want to delete.
96 * Advanced Playback and Edtng

O IMPORTANT
If you use copyrighted songs and music tracks in your video creations,
remember that music under copyright may not be used without permis-
sion from the copyright holder, except for cases permitted under appli-
cable laws, such as for personal use. Make sure to follow applicable
laws when using music files.
(_ NOTES
Initializing a memory card will permanently erase any music files you
may have transferred to the card. (J]_/JJllJ_ The music files that
come pre-installed in the built-in memory will be restored after it is initial-
ized.) To transfer music files from the supplied VIXIA CD-ROM to the
memory card:
- Windows users: Use the supplied software for AVCHD movies,
Transfer Utility LE. For details, refer to the Software Guide (PDF file)
of PIXELA's software.
- Mac OS users: Use Finder to transfer music files from the "MUSIC"
folder on the supplied VIXIA CD-ROM to the memory card. Refer to
About the music f/Yes([_]3190) for the folder structure of the memory
card.
Transfer music files to the memory card that contains the recordings
you want to play back with background music.
Selectingthe PlaybackStarting Point
If you have a very long scene, you may want to start playing back the
scene from a certain point. You can use the movie timeline to break the
scene to segments at fixed time intervals ranging from 6 seconds to
6 minutes.
Operating modes: I I
1 Open the desired index screen for AVCHD movies ([_]3 50, 93, 94).
Advanced Playback and Edtng • 97

2 Open the scene's [Timeline] screen,
The [Timeline] screen appears. The large thumbnail will show the first
frame of the scene. Below it, the timeline ruler shows frames taken
from the scene at fixed intervals.
3 Touch the desired frame in the timeline ruler to start playing back
the scene from that point.
% %
Touch twice to return to the index screen,
Previous/next scene.
Drag your finger left along the ruler to display the next 5 frames,
4_ Scene's video quality and length,
Recording date and time.
Drag your finger right along the ruler to display the previous
5 frames,
7_ Current scene /Total number of scenes,
Currently selected interval between frames.
To change the interval between frames
£8 * Advanced Playback and Edtng

DividingScenes
You can divide AVCHD scenes in order to leave out the best parts and
later cut out the rest.
Operating modes: .... I
1 Play back the desired scene ([_ 50).
2 Touch the screen and then touch [||] to pause the playback.
3 Open the screen for dividing scenes.
4 Bring the scene to a precise point, if necessary.
Playback controls will appear on the screen ([_ 52). Use any special
playback modes (fast playback, frame reverse/advance) as necessary
to locate the desired point.
5 Divide the scene.
• The video from the division point to the end of the scene will appear
as a new scene in the index screen.
NOTES
• When advancing/reversing frames while dividing the scenes, the interval
between frames is about 0.5 seconds.
• If the scene cannot be divided at the point where you paused the play-
back, advance/reverse a frame and then divide the scene.
• During the playback of a scene that was divided, you may notice some
anomalies in the picture/sound at the point where the scene was cut.
• Video snapshot scenes and other scenes that are too short (less than 3
seconds) cannot be divided.
• Scenes cannot be divided within 1 second from the beginning or the
end of the scene.
Advanced Playback and Edtng * 99

TrimmingScenes
You can trim MP4 scenes by removing everything up to a certain point
or everything after a certain point. By doing so, you leave only memo-
rable moments to keep for posterity.
Operating modes: I I
1 Play back the desired scene (C]_ 50).
2 Touch the screen and then touch [|11] to pause the playback.
3 Open the screen for trimming scenes.
4 Bring the scene to a precise point, if necessary.
The point at which is movie will be trimmed is indicated by the _'
marker.
Playback controls will appear on the screen ([_ 52). Use any special
playback modes (fast playback, frame reverse/advance) as
necessary to locate the desired point.
5 Trim the scene.
[Trim] @ seieCi Whetheit0 tdm bef0re 0r aftei the
marker _ Select whether to save as a new scene or write
Touch [Stop] to interrupt the operation while it is in progress.
(_ NOTES
You may not be able to trim the following types of scenes.
- _/1_-_ Scenes copied from the built-in memory to an SDXC
memory card.
- Scenes recorded or copied using another device.
10_ • Advanced Playback and Edtng
Slideshow
You can play a slideshow of all the photos and even set it to music.
Operating modes:
1 Open the [1_ Photo Playback] index screen ([_ 54).
2 Select the music track.
3 Touch the photo that will open the slideshow to display it in single
photo view.
4 Touch the screen to display the playback controls, then touch [_1_]
to play back the slideshow set to the selected music track.
During the photo slideshow
Touch the screen and drag your finger left and right along the volume
bar to adjust the volume.
Touch the screen and touch [||] to stop the slideshow.
To change the elideshow'e transition effects from the index screen
I_ _ [=_" other settings] [Siideshow
Trans tion] e)[_ Off], [_ Dissolve] or [_ Slide Image]
Advanced Playback and Edtng * 101
ExternalConnections
This chapter explains how to connect your camcorder to an
external device such as a TV, VCR, or computer. IE_L_/l_'r_r_
You can also use the camcorder's convenient Wi-Fi functions
(CJ_122).
Terminals on the Camcorder
Open the LCD panel to access the terminals on the camcorder.
gv .DM'tOUT uSB.'_t_
(cableconoecto
shownupside-down) --
_> AV OUT/_ Terminal
_b HDMI OUT Terminal*
The HDMI OUT terminal offers a high-quality digital connection that combines
audio and video in a single convenient cable. This terminal is an HDMI mini
receptacle. When using a commercially available HDMI cable, make sure the
HDMI cable is Type A to Type C.
_3_USB Terminal
This terminal is a mini-AB receptacle. You can use the supplied USB cable to
connect to a computer or other digital devices with standard-A receptacles; or
use the optional UA-IO0 USB Adapter to connect to the camcorder an
external hard drive or similar storage device with a standard-A cable (_/
only).
* When connecting the supplied High Speed HDMI cable to the camcorder, make
sure to align the triangle marks on the cable's connector and on the camcorder's
terminal.
102 * ExternalConnectcos

ConnectionDiagrams
In the following connection diagrams, the left side shows the terminals
on the camcorder and the right side shows (for reference only) an
example of terminals on a connected device.
HDMI
HDMIOUT
HDMI IN
HTC-IO0/S High Speed HDMI Cable
dDMI mini connecton isue[mem stanaard HDMI
connector_
About the HDMI TM connection
The HDMI (High-Definition Multimedia Interface} connection (1_) is a
convenient all-digital connection using a single cable for both video
and audio. When you connect the camcorder to an HDTV equipped
with an HDMI terminal, you can enjoy video and audio playback at
the highest quality.
- The HDMI OUT terminal on the camcorder is for output only. Do not
connect it to an HDMI output terminal on an external device, as this
may damage the camcorder.
- While the camcorder is connected to an HDTV using connection _,
there will be no video output from the AV OUTiO terminal.
- Correct operation cannot be guaranteed when connecting the
camcorder to DVl monitors.
- Depending on the HDTV, correct playback of personal video content may
not be possible using connection _. Try using connection 21.
Exte hal Connect ons • 103

Composite Video
Yellow .,._41m_Z]__
oAVT@ Q White @ (_)
STV-250N(_tetrel_ide°Cable _ Red __)_
USB
©
USBCable
Mini-B (supplied) Standard-A
(computer,digitalrecorder)
1_[_3/_ only
Standard-A USBcablesuppliedwith/
built-intotheexternalstorage
usB_ UA-1O0USB
Mini-B Adapter(optional)
Externalharddrive
104 * External Connect ons

(_) I/0TES
Power the camcorder using the compact power adapter and only then
connect it to the computer using the supplied USB cable in the follow-
ing cases.
- To write back scenes recorded with this camcorder that were
previously saved on a computer. For details, refer to the Software
Guide (PDF file) of PIXELA's software.
- To transfer music files from the supplied VIXIA CD-ROM to a memory
card in the camcorder in order to use them as background music. For
details, refer to the Software Guide (PDF file) of PIXELA's software.
- To save your recordings on a computer.
- To save a memory onto an external hard drive.
Sound from the built-in speaker will be muted while a cable is con-
nected to the HDMI OUT terminal or AV OUT/O terminal.
Audio and video will not be output from the HDMI terminal while Wi-Fi
functions are in use.
Playbackon a TVScreen
Connect the camcorder to a TV to enjoy your recordings with family
and friends. Playback on an HDTV using the HDMI OUT terminal will
ensure the best playback quality.
Operating modes:
I I
1 Turn off the camcorder and the TV.
2 Connect the camcorder to the TV.
Refer to Connection Diagrams ([_ 103) and select the most
appropriate connection for your TV.
3 Turn on the connected TV.
On the TV, select as the video input the same terminal to which you
connected the camcorder. Refer to the instruction manual of the
connected TV.
4 Turn on the camcorder and set it to or mode.
Play back the desired movies or photos.
Exte nal Connect ons • 105

(_ NOTES
You can also play video directly from your memory card on AVCHD-
compatible HDTVs and digital recorders with a card slot compatible
with the type of memory card used*.
We recommend powering the camcorder using the compact power
adapter,
Connection _: When you play back your 16:9 movies on standard TV
sets with a 4:3 aspect ratio, the TV set will switch automatically to wide-
screen mode if it is compatible with the Video ID-1 system, Otherwise,
change the aspect ratio of the TV manually.
* Refer to the instruction manual of the device. Depending on the device used, cor-
rect playback may not be possible even ifthe device is AVCHD-compatible. In
such case, play back the recordings on the memory card using the camcorder.
106 • External Connect ons

Saving and Sharing Your Recordings
i]l]_]_/i]I]i_m CopyingMoviesandPhotosto a MemoryCard
You can copy your recordings from the built-in memory to a memory
card.
CopyingScenesfromthe IndexScreen
Operating modes: I I
1 Open the desired index screen in the built-in memory ([_ 50, 93,
94).
To copy all the scenes recorded on a specific date, drag your finger
left/right until a scene you want to copy appears.
2 Copy the scenes.
* When you select [Select], perform the following procedure to select the individ-
ual scenes you want to copy before touching [Yes].
**Touch [Stop] to interrupt the operation while it is in progress.
To select individual scenes
1 Touch the individual scenes you want to copy.
A checkmark ,/will appear on the scenes you touch. The total
number of selected scenes will appear next to the [_ icon.
Touch a selected scene to remove the checkmark. To remove all
checkmarks at once, touch [Remove All] _} [Yes].
2 After selecting all the desired scenes, touch [OK].
Exte hal Connect ons • 107

Options
[date/folder name] Copy all the scenes recorded on a particular
date. For AVCHD movies, the date will appear in the control but-
ton. For MP4 movies, the folder name* (C]_ 152) will appear.
[SeJeet] Select individual scenes to copy.
[All Scenes] Copy all the scenes.
* The lastfour digits ofthe folder name indicatethe date thefolder was created.
Copying a Single Photo
Operating modes:
I
1 In single photo view, select the photo you want to copy.
2 Touch the screen to display the playback controls.
3 Copy the photo.
4 Drag your finger left/right to select another photo to copy or
touch [X]o
Copying Photos from the Index Screen
Operating modes: I J C
1 Open the [#L_ Photo Playback] index screen in the built-in
memory ([_ 54).
2 Copy the photos.
•._ . . , **
[Edit ] @[Copy(@ _)] @ Desired option @ [Yes]
[oK]
108 * External Connect ons

*Whenyouselect[Select],performthefollowingproceduretoselecttheindivid-
ualphotosyouwanttocopybeforetouching[Yes].
**Touch[Stop]tointerrupttheoperationwhileitisinprogress.
To select individual photos
1 Touch the individual photos you want to copy.
A checkmark ,/will appear on the photos you touch. The total
number of selected photos will appear next to the _ icon.
Touch a selected photo to remove the checkmark. To remove all
checkmarks at once, touch [Remove All] _} [Yes].
2 After selecting all the desired photos, touch [OK].
Options
[folder name] Copy all the photos taken on a particular date, The
folder name* ([_ 152) will appear in the control button,
[Select] Select individual photosto copy,
[All Photos] Copy all the photos.
* The lastfour digitsof thefolder nameindicatethe datethefolder was created.
O IMPORTANT
Observe the following precautions while the ACCESS indicator is on or
flashing. Failing to do so may result in permanent data loss,
- Do not open the memory card slot cover.
- Do not disconnect the power source or turn off the camcorder,
- Do not press [_,
(_ NOTES
In the following cases, you will not be able to copy recordings to the
memory card:
- Ifthe memory card slot cover is open.
- Ifthe LOCK switch on the memory card is set to prevent writing.
- Ifthe file numbering is at maximum ([_ 152).
- Ifthere is no memory card in the memory card slot.
Exte hal Connect ons • 109

_I]_/1]I]]1_ ConvertingMoviesto MP4Format
You can convert AVCHD movies into MP4 movies or even convert MP4
movies into smaller MP4 movies. This is convenient, for example, when
you want to upload the MP4 movies to the Web.
The movie you want to convert must be in the built-in memory. After
conversion, the resulting MP4 movie will be saved on the memory
card.
Operating modes: I I
1 Open the desired index screen in the built-in memory ([_ 50, 93,
94).
2 Open the screen for selecting scenes to convert.
* Beforeselectingthe videoquality,touch [JoinScenes]to jointhe converted
moviesinto onemovie.
3 Touch the individual scenes you want to convert.
A checkmark ,/will appear on the scenes you touch. The total
number of selected scenes will appear next to the [_ icon.
Touch a selected scene to remove the checkmark. To remove all
checkmarks at once, touch [Remove All] _ [Yes].
4 After selecting all the desired scenes, touch [OK] and then touch
[Next].
To add a cinema-look filter* ([_ 65): Touch [FILTER 1] and then
select the desired filter. Touch the button again to deactivate the filter.
To add decorations* ([_ 69): Touch [f_,_].
To adjust the volume ([_ 52) or background music balance ([_ 96):
Touch [,!_,_].
* Whena cinema-lookfilter isappliedto a movie,you cannot adddecorations.
5 Touch [START] to convert the scene.
Touch [STOP] to interrupt the operation while it is in progress.
6Touch [OK].
110 *External Cor_r_ect or_s
Other manuals for VIXIA HF R40
5
This manual suits for next models
2
Other Canon Camcorder manuals

Canon
Canon XL 2 User manual

Canon
Canon MV450i User manual

Canon
Canon DM-GL1 User manual

Canon
Canon 310 XL User manual

Canon
Canon DIM-462 User manual

Canon
Canon EOS C100 User guide

Canon
Canon Optura 500 User manual

Canon
Canon 4374B001 User manual

Canon
Canon ELURA 80 User manual

Canon
Canon Legria HFG10 User manual

Canon
Canon VIXIA HF R30 User manual

Canon
Canon XF400 User manual

Canon
Canon ZR200 User manual

Canon
Canon MVX 1i User manual

Canon
Canon EOS C300 PL User manual

Canon
Canon VIXIA HF M40 User manual

Canon
Canon 4063B001 User manual

Canon
Canon Canovision E850 Hi User manual

Canon
Canon FS30 User manual

Canon
Canon Ultura User manual