manuals.online logo
Brands
  1. Home
  2. •
  3. Brands
  4. •
  5. Canon
  6. •
  7. Digital Camera
  8. •
  9. Canon EOS M50 User manual

Canon EOS M50 User manual

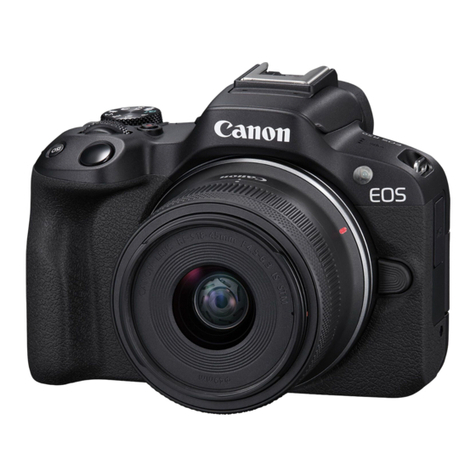
Canon EOS M50
Mirrorless Camera
Kit contents
. Canon EOS M50 body
2. Canon EF-M lens (15-45 mm)
3. Lens cap
4. SD memory card (SanDisk Ultra, 32
GB) already installed
5. Canon battery pack (7.2 V lithium
ion) already installed
6. Canon battery charger
7. USB cable (Micro-USB to USB-A)
for le transferring
8. Manufacturer’s user manual
Please ensure these contents are included when you return the device.
Kits with missing items will not be accepted.
All Items Included
Version . .0 (2022-08-30)
1
Table of contents
Before using the device 2
Instructions 3
1. Turning on the camera 3
2. Extending the lens 3
3. Selecting a recording mode 3
4A. Taking a photo 4
4B. Recording a video 4
5. Viewing media stored on the camera 4
6. Turning off the camera 5
7A. Transferring media to any computer with an SD-card slot 6
7B. Transferring media to a Windows computer with a USB-A port 7
7C. Transferring media to a Mac computer with a USB-A port 8
Helpful tips and usage notes 9
Attributions 10
2
Before using the device
1. Unfold the touchscreen at the back of the camera and turn it to face you:
1.1. Open/pull the touchscreen panel away from the camera. The
touchscreen itself should face you.
1.2. Twist the touchscreen panel so its top edge turns away from you. The
touchscreen itself should face upward as you turn it to face the
camera’s front.
1.3. Close/push the touchscreen panel into the camera. The touchscreen
should now face you.
2. Download and install Canon’s EOS Utility app: https://bit.ly/3zIwmWQ
Note: This app is necessary for downloading camera les to a Mac
computer that doesn’t have an SD card slot
Otherwise, it’s an optional app that lets you connect the camera to a
computer (by USB cable or Wi-Fi connection). Besides downloading les
from the camera, you can remotely change its settings and record.
3
Instructions
1. Turning on the camera
1. Use the On/O lever (on top) to turn on the
camera:
1.1. Locate the On/O lever on the right side of the
camera as you face its back (Fig. 1a).
1.2. Slide the lever to the On position.
2. Extending the lens
1. Locate the black, arrow-shaped slide lock on the
lens body (Fig. 2a). The lock is on the left side of
the lens as you face the back of the camera. This
toggle prevents the lens from unexpectedly moving.
2. Slide and hold the lock toward its arrow marking.
3. While holding the lock, turn the lens counter-
clockwise (as you face the camera’s back). You
can release the lock once the lens starts turning.
Note: The camera starts to show an image when the
lens body is at the 15 mm marking.
3. Selecting a recording mode
1. Locate the mode-selection dial on top of the
camera.
2. Turn the dial, clockwise or counter-clockwise, to
select a recording mode (Fig. 3a). The selected
mode is the dial
’
s glyph that aligns with the
camera
’
s white notch. Note:
I
f you have the
touchscreen open
,
there
’
s a short description of
each mode that appears onscreen.
3. Turn the dial until its
P
glyph aligns with the
notch to open the
P
rogram
A
E mode.
4
.
P
ress the
M
en
u
button on the back of the camera
to navigate through the camera settings (Fig. 3b).
Fig. 1a.
P
ower button
Fig. 2a. Slide lock at
the 15 mm marking
Fig. 3a.
M
ode
-
selection
dial set to
Sc
n (Special
Scene) mode
Fig. 3b.
M
en
u
button
4
4A. Taking a photo
1. Locate the shutter utton that’s on top of the
camera (Fig. 3c). It’s the largest round button.
1.1. (Optional) Lift the flash cover to use the
camera’s flash light when you take a photo
(Fig. 3d).
1.2. (Recommended) Lightly press the shutter
button to auto-focus the camera’s lens.
1.3. Firmly press the shutter button to capture an
image.
4B. Recording a video
1. Locate the record utton (smaller, red circle) on
the top of the camera. It’s on the right side as you
face the back of the camera. It has a red inner-dot
(Fig. 3e).
2. Press the record utton to start recording video.
The touchscreen will show a red dot in the upper-
right corner and the duration of the recording in the
upper-left corner.
3. Press the record utton, while recording video, to
stop recording.
5.
V
iewing media stored on the camera
1. Press the camera
-
roll
/
pla
y
utton to view all
media stored on the camera. This button is on the
back of the camera and ne
x
t to the
Menu
button.
It’s a blue triangle inside a blue rectangle (Fig.
4
a).
2.
S
wipe the touchscreen or use the selection wheel
(right side of camera’s ack) to scroll etween
media.
Fig. 3c.
S
hutter button
Fig. 3d. Lifted flash
cover
Fig. 3e. Record button
for video
Fig. 4a.
C
amera-roll or
play button
5
6. Turning off the camera
1. Slide the On/Off lever (on top of camera) to the
Off position.
2. Hold the lens slide-lock and turn the lens
clockwise to collapse it:
2.1. Slide and hold the lock toward its arrow.
2.2. While holding the lock, turn the lens clockwise
(as you face the camera’s back) until the lens
can’t turn anymore
Note: The lens is fully collapsed when the
white dot on the lens body aligns with the
white notch on the lens base (near the middle
of the Canon logo) (Fig. 6a).
3. Press the lens cover over the lens.
4. Return the touchscreen to its inward-facing
position:
4.1. Open/pull the touchscreen panel away from
the camera. The touchscreen itself should face
away from you.
4.2. Twist the touchscreen panel so its top edge
turns toward you. The touchscreen itself
should face upward as you turn it face you (Fig.
6b).
4.3. Close/push the touchscreen panel into the
camera body (Fig. 6c).
Fig. 6a. Collapsed lens
Fig. 6b. Touchscreen
panel open/pulled and
turned
Fig. 6c. Touchscreen
folded inward
6
7A. Transferring media to any computer
with an SD-card slot
Note: These instructions assume that your has an
S -card slot.
1. Ensure that the camera is turned off.
2. Open the camera’s card/battery cover (bottom of
camera) and remove the SD card:
2.1. Locate the card/battery cover on the bottom of
the camera. The cover has the label, Card/
Batt. Open.
2.2. Slide the cover to the right. The cover will
spring open and swing toward you.
2.3. Push the edge of the S card downward/
inward. It will spring from the slot toward you.
2.4. Remove the S card from the camera.
3.
I
nsert the SD card into your computer’s SD-card
slot. The computer should recogni
z
e the card as an
e
x
ternal device/drive
(E
O
S_Digi
ta
l)
.
4.
F
ind the camera’s media

les in the following
path on your computer

E
O
S_Digi
ta
l
-
>
D
C
IM
-
>
100
Canon
5
. Select the desired media and transfer it to the
computer or a cloud service for storage.
7
7B. Transferring media to a Windows
computer with a USB-A port
1. Locate and open the HDMI cover on the right side
of the camera (Fig. 7a). The camera’s HDMI and
micro-USB por s are behind/under his cover.
2. Connect the camera to your Windows computer
using the micro-USB to USB-A cable:
2.1. Inser he micro-USB end of he cable (smaller
plug) in o he camera’s micro-USB por , which
is nex o he HDMI por .
2.2. Inser he USB-A end of he cable (larger,
rec angular plug) in o he compu er’s USB-A
por .
3. Turn on the camera. The compu er should
recognize i as an ex ernal device/drive (Canon EOS
M50).
Fig. 7a. HDMI cover
4. Find the camera
’
s media

les in the following path on the computer (Fig.
7b)

This
P
C -
>
Canon EOS M50 -
>
SD -
>
DCIM -
>
1
00Canon
5
. Select the desired media and transfer it to the computer or a cloud
service for storage.
Fig. 7b.
C
amera’s s orage space labelled as SD which has DCIM folder, which has
1
00Canon folder
8
7C. Transferring media to a Mac computer
with a USB-A port
1. Download and install the latest version of
Canon’s EOS Utility app: https://bit.ly/3zIwmWQ.
2. Connect the camera to your Windows computer
using the micro-USB to USB-A cable:
2.1. Insert the micro-USB end of the cable (smaller
plug) into the camera’s micro-USB port, which
is next to the HDMI port.
2.2. Insert the USB-A end (larger, rectangular plug)
into the computer’s USB-A port.
3. Turn on the camera and open the EOS Utility app.
In some cases, the app will automatically launch
when the camera is turned on.
4. In the EOS M50 window, select Download images
to a computer (Fig. 7c). Another screen will appear
in the same window and list options to download
les.
6. Clic
k
Select and download. A gallery window will
open.
7. Select and download the desired images or
videos by clic
k
ing their chec
k
bo
x
es and then
clic
k
ing the Download button (Fig. 7d).
Fig. 7c. E0S M50
window
Fig. 7d. Image selection screen
9
Helpful tips and usage notes
A. If you’re a beginner with photography, c nsidering use the (Scene
Intelligent) Aut rec rding m de:
A.1. Turn the m de-selecti n dial t the glyph that has a green-c l ured A
inside a green-c l ured rectangle. The t uchscreen will display the
title, Scene Intelligent Auto.
A.2. Select OK using the t uchscreen r the Set butt n in the camera’s
selecti n wheel. In (Scene Intelligent) Aut m de, the camera will
aut matically adjust its settings t rec rd suitable images and vide s.
B. If you have some understanding of photography, c nsider using the
Manual Exp sure rec rding m de:
B.1. Turn the m de-selecti n dial t the M glyph. The t uchscreen will
display the title, Manual exposure.
B.2. Select OK using the t uchscreen r the Set butt n in the camera’s
selecti n wheel.
B.3. (Rec mmended) C nsult the f ll wing ‘cheat sheet’ f r manual digital-
ph t graphy: https://bit.ly/mdp-cheat-shee
This inf rmati n is c urtesy f the Digital Media Lab at Carmel Clay
Public Library (Carmel, Indiana).
10
Attributions
1. Contributors
Media Creation Lab / York University Digital cholarship Infrastructure
Maykel Faragalla, photographer & contributing writer
Tim Huynh, editor & contributing writer
Raa Naz, lead writer
Ananth Putcha, contributing writer
BonaFide Communications, York University Writing Department
Nicole Bednarski, consultant
Charlotte MacDowell, consultant
Sophie Morgan, consultant
Amanda Naoum, consultant
Lorena Urican, consultant
Patrons of the Media Creation Lab
This work is licensed under a Creati
v
e Commons
Attribution
-
NonCommercial
4.0
I
nternational License
.

Other manuals for EOS M50

2

Other Canon Digital Camera manuals

Canon EOS 3 User manual

Canon

Canon EOS 3 User manual

Canon SC A60 User manual

Canon

Canon SC A60 User manual

Canon PowerShot G3 User manual

Canon

Canon PowerShot G3 User manual

Canon Ixus 285 HS User manual

Canon

Canon Ixus 285 HS User manual

Canon PowerShot SX740 HS Installation guide

Canon

Canon PowerShot SX740 HS Installation guide

Canon EOS 5D Mark II - EOS 5D Mark II 21.1MP Full Frame CMOS Digital SLR... Quick reference guide

Canon

Canon EOS 5D Mark II - EOS 5D Mark II 21.1MP Full Frame CMOS Digital SLR... Quick reference guide

Canon EOS 7D Mark II (G) User manual

Canon

Canon EOS 7D Mark II (G) User manual

Canon IXUS IXUS 220HS User manual

Canon

Canon IXUS IXUS 220HS User manual

Canon CDI-M186-010 User manual

Canon

Canon CDI-M186-010 User manual

Canon Powershot A650 IS User manual

Canon

Canon Powershot A650 IS User manual

Canon EOS 33 User manual

Canon

Canon EOS 33 User manual

Canon EOS-1D Mark II Digial Manual

Canon

Canon EOS-1D Mark II Digial Manual

Canon Powershot SD3500 IS User manual

Canon

Canon Powershot SD3500 IS User manual

Canon Direct Print User manual

Canon

Canon Direct Print User manual

Canon PowerShot A550 User manual

Canon

Canon PowerShot A550 User manual

Canon MARK III EOS-1 DS User manual

Canon

Canon MARK III EOS-1 DS User manual

Canon EOS REBEL K2 3000V DATE User manual

Canon

Canon EOS REBEL K2 3000V DATE User manual

Canon Sure shot 85 zoom User manual

Canon

Canon Sure shot 85 zoom User manual

Canon PowerShot A450 User manual

Canon

Canon PowerShot A450 User manual

Canon 3822B002 User manual

Canon

Canon 3822B002 User manual

Canon PowerShot SX160 IS User manual

Canon

Canon PowerShot SX160 IS User manual

Canon Powershot S2 IS User manual

Canon

Canon Powershot S2 IS User manual

Canon EOS REBEL T6i Installation guide

Canon

Canon EOS REBEL T6i Installation guide

Canon EOS 7D Mark II (G) User manual

Canon

Canon EOS 7D Mark II (G) User manual

Popular Digital Camera manuals by other brands

RED Epic Menu guide

RED

RED Epic Menu guide

Ricoh WG-60 operating manual

Ricoh

Ricoh WG-60 operating manual

Nikon D700 user manual

Nikon

Nikon D700 user manual

TP-Link Cloud Camera Quick start quide

TP-Link

TP-Link Cloud Camera Quick start quide

NED XCM8060SA user manual

NED

NED XCM8060SA user manual

Ricoh 35 manual

Ricoh

Ricoh 35 manual

Cocoon HE200011 instruction manual

Cocoon

Cocoon HE200011 instruction manual

Polaroid IS536 user manual

Polaroid

Polaroid IS536 user manual

Sony PXW-FS7 instruction manual

Sony

Sony PXW-FS7 instruction manual

Vivitar Vivicam 55 Getting to know

Vivitar

Vivitar Vivicam 55 Getting to know

Panasonic LUMIX DMC-FX38 operating instructions

Panasonic

Panasonic LUMIX DMC-FX38 operating instructions

ipf electronic opti-check Technical documentation

ipf electronic

ipf electronic opti-check Technical documentation

Spypen ZARA user manual

Spypen

Spypen ZARA user manual

Polaroid A932 user guide

Polaroid

Polaroid A932 user guide

Conrad 75 13 76 operating instructions

Conrad

Conrad 75 13 76 operating instructions

GE A Series A1456W user manual

GE

GE A Series A1456W user manual

FujiFilm FinePixS5000 Service manual

FujiFilm

FujiFilm FinePixS5000 Service manual

Vicon V1000-WIR-360 Installation & operation manual

Vicon

Vicon V1000-WIR-360 Installation & operation manual

manuals.online logo
manuals.online logoBrands
  • About & Mission
  • Contact us
  • Privacy Policy
  • Terms and Conditions

Copyright 2025 Manuals.Online. All Rights Reserved.