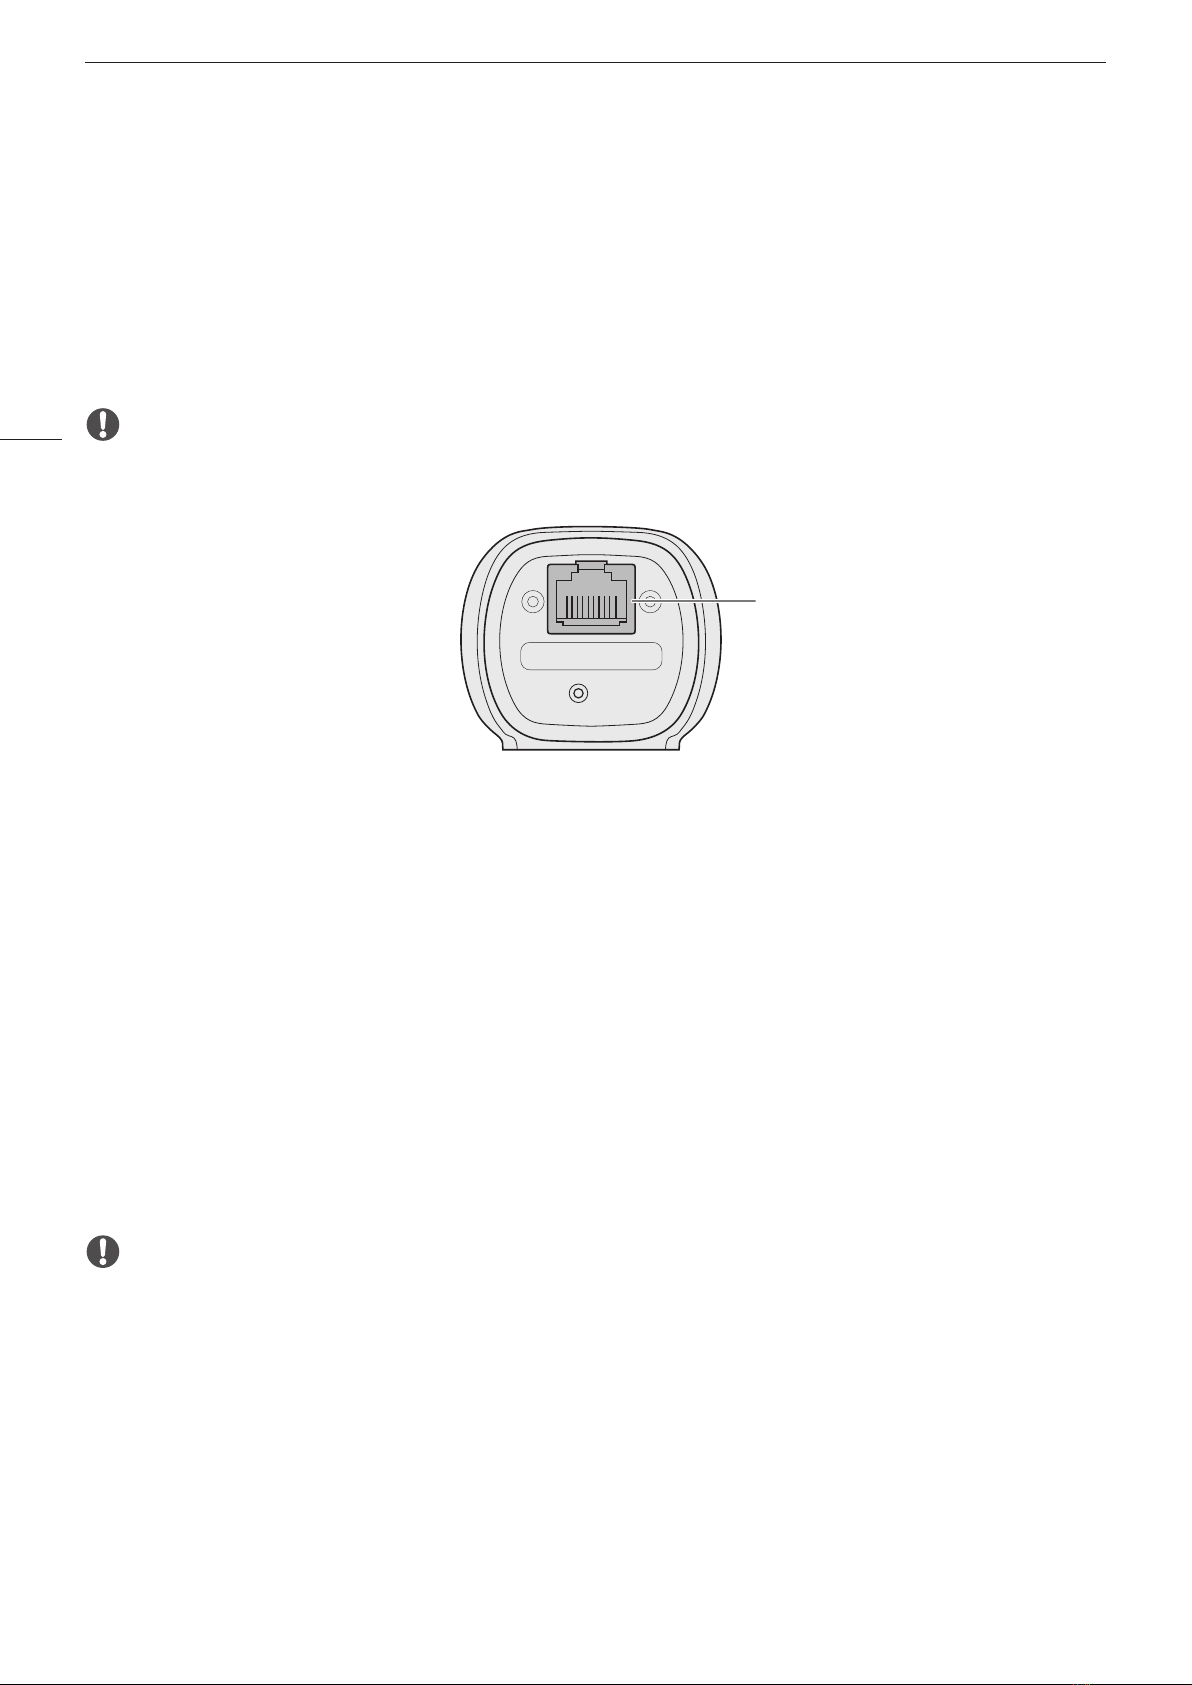
Starting and Configuring the Camera
10
Setting Options
Setting options in boldface indicate default values.
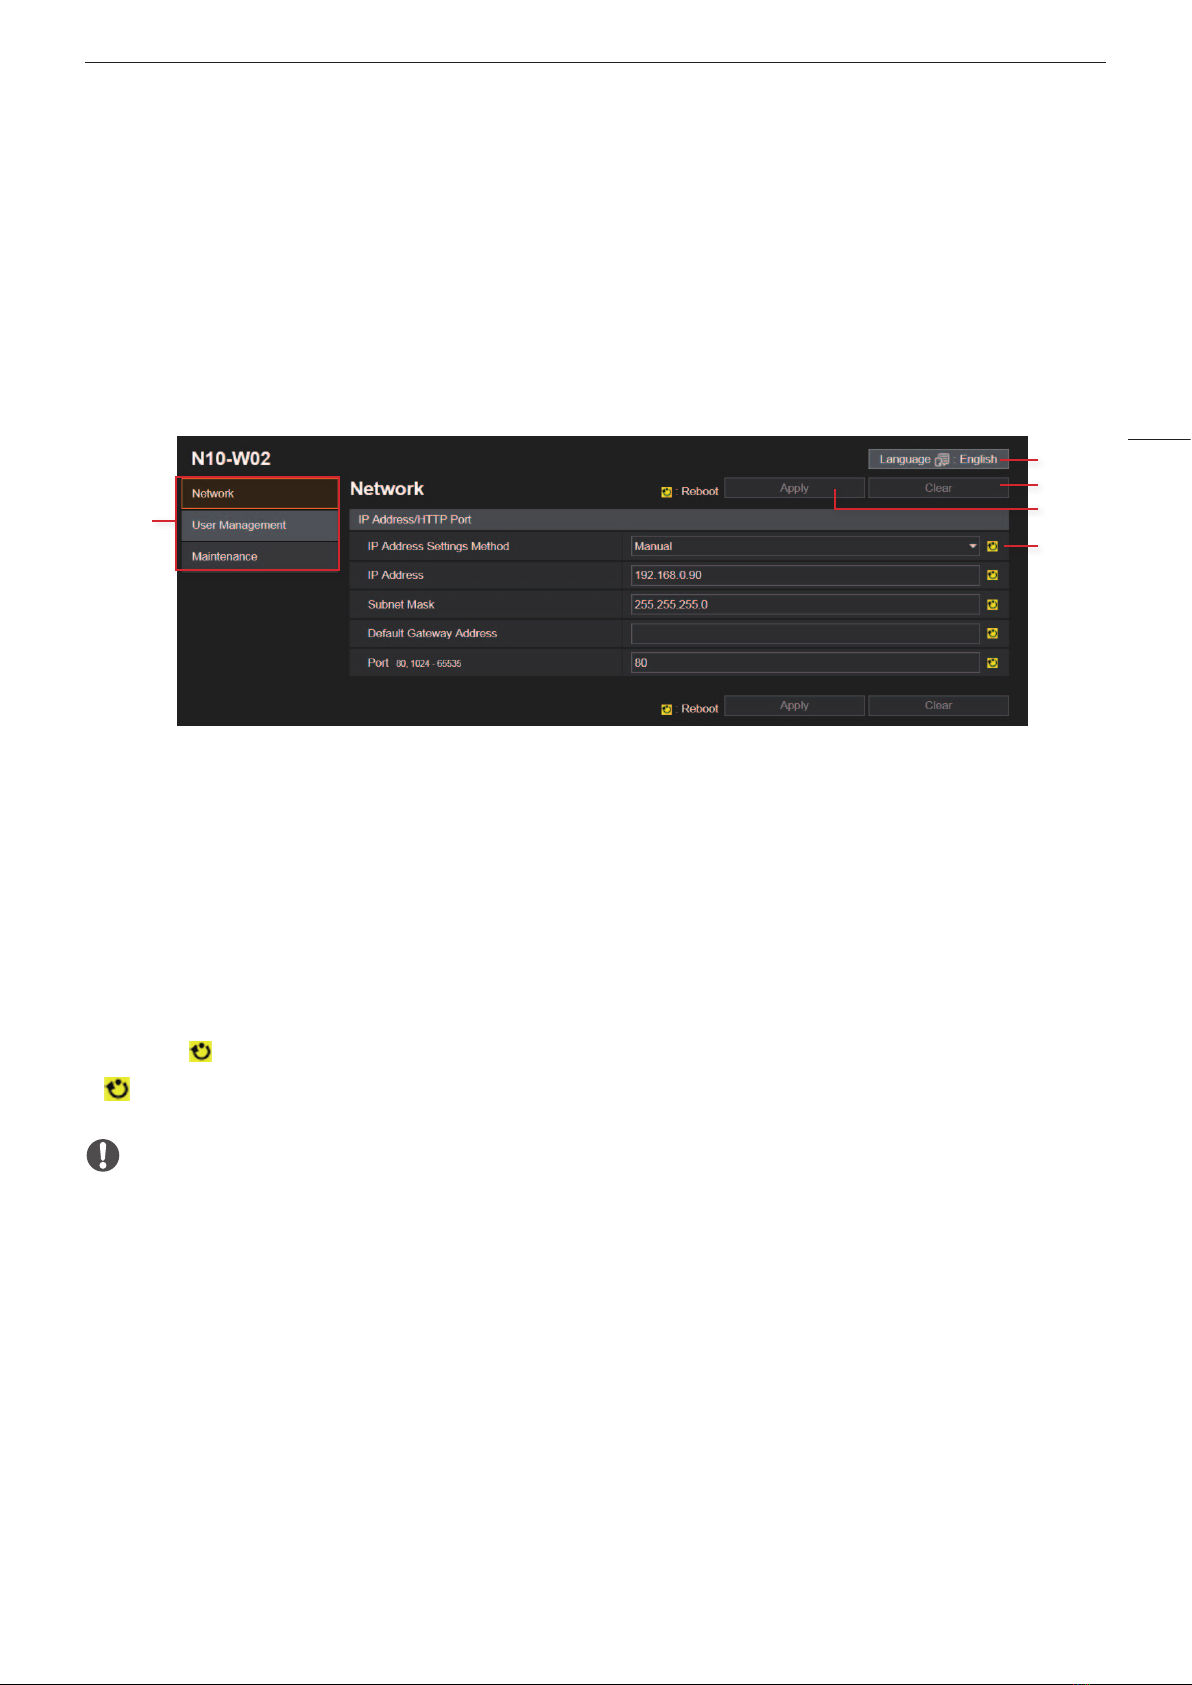
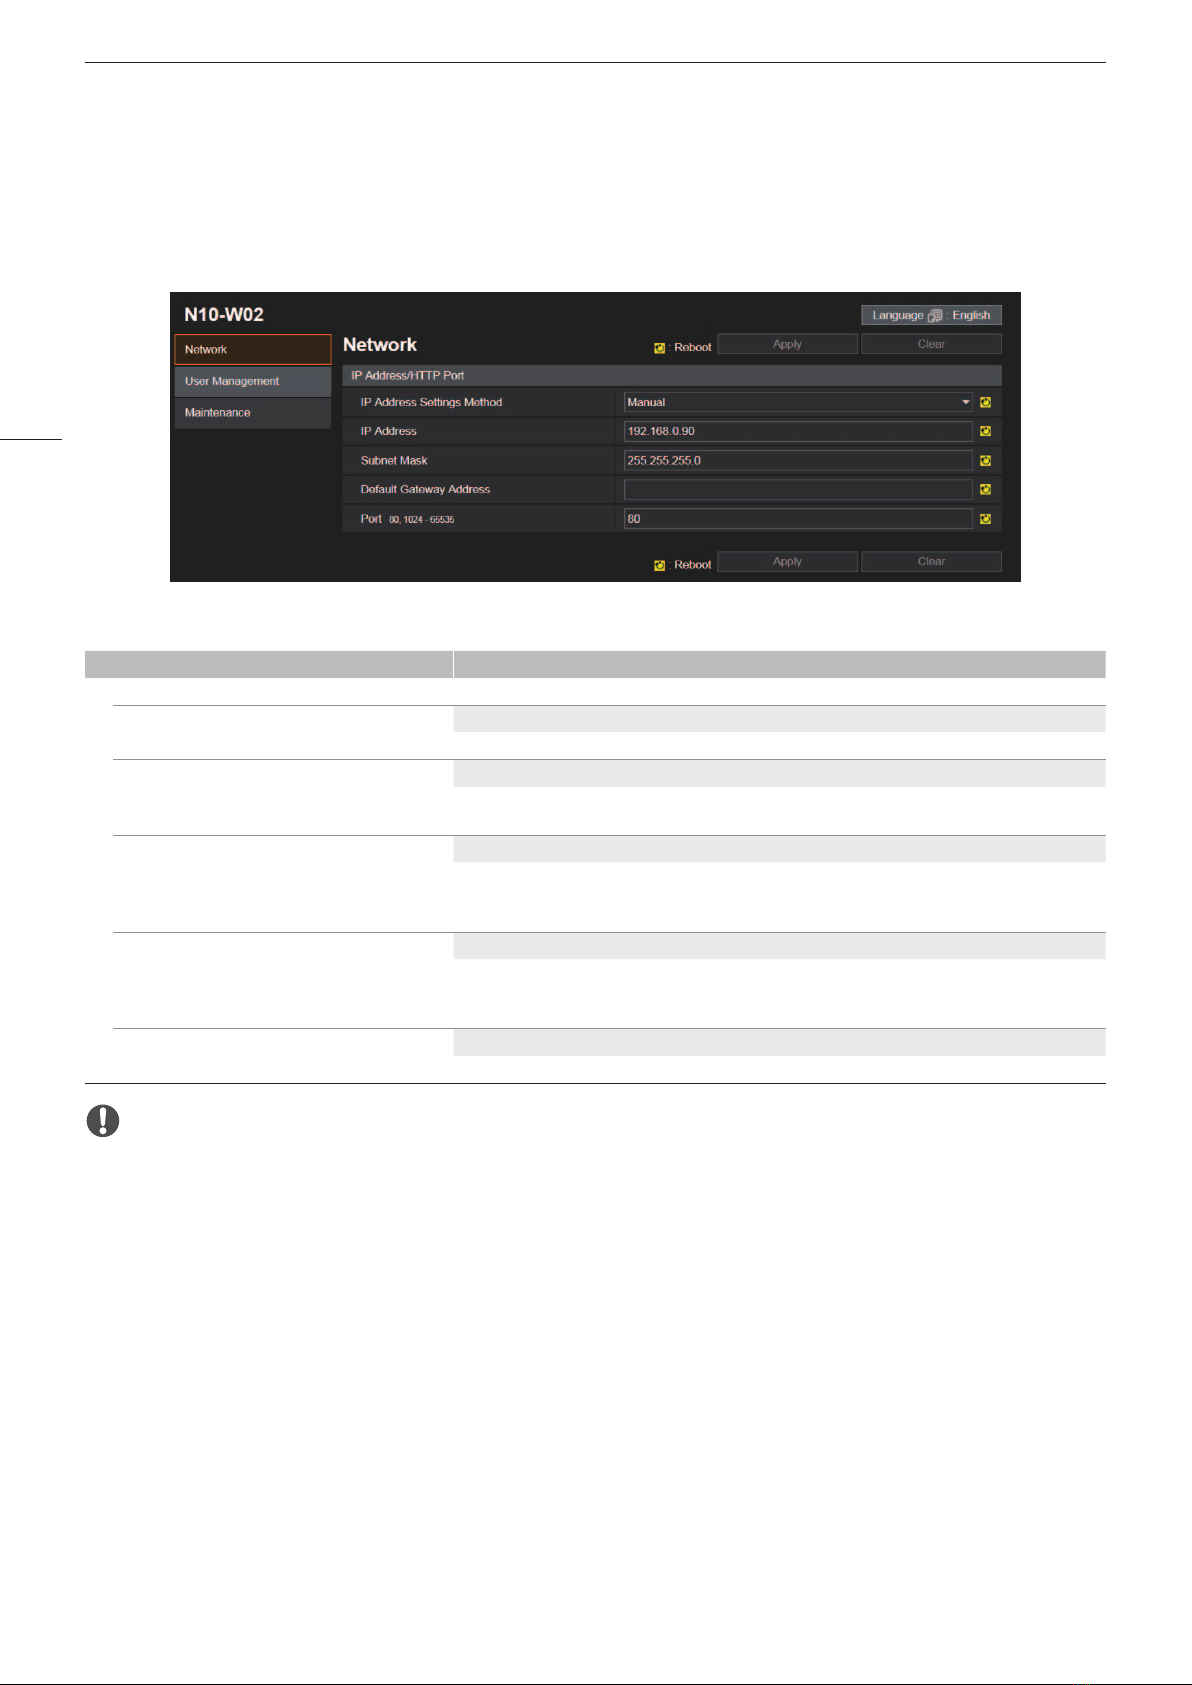
[Network] Menu
Menu item Setting options / Description
[IP Address/HTTP Port]
[IP Address Settings Method] [Manual], [Auto (DHCP)]
Selects the method for configuring the IPv4 settings.
[IP Address] Default: [192.168.0.90]
Assigns the IP address. When [Auto (DHCP)] is selected for [IP Address Settings Method], the IP address is
obtained from the DHCP server and displayed. When [Manual] is selected, enter a static IP address manually.
[Subnet Mask] Default: [255.255.255.0]
Assigns the subnet mask. When [Auto (DHCP)] is selected for [IP Address Settings Method], the subnet mask
is obtained from the DHCP server and displayed. When [Manual] is selected, enter a subnet mask manually,
as necessary.
[Default Gateway Address] –
Assigns the default gateway address. When [Auto (DHCP)] is selected for [IP Address Settings Method], the
default gateway address is obtained from the DHCP server and displayed. When [Manual] is selected, enter
a default gateway address manually.
[Port] Default: [80]
Assigns the port number.
IMPORTANT
• If you change network connection settings, the currently open web browser may not be able to connect to the camera. In such
case, after you select [Apply] or [Apply and reboot], a confirmation dialog box will appear. To apply the changes, select [OK].
• If the web browser cannot connect to the camera after settings have been changed and the camera was rebooted, a message
will appear along with a URI for reestablishing the connection, if such a URI is available. If the camera cannot connect using the
URI, contact the system administrator.
• IP addresses that begin with [127.] (such as [127.0.0.1]) are not considered valid.
• When setting the IP address manually, ask the system administrator for the correct [IP Address], [Subnet Mask] and [Default
Gateway Address] settings.
• If the [IP Address], [Subnet Mask] or [Default Gateway Address] setting is not correct, you may not be able to access the camera
over the network. In such case, press the RESET button to reset the settings (A13) and then configure the settings again.