manuals.online logo
Brands
  1. Home
  2. •
  3. Brands
  4. •
  5. Canon
  6. •
  7. Digital Camera
  8. •
  9. Canon PowerShot SX130 IS User manual

Canon PowerShot SX130 IS User manual

CaHOH
7_o_erSho, SXI30 IS
Camera User Guide
Make sure guide, including the Safety
Precautions before using the camera.
Store this guide use it in the future,
Pointthecameraatapersonandpresstheshutterbuttonfully.Thecamera
willshootapproximatelytwosecondsafteritdetectsawink.
Choose _:_.
Follow Steps 1 - 2 on p. 59 to choose _,
then press the DJSP. button.
Press the _), buttons or turn the J_!_dial to
choose _:_, then press the DJSP,button.
Compose the shot and press the
shutter button halfway.
Confirm that a green frame appears around
the face of the person who will wink.
Press the shutter button fully.
The camera will enter shooting stand-by,
and [Wink to take picture] will appear on
the screen.
The lamp will blink and the self-timer
sound will play.
Face the camera and wink.
The shutter will release approximately 2
seconds after a wink is detected from the
person with a frame around the person's
face.
To cancel the countdown, press the "_"
button.
Wink a bit slowly.
A wink may not be detected if eyes are covered by hair or a hat, or when wearing
glasses.
After choosing _:_ in Step 1, press the ,Av buttons.
63
Usingthe Face Self-Timer
The shutter will release approximately two seconds after the camera detects
a new face (p. 80). You can use this when the photographer wants to be in
the image, such as a group photo.
Choose _.
@ Follow Steps 1 - 2 on p. 59 to choose 4,
then press the DISP. button.
Press the 4 _ buttons or turn the 'i!i_:_:;dial to
choose _, then press the DISP,button.
Compose the shot and press the
shutter button halfway.
Make sure a green frame appears on the
face focused on and white frames appear
on other faces.
Press the shutter button fully.
The camera will enter shooting stand-by,
and [Look straight at camera to start count
down] will appear on the screen.
The lamp will blink and the self-timer
sound will play.
........Join the subjects and look at the
camera.
When the camera detects a new face, the
lamp and sound will speed up (the lamp
remains lit when the flash will fire), and two
seconds later the shutter will release.
To cancel shooting with the timer after
countdown has started, press the v button.
64
Shoot with the Effects of aFish=Eye Lens (Fish=eye Effect)
After choosing _. in Step 1, press the _-v buttons.
Lets you shoot with the distorting effect of a fish-eye lens.
Choose _,j.
...... Follow Steps 1 - 2 on p. 59 to choose _,j_.
Choose an effect level.
Press the D IS P. button.
[Effect Level] will appear on the screen.
Press the _ _ buttons or turn the fi_:i_dial to
choose an effect level, then press the
DISR button.
You can check the effect on the screen.
Shoot.
65
Blurs chosen portions in the top and bottom of an image to produce the effect
of a miniature model.
Choose _.
Follow Steps 1 - 2 on p. 59 to choose _._.
A white frame (the area that will not be
blurred) appears on the screen.
Choose the area to keep in focus.
Press the DISP.button.
Move the zoom lever to change the frame
size, and press the ,_,v buttons to change
the frame position.
Pressing the D!SR button restores the
shooting screen.
Shoot.
In addition to the modes explained here, the following scene modes are also
available:
,4AColor Accent (p. 96)
IS Color Swap (p. 97)
66
Choosing Settings Yourse|f
in this chapter you wiii learn how to use the various functions in p
mode to progressively advance your shooting skills.
This chapter assumes that you have set the mode dial to P.
P stands for Program AE.
Before attempting to shoot using a function explained in this chapter in
modes other than P mode, check if the function is available in those modes
(pp. 162- 165).
67
You can choose the settings for various functions to suit your preferences.
AE stands for Auto Exposure.
The focusing range is approximately 1 cm - infinity (0.4 in. - infinity) at
maximum wide angle ([]), and approximately 1 m - infinity (3.3 ft. - infinity)
at maximum telephoto (E_]).
EnterP mode.
: Set the mode dial to P.
Adjustthesettings aecordingto
your purposes (pp. 68 - 77).
..... Shoot.
If a correct exposure cannot be obtained when pressing the shutter button
halfway, the shutter speed and aperture value are shown in orange. Try the
following settings to obtain the correct exposure.
Turn on the flash (p. 69)
Choose a higher ISO speed (p. 72)
You can adjust the standard exposure set by the camera in 1/3-stop
increments in the range of -2 to +2.
Enter Exposure Compensation
mode.
Press the [] button.
Adjust the brightness.
While watching the screen, turn the _.!'_ dial
to adjust the brightness, then press the []
button.
The exposure compensation amount will
appear on the screen.
68
You can make the flash fire every time you shoot. The effective flash range is
approximately 50 cm - 3.0 m (1.6 - 9.8 ft.) at maximum wide angle (_]), and
approximately 1.0 - 2.0 m (3.3 - 6.6 ft.) at maximum telephoto (E_q).
.... Raise the flash,
Choose _..
After pressing the _ button, press the 4 _'
buttons or turn the <._: dial to choose _.,
then press the @ button.
Once set, _. will appear.
@
The flash is lowered. Raise the flash manually.
When it is difficult to focus because your shot contains subjects that are near,
you can change the focusing range to focus more reliably.
Choose _.
After pressing the _ button, press the _
buttons or turn the _i:_ dial to choose _,
then press the @ button.
Once set, _ will appear.
_ Approx. 1-50 cm (0.4 in.- 1.6 ft.)* Only focuses on close subjects.
* @hen at the rnaximum wide angle i_i setting of the iensl
Try attaching the camera to a tripod and shooting in 42 to prevent the camera from
moving and blurring the image (p. 76).
69
uuuuu_
uuuuu_
uuuuu_
uuuuu_Changing the Recording Pi×el Setting (image Size)
You can choose from five recording pixel (image size) settings.
Choose the recording pixel setting.
After pressing the @ button, press the
,_'v buttons to choose L•
Choose an option.
.... Press the 4 )' buttons or turn the dial to
choose an option, then press the @
button.
The setting will appear on the screen.
You can choose from the following two compression ratios (image quality):
_lm (Fine), J (Normal).
.... Choose the compression ratio
setting.
After pressing the @ button, press the
,_'v buttons to choose J.
70
Changing the Compression Ratio (image Quality)
Choose an option.
Press the 4 )' buttons or turn the _i;_i_:dial to
choose an option, then press the @
button.
The setting will appear on the screen.
Approximate Values for Recording Pixeis and Compression
Ratio
3084 1231 5042
12M/4000x3000 _ 1474 2514 10295
M1 (Medium 1) _ 1620 2320 9503
6M/2816x2112 .d 780 4641 19007
M2 (Medium 2) _ 558 6352 26010
2M11600x1200 ,_ 278 12069 49420
S (Small) _ 150 20116 82367
0.3M/640x480 _ 84 30174 123550
(Widescreen) _ 2311 1630 6677
4000x2248 Jl 1105 3352 13727
The values in the table are measured according to Canon standards and may change
depending on the subject, memory card and camera settings.
L(Large)
Approximate Values for Paper Size
A2 L] S Suitable for sending images as e-mail
attachments.
A33.55,,x7"Postcard-x5A5size_2[ M1 _ For printing on wide size paper.
71
Choose the ISO speed.
After pressing the ,_ button, press the
A'v- buttons or turn the ;_i_ dial to choose
an option, then press the@- button.
The setting will appear on the screen.
Automaiicaiiy ad]usis ihe iSO speed io ihe Shooting mode and shooting
cond tons.
I_ _ Fine weather conditions, outdoor shooting.
80 loo 2o8 Low
_ _ Cloudy, twilight
400880 High Nightscapes, dark interiors
le88
Lowering the ISO speed results in sharper images, but there may be an
increased chance of image blurring in certain shooting conditions.
Raising the ISO speed results in a faster shutter speed, reducing image blurring
and letting the flash reach greater distances to the subject. The images,
however, will appear coarse.
72
The white balance (WB) function sets the optimal white balance for natural
looking colors to match the shooting conditions.
Choose the white balance function.
After pressing the @ button, press the
Av buttons to choose AWB.
Choose an option.
Press the 4 _ buttons or turn the _i;_i_'dial to
choose an option, then press the @
button.
The setting will appear on the screen.
Automatically sets the optimal white balance for the shooting
AWBAuto conditions.
€_'.'- Day Light Fine weather conditions, outdoor shooting
i Cloudy Cloudy, shady, twilight conditions
_,6: Tungsten Tungsten, bulb-type (3-wavelength) fluorescent lighting
Warm-white fluorescent, cool-white fluorescent, warm-white-type
Fluorescent (3-wavelength) fluorescent lighting
Fluorescent H Daylight fluorescent, daylight-type (3-wavelength) fluorescent lighting
Custom Manually sets a custom white balance.
Custom White Ba|ance
You can adjust the white balance to the light source at the shooting location.
Make sure that you set the white balance under the light source of the actual
scene you will shoot.
In Step 2 above, choose _.
Make sure the entire screen is filled with a
plain, white colored subject, then press the
DISR button.
The tint on the screen will change when a
white balance data is set.
73
As long as you hold the shutter button down, the camera will shoot
continuously.
.... Choose a Drive mode.
:: After pressing the @ button, press the
,a_v buttons to choose E].
Choose an option.
Press the 4 )' buttons or turn the J!:::_diaBto
choose _ or _, then press the @
button.
shoot.
As long as you hold the shutter button
down, the camera will shoot successive
images.
The camera shoots continuously with the focus and
D_l Continuous 1.0 exposure set when the shutter button is pressed
halfway.
Continuous 0.6 The camera shoots continuously and focuses.
Shooting AF The [AF Frame] is set to [Center].
The camera shoots continuously with the focus fixed
Continuous 0.7 to the position set in manual focus. Ini_{_mode, the
Shooting LV* focus is locked on the first shot.
* When in _i_i(pl 60)i shooting with the RE lock (p. 81) or manual focus modes (p. 86),
will change to _.
74
You can change the tone of an image to sepia or black and white when
shooting.
Choose My Colors.
After pressing the @ button, press the
,_'_" buttons to choose _FF.
.... Choose an option.
: Press the _ _ buttons or turn the _i;_i_:dialto
choose an option, then press the @
button.
The setting will appear on the screen.
z_v Vivid _mphasizes {he coniiasi ancl coior saiuia{ion for a vivid
impression.
Tones down {he coniias{ and coioi saturaiion foi neuiiai
z_N Neutral hues.
_e sePia sepia tones.
4_W BAN Black and white.
Combines the effects of Vivid Red, Vivid Green and Vivid
_p Positive Film Blue to produce intense natural appearing colors like those
obtained with positive film.
Z_L Lighter Skin Tone Makes skin tones lighter.
Emphasizes blue iinis: Makes the sky: ocean and oihei
_IB Vivid Blue blue subjects more vivid.
Emphasizes green tints. Makes mountains, foliage and
_IG Vivid Green other green subjects more vivid.
_R Vivid Red Emphasizes red tints. Makes red subjects more vivid.
You can adjust contrast, sharpness, and color saturation
_C Custom Color etc. to your preference (p. 76).
75
uuuuu_
uuuuu_
uuuuu_
uuuuu_Using the Self-Timer to Prevent Camera Shake
Custom Color
The contrast, sharpness, color saturation, red, green, blue, and skin tones in
an image can be chosen and set at 5 different levels.
Follow Step 2 on p. 75 to choose _/C, then
press the D!SP.button.
Press the .A.'_ buttons to choose an
option, then press the _)' buttons or turn
the _: dial to choose a value.
The more to the right, the stronger/darker
(skin tone) the effect gets, the more to the
left, the weaker/lighter (skin tone) the effect
gets.
Press the DJSP. button to complete the
setting.
The camera will shoot approximately two seconds after the shutter button is
pressed, preventing any camera shake that occurs when pressing the shutter
button.
Choose _.
@ After pressing the v button, press the
Av buttons or turn the (_i_ dial to choose
_, then press the @ button.
Once set, _ will appear on the screen.
@ Follow Step 3 on p. 57 to shoot.
76
You can set the time delay (0 - 30 seconds) and the number of shots (1 - 10
shots).
Choose _.
After pressing the "_" button, press the
,_v buttons or turn the _i_::_dial to choose
_c, then press the MENU button
immediately.
choosethesetti.gs.
Press the Av buttons to choose [Delay]
or [Shots].
Press the _ buttonsorturn the dial to
choose a value, then press the _ button.
Follow Step 3 on p. 57 to shoot.
Exposure and white balance settings are set with the first shot.
If the flash fires or you set a high number of shots, the shooting interval may take
longer than usual.
If the memory card becomes full, shooting stops automatically.
77
You can use a TV to display the camera screen content while shooting.
To connect the camera to a TV, follow the Steps in "Viewing Images on a
TV" (p. 117).
Shooting procedures are the same as when using the camera screen.
While you keep the shutter button pressed halfway, the focus and exposure
are locked. You can now recompose and shoot. This is called Focus Lock.
.....Focus.
Center the subject you want in focus, and
press the shutter button halfway.
Confirm that the AF Frame on the subject
is green.
Reoompose.
Keep the shutter button pressed halfway
and move the camera to recompose the
scene.
shoot.
Press the shutter button fully.
78
Getting More Out of Your
Camera
This chapter serves as the advanced version of Chapter 4 and exp.ains
how to take pictures using various functions.
This chapter assumes that you have set the mode dial to P.
The sections "Setting the Shutter Speed" (p. 89), "Setting the Aperture
Value" (p. 90), "Setting the Shutter Speed and Aperture Value" (p. 91),
assume that you have set the mode dial to the corresponding mode.
The section "Adjusting the Flash Output" (p. 95) assumes that you have set
the mode dial to _V_.
The section "Changing the Color and Shooting" (p. 96) assumes that you
have set the mode dial to SeN and chosen the corresponding mode.
Before attempting to shoot using a function explained in this chapter in
modes other than P mode, check if the function is available in those modes
(pp. I62- I65).
79
You can change the AF (Auto Focus) frame mode to match the scene you
want to shoot.
Choose [AF Frame].
After pressing the MENUbutton, choose
[AF Frame] in the O tab, then press the
_ buttons to choose an option.
Center
The AF frame is locked to the center. This is effective for focusing on a specific
point.
Press the MENU button to choose [AF Frame Size] in the O tab, then choose
[Small].
The AF frame is set to [Normal] when using Digital Zoom (p. 54), Digital Tele-
converter (p. 55), or Manual Focus (p. 86).
Face Detect
Detects people's faces and sets the focus, exposure (evaluative metering
only) and white balance (AWBonly).
When the camera is pointed at subjects, a white frame appears on the face
the camera judges to be the main subject, and gray frames (max. 2) will
appear on other faces.
A frame will follow a moving subject within a certain range.
When the shutter button is pressed halfway, up to 9 green frames will
appear on faces that the camera focuses on.
8O
iiiiiiiii_
Ohootioowi,hth°A Lockiii!iii!iiii
The focus can be locked. After locking the focus, the focal distance will not
change even when you release your finger from the shutter button.
....i:iii!ii!iiii!j¸¸¸
Lock the focus.
Keep the shutter button pressed halfway
and press the _ button.
The focus locks, and _]_ and the MF
indicator appear on the screen.
After you release your finger from the
shutter button, press the _ button again,
then press the ,_ buttons or turn the _ !4_
dial to choose _. The focus will unlock.
: Composethesce.e_.a_hoot.
81

Other manuals for PowerShot SX130 IS

7

Other Canon Digital Camera manuals

Canon 80D Experience User manual

Canon

Canon 80D Experience User manual

Canon PowerShot S230 DIGITAL ELPH User manual

Canon

Canon PowerShot S230 DIGITAL ELPH User manual

Canon WP-DC26 User manual

Canon

Canon WP-DC26 User manual

Canon Iwy Cliq+ User manual

Canon

Canon Iwy Cliq+ User manual

Canon PowerShot ELPH 530 HS User manual

Canon

Canon PowerShot ELPH 530 HS User manual

Canon Digital IXUS 950 IS User manual

Canon

Canon Digital IXUS 950 IS User manual

Canon PowerShot N100 User manual

Canon

Canon PowerShot N100 User manual

Canon PowerShot SX1 IS User manual

Canon

Canon PowerShot SX1 IS User manual

Canon EOS-1D Mark II Digial User manual

Canon

Canon EOS-1D Mark II Digial User manual

Canon Powershot S60 User manual

Canon

Canon Powershot S60 User manual

Canon PowerShot SD870 IS Digital ELPH User manual

Canon

Canon PowerShot SD870 IS Digital ELPH User manual

Canon EOS 1200D User manual

Canon

Canon EOS 1200D User manual

Canon IXUS 145 User manual

Canon

Canon IXUS 145 User manual

Canon PowerShot G1 X User manual

Canon

Canon PowerShot G1 X User manual

Canon EOS 60Da User manual

Canon

Canon EOS 60Da User manual

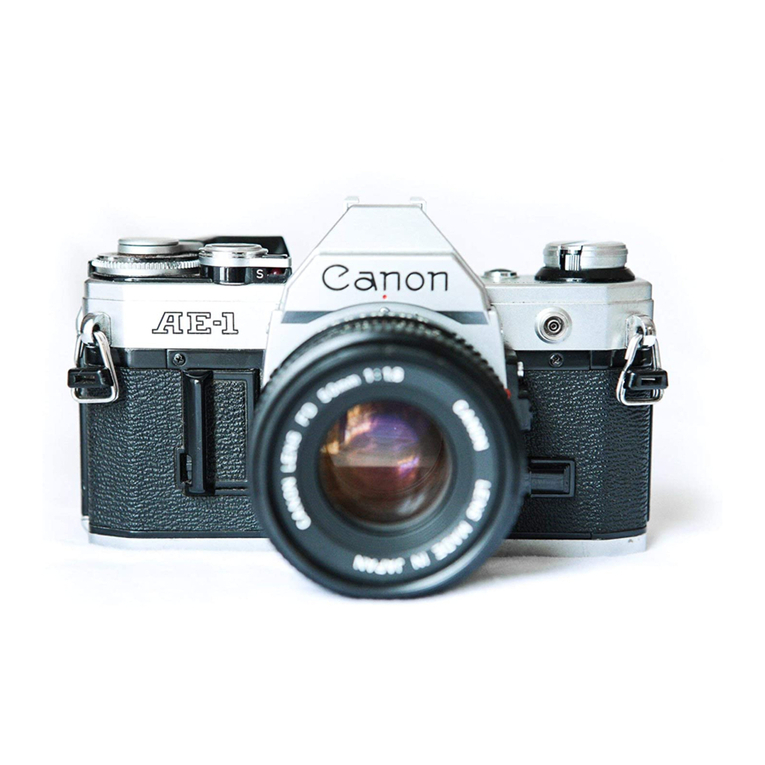
Canon AE-1 User manual

Canon

Canon AE-1 User manual

Canon PowerShot G7 X Mark III Assembly instructions

Canon

Canon PowerShot G7 X Mark III Assembly instructions

Canon EOS C300 Mark III User manual

Canon

Canon EOS C300 Mark III User manual

Canon PowerShot SX230 HS User manual

Canon

Canon PowerShot SX230 HS User manual

Canon PowerShot SX60 HS User manual

Canon

Canon PowerShot SX60 HS User manual

Canon SD User manual

Canon

Canon SD User manual

Canon PowerShot A720 IS User manual

Canon

Canon PowerShot A720 IS User manual

Canon PowerShot SD870 IS Digital ELPH User manual

Canon

Canon PowerShot SD870 IS Digital ELPH User manual

Canon PowerShot SD900 User manual

Canon

Canon PowerShot SD900 User manual

Popular Digital Camera manuals by other brands

Nikon COOLPIX S203 user manual

Nikon

Nikon COOLPIX S203 user manual

Toshiba Sora PDR-T10 instruction manual

Toshiba

Toshiba Sora PDR-T10 instruction manual

Samsung SMARTCAM user manual

Samsung

Samsung SMARTCAM user manual

Sony Alpha DSLR-A290 Specifications

Sony

Sony Alpha DSLR-A290 Specifications

Ricoh RZ-770 owner's manual

Ricoh

Ricoh RZ-770 owner's manual

Olympus CAMEDIA C-765 Ultra Zoom quick start guide

Olympus

Olympus CAMEDIA C-765 Ultra Zoom quick start guide

Automation Technology C3 Series Hardware reference manual

Automation Technology

Automation Technology C3 Series Hardware reference manual

Nikon D3S Technical guide

Nikon

Nikon D3S Technical guide

Samsung VLUU PL100 quick guide

Samsung

Samsung VLUU PL100 quick guide

Nikon COOLPIX S4000 user manual

Nikon

Nikon COOLPIX S4000 user manual

Sony Cyber-shot DSC-H70 instruction manual

Sony

Sony Cyber-shot DSC-H70 instruction manual

Olympus FE-150/X-735 Basic Manual

Olympus

Olympus FE-150/X-735 Basic Manual

Hasselblad X1D II 50C user guide

Hasselblad

Hasselblad X1D II 50C user guide

Sony DSC-W690/B Specifications

Sony

Sony DSC-W690/B Specifications

Nikon COOLPIX 4300 Repair manual

Nikon

Nikon COOLPIX 4300 Repair manual

Ezviz C3W quick start guide

Ezviz

Ezviz C3W quick start guide

Olympus Stylus 820 instruction manual

Olympus

Olympus Stylus 820 instruction manual

Nikon Z 9 Settings guide

Nikon

Nikon Z 9 Settings guide

manuals.online logo
manuals.online logoBrands
  • About & Mission
  • Contact us
  • Privacy Policy
  • Terms and Conditions

Copyright 2025 Manuals.Online. All Rights Reserved.