manuals.online logo
Brands
  1. Home
  2. •
  3. Brands
  4. •
  5. Canon
  6. •
  7. Digital Camera
  8. •
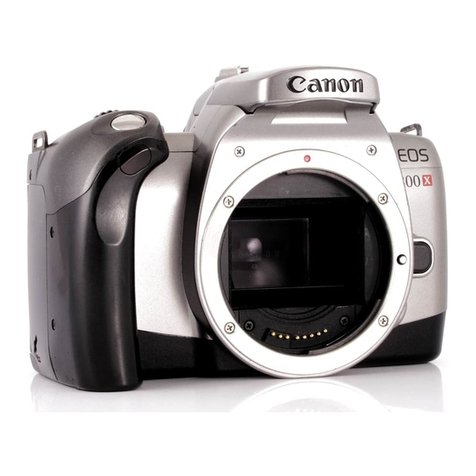
  9. Canon TL User manual

Canon TL User manual

We are highly gratified that you have selected
the Canon
TL-a wise choice
tlrat promises
you
many
delightful
years
of photographic
experiences.
Canonis recognized
the world over as the fore-
most pioneer
in the development
of photographic
equipment
ofthehighest
quality
and
performance.
Whether
your new TL is for the home,labora-
tory,
or for traveling,make the most of your
opportunities
I
Before
Using...
Please
read
this instruction
bookletcarefully,
and
master
the manipulations
of the various
parts
of
the TL completely. Once
thoroughlyversed
inthe
correcthandling
of this camera,
you can use
the
Canon
TL to the fullestextent
of its caoabilities
www.orphancameras.com
,Drstance
Scale
I
A M Flirttl
Frtr)it';tngRirrri,
'irlq kr;i \
'.\
Depth-of-FieldScale
lrreset APerture Ring
Bayonet Moirnt Rirrg
Metering Lever Lock
Meterine Lever
-_-
- Filrrr SJ:eetl
.-2n""' Set i?ing
Frrlrl Rewrnci
-
Crairk
Frarne
Counter
':ih
utlr:r Releirse
Buttorr
Speecl
Scale
-
ir,it
;iter Speed Dial
i:rlrn
Ac1
va
nce Lever
'"-'Ali;\ Frlr-n
!iP;qea1
iicale
i:
rirri
I'i.rrrt]
lnclir.
alor
r Type: 35mm single.lensreflex camera.
I Viewfinder: Eye-level
using pentagonal
prism. AngleFinderA can be attached.
. Focusing
Screen: Highly efficient in resolving
power,using Fresnel lens and microprism
screenrangefinder.
r Mirror: Shockless
quick return system.
r StandardLens: Canon Lens FLsomm f/1.8. With FL (breech-tock
bayonettmount.
I Aperture
: Automatic preset aperture mechanism built-in. Instant-return diaphragm.
Preset
is possible
to releasefor previewing
depth-of-field.
r Shutter: Cloth focal-plane shutter with speeds from 1/5OO
to 1sec., B and X. Singte
pivot
dial.
I ExposureMeter
: Built-in. Using CdS photocell. Zero-adjustment
type coupledto shutter
speeddialandaperture
setting.ASA25-2OOO.
With
ASAlOO
fitm,EV3.5
(f/1.8at U4sec.l-EV17
lfll6 at 1/5OOsec.l
one stage system. Poweredby one 1.35V M2O (f 625) mercury battery.
I LightMeasurement: TTL(Through-The-Lensl
system using
condenser
lens. Exposure
meter
functions with the metering lever. Semi-spot
meter readingsystem, measures 1/3 of the
angle-of-view.
Continuousmeasurement
is possible
with the metering leverlock.
r FlashSynchronization: FP and X contacts. Synchronizingpossible for FP, M and MF
flash bulbs and electronic
flash units.
r Film Rewinding: By button and crank.
r Fifm Advance
Lever: Singleoperation 174", possible
to wind with several
short strokes.
I Film Loading: By opening back cover. Accepts
any standard35mm film roll in cartridge.
QL mechanismfor quick loading
of film.
I InterchangeableLenses: Automatic pre-set
aperturetype Canon FL lenses.
r FrameCounter: Self-resetting
type. I
r Size: L44x93 x 43mm 1551,,
x3)(,, x L%,1.
r Weight: 7OO
grams {1lb. 8% oz.}-body only. Subiecttochanse
withoutnotice.
www.orphancameras.com
Gontents Mercury BatteryLoadingeind
Checking
FilmWinding
Shutter
and Aperture
Adjustment.
UsingBuilt-ln
ExPosure
Meter
Exposure
Settings.
Coupling
Range
of Built'ln Exposure
Meter
Focusing
Composition
Holding
the Camera
.
Film
Loading.
Film
Rewinding.
Synchronizing
Flash
Unit
Uses
of Lenses.
Double
Exposures.
Filters
Interchangeable
Proper
Care of Lenses
and Accessories
the Camera
8
lo
t2
16
18
20
2I
22
23
25
28
29
30
34
35
36
39
Follow
these
simple
steps
for
normal
photography:
1 f-ouO
the film simplywith the QL mechanism.
2
3Set the ASA film speed.
Wind the film advance lever
4 Remove
the lens cap.
www.orphancameras.com
5
6Look through the viewfinder and focus.
Conrpose the picture.
1 Determine the exposure with built-in meter.
I Pressthe shutterrelease
button
gently.
Mercury
BatteryLoading
and
Checking
The built-in
exposure
meter of the Canon TL functions
only
when the mercury
battery
is properly
loaded.
I Insert
acoininto
thegroove
of the battery
compartment
I cover
and
turn to the leftto remove.
,) Facethe central contact of the mercury
batteryin.
- wards
and insert.
I Replace
the coverby turning it to the right.
r,
r Before
inserting,
wipe all battery
poles
clean
of finger-
prints or stains with a dry cloth. Unclean poles may
cause corrosion
and damage the contact points
of the
camera.
r A1.35V
M20 (#625l'
mercury
battery
shouldbe
used-
equivalent to Mallory PX.625, Eveready EpX625.
r Be sure
the battery
isinserted
in the correct
direction
by referring
to the diagram on the compartment
cover.
Otherwise,
the meter will not function properly
and the
cover
cannotbe screwed
in.
r When
the camera
is not used
fora long
period,
remove
the mercury
battery
and keep
in a dry place.
www.orphancameras.com
Battery Gheck
To check the power level of the mercury battery after
loading
:
I Set the film speed scale at ASA lOO/DlN 2I, the
I
' shutter speed dial at any index between " 500" and
"4" , andthe pre-set
aperture
ring at the maximum f/stop.
For the film speed setting, lift up the outer ring of the
shutter speed dial and turn.
,) Press the metering lever towards the lens and
3 aim the camera at the sky or other bright subject.
lf the meter needle inside the viewfinder swings up, the
battery has sufficient power. Otherwise, the battery must
be replaced.
r Life of the battery in normal use is approximatelyone
vear.
IT
Meter Needle Sufficient Power
lnsufficient Power
(Must be ieplaced)
Film
Winding
Thefilm advance
leverwinds
the film, cocks
the
shutter,
and
prepares
theaperture
andmirror
for the next
shutter
releaseall in one
motion.
I Turn
the film advanceleveruntil it stops. The film
I will be advanced
oneframeand the shutter
cocked.
The frame counter is simultaneously
advancedto the
next
number.
,) Whenthe shutter
releasebuttonis pressed,
the mirror
3 flips up, the diaphragm
simultaneously
closesdown
to the pre-set
f/stop and tl.re
shutteroperates. After
the
shutteris operated,
the advancelevercan be
wound
for
the nextframe.
r Winding
maybe
doneby moving
the lever
with several
short strokes.
r After
loading
the film, make anotherwind, since
the
first
winding
may not be completed.
r The shutterwill not function
when the shutterrelease
buttonispressed
unlessthe windingiscompleted.In
such
a case,
checkthe winding
once
more.
Frame
Gounter
Each winding will advance
the number of the frame
counter,
indicating
the number
of pictures
taken. When
the back cover is opened,
the indicator
automatically
returns
to startingposition
" S
".
www.orphancameras.com
Attaching the Gable Releaseor Self'Timer
Optionaf Canon Release or Canon Self'Timer 7 can be
attached to the TL by screwing them into the threaded
hole in the center of the shutter release button.
Shutter
andAperture
Adiustment
Exposures
are adjustedby the shutter and aperture. The
shutter controls
the exposure time and the aperture con-
trols the amount of incoming light. The Canon TL uses
the zero-adjustment
coupled meter,a very simple method
of obtaining proper exposures.
Shutter Speed Dial
Adjust the shutter speed by turning the shutter speed
dial to the desired index number. The index on the dial
shows the denominators of 1/5OO
sec., 1/25O
sec., etc.
r The shutter speed dial does not revolve between the
indexes
"B" and "X".
r Be sure to set the index at a position where the click-
stop catches. In case of " B " index, adjust it to the
white dot just below the " B
" index.
l " B " indicates
bulb exposure,
and is used
when making
exposures of more than one second. When the shutter
speed dial is set at " B ", the shutter remains open as
long as the shutter release button is pressed.
r Time exposure
is possible by using the lockable
cable
release.
r The " X" indexis used for synchronizing
an electronic
flash unit such as the Carron Speedlite. Although the
shutter speed at " X " is 1i6Osec., it is equivalent to a
very short exposure time dr.rring
the flash of the flash
unit
L2
www.orphancameras.com
Aperture
Incoming
lightand depth-of'field
are
adjusted
by turning
the preset
aperture
ring to the desired
f/stop'
r As the f/stop value gets larger,
the amount of light
reaching
the film plane becomes
correspondingly
less'
Foreachf/stop up, the light
is
reduced
one-half'
Accord-
ingly,
when the aperture
is increased
by one f/stop,
the
"*posut" is doubled,
and when it is increased
by two
f/stopsthe exposure
is quadrupled.
r Certain
lenses,
however,
haveno relation
to the light-
ness being halved between
the maximumand the next
f/stops
on the presetaperture
ring.
r The preset
aperture
ring can also be set between
two
f/stops.
r The ratio betweenthe aperture and the amount of
exposure,
using
tl2 as the basis,
is as follows
:
f/stop :
1.2 L.4 1.8 2 2.8 3.5 4 5.6 B 11 16 22
Exposure
Ratio
:
3 2 r.25 L Il2 tl3 I14 IIB 1116
Il32 1164
tlI28
Presetting Aperture and Ghecking Depth'of'
Field
Lens with A'M Ring
1 Presetting
of Aperture: Set the A-M ring at "A"'
I Th"n set the desiredf/stop on the pre-setaperture
ring
to the index. The diaphragm
will
close
down
to the
preset
f/stop only for the instant
that the shutter is re-
teased. Except
for that instant,
the diaphragm
remains
fully
open.
,) Manually
Operated
Aperture: When the A-M ring is
L set at " M
", the diaphragmcloses
down to any
desiredf/stop by turning the preset aperture ring and
the depth-of-field
at the time of shutter
release
can be
checked.When
the A-M ring is reset at "A" the dia-
phragm
againreturns
to maximumopening.
Lens with Manual Aperture Ring
I Presetting
of Aperture: Set the desired f/stop on
I the pre-set
aperturering to the index. Then set the
index of the manual aperture
ring to this preset
f/stop.
The diaphragmwill closedown to the preset
f/stoponly
for the instantthat the shutter is released.
,) Manually
Operated
Aperture: Whenthe manual
aper-
L ture ring is turned in the direction
of closing
down
the diaphragm,
after setting the desiredf/stop on the
preset aperture
ring to the index,
the diaphragmwill
close down to the preset f/stop and the depth-of-field
can be checked.The manual aperture
ring cannot be
turnedwhen set at the maximumf/stop.
r Refer
to pages32-33 concerningdepth-of-field.
FL 50mm f/1.8
Index
Preset
Aperture
A-MRing
lndex
Preset
Aperture Ring
Manual
Aperture Ring
FL 100mm
f/3.5
www.orphancameras.com
Relationship
Between the Shutter, Diaphragm, and Mirror
Pressthe shutter release
button. The shutter clicks.
The diaphragm closes
down to pre-set f/stop.
Mirror begins
to snap up. Mirror is uP.
The diaphragm returns
to maxirnum opening.
Mirror returnsto
the former position'
tlsiltg
ffiulHt"f;n
Fxpusure
Meter
The Canon TL provides the most accurate light measure-
ment possible
with it's unique TTL (Through-The-Lens)
sys-
tem. The CdS photocell of the exposure meter is placed in
the closest position to the beam-splitting condenser lens.
The semi-spot meter reading system enables accurate
measurement of the main subject even in counter.light
conditions. The rectangular frame in the viewfinder rep-
resents the light measurement area of the CdS photocell.
Place the main subject within this frame and measure the
intensity of light so as to obtain the proper exposure.
Film Speed Setting
Set the ASA/DIN film speed scale to the speed of the
film being used. Film speeds are normally shown on the
fifm box cover and/or explanatory sheet.
Lift and turn the film speed set ring around the shutter
speed dial. lf the film is ASA 10O, for example, make
the correct setting by showing lOO in the small window.
r The following film speeds may be used
:
(32)
(40) (64)(80) 02s)
(160) (250)
(320) (s00)(640)
ASA 25 . 50 100 . 200 . . 400 . 800
DIN 15. 18 2t 24. 27 30
(16)(17) (ls)(20) (22)(?3) (2s)(26) (28)
(29)
0000)02s0) (2000)
1600
33
(31)
(32) (34)
Figuresin parentheses
represent
intermediate
film speeds
www.orphancameras.com
r When ASA25/DlN 15 appearin the small windows,
thisis
asfar as the film speedset ring turns to the left.
White
dots at the rightend redd ASA2OO0
and DIN 34.
MeteringLever
The exposure can be properly measured by pressing the
metering lever towards the lens.
The metering lever'can be fixed for continuous light mea-
surement by pressing
it towards the lens after setting the
metering lever lock at "L" position. lf the lock is returned
to its original
position(white
dot) the metering lever will re-
turn to its original
position.
Correct
exposure
valuecannot be obtained unless
the meter-
ing lever is pressed.
r With the fixing of the metering lever, telephoto lenses
can be conveniently handled. Also when shootingsubjects
with different light intensities,continuouslight measurement
is possible.
I Due to the characteristics of the CdS photocell, the
movement of the meter needle may occasionally become
slack, owing to changes in the degree of light.
r When not using the camera, attach the lenscap so as to
prevent unnecessary
consumption of the mercury battery.
How to "Average " Exposures
When measuring a subject with greatly differing dark and
bright parts, take two measurements, one each of the
dark and bright parts. Then obtain the average value
and set the fi
stop or shutter speed accordingly.
Exposure
Settings
The built-in
exposuremeter, which is of the zero-adjust-
ment type, is coupled
to the shutterspeeddial and pre-
set aperture ring. The exact exposure is easily deter-
mined accordingto the brightnessof the subjectto be
photographed.
There are two ways of determiningthe
exposure-either by first selectingthe shutter speedor
by first selectingthe f/stop of the aperture.
Shutter Speed Priority Method
I Setthe shutterspeeddial at the desiredspeed.
t
,) Facethe camera towards the subject,lookinto the
L viewfinder,and press
the meteringlever.
I Either keep pressing
the meteringlever or lock the
u leverand turn the pre-set
aperture ring.
l Set the meter needle
at the indexwithin
tlre
' viewfinderfor correctexposure.
www.orphancameras.com
#
t*
'i'
f/stop Priority Method
I Setthe preset
aperture
ring
at thedesired
f/stop.
T
(, Face
the camera towards the subject, look into the
L viewfinder,
and press
the metering
lever.
? While
pressing
or locking
the lever,turn the shutter
r' speed
dial.
t Set the meter needle
at the 'r
O " index
withinthe
-l viewfinder
for correct exposure.
r Since the shutter speed dial cannot be set at the
intermediate
positions,
the shutterspeed
priority
method
is recommended
when exposure
accuracyis a crucial
factor.
r Light measurement
at " B
" and " X
" of the shutter
speed
dial
is not possible
withthe built'in exposure
meter
because
" 8" isused
for longexposures
over
onesecond,
and " X
" is for the electronic
flash unit.
r Whenthe built-in
exposure
meter
isoutsidethe
coupling
range,
the meter
needlewill point to the top of the view-
finder and will indicatethat proper
exposure
cannot be
obtained. Referto " Coupling
Range
of Built-ln
Exposure
Meter" on the following
page.
r Do not leavethe camera
on the conditions
mentioned
above
since
the battery
discharges
in maximum
current and
makesshorterthe life. To prevent
discharging'be
sure
to
re-adjust
the shutter
speed
dial.

Other manuals for TL

1

Other Canon Digital Camera manuals

Canon Canonet 1 User manual

Canon

Canon Canonet 1 User manual

Canon 2663B001 User manual

Canon

Canon 2663B001 User manual

Canon 300X User manual

Canon

Canon 300X User manual

Canon EOS Rebel T5 User manual

Canon

Canon EOS Rebel T5 User manual

Canon EOS 90D Assembly instructions

Canon

Canon EOS 90D Assembly instructions

Canon EOS IX 7 User manual

Canon

Canon EOS IX 7 User manual

Canon PowerShot G7 User guide

Canon

Canon PowerShot G7 User guide

Canon VIXIA HFR60 User manual

Canon

Canon VIXIA HFR60 User manual

Canon PowerShot SX1 IS User manual

Canon

Canon PowerShot SX1 IS User manual

Canon PowerShot Elph 340 HS IXUS 265 HS User manual

Canon

Canon PowerShot Elph 340 HS IXUS 265 HS User manual

Canon EOS 7D Mark II (G) User manual

Canon

Canon EOS 7D Mark II (G) User manual

Canon EOS-1D Instruction Manual

Canon

Canon EOS-1D Instruction Manual

Canon EOS Rebel T3i User manual

Canon

Canon EOS Rebel T3i User manual

Canon PowerShot A2400 IS User manual

Canon

Canon PowerShot A2400 IS User manual

Canon PowerShot A550 User manual

Canon

Canon PowerShot A550 User manual

Canon PowerShot A620 User User manual

Canon

Canon PowerShot A620 User User manual

Canon SURE SHOT 90u User manual

Canon

Canon SURE SHOT 90u User manual

Canon PowerShot A5 User manual

Canon

Canon PowerShot A5 User manual

Canon CX-1 User manual

Canon

Canon CX-1 User manual

Canon AE-1 User manual

Canon

Canon AE-1 User manual

Canon 1901B017 User manual

Canon

Canon 1901B017 User manual

Canon PowerShot SX600 HS User manual

Canon

Canon PowerShot SX600 HS User manual

Canon PowerShot A450 Assembly instructions

Canon

Canon PowerShot A450 Assembly instructions

Canon PowerShot S5 IS User manual

Canon

Canon PowerShot S5 IS User manual
Popular Digital Camera manuals by other brands

Casio EX-V8 - EXILIM Hi-Zoom Digital Camera user guide

Casio

Casio EX-V8 - EXILIM Hi-Zoom Digital Camera user guide

Nikon CoolPix S550 Repair manual

Nikon

Nikon CoolPix S550 Repair manual

PNI House WiFi 400 user manual

PNI

PNI House WiFi 400 user manual

Netvue Vigil 2 quick guide

Netvue

Netvue Vigil 2 quick guide

Nikon COOLPIX P520 Reference manual

Nikon

Nikon COOLPIX P520 Reference manual

Olympus Stylus Zoom instructions

Olympus

Olympus Stylus Zoom instructions

Spypoint LINK-S Quick Strat Guide

Spypoint

Spypoint LINK-S Quick Strat Guide

Samsung ES20 user manual

Samsung

Samsung ES20 user manual

Hamron 012441 operating instructions

Hamron

Hamron 012441 operating instructions

ENVIO Terra AESS-BVM90H500ST quick start guide

ENVIO

ENVIO Terra AESS-BVM90H500ST quick start guide

Mini Gadgets BBWiFi manual

Mini Gadgets

Mini Gadgets BBWiFi manual

HP SB360 user manual

HP

HP SB360 user manual

Olympus CAMEDIA D-555 Zoom Basic Manual

Olympus

Olympus CAMEDIA D-555 Zoom Basic Manual

Ikegami ISD-A15 instruction manual

Ikegami

Ikegami ISD-A15 instruction manual

Samsung SCC-C4253P user manual

Samsung

Samsung SCC-C4253P user manual

AgfaPhoto DC-730i user manual

AgfaPhoto

AgfaPhoto DC-730i user manual

Panasonic Lumix DMC-LX5P Service manual

Panasonic

Panasonic Lumix DMC-LX5P Service manual

Olympus Camedia D-380 quick start guide

Olympus

Olympus Camedia D-380 quick start guide

manuals.online logo
manuals.online logoBrands
  • About & Mission
  • Contact us
  • Privacy Policy
  • Terms and Conditions

Copyright 2025 Manuals.Online. All Rights Reserved.