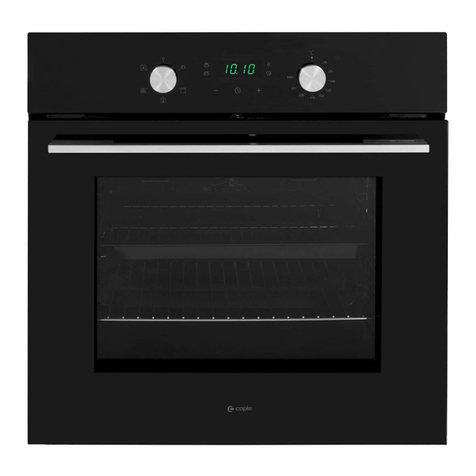
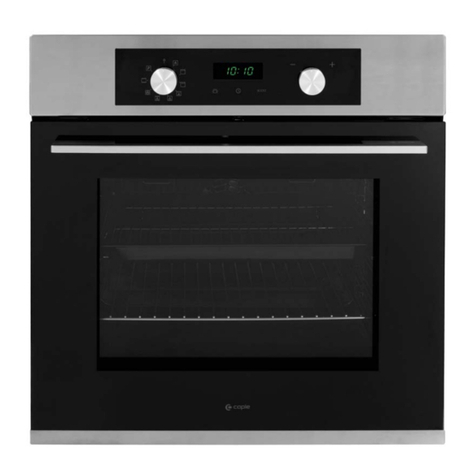
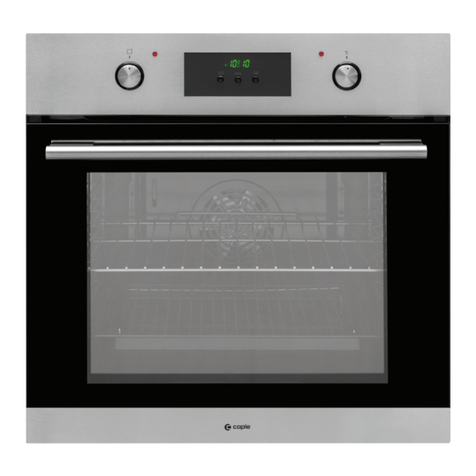
Caple SO109 User manual

Instruction manual for steam oven
Model code: SO109
Contact Caple on 0844 800 3830 or for spare parts www.caple.co.uk

239
GB
Dear Customer,
We would like to thank you and congratulate you on your choice.
This new product has been carefully designed and built using top quality materials, and
meticulously tested to ensure that it meets all your culinary requirements.
Please read and observe these simple instructions, which will enable you to achieve
excellent results from the very rst time you use it. This state-of-the-art appliance comes to
you with our very best wishes.
IMPORTANT INSTRUCTIONS AND SAFETY WARNINGS, READ CAREFULLY AND
KEEP FOR FUTURE USE
IMPORTANT INSTRUCTIONS AND SAFETY
WARNINGS
READ CAREFULLY AND KEEP
FOR FUTURE USE

38 3
GB
THIS PRODUCT IS DESIGNED FOR DOMESTIC USE.
THE MANUFACTURER DECLINES ALL RESPONSIBILITY FOR PERSONAL INJURY OR PROPERTY DAMAGE
DERIVING FROM INCORRECT INSTALLATION OR IMPROPER, ERRONEOUS OR UNSUITABLE USE.
THE APPLIANCE MUST NOT BE USED BY PEOPLE (INCLUDING CHILDREN) WITH PHYSICAL, SENSORIAL
OR MENTAL IMPAIRMENTS, OR BY PEOPLE WITHOUT THE NECESSARY EXPERIENCE OR KNOWLEDGE,
UNLESS THEY ARE SUPERVISED OR INSTRUCTED IN THE USE OF THE APPLIANCE BY A PERSON
RESPONSIBLE FOR THEIR SAFETY.
CHILDREN MUST BE SUPERVISED TO ENSURE THAT THEY DO NOT PLAY WITH THE APPLIANCE.
DO NOT PLACE ALUMINIUM FOIL, POTS OR SIMILAR OBJECTS IN CONTACT WITH THE BASE INSIDE THE
OVEN FOR COOKING.
THE APPLIANCE GETS VERY HOT DURING USE. WARNING: DON’T TOUCH THE HEATING ELEMENTS
INSIDE THE OVEN.
ATTENTION: - If the door or the gasket seals of the door are damaged, the oven may
not be used until it is repaired by a qualied service technician;
- This appliance and its internal components, especially electried parts,
may only be repaired, modied or customized by the manufacturer,
its service department or similarly qualied persons. Incompetent
repairs can cause serious accidents, damage to the appliance and its
surroundings and malfunctions.
Remember that even the replacement of the lamp inside the oven
must be performed by qualied personnel who will rst disconnect the
appliance from the mains.
- If the appliance fails to operate or requires repair, contact our service
department.
- Use only original replacement part.
IMPORTANT: - As a safety precaution, before cleaning the oven, always disconnect
the plug from the outlet or remove the appliance’s power cord.
- In addition, avoid using acid or alkaline substances (such as lemon,
vinegar, salt, tomatoes, etc.). Avoid using products containing chlorine,
acids or abrasives, especially for cleaning painted parts.
CARE AND
MAINTENANCE
- Although the cooking chamber is made of high-quality steel, incorrect
maintenance can cause corrosion;
- The oven must be cleaned periodically and all food residues must be
removed;
- Do not clean the oven immediately after the dish has been removed
because the residual drops of steam are still very hot (danger of burns);
check that the display shows a low residual temperature or none.
- Take care when opening the door when the oven is on because the
exiting steam can cause burns.
441
GB
- If the electricity is interrupted, when it comes back on, the oven
requires you to empty the circuit even though there shouldn’t be any
water in it.
- Do not use rough abrasives or sharp metal scrapers to clean the glass
door of the oven because they could scratch the surface and cause the
glass to shatter.
- During cleaning, take care that no water enters the appliance.
- Use only slightly damp rags.
- Never spray water inside or outside of the appliance.
- Do not use steam devices for cleaning because water that penetrates
could cause damage.
- Do not use the appliance for heating or humidifying the room.
- Make use of the “child lock” key.
- The appliance must be installed and used in an ambient temperature
between 5 °C and 35 °C.
- If there is a risk of frost, the residual water in the pumps could freeze
and damage them.
- Use only the thermal probe recommended for this oven.

40 5
GB
IMPORTANT
The oven’s identication plate is even accessible when the appliance is installed. This identication
plate, which is visible when you open the door, shows all the information you will need when requesting
replacement parts for the appliance.
FIRST USE
The oven should be thoroughly cleaned with soap and water and carefully rinsed.
Heat the oven for about 30 minutes at the maximum temperature; this eliminates all the residual
manufacturing oils that could cause unpleasant odours during cooking. Use the circular plus fan
function without accessories in the oven.
Before using the accessories for the rst time, clean them carefully with a very hot alkaline washing
solution and a soft cloth.
USING THE FLAT GRILL
To remove the at grill, pull the grill towards you until it stops and then lift, by pulling upwards, until it comes
completely out.
To insert the at grill, slide it in at an angle of 45° until it locks and then lower it horizontally and push it all the way
in.
If the at grill has a low drip tray, to remove it lift it slightly and slide it towards you. To reinsert it, slide
it back until it is correctly seated.

643
GB
USING THE PERFORATED TRAY
This tray is used for steam cooking and is positioned on the at grill together with its support.
We recommend also using it in combination with the drip tray to catch everything the drips from the
food during cooking.
rESPEcT for THE EnVIronMEnT
The documentation for this appliance is printed on paper bleached without chlorine or recycled paper
to contribute to protecting the environment.
The packaging was designed to prevent damage to the environment; they are ecological products that
can be recovered or recycled.
Recycling the packing saves raw materials and reduces the volume of industrial and domestic waste.
THE PACKING MATERIAL is 100% recyclable and marked with the recycling symbol.
Dispose of in conformity with local law. The packing material (plastic bags, polystyrene
parts, etc.) must be kept out of the reach of children because it is potentially dangerous.
THIS APPLIANCE is marked in conformity with European Directive 2002/96/EC, Waste Electrical and
Electronic Equipment (WEEE). By making sure that this product is disposed of correctly, the user
contributes to preventing potential negative consequences for the environment and health.
THE SYMBOL on the product or accompanying documentation indicates that this product must not
be treated as domestic waste but must be delivered to a suitable collection point for the recycling of
electrical and electronic equipment.
DISPOSAL MUST BE MADE in conformity with local laws on waste disposal.
FOR ADDITIONAL INFORMATION about the treatment, recovery and recycling of this product,
contact the local ofce of competence, the domestic waste collection service or the store
where the product was purchased.
BEFORE SCRAPPING, make it unusable by cutting the electrical cord.

42 7
GB
STEAM OVEN 45
COMMAND OVERVIEW
STANDARD COOKING FUNCTIONS: from 1 to 5;
SETTING TEMPERATURE, COOKING TIME: 19 and 20;
ON/OFF + CHILD LOCK: 27;
STEAM OVEN FUNCTIONS: from 6 to 9;
CLEAN FUNCTION (SELF-CLEANING): 10;
RECIPE FUNCTIONS: 11 and 12;
SCROLL MENU FUNCTIONS: 13 and 14;
TIMER FUNCTIONS: 24;
SETTING THE TIMER: 19 and 20;
1 oven light;
2 circular ventilated;
3 intensive (grill + circular ventilated);
4 ventilated grill;
5 grill;
6 steam up to 100 °C;
7 steam up to 130 °C;
8 steam combined with ventilated cooking;
9 steam puff;
10 CLEAN function;
11 automatic system settings (recipes);
12 conrm display settings function;
13 scroll the display downwards, decrease cooking temperature;
14 scroll the display upwards, increase cooking temperature;
15 indications of temperature settings on the display;
16 key function enabled/disabled;
17 timer indication function;
18 countdown function;
19 increase settings function;
20 decrease settings function;
21 “minute-counter” timer function;
22 “end cooking” timer function;
23 “cooking time” timer function;
24 timer function;
25 “START” function;
26 “STOP” function;
27 ON/OFF and special “child lock” function.

845
GB
Note: all settings/function changes are conrmed by a beep.
Another function that can be set during steam cooking is the PAUSE function.
This function is activated by pressing the selected function key again: it will begin to ash until you
press it again after you have completed what you had to do (remember to do it or it will not nish
cooking!)
INTRODUCTION TO THE OVEN
Dear Customer, your new oven is controlled by an electronic board that constantly monitors its
operation to improve its performance.
The touch control is state-of-the-art, precise and reliable.
The interface is elegant, orderly and discrete, more intuitive than ever!
A few keys, many functions, no difcult key combinations or sequences: you just concentrate on
following the recipe and the oven is ready with two gestures!
INSTALLATION AND HOOK-UP
Dear Customer, this oven is a sophisticated electronic appliance, classied as a durable good. Its
installation requires qualied professionals for both the hook-up of the power line and its placement in
the kitchen counter.
(SEE ASSEMBLY INSTRUCTIONS ON PAGE 60)
First hook-up
When the oven is connected to the electric mains for the rst time, the display will ask you to select
your language;
select the desired language with the keys;
use the keys to conrm your choice.
From now on, that language will remain selected even after power blackouts. Go to DEMO MODE.

44 9
GB
DEMO MODE
This is the mode that the oven is normally in every time that there is a power failure and, consequently,
when it is rst hooked-up.
the purpose is to show how you can control it with a recorded sequence of commands.
In this mode, the oven is NEVER really turned on, i.e., the heating elements are never powered!
The control panel is INACTIVE and, so, the oven will not respond to commands!
To disable the demonstration mode, touch the light
symbol for ve seconds: the oven will go to normal
operation and be ready for turning on.
Now you can set the time but it is not necessary for
turning on the oven.
SETTING THE CLOCK
The oven will signal that it is connected to the power mains with a double beep.
To set the system time, press the “TIMER FUNCTIONS” button for at least 3 seconds.
Each command activated is conrmed by a beep

10 47
GB
Set the clock with the + and - buttons: during
setting the separator dots ash and the time has
been set when the dots remain steady on.
ACTIONS POSSIBLE WITH THE OVEN OFF
- Turning on the oven light
The oven light is turned on/off by pressing the
symbol as shown in the gure.
- Change the language
When the oven is off, you can change the language of the display by simultaneously selecting and
the + in the lower right for at least 3 seconds.
Then, use to select the language and conrm your choice with .
- Setting the “minute-counter” timer function
See the section on page 48.
TURNING ON THE OVEN
Turn the oven on by touching the symbol in the
gure.
to activate the oven functions, always press except for the light and timer functions, which are
independent.
The command activates all the icons by lighting up their backgrounds.
NOTE: Remember that the oven only turns on if the key function is deactivated

46 11
GB
The word ON appears on the display for a minute. The control is waiting for you to select a
cooking function. Otherwise, the oven assumes that it was turned on by accident and, for
safety reasons, it automatically turns off, displaying the word OFF for several seconds.
Key (or child safety) function
The key function is activated/deactivated by pressing the key for at least 3 seconds.
You can activate and deactivate the oven mode at
any time.
The padlock OPEN
symbol means that
the key function is not
active.
The padlock CLOSED
symbol means that the
key function is active.

12 49
GB
MAIN FUNCTIONS
Overview of front panel commands
Cooking functions
Special function
Temperature/power
Lock
Clock
Programmin the
oven
Oven ON/OFF
Lock oven ON/OFF
The cooking functions
The panel provides eleven specic cooking functions!
To activate a function, just touch the corresponding symbol. Each function has a temperature setting
selected on the basis of cooking tests of the recipes that are typically used, which can be easily
changed based on your own experience.
Oven functions
Oven lamp.
In this type of cooking, a fan located in the rear part circulates warm air inside
the oven, distributing it uniformly.
This cooks food faster than conventional cooking. This system is good for cooking on several shelves
and even for different types of foods (sh, meat, etc.).

48 13
GB
Type of cooking for grilling or browning foods. The grill with the food to be cooked is placed in
the 2nd or 3rd position from the bottom. Pre-heat for at least 2 minutes before putting in the
dish.
Steam cooking 100 °C (pre-set to 100°C and adjustable to 40 °C).
Steam cooking at 130 °C (reheating, preset at 130 °C and adjustable up to 70 °C)
Steam combined with ventilated cooking
Steam puff
Clean oven/Circuit steam generator (settable or automatic programs for the efciency of the
oven)
Access to preset recipes
The table below shows the results of the cooking tests conducted in our laboratories by a professional
cook. In any case, these are only indicative and the values that we have selected are only a starting
point for you to experiment with your own recipes to obtain better results!
Steam functions

14 51
GB
Simple cooking commands
Thanks to state-of-the-art controls, only two touches are required to set a cooking mode:
turn on the oven and select the most suitable function for the dish
you are about to cook… you choose it and you touch it!
then
The control suggests a temperature for each function, which you can change at any time, but if you
consider it suitable, you don’t need to do anything else, the oven will start by itself in just a few seconds!
Setting the temperature
The control uses a temperature probe that is accurate to ±5 °C for the maximum reliability of the
cooking temperatures requested.
You can change the temperature at any time. After selecting the cooking function just touch the
symbols and the temperature can be set in a range from +50 °C to MAX.
You don’t need to conrm the change, the control activates
by itself after a few seconds.
During heating, the centigrade symbol (°C) ashes
to indicate that it is heating up to reach the selected
temperature.
When the temperature is reached, it beeps.
NOTE: some models may display the current temperature in the oven until the temperature set is
reached. If you want to check the temperature set, press any one of the keys and, if you wish,
you can use them to change the temperature set.
Note: always be very careful when opening the door of the appliance because, depending on the case,
steam or boiling hot air could come out.

50 15
GB
ATTENTION:
The oven has been designed so that, during cooking, it maintains the right balance between the
heat used for the various types of cooking and the steam produced from the foods themselves.
This balancing means that, at the end of cooking, you may nd excess cooking condensate
(water and melted fats) in the carafe; so, remember to empty and clean it.
Residual heat
While cooking food, the structure of the oven stores heat. This heat is kept isolated from the rest of the
kitchen thanks to generous heat insulation and certain construction techniques.
This heat is gradually dissipated over time and can still be a resource in the kitchen, if it is managed: the
control shows the internal temperature after the oven is turned off until it falls to 50 °C
Use this characteristic to keep foods warm or to complete their cooking gently!
Food Probe (or thermometer probe)
Tenderness, aroma and avour are the result of precise,
functional control.
The food probe is a thermometer which, when inserted
into the food, makes it possible to check the internal
temperature and use it to establish the end of cooking.
For example, meat may look like it is cooked on the
outside, but still be pink on the inside!
The temperature reached by food during cooking is closely
linked to problems relating to health and hygiene. Bacteria
can be contained in every kind of meat, poultry and sh,
as well as raw eggs.
Certain types of bacteria make food go off, while others,
such as Salmonella, Campylobacter jejuni, Listeria
monocytogenes, Escherichia coli and Staphylococcus
aureus can be seriously harmful to human health. Bacteria
multiply very quickly above a temperature of 4.4° up to
60°C. Mince is particularly at risk from this point of view.
To prevent bacteria from multiplying, it is necessary to take the following measures:
Per evitare la moltiplicazione dei batteri è necessario:
• Do not defrost food at room temperature, always in the fridge or in the oven using the specic
function. In the latter case, cook the food immediately afterwards.
• Stuffchickenjustbeforeeatingit.Neverbuypre-packedready-stuffedchickenandonlybuyready-
cooked stuffed chicken when you intend to eat it within 2 hours.
• Marinatefoodinthefridge,notatroomtemperature.
• Useafoodprobetocheckthetemperatureofmeat,shandpoultryiftheyaremorethan5cmthick,
to ensure that the minimum cooking temperatures are reached.
The greatest hazards are posed by poorly cooked chicken, particularly at risk from Salmonella.

16 53
GB
• Avoid interrupting the cooking process, i.e., partially cooking food, storing it and completing
the cooking process later. This sequence encourages the growth of bacteria due to the “warm”
temperatures reached inside the food.
• Roastmeatandpoultryintheovenattemperaturesofatleast165°C.
NOTE: Always use the probe provided by the manufacturer
HOW USE THE FOOD PROBE
As you can see from Figure 1 above, the probe socket is located in the upper left corner of the oven
chamber, protected by a metal cover with plug.
Remove the cover and insert the plug of the probe all the
way (you will hear a slight conrming click).
Insert the probe in the food without touching fatty parts
or bones.
Remember that the probe will not work if it is connected when the oven is already switched on!
In summary:
• Inserttheprobewiththeovenoff,theprobesymbolwillappearonthedisplay.
• Putthefoodintheoven.
• Inserttheprobeinthecentreofthefood,avoidingfattypartsandbones.
• Turnontheovenwiththemostappropriatecookingfunctionforyourdish.
• Adjustthetemperaturetheovenwiththe keys according to your liking.
• Afterafewmomentstheovenbeginstocookandthedisplayshowstheinstantaneousinternal
temperature of the food. By pressing the keys, you can change the internal temperature
that must be reached inside the food between 30 to 99 °C.
• Ifyouwishtochangethetemperatureofthecentreoftheovenduringcooking,pressthe
which turns red and allows you to change it, always by pressing the ; keys; when you are
nished, the display will return to showing after the instantaneous temperature of the centre of
the oven.

52 17
GB
NOTE: If you want to check the temperatures involved, press the key, which will display the
instantaneous temperature of the probe in the centre of the own
In any case, we recommend that you consult the following table taken from the National Food Safety
Database (USA).
fooD MInIMUM InTErnal TEMPEraTUrE
Mince
Hamburger 71°C
Beef, veal, lamb, pork 74°C
Chicken, turkey 74°C
Beef, veal, lamb
Roasts and steaks:
Rare
The cooking temperature for rare meat is not indicated by the NFSD
as it is unsafe for health reasons
Medium-rare 63°C
Medium 71°C
Well done 77°C
Pork
Chops, roasts, ribs:
Medium 71°C
Well done 77°C
Fresh ham 71°C
Fresh sausages 71°C
Poultry
Whole chicken or chicken pieces 82°C
Duck 82°C
Whole turkey (not stuffed) 82°C
Turkey breast 77°C
NOTE: IF THE PLUG OF THE PROBE IS REMOVED AFTER COOKING HAS STARTED,
THE CONTROL BLOCKS THE OVEN AND DISPLAYS THE ERROR “CENTRE PROBE
DISCONNECTED”.

18 55
GB
When cooking with the aid of the food probe, all the pre-set temperatures are changed to 165
°C (except for steam) to be consistent with its philosophy of use: they can be changed from a
minimum of 120 °C to a maximum of 250 °C.
Cooking ends when the internal temperature set for the food probe is reached; all oven programming
functions (timer functions) are inhibited except for the “Minute-counter”
When finished cooking, always remember to disconnect the probe and insert the plug provided
with the appliance.
Oven light control
The oven light control is active in all cooking functions and is independent of them, i.e., it can be turned
on or off depending on the need, whenever you want!
The oven light is normally kept on during heating and, then, for three minutes after the temperature
setting is reached. After that time, the light is turned off to save energy.
To check how the food is cooking, you must turn on the inside light. To do this, just touch the light
symbol : it will stay on for three minutes and then turn off by itself. Of course, you can turn it off right
away by touching the light symbol again.
The light inside the oven always turns on when the door is opened and remains on until the door is
closed.

54 19
GB
PROGRAMMING THE OVEN
The oven program has three ways to control the cooking time, in
combination with all the other cooking functions.
Touch the timer symbol once and the
relative symbol will light up. Plus, the clock
display will replace the current time.
The separator dots ash to indicate that you
can program the cooking time
Once the cooking time is entered, the display will ash the current time again and
the “cooking time” symbol will be lit.
The countdown starts now. After the indicated cooking time has elapsed, the oven will beep and
the heating elements will turn off, ending cooking. The following words will appear on the display:
“Program finished remove the dish”: press any button to stop the beeping or open the door.
After 1 minute, the oven will automatically turn off, if other cooking functions have not been set.

20 57
GB
Timer programming: end-of-cooking time
Touch the timer symbol two times and the
relative symbol will light up.
The separator does will ash to indicate
that you can set the end-of-cooking time.
Set the end-of-cooking time by touching
the “+” and “-” symbols.
Once the end-of-cooking time is entered, the display will ash the current time
again and the “end-of-cooking time” symbol will be lit.
The countdown starts now. When the set time has been reached, the oven will beep and the heating
elements will turn off, ending cooking. The following words will appear on the display: “Program
finished remove the dish”: press any button to stop the beeping or open the door.
After eight seconds, the oven will automatically turn off, if other cooking functions have not been set.
Timer programming: delayed cooking
By combining the two modes, “cooking time” and “end-of-cooking time”, you can program the oven
so that cooking starts later than the current time.
For example, if you want to go out at 8:30 and you want a roast to be ready when you return at 13:00,
do this:
Prepare the roast for cooking and put it in the oven.
Turn on the oven, select the cooking function and set the temperature.
end of
cooking time
Table of contents
Other Caple Oven manuals