Carbine 76CSR User manual

1
OWNER ’S MANUAL
®
REMOTE START with SECURITY & KEYLESS ENTRY SYSTEM

2
Congratulations
Congratulations on the purchase of this CARBINE keyless entry
and remote start system.
Reading this owners guide prior to using the system will familiarize
you with it’s many features. If issues arise or you have questions,
contact your installing dealer first. Additionally, you can contact us
online at www.carbine.com or call 310-735-2000.

3
Replacement Remote Controls
To purchase replacement remote controls, please
see your authorized dealer/installer or visit us at
www.carbine.com
Remote part numbers are found on the back of
the remote control.

4
Contents
Congratulations .........................................................................................2
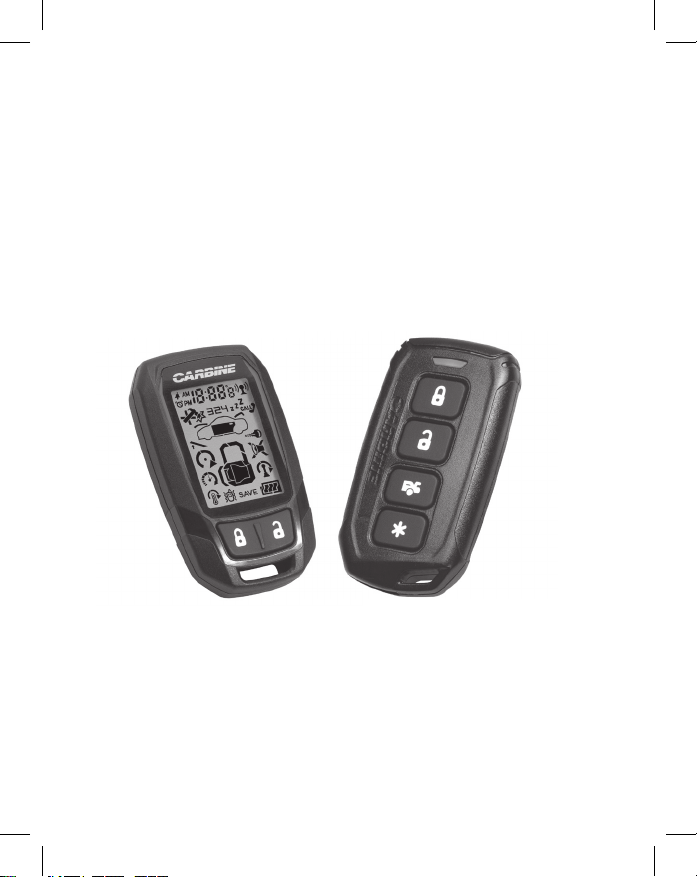
Replacement Remote Controls...................................................................3
Remote Configuration ................................................................................5
LCD Configurations....................................................................................6
Arming/ Disarming.....................................................................................8
Disarm without a Transmitter .....................................................................8
Passive Arming/Locking.............................................................................9
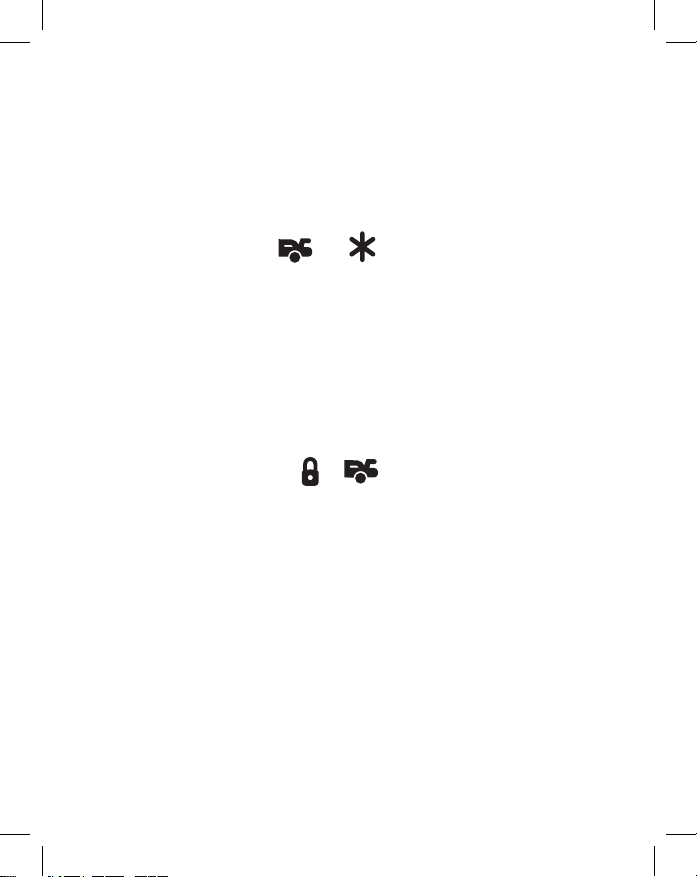
Panic Alarm ...............................................................................................9
Trunk Release (CH#3) ................................................................................9
Car Finder................................................................................................10
AUX Output (CH#4)...................................................................................10
AUX Output (CH#5) (CH#6) .......................................................................11
Valet Mode...............................................................................................12
Trigger the System...................................................................................13
Progressive Door Trigger..........................................................................13
Tamper Warnings.....................................................................................13
Forced Passive Arming.............................................................................14
Automatic Starter Disable ........................................................................14
Nuisance Prevention System....................................................................14
Ignition Key Controlled Dome Light ..........................................................15
Remote Starting the Vehicle .....................................................................16
Key Takeover ...........................................................................................17
Quick Stop Mode .....................................................................................18
Timer Mode Starting ................................................................................19
Short-Run Turbo Timer Mode ...................................................................20
Automatic Rear Window Defogger............................................................20
Programming the LCD Remote Controller.................................................21
Pairing a Replacement Remote Control ....................................................24
System Maintenance / Battery Replacement ............................................25

5
Remote Configuration
Button Feature Comment
Lock/ Arm Press and release.
Unlock/ Disarm Press and release.
Panic Alarm On Press and hold for 1.5 sec.
–
Arm and delete the
on-board shock sensor
Press two times within 5 seconds.
2 short chirps + 1 long
––
Arm and delete the option-
al sensor. On-Board shock
sensor is active.
Press three times within 10 seconds.
3 short chirps + 1 long
–
–
Arm and delete the
On-Board shock sensor
and the optional sensor.
Press four times within 15 seconds.
4 short chirps + 1 long
––
–
Arm and delete all trigger
devices. Ignition trigger
and Tilt sensor is active.
Press five times within 20 seconds.
5 short chirps + 1 long
or Panic Alarm Off Press and release either.
–Silent Arm/ Lock Press first then
–Silent Disarm/ Unlock Press first then
Activate Ch#3 (trunk) Press and hold for 1.2 sec.
+AUX Ch 4 Press together and hold.
+AUX Ch 5 Press together and hold.
+AUX Ch 6 Press together and hold.
––Remote Valet Mode On/Off Open a door first. Press and release
in sequence.
Remote Start On or Off Press and release.

6
Standard LCD Icon Configurations
LCD Icon Description LCD Icon Description
The lock icon will be
displayed when the doors
are locked and the system
is armed
The unlock icon will be
displayed when the doors
are locked and the system is
disarmed
The valet mode icon will be
displayed when the system is
in valet mode
The time display shows actual
time, RS countdown time, alarm
clock time and countdown timer
Driver Paging
Someone is paging you from
your vehicle
The remote is in range
of the vehicle
The remote is transmitting The remote is receiving
Remote Configuration (continued)
+Timer or Temp Start Press together and release.
Arm While Driving Ignition must be on. Press and
hold for 1.0 sec.
+Turbo Timer Activation Engine Running. Press both
then release.
+Car Finder Press together and release.

7
LCD Icon Description LCD Icon Description
The remote battery needs to
be replaced
The remote battery is full
The door is open or the alarm
has been triggered from an
open door
The hood is open or the alarm
has been triggered from an
open hood
The trunk is open or the
alarm has been triggered
from an open trunk
Button lock is active or the
alarm was triggered by voltage
from the ignition key
The alarm was triggered by
the shock sensor
The shock sensor is inactive
The tilt sensor is active
The alarm was trigged by the
tilt sensor (flashing)
Manual transmission mode
is active
Engine is cranking Engine is running
Timer start mode is active
Temperature start mode
is active
Siren is active
The panic alarm is active or the
alarm is triggered
Transmitter battery save
mode is active
Melody mode is off, vibrate
mode is active
Alarm clock is active Countdown timer mode is active

8
Lock / Arm
Press and release the button to arm the security system and lock
the doors. The parking lights will flash one time. (door lock control
must be installed)
Unlock / Disarm
Press and release the button to disarm the security
system and unlock the doors. The parking lights will flash two
times. (door lock control must be installed)
Silent Arm / Disarm
Press and release the button before pressing the or
button to initiate silent mode. The system will LOCK or UNLOCK
without arming or disarming chirps.
Note: If the system had previously been triggered, the tamper
warning chirps will always sound upon disarm.
Disarm without the Remote Control
Your CARBINE system has an override mode that allows you to
disarm your system in the event that you have lost or damaged
your remote controller.
- While the alarm is sounding, turn the ignition key to On, then press
and release the valet switch button. This will disarm the system.
Note: If your system was installed and programmed to
“Automatically Arm”, the system should be placed into
“Valet Mode” to prevent it from becoming re-armed until
you can correct the issue with your remote control.

9
Passive Arming/Locking
Your CARBINE system can be programmed to Passive Arm and
Lock the doors. If this feature is programmed on, it will automat-
ically arm and lock the doors 30 seconds after the last protected
entrance is closed.
During the 30 second countdown, the RCC LED will flash fast and
the siren/horn will chirp after 20 seconds to warn that the system
is about to arm and lock.
Panic Alarm
1. Press and hold the button for 3 seconds to activate panic
alarm. Once activated, the panic alarm will sound the horn or siren
and flash the parking lights for 30 seconds.
2. Press and release the or button to stop the panic mode.
Trunk Release (CH#3)
Press and hold the button for 1.2 seconds to release
the trunk/ hatch lid
- The vehicle must have electronic trunk control
- The trunk release control option must be installed

10
Car Finder
The Car Finder feature will help you locate your
vehicle by flashing the parking lights.
To Activate the Car Finder feature
1. Press and release the and buttons at the same time.
2. The vehicle parking lights will flash (5) times.
3. Repeat the procedure as needed to locate your vehicle.
AUX Output Activation (CH#4)
Depending on your installation, your installer may have connected
the channel #4 output to your vehicle. To activate the AUX/CH#4
output, press and hold the + buttons together.
This action will energize the AUX/CH#4 output for as long as
you hold the buttons down. The operation of AUX Channel #4
is programmable.

11
AUX Output Activation (CH#5)
Depending on your installation, your installer may have connected
the channel #5 output to your vehicle. To activate the AUX/CH#5
output, press and hold the + buttons together.
This action will energize the AUX/CH#5 output for as long as
you hold the buttons down. The operation of AUX Channel #5
is programmable. By default, the AUX #5 output will stay active
as long as you hold the buttons down.
AUX Output Activation (CH#6)
Depending on your installation, your installer may have connected
the channel #6 output to your vehicle. To activate the AUX/CH#6
output, press and hold the + buttons together. This action
will energize the AUX/CH#6 output for as long as you hold the
buttons down. The operation of AUX Channel #6 is programmable.
By default, the AUX #6 output will stay active as long as you hold
the buttons down.

12
Valet Mode (By Valet Button)
Valet mode is a convenience when you take your car in for
service or allow someone who may not be familiar with
your security system to drive your vehicle.
- All doors must be closed
- Turn the ignition key On then Off.
- Press and release the valet button (1) time.
The status LED will be on.
- Parking lights flash fast 9 times.
- Repeat the procedure to turn off the valet mode.
The status LED will be off.
- Parking lights flash slow 9 times.
Valet Mode (By Remote)
Valet mode is a convenience when you take your car in for
service or allow someone who may not be familiar with your
security system to drive your vehicle. To activate Valet Mode
using your remote control. Repeat the following procedure.
1. Open the drivers door.
2. Press then then on your remote control.
3. The LED status indicator will be on solid.
- Parking lights flash fast 9 times.
4. Repeat 1 and 2 above to exit Valet Mode.
The status LED indicator will be off.
- Parking lights flash slow 9 times.

13
Trigger the System
If at any time the system becomes triggered, the horn/siren will
sound for 30 seconds and then re-arm. If a protected entrance is
left open, the alarm will sound for three, 30 second cycles and then
the protected entrance is bypassed while the remaining detection
zones are active.
Progressive Door Trigger
This feature is ON by default and can be programmed off by the
installer. When your CARBINE system is armed and a door is
opened, instead of “full alarm mode” the system will chirp the
horn/siren 10 times prior to going into full alarm mode.
Tamper Warning at Disarm
If the alarm had been triggered while you were away from the
vehicle, upon disarming, a 4-chirp tamper disarm warning will
occur. In addition to the 4-chirp warning, the status LED will
flash a distinctive number of times to indicate which alarm
zone set off the alarm.
Tamper LED Flashes Trigger Source
1 Doors
2Hood/ Trunk
3 Optional Sensor
4 Onboard Shock Sensor
5Ignition Voltage
6 Tilt Sensor

14
Forced Passive Arming
As additional protection, the Forced Passive Arm feature will
arm the security system 1 hour after exiting the vehicle. In some
cases, you may forget to press the button to arm your
system. Forced Passive Arming will keep the vehicle protected.
By default, this system is ON and active unless programmed
differently by the installer.
Automatic Starter Disable
The purpose of this feature is to keep your vehicle from being stolen
at all times. This system is activated independently of all other
systems. After turning the ignition key off, the Auto Starter Disable
system will begin to count down. The LED indicator on the RCC will
begin to flash. 30 Seconds later, the security system starter disable
circuit will be active. To start the vehicle, it will be necessary to
disarm the system using the remote controller.
Nuisance Prevention System
To prevent continuous alarm cycles from faulty and over-sensitive
sensors or an attempted theft that has left a protected door open,
the Nuisance Prevention System will monitor all trigger inputs.
If the alarm triggers (3) times with a 60-minute period from the
same sensor, the NPS will interpret this as a false trigger. The NPS
will ignore the affected sensor while leaving all other sensors and
triggers active.

15
Ignition Key Controlled Dome Light
- If dome light control has been installed, every time you
stop the engine (Ignition Key Off), the dome light in your
vehicle will illuminate.
- When you disarm your security system the dome light will
illuminate. When you enter the vehicle and turn On the
ignition key, the dome light will go out.
Note: Since this system mimics some factory installed
dome light systems in many vehicle brands, the
operation may not be noticed.

16
Remote Starting the Vehicle
Warning!
1) Never remote start your vehicle when the keys
are in the ignition.
2) Never start the vehicle unless the transmission
is in PARK or NEUTRAL.
3) Never start your vehicle while it is inside a
building that has minimal ventilation.
1. Make sure the parking brake is set ON.
2. Press and release the one time (or the amount
of times programmed by the installer).
3. The parking lights will flash once to confirm the vehicle
will attempt to start the engine.
- Gasoline vehicles will begin the starting procedure
4 seconds after the parking lights flash.
- Diesel vehicles will begin the starting procedure after
the “Wait to Start” timer has expired.
4. Once the vehicle’s engine has started, it will run for a
pre-programmed period of time (12, 24 or 60 minutes).

17
Key Takeover:
When you are ready to drive the vehicle
1. Unlock the door using the CARBINE remote control.
2. Enter the vehicle and do not step on the foot brake.
3. Insert the ignition key and turn it to the RUN position.
4. Step on the foot brake. The remote starter will shut off and the
parking lights will turn off.
5. Disengage the parking brake and begin driving.
Note 1: If the foot brake is pressed before the ignition key is placed
in the RUN position, the remote starter will disengage,
and you will have to re-start the engine using the normal
starting procedure.
Note 2: If your vehicle uses a Smart Key or PTS (Push To Start)
starting system. Step on the brake (the engine will stop) and
press the START button to re-start the engine as normal.

18
Quick Stop Mode:
Your CARBINE remote starter can also keep the engine running
during short trips away from the vehicle.
To Enable Quick Stop Mode
1. Park in a well-ventilated area.
2. With the engine running, set the transmission in park and
set the parking brake.
3. Press and release the one time (or the amount of times
programmed by the installer).
4. Turn the ignition key off and remove the ignition key.
The engine will continue to run.
Note: If your vehicle uses a Smart Key or PTS (Push To Start)
starting system, press the start button once. DO NOT press
the foot brake.
5. Exit the vehicle and lock the doors using the
CARBINE remote control.
Note: This feature will not work if the foot brake
is pressed at any time.

19
Timer Mode Starting
There are (2) types of timer start modes that can be
programmed to perform when activated.
- Timed Mode. This mode allows you to keep the engine
warmed by starting the engine every (3) hours.
After (6) starts, this system will be off.
- Temp Mode. This mode checks the ambient temperature
inside the vehicle every (3) hours. If the temperature has
reached 0 degrees or less, the remote start will start the engine
and allow it to run its pre-programmed run time. The inside
temperature will be checked again in (3) hours after the remote
start run time has completed.
To initiate Timer Mode Starting, press the +
buttons at the same time then release them.
- The parking lights will flash (4) times.
- The vehicle engine will start.
- Press the button to shut off the remote starter.
- Timer start mode is now engaged.
To deactivate Timer Start Mode, turn on the ignition key ON or
activate any of the remote start safety features (press the brake
pedal, release the parking brake, open the hood).
- The parking lights will flash (4) times when timer
start mode is deactivated.

20
Short-Run TurboTimer Mode:
Short Run Turbo Mode keep the engine running for a
short length of time to allow the engines turbo boost
system to cool down before stopping the engine.
Activate theTurbo Timer Mode
- Stop the vehicle and set the parking brake.
- Press and release the + at the same time.
The parking lights will flash.
- Remove the ignition key and exit the vehicle. At this time you can
arm the system with the remote controller. Arming will not stop
the Turbo Timer Mode.
- The engine will be off after the programmed runtime expires.
Automatic Rear Window Defogger
When this feature is installed, the rear window defogger automat-
ically activates during the remote start procedure. This feature
is controlled by the temperature sensor inside the alarm control
module. If the ambient temperature of the inside of the vehicle is
55º F or lower, the rear defogger output will activate and turn on
the vehicles rear defogger system.
Table of contents
Other Carbine Remote Starter manuals
Popular Remote Starter manuals by other brands

Clifford
Clifford INTELLISTART 4 owner's guide

Schumacher Electric
Schumacher Electric SL1316 owner's manual

DesignTech
DesignTech Ready start 24739 installation manual

Voxx Electronics
Voxx Electronics Prestige APS997ZLR owner's guide

Clarke
Clarke JS4000 Operation & maintenance instructions

Black Widow Security
Black Widow Security BW FM 6150 user manual

Prestige
Prestige PE5BZ owner's guide

EINHELL
EINHELL CC-JS 18 Original operating instructions

ULTIMATE SPEED
ULTIMATE SPEED DIS-127 Operation and safety notes

FlashLogic
FlashLogic FLC-DL-GM2 install guide

Audiovox
Audiovox Prestige Platinum APS-57C owner's manual

Nobody Messes with... IT
Nobody Messes with... IT JT 200 Operation instructions