manuals.online logo
Brands
  1. Home
  2. •
  3. Brands
  4. •
  5. Carimali
  6. •
  7. Plumbing Product
  8. •
  9. Carimali CALFLEX 23057X-CRX User manual

Carimali CALFLEX 23057X-CRX User manual

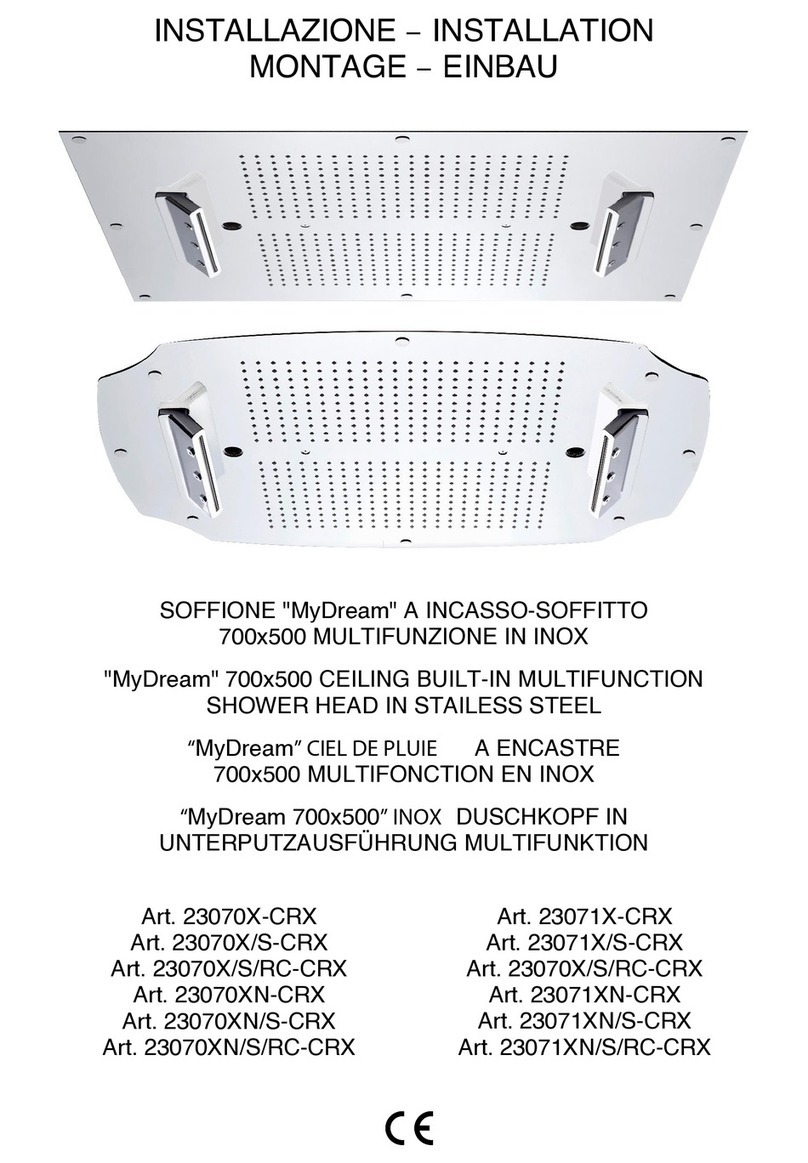
INSTALLAZIONE –INSTALLATION
MONTAGE –EINBAU
SOFFIONE "MyDream" A INCASSO-SOFFITTO
490x490 MULTIFUNZIONE IN INOX
"MyDream" 490x490 CEILING BUILT-IN MULTIFUNCTION
SHOWER HEAD IN STAILESS STEEL
“MyDream” CIEL DE PLUIE A ENCASTRE
490x490 MULTIFONCTION EN INOX
“MyDream 490x490” INOX DUSCHKOPF IN
UNTERPUTZAUSFÜHRUNG MULTIFUNKTION
Art. 23057X-CRX
Art. 23057X/S-CRX
Art. 23057X/S/RC-CRX
Art. 23057XN-CRX
Art. 23057XN/S-CRX
Art. 23057XN/S/RC-CRX
Fax +39 0323 889338
e-mail: [email protected]
Tel. +39 0323 889328
Via Zona Industriale , 5bis
28891 Nonio (VB) Italy
Questo disegno e' di proprieta' CALFLEX s.r.l che, a norma di legge, si riserva tutti i diritti. This drawing is property of CALFLEX s.r.l. All right reserved.
490
4901,5
SOFFIONE "MyDream" INOX INCASSO-SOFFITTO 490x490
C/CROMOTERAPIA, 2 NEBULIZZATORI S/PULSANTIERA
00 23057XN_S
DESCRIZIONE REVISIONE ARTICOLO
DISEGNATORE
M.N. A.M. 1:4 A4
DATA
27/07/2015
CONTROLLATO PESO (g) SCALA COD. PROG. FORM
2
AVVERTENZE:
L’impianto deve essere effettuato da personale autorizzato, certificato secondo le vigenti normative dello
stato in cui avviene l’installazione.
Tutto il materiale utilizzato deve essere conforme ai requisiti di sicurezza previsti per il tipo di applicazione,
secondo le vigenti normative dello stato in cui avviene l’installazione.
Tutti gli allacciamenti (idrico ed elettrico) devono essere perfettamente isolati gli uni dagli altri e fissati in
maniera stabile.
Questo apparecchio può essere usato da persone con età superiore a 8 anni e le persone con ridotte
capacità fisiche, sensoriali o mentali, o prive di esperienza, solo se adeguatamente supervisionate o istruite
all’uso in sicurezza del dispositivo e con la consapevolezza dei rischi associati. I bambini non devono
giocare con l’apparecchio. La pulizia e la manutenzione non devono essere eseguite dai bambini senza
supervisione.
Negli apparecchi non vi sono componenti contenenti mercurio e amianto.
WARNINGS:
The plant must be made by an authorised staff and must be certified at the norms in use in the country
where the installation is made.
All the material used must be conformed to the safety requirements forecast for this type of installation, as
per the norms which are effective in the country where the installation is made.
All (hydraulic and electric) connections must be perfectly isolated one from the other and stably fixed.
This device can be used by people over the age of 8 years and by persons with reduced physical, sensory
or mental capabilities, or lack of experience, only if properly supervised or instructed on safe use of the
device and with knowledge of the risks associated. Children must not play with the device. Cleaning and
maintenance shall not be made by children without supervision.
In the equipment there are no components containing mercury and asbestos.
AVERTISSEMENTS:
L'implant doit être effectué par un personnel autorisé, certifié selon les normes en vigueur du pays dans
lequel a lieu l'installation.
Tout le matériel utilisé doit être conforme aux requis de sécurité prévus pour ce type d'application, selon
les normes en vigueur du pays où a lieu l'installation.
Tous les branchements (hydrique et électrique) doivent être parfaitement isolés les uns des autres et fixés
de façon stable.
Ce dispositif peut être utilisé par les personnes âgées de plus de 8 ans et les personnes ayant une
déficience physique réduite, sensorielles ou mentales, ou le manque d'expérience, seulement si elle sont
correctement supervisées ou instruites sur l'utilisation sécuritaire de l'appareil et en connaissance des
risques associés. Les enfants ne devraient pas jouer avec l'appareil. Nettoyage et entretien ne doivent pas
être fabriqués par des enfants sans surveillance.
Dans l'équipement il n'y a pas de composants contenant du mercure et de l'amiante.
HINWEISE:
Die Anlage muss von dazu berechtigtem Personal installiert werden, zertifiziert entsprechend der
Rechtsvorschriften, welche in dem Land gelten, in dem die Installation vorgenommen werden soll.
Das gesamte, verwendete Material muss den Sicherheitsanforderungen entsprechen, welche für diese Art
der Anwendung vorgesehen sind, entsprechend der Rechtsvorschriften, welche in dem Land gelten, in dem
die Installation vorgenommen werden soll.
Alle Anschlüsse (Wasser- und Elektroanschlüsse) müssen perfekt voneinander isoliert sein und auf
beständige Art und Weise fixiert sein.
Dieses Gerät kann von Personen über dem Alter von 8 Jahren und Personen mit eingeschränkten
physischen, sensorischen oder geistigen Fähigkeiten oder Mangel an Erfahrung, wenn ordnungsgemäß
eingewiesen Betreute Gold war die sichere Anwendung des Gerätes und mit Kenntnis der Risiken
verbunden sind, verwendet werden. Kinder dürfen nicht mit dem Gerät spielen. Reinigung und Wartung
`darf nicht von Kindern ohne Aufsicht erfolgen.
In der Anlage gibt es keine Komponenten, Quecksilber und Asbest enthalten.
3
CARATTERISTICHE TECNICHE –TECHNICAL CHARACTERISTICS
CARACTERISTIQUES TECHNIQUES –TECHNISCHE DATEN
A.C.
85-260 V
4,5 V
4,5 V
4
PORTATA ACQUA –WATER FLOW RATE
EAU DÉBIT–WASSERDURCHSATZ
Portata minima in ingresso per un getto di buona qualità: 16 l/min.
Minimum inlet flow rate for a jet of good quality: 16 l/min.
Débit minimum d'entrée pour un jet de bonne qualité: 16 l/min.
Mindestens Eintritt-Wassermenge für einen guten Strahl: 16 l/min.
PRESSIONE DELL’ACQUA – WATER PRESSURE
EAU PRESSION –WASSERDRUCK
Pressione idrica massima sopportata dal sistema: 8 bar = 800000 Pa
Maximum water pressure borne by the system: 8 bar = 800000 Pa
La pression d'eau maximum supportée par le système: 8 bar = 800000 Pa
Maximaler Wasserdruck durch das System getragen: 8 bar = 800000 Pa
SOLO PER SOFFIONI CON FARETTI
-
ONLY FOR SHOWER HEADS WITH LEDS
SEULEMENT POUR LES CIELS DE PLUIE AVEC LEDs
-
NUR FÜR DUSCHKOPFE MIT LED
COLLEGAMENTO ELETTRICO
-
ELECTRICAL CONNECTION
BRANCHEMENT ELECTRIQUE
-
ELEKTROANSCHLÜSSE
CON PULSANTIERA
WITH SWITCH CONTROL
AVEC BOUTON DE CONTRÔLE
MIT SCHALTERSTEUER
CON TELECOMANDO
WITH REMOTE CONTROL
AVEC TÉLÉCOMMANDE
MIT FERNBEDIENUNG
5
FUNZIONAMENTO CROMOTERAPIA
-
CHROMOTHERAPY FUNCTIONING
FONCTIONNEMENT CHROMOTHÉRAPIE
-
LAUF DER CHROMOTHERAPIE
CON PULSANTIERA
WITH SWITCH CONTROL
AVEC BOUTON DE CONTRÔLE
MIT SCHALTERSTEUER
1° pressione pulsante (circa 1s): avvio ciclo cromoterapia
2° pressione pulsante (circa 1s): arresto ciclo cromoterapia su colore desiderato
3° pressione pulsante (circa 1s): spegnimento led
1st button pressing (about 1s): starting chromotherapy cycle
2nd button pressing (about 1s): stop chromotherapy cycle on desired colour
3th button pressing (about 1s): led off
1° Pression sur bouton (environ 1 seconde) = mise en fonction du cycle des couleurs de la chromo thérapie
2° Pression sur bouton (environ 1 seconde) = arrêt du cycle chromo thérapie sur couleur désirée
3° Pression sur bouton (environ 1 seconde) = led éteints
Erster Druck des Knopf (zirka 1“): Einleitung des Chromotherapie-Zyklus.
Zweiter Druck des Knopf (zirka 1“): Stillung des Chromotherapie-Zyklus unter wünsche Farbe.
Dritter Druck des Knopf (zirka 1“): Löschen der Led.
6
FUNZIONAMENTO CROMOTERAPIA
-
CHROMOTHERAPY FUNCTIONING
FONCTIONNEMENT CHROMOTHÉRAPIE
-
LAUF DER CHROMOTHERAPIE
CON TELECOMANDO
WITH REMOTE CONTROL
AVEC TÉLÉCOMMANDE
MIT FERNBEDIENUNG

LED ROSSO DI SEGNALAZIONE
RED LED SIGNAL
ROUGE SIGNAL LED
ROTE SIGNAL-LED
ON/OFF


MODALITÀ DINAMICA / PAUSA
DYNAMIC MODE / PAUSE
MODE DYNAMIQUE / PAUSE
DYNAMIKMODUS / PAUSE
LUMINOSITÀ PER RGB
BRIGHTNESS CONTROL FOR RGB
RÉGLAGE LUMINOSITÉ POUR RGB
HELLIGKEIT STEUERUNG FÜR RGB




VELOCITÀ PER MODALITÀ DINAMICA
RGB
SPEED CONTROL FOR RGB DYNAMIC
MODE
REGULATION VITESSE POUR RGB
MODE DYNAMIQUE
DREHZAHLREGELUNG FÜR RGB
DYNAMIKMODUS
7 COLORI STATICI
7 STATIC COLORS
7 COULEURS STATIQUES
7 STATISCHE FARBEN



LUCE BIANCA /
LUMINOSITÀ PER LUCE BIANCA
WHITE LIGHT /
BRIGHTNESS FOR WHITE LIGHT
LUMIÈRE BLANCHE /
LUMINOSITÉ POUR LA LUMIÈRE
BLANCHE
WEISSES LICHT /
HELLIGKEIT FÜR WEISSES LICHT
ATTENZIONE: per maggiori dettagli vedere istruzioni telecomando
WARNING: see the remote control instruction for further information
ATTENTION : pour plus d’information, voir le mode d’emploi du télécommande
VORSICHT: finden Sie weitere Informationen über die Fernbedienung des Anweisungen
7
PRE-INSTALLAZIONE –PRE-INSTALLATION
PRE-INSTALLATION –VORMONTAGE
SOFFIONE
/
SHOWER HEAD
CONTROSOFFITTATURA
/
FALSE CEILING
COLLEGAMENTO ELETTRICO 3,5V
(in dotazione)
/
ELECTRICAL CONNECTION 3,5V
(supplied)
COLLEGAMENTO ELETTRICO
230V 50Hz (EUR) o 120V 60HZ (USA)
(non in dotazione)
/
ELECTRICAL CONNECTION
230V 50Hz (EUR) o 120V 60HZ (USA)
(not supplied)
USCITA ACQUA
M1/2”G (EUR) o M1/2”NPT (USA)
/
WATER CONNECTION
M1/2”G (EUR) o M1/2”NPT (USA)
PULSANTIERA
(in dotazione)
/
SWITCH CONTROL
(supplied)
INTERRUTTORE ON/OFF
(non in dotazione)
/
SWITCH ON/OFF
(not supplied)
8
.2
.1
A.C.
85-260V
Ø25
M1/2”G or M1/2”NPT
PUNTI (.1) E (.2)
SOLO PER SOFFIONI
CON PULSANTIERA
POINTS (.1) AND (.2)
ONLY FOR SHOWERHEADS
WITH SWITCH CONTROL
POINTS (.1) ET (.2) SEULEMENT
POUR LES CIELS DE PLUIE
AVEC BOUTON DE CONTRÔLE
PUNKTE (.1) UND (.2)
NUR FÜR DUSCHKOPFE MIT
SCHALTERSTEUER
9
Predisporre dei collegamenti a soffitto con uscita M1/2“G (EUR) o M1/2“NPT (USA) in prossimità della futura sede del soffione:
2 collegamenti per i soffioni con nebulizzatori;
1 collegamenti per i soffioni senza nebulizzatori.
Predisporre anche un controsoffitto rinforzato avente uno spessore compreso tra 7 e 21 mm posto ad una distanza dal soffitto non inferiore
a 10 cm.
ATTENZIONE: Assicurarsi che il controsoffitto sia perfettamente in bolla.
Predisposizione per soffioni con faretti:
Per il corretto funzionamento del sistema occorre inoltre acquistare una pulsantiera o un telecomando: si raccomanda di scegliere la
pulsantiera adeguata (1, 2 o 3 tasti) in base alle funzioni richieste (cromoterapia, aromaterapia, musica).
Predisporre un interruttore generale all’interno della zona 3 o al di fuori di essa (no zona 0, 1, 2) e un collegamento elettrico da 85÷260V
47÷400Hz al di sopra del cartongesso.
ATTENZIONE: Assicurarsi che non vi sia corrente in tutte le fasi d’installazione e/o manutenzione.
Predisporre tra la futura sede della centralina e la futura sede della pulsantiera interna dello spazio doccia una canalina Ø25 mm.
ATTENZIONE: È inoltre necessario seguire scrupolosamente le istruzioni di montaggio al fine di installare il prodotto in maniera corretta; a
tale proposito il produttore non risponde nel caso di un utilizzo o d’installazioni errate.
Run some water pipes to the ceiling with M1/2“G (EUR) or M1/2“NPT (USA) outlet for the showerhead:
2 water pipes for shower head with atomizers;
1 water pipes for shower head without atomizers.
Prepare also a reinforced false ceiling from 7 to 21 mm thick that must be at a minimum distance of 10 cm from the ceiling.
WARNING: Make sure that the false ceiling is perfectly level.
Pre-requisites for shower head with LEDs:
For the correct use of the system, buy also a switch or a remote control: it is recommended to choose adequate switch control (1, 2 or 3
buttons) according to the functions needed (chromotherapy, aromatherapy and music experience).
Prepare a general switch inside the zone 3 or outside it (not in zones 0, 1 or 2) and a 85÷260V 47÷400Hz electrical connection above the
plasterboard.
WARNING: Make sure that the electricity is switch out during all the installation and maintenance phases.
Prepare a cable duct (Ø25 mm corrugated pipe) between the future home of the control unit and the switch control placed inside the shower
space.
WARNING: It is also necessary to respect scrupulously the assembling instruction in order to install the product correctly; the producer is not
responsible in case of wrong use or incorrect installation.
Préparer des prises d’eau pour le ciel de pluie au plafond avec sortie M1/2“G (EUR) ou M1/2“NPT (USA):
2 prises d’eau pour le ciel de pluie avec nébuliseurs ;
1 prises d’eau pour le ciel de pluie sans nébuliseurs.
Préparer ainsi qu’un faux plafond renforcé entre 7 et 21 mm d'épaisseur qui doit être placé à une distance minimum de 10 cm du plafond.
ATTENTION: S’assurer que le faux plafond soie parfaitement à niveau.
Prédisposition pour le ciel de pluie avec led:
Pour un correct fonctionnement du système il faut également acheter un bouton de contrôle adéquat (1, 2 ou 3 touches) selon les fonctions
requises (chromothépie, aromathérapie et musique) ou une télécommande.
Prédisposer un interrupteur général à l'intérieur de la zone 3 ou en dehors de celle-ci (pas en zone 0 ni 1 ni 2) et préparer un branchement
électrique 85÷260V 47÷400Hz au-dessus de la plaque de plâtre.
ATTENTION: S'assurer que le courant est coupé durant les phases de montage et durant celles de manutention.
Préparer la tuyauterie (tube ondulé de Ø25 mm) entre le lieu où sera placée la centrale contrôle et le bouton de démarrage placé dans
l’espace de douche.
ATTENTION: Il est en outre nécessaire de respecter scrupuleusement les instructions de montage pour installer le produit de façon
correcte. Le producteur à ce propos décline toute responsabilité en cas d'emploi inapproprié et d'incorrecte installation.
Im Voraus einige Decke-Verbindungen mit Ausgang M1/2“G (EUR) o M1/2“NPT (USA) in der Nähe des künftigen Standorts der Duschkopf
vorbereiten.
zwei Decke-Verbindungen für Duschkopf mit Zerstäubern;
ein Decke-Verbindungen für Duschkopf sin Zerstäubern.
Eine doppelte Zwischendecke mit einer Dicke zwischen 7 und 21 mm vorbereiten und sie mindestens 10 cm Entfernung aus der Decke
positionieren.
VORSICHT: Stellen Sie sicher, dass die Zwischendecke perfekt nivelliert ist.
Vorbereitungsarbeiten für Duschkopf mit Led:
Für die korrekte Nutzung des Systems, kaufen Sie einen Schaltersteuer oder eine Fernbedienung: bitte die richtige Schaltersteuer (1, 2
oder 3 Tasten) wählen nach den benötigten Funktionen (Farbtherapie, Aromatherapie und Musik).
Innerhalb des Bereichs 3 (nicht in Bereich 0, 1, 2) oder außerhalb von diesem einen Schutzschalter vorbereiten und eine elektrische
Verbindung von 85÷260V 47÷400Hz über dem Gips vorbereiten.
VORSICHT: Dass während aller Installations- und/oder Wartungsphasen die Stromzufuhr unterbrochen ist.
Bereiten Sie einen Kabelkanal (Ø 25 mm Wellrohr) zwischen der künftigen Heimat der Steuereinheit und der Steuerschalter in der Dusche
Raum platziert.
VORSICHT: Außerdem müssen unbedingt die Montageanweisungen befolgt werden, damit das Produkt auf korrekte Art und Weise
installiert werden kann; diesbezüglich haftet der Hersteller keinesfalls bei fehlerhafter Anwendung oder fehlerhafter Installation.
10
INSTALLAZIONE –INSTALLATION –MONTAGE –EINBAU
Posizionare la dima in cartone (in dotazione) sul controsoffitto nel punto di installazione desiderato.
Position the cardboard template (supplied) on the false ceiling in the required installation point.
Positionner le gabarit en carton (fourni) sur le faux plafond de plâtre dans le point d'installation requis.
Den Schablone (immer eingebaut) auf der Zwischendecke in der gewünschten Installation-Stelle positionieren.
Tracciare la posizione dello scasso e dei fori di fissaggio.
Trace the position of the cavity and of the fastening holes.
Tracer la position de la cavité et des trous de fixation.
Die Position der Nische und der Befestigungslöcher anzeichnen.
11
Tagliare e forare con punta Ø10 il controsoffitto in funzione della traccia eseguita al punto precedente.
Cut and drill the false ceiling using a Ø10 drill bit according to the trace made under previous point.
Couper et percer le faux plafond avec une mèche Ø10 selon la trace réalisée au point précédent.
Den Gipskarton mit einer Ø10 Spitze schneiden und lochen, in Abhängigkeit von der Spur in den vorherigen Punkt
ausgeführt.
Posizionare la dima in cartone sul soffitto come indicato in figura. Tracciare la posizione dei fori di fissaggio.
Position the cardboard template on the ceiling in the required installation point. Trace the position of the fastening holes.
Positionner le gabarit en carton sur le plafond dans le point d'installation requis. Tracer la position du trous de fixation.
Den Schablone auf der Decke in der gewünschten Installation-Stelle positionieren. Die Position der Befestigungslöcher
anzeichnen.
12
Forare con punta Ø8 il soffitto in funzione della traccia eseguita al punto precedente.
Drill the ceiling using an Ø8 drill bit according to the trace made under previous point.
Percer le plafond avec une mèche Ø8 selon la trace réalisée au point précédent.
Die Decke mit einer Ø8 Spitze lochen, in Abhängigkeit von der Spur in den vorherigen Punkt ausgeführt.
Inserire i tasselli nel cartongesso e avvitare le viti con cacciavite a stella.
Inserire il tassello nel soffitto e avvitare la vite a occhio.
ATTENZIONE: verificare di aver avvitato le viti fino al completo serraggio dei tasselli.
Insert the plugs into the plasterboard and fasten the screws using a Phillips screwdriver.
Insert the plug into the ceiling and screw the eye-bolt.
WARNING: verify that the screws are screwed in up to the complete plugs tightening.
Insérer les fiches dans la plaque de plâtre et visser les vis avec un tournevis cruciforme.
Insérer la fiche dans le plafond et visser la vis à œil.
ATTENTION : vérifier que les vis soient vissées jusqu’au complet serrage des fiches.
Die Dübel in der Gipskartonplatten einstecken. Die Schrauben mit einem Kreuzschlitz-Schraubendreher verschließen.
Der Dübel in der Decke einstecken. Die Augenschraube verschließen.
VORSICHT: überprüfen dass die Schrauben völlig geschraubt sind und dass die Dübel völlig befestigt sind.
13
Svitare le viti dai tasselli sul cartongesso con cacciavite a stella.
Unscrew the screws from the plugs using a Phillips screwdriver.
Dévisser les vis des fiches sur la plaque de plâtre avec un tournevis cruciforme.
Die Schrauben auf dem Gipskartonplatten mit einem Kreuzschlitz-Schraubendreher lösen.
14
SOLO PER SOFFIONI CON FARETTI
-
ONLY FOR SHOWER HEADS WITH LEDS
SEULEMENT POUR LES CIELS DE PLUIE AVEC LEDs
-
NUR FÜR DUSCHKOPFE MIT LED
Porre la centralina al di sopra del cartongesso.
Collegare il cavo della pulsantiera alla centralina (solo per soffioni con pulsantiera).
ATTENZIONE: il prodotto deve essere utilizzato solo con la centrina Picotec mod. CNT0009 (con pulsantiera) o mod.
CNT0015VT (con telecomando).
Put the electronic control unit above the plasterboard.
Connect the cable of the switch control to the control unit (only for showerheads with switch control).
WARNING: the product must only be used with the control unit Picotec mod. CNT0009 (with switch control) or mod.
CNT0015VT (with remote control).
Mettre l’unité de contrôle électronique au-dessus de la plaque de plâtre.
Connecter le câble du bouton à la centrale contrôle (seulement pour les ciels de pluie avec le bouton de contrôle).
ATTENTION : le produit ne doit être utilisé qu’avec l'unité de commande Picotec mod. CNT0009 (avec bouton de contrôle)
ou mod. CNT0015VT (avec télécommande).
Stellen Sie das Gerät auf der Oberseite der Gipskartonplatten.
Verbinden Sie das Kabel des Schalters an die Steuereinheit (nur für Duschkopfe mit Schaltersteuer).
ACHTUNG: Das Produkt sollte nur mit der Steuereinheit verwendet werden Picotec mod. CNT0009 (mit Schaltersteuer) oder
mod. CNT0015VT (mit Fernbedienung).
Connettere il cavo di collegamento alla centralina.
Connect the connection cable to the control unit.
Connecter le câble de connexion à la centrale contrôle.
Schließen Sie de Kabel an die Steuereinheit.
15
SOLO PER SOFFIONI CON FARETTI
ONLY FOR SHOWER HEADS WITH
LEDS
SEULEMENT POUR LES CIELS DE
PLUIE AVEC LEDs
NUR FÜR DUSCHKOPFE MIT LED
Assicurarsi che non vi sia corrente all’interno dell’impianto elettrico ed in seguito posizionare la centralina al di sopra del
cartongesso e collegarla alla linea elettrica utilizzando un morsetto 2 poli.
ATTENZIONE: se si applica al cavo di alimentazione una spina normalizzata, essa deve essere conforme alla norma IEC
60083.
ATTENZIONE: se il cavo di alimentazione è danneggiato, esso deve essere sostituito dal costruttore o dal suo servizio di
assistenza tecnica o comunque da una persona con qualifica similare, in modo da prevenire ogni rischio.
Make sure that there is no electricity in the electrical system. Then put the electronic control unit above the plasterboard and
connect it to the power line using a 2-pole terminal block.
WARNING: If a standard plus is attached to the power cable, this must be in compliance with IEC 60083 standards.
WARNING: if the power cable is damaged, it must be replaced by the manufacturer or its Service Centre or anyway by a
similarly qualified person in order to avoid any risks.
S’assurer qu’il n’y a pas de courant dans l’installation électrique. Après positionner l’unité de contrôle électronique au-
dessous du placoplâtre et la connecter à la ligne électrique avec une borne électrique à deux pôles.
ATTENTION: Si on applique une prise électrique standard au câble d’alimentation, elle doit être conforme à la norme IEC
60083.
ATTENTION: si le câble d'alimentation est endommagé, il doit être remplacé par le fabricant ou son centre de service ou de
toute façon par une personne qualifiée afin d'éviter tout risque.
Stellen Sie sicher, dass es keinen Strom in der elektrischen Anlage gibt. Danach das Gerät an das Stromnetz mit einem 2-
poligen verbinden.
ACHTUNG: Wenn es gilt für einen Standard-Stecker Netzkabel , muss es in Übereinstimmung IEC 60083 mit sein
ACHTUNG: wenn das Netzkabel beschädigt ist, muss es vom Hersteller oder seinem Kundendienst oder jedenfalls durch
eine ähnlich qualifizierte Person, um Gefahren zu vermeiden ersetzt werden.
16
Collegare i raccordi di distribuzione dell’acqua all’impianto serrando a tenuta utilizzando canapa o similari.
Collegare i 4 flessibili al raccordo di distribuzione dell’acqua serrando a tenuta con chiave da 11 mm.
Collegare i 2 flessibili al raccordo di distribuzione dell’acqua serrando a tenuta con chiave da 23 mm.
Connect the water distribution connections to the system by tightening it hermetically using hemp or similar materials.
Connect hermetically the 4 flexibles to the water distribution connection using a 11 mm wrench.
Connect hermetically the 2 flexibles to the water distribution connection using a 23 mm wrench.
Connecter les raccords de distribution d'eau à l’implantation en le serrant solidement avec du chanvre ou des matériaux
similaires.
Connecter les 4 flexibles au raccord de distribution d’eau en le serrant solidement avec l’aide d’une clé de 11 mm.
Connecter les 2 flexibles au raccord de distribution d’eau en le serrant solidement avec l’aide d’une clé de 23 mm.
Der Wasserverteilungsanschluss mit der Wasserversorgungsanlage verbinden. Schrauben sie luftdicht, Hanf oder ähnliches
benutzen.
Die 4 Schläuchen mit dem Wasserverteilungsanschluss verbinden. Mit einem 11 mm Schlüssel, schrauben sie die luftdicht.
Die 2 Schläuchen mit dem Wasserverteilungsanschluss verbinden. Mit einem 23 mm Schlüssel, schrauben sie die luftdicht.
17
Agganciare la catena di sicurezza al punto di ancoraggio a soffitto e fissare il soffione alla catena.
Così facendo il soffione è “in sicurezza”.
Hook the safety chain to the anchoring point and fasten the shower head to the chain.
Thus the shower head is “safe”.
Accrocher la chaîne de sécurité au point d'ancrage et fixer la pomme de douche au chaîne.
Ainsi la pomme de douche est “en sécurité ”.
Die Sicherheitsketten an den Verankerungspunkten verankern und den Brausekopf an den Sicherheitsketten befestigen.
Der Brausekopf ist dann “sicher”.
18
Collegare il soffione all’impianto serrando a tenuta i flessibili in dotazione con chiave da 23mm anteponendo le guarnizioni.
Attenzione, prima di ultimare l'installazione, verificare che l'impianto sia perfettamente a tenuta d'acqua.
Connect the showerhead to the system by sealing the flexible hoses supplied using a 23mm wrench, putting supplied
gaskets first.
Attention, before ending the installation, verify that the plant is perfectly watertight.
Connecter le ciel de pluie à l’implantation en serrant étanche le flexibles fourni avec une clé de 23mm et en mettant avant les
garnitures fournies.
Attention avant de finir l'installation, vérifier que l'implant soit parfaitement étanche à l'eau.
Den Duschkopft zur der Anlage verbinden. Mit einem 23mm Schlüssel der ausgestatten Schlauchen verschließen. Die
Dichtungen voranstellen.
Achtung, bevor die Installation vollendet, überprüfen dass die Anlage völlig Wasserdichtigkeit ist.
19
SOLO PER SOFFIONI CON FARETTI
-
ONLY FOR SHOWER HEADS WITH LEDS
SEULEMENT POUR LES CIELS DE PLUIE AVEC LEDs
-
NUR FÜR DUSCHKOPFE MIT LED
Connettere il faretto.
Connect the led.
Brancher le led.
Fügen Sie bitte das Led-
Spotlight zusam.
Avvitare la barra filettata con sistema a molla nei 4 punti.
Screw the threaded bar with spring system in the 4 points.
Visser la barre filetée avec système à ressort dans les 4 points.
Die gewindegeschnittene Stange mit Federsystem an den 4 Punkten
einschrauben.

This manual suits for next models

5

Other Carimali Plumbing Product manuals

Carimali Calflex MyDream 23073X-CRX User manual

Carimali

Carimali Calflex MyDream 23073X-CRX User manual

Carimali QTIME 0-QTM5101 User manual

Carimali

Carimali QTIME 0-QTM5101 User manual

Carimali 23075X-CRX User manual

Carimali

Carimali 23075X-CRX User manual

Carimali MyDream User manual

Carimali

Carimali MyDream User manual

Popular Plumbing Product manuals by other brands

Weka Holzbau 530.2015.30 ASSEMBLY, USER AND MAINTENANCE INSTRUCTIONS

Weka Holzbau

Weka Holzbau 530.2015.30 ASSEMBLY, USER AND MAINTENANCE INSTRUCTIONS

Mora armatur Tronic Solid instructions

Mora armatur

Mora armatur Tronic Solid instructions

Hans Grohe Logis 70 71204000 Instructions for use/assembly instructions

Hans Grohe

Hans Grohe Logis 70 71204000 Instructions for use/assembly instructions

Pacific Bay PB-LU15CP installation manual

Pacific Bay

Pacific Bay PB-LU15CP installation manual

Kohler K-3820 Installation and care guide

Kohler

Kohler K-3820 Installation and care guide

Felton QUE Q2RSCC installation guide

Felton

Felton QUE Q2RSCC installation guide

American Standard Silhouette 7145.001 Specification sheet

American Standard

American Standard Silhouette 7145.001 Specification sheet

Sanela SLPN 09CZ Instructions for use

Sanela

Sanela SLPN 09CZ Instructions for use

American Standard Palisade 7103 installation instructions

American Standard

American Standard Palisade 7103 installation instructions

Aquasanita SABIADUO 2963 installation instructions

Aquasanita

Aquasanita SABIADUO 2963 installation instructions

Laufen MULTISTATION HF770607441060 installation instructions

Laufen

Laufen MULTISTATION HF770607441060 installation instructions

Kohler K-T442 Installation and care guide

Kohler

Kohler K-T442 Installation and care guide

Boston TIGER 5006 Installation

Boston

Boston TIGER 5006 Installation

Kohler 72762T-9MND installation instructions

Kohler

Kohler 72762T-9MND installation instructions

Sanela SLP 06K Instructions for use

Sanela

Sanela SLP 06K Instructions for use

Akw MediCare Installation and user care instructions

Akw

Akw MediCare Installation and user care instructions

Hans Grohe PuraVida 15665 3 Series Instructions for use/assembly instructions

Hans Grohe

Hans Grohe PuraVida 15665 3 Series Instructions for use/assembly instructions

Crosswater Berea 11-19-T installation instructions

Crosswater

Crosswater Berea 11-19-T installation instructions

manuals.online logo
manuals.online logoBrands
  • About & Mission
  • Contact us
  • Privacy Policy
  • Terms and Conditions

Copyright 2025 Manuals.Online. All Rights Reserved.