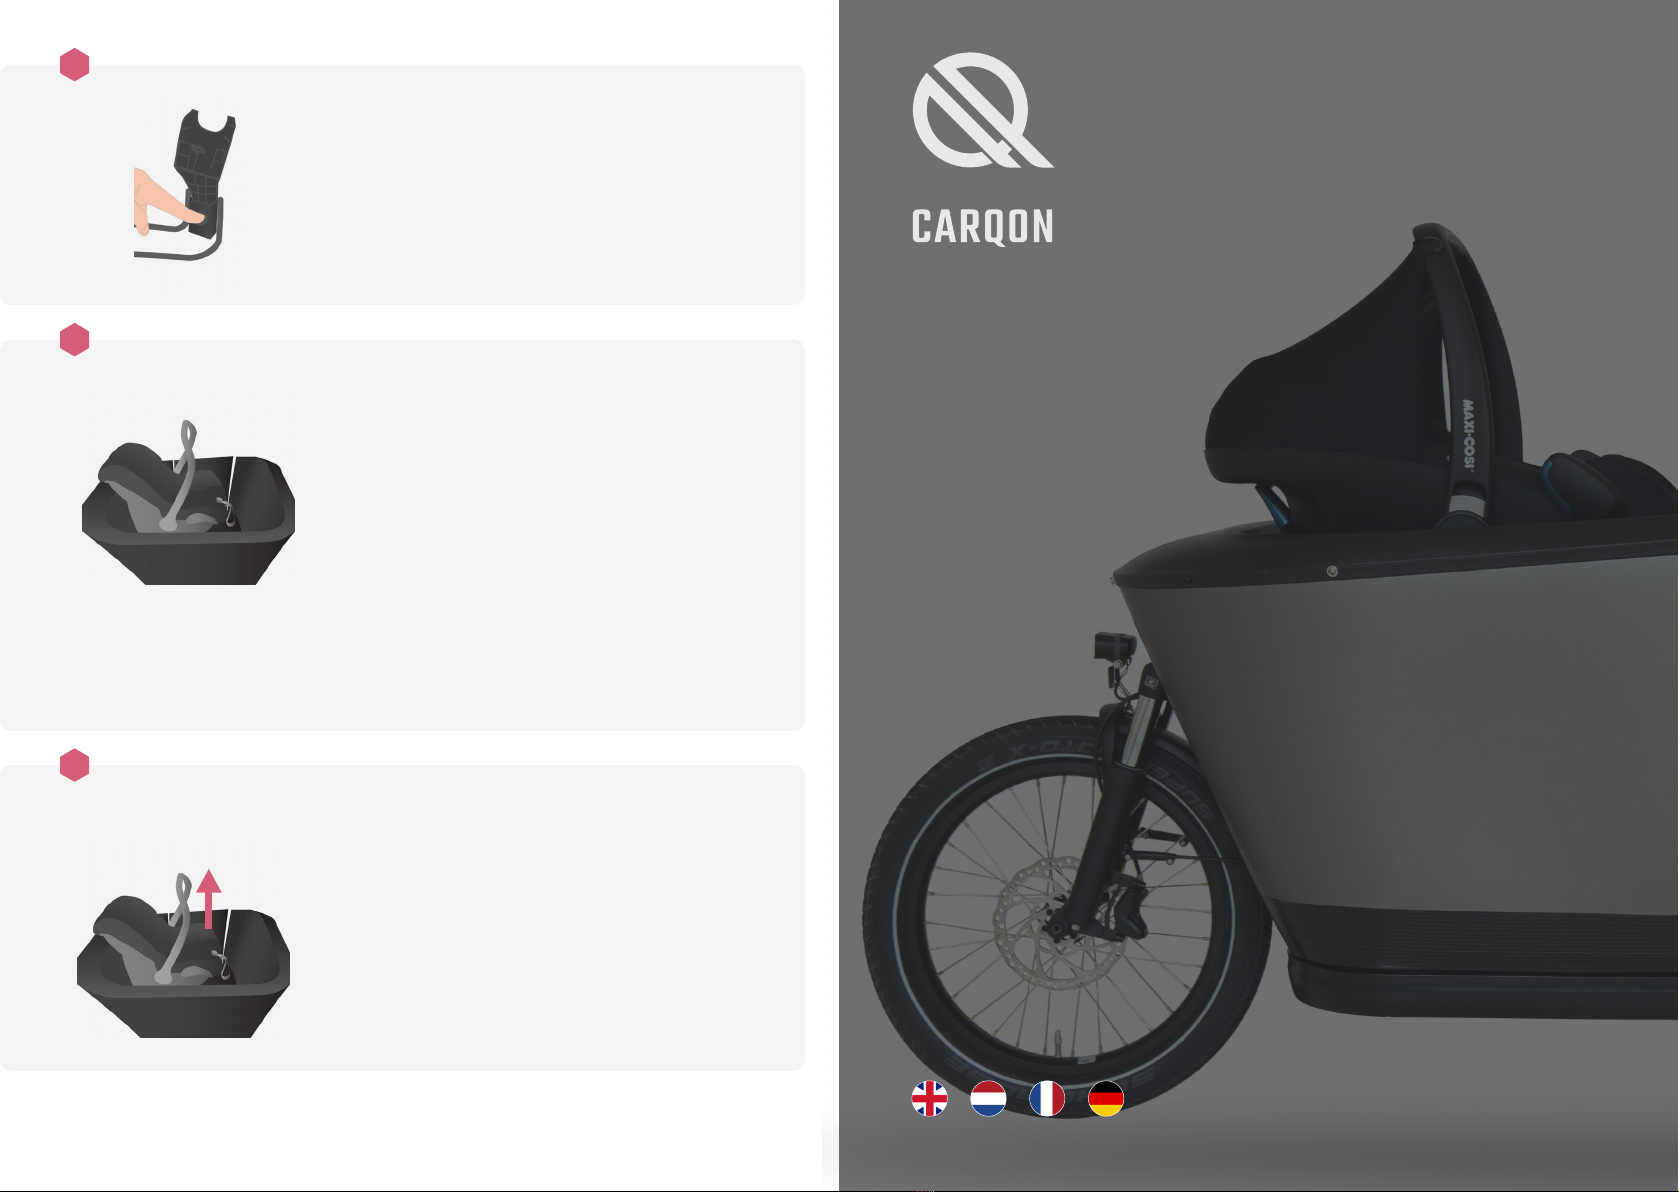
Installing the Carqon Maxi Cosi Carrier
Strong Carqon Maxi-Cosi carrier to transport your baby safely.
The carrier is securely mounted on the frame with hangers that,
together with the suspension fork, creates great driving comfort.
EN
NL
FR
DE
EN
NL
FR
DE
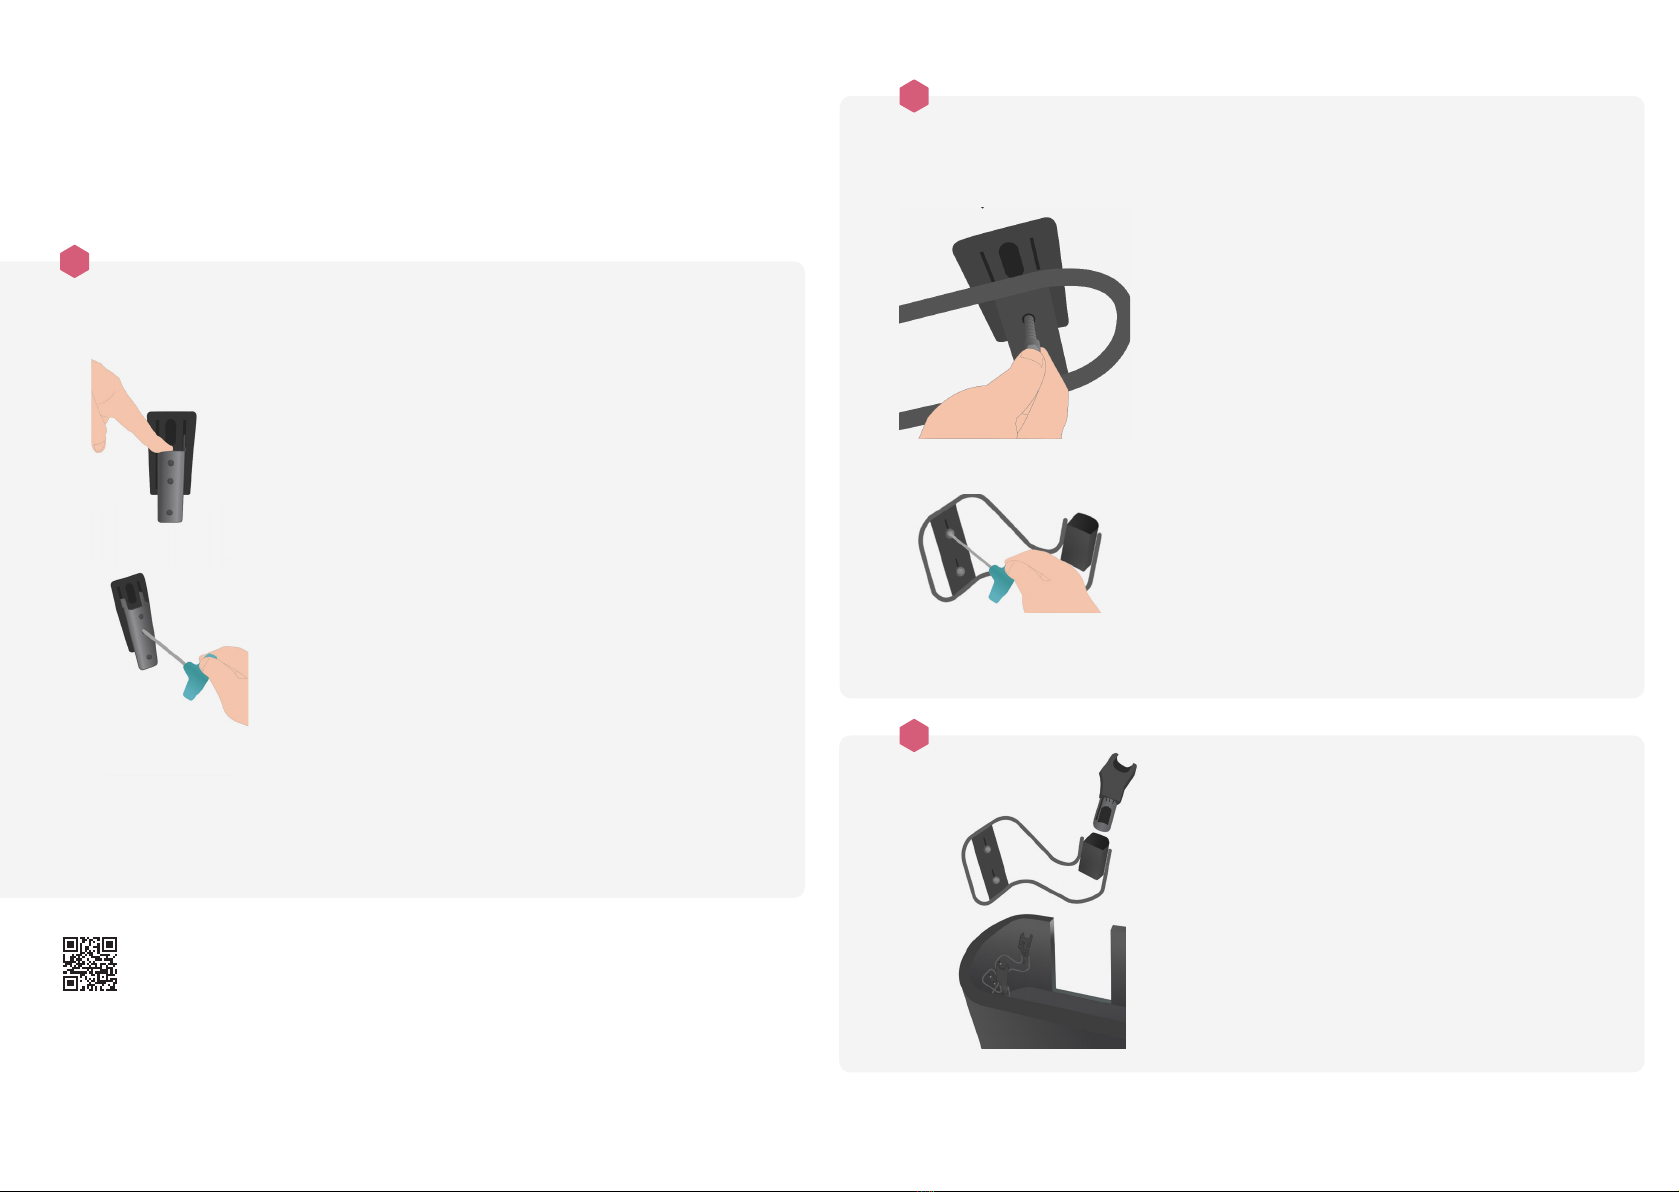
Guide the brackets securely into the slits of the metal plates with
black caps by pushing them down firmly and fasten the brackets
with the hex key 4. Check carefully if the brackets are firmly secured
so they cannot come off. Tighten the M6x30 hex key in such a way
that it is even with the black cap. Note: the bolt should not protrude,
but shouldn’t be screwed in too far either.
Schuif de brackets met de haken in de gleuven van de metalen
plaatjes met het zwarte afdekkapje, duw stevig naar onder tot deze
niet verder kan en zet de houder vast doormiddel van het aandraaien
van de inbus 4 stelbout. Controleer zorgvuldig of de haken goed
opgesloten zitten en niet uitneembaar zijn. Draai de M6x30 stelbout
zo ver aan dat deze vlak ligt/gelijk ligt aan de zwarte cap. Let op, de
bout mag niet uitsteken, maar ook niet te diep doorgedraaid worden
Glissez les équerres aux crochets dans les rainures des plaquettes
métalliques au couvercle de protection noir, poussez fermement
vers le bas jusqu’à la butée et fixez fermement le support en serrant
le boulon à l’aide de la clé Allen 4. Vérifiez attentivement que les
crochets sont bien coincés et ne peuvent être retirés. Serrez le
boulon M6x30 au maximum / jusqu’à ce qu’il soit au niveau du
trou. Ce faisant, veillez bien à ce que le boulon ne dépasse pas à
l’extérieur et ne soit pas trop vissé vers l’intérieur.
Schieben Sie die Klammern mit den Haken in die Schlitze der
Metallplatten mit schwarzer Abdeckkappe, drücken Sie sie bis zum
Anschlag fest nach unten und sichern Sie die Klammern durch
Anziehen der Einstellschraube mit Hilfe des Inbusschlüssels Nr.
4. Kontrollieren Sie den festen Sitz der Haken. Diese dürfen nicht
locker sein oder sich lösen. Ziehen Sie die Stellschraube M6x30 so
weit an, dass sie bündig/flach mit der schwarzen Kappe abschließt.
Unbedingt beachten: Der Bolzen darf dabei weder hervorstehen,
noch zu tief eingeschraubt werden.
Slide both brackets, with the bracket arms pointing out,
over the brackets in the box. Fasten both arms in the lowest
position possible – but at the same height – to the brackets
using two M6 bolts per side. Note: the height of the carrier
can be adjusted 2-3 cm if needed, for leg space at the box
bench. The position varies per type of Maxi Cosi carrier.
Schuif beide beugels, met de beugelarmen naar buiten
gericht, over de brackets in de bak. Bevestig beide armen op
de laagst mogelijke positie – maar wel op gelijke hoogte –
aan de brackets doormiddel van twee M6 bouten per kant.
Let op: indien wenselijk is het mogelijk de drager 2-3 cm in
hoogte te verstellen i.v.m. de beenruimte bij het bankje in de
bak. De afstelling kan verschillen per type Maxi Cosi drager.
Installez les deux anses du siège, tournées vers l’extérieur,
sur les équerres correspondantes. Attachez les deux
anses sur les équerres sur la plus basse position possible,
mais à la même hauteur, à l’aide des deux boulons M6 de
chaque côté. Attention : il est possible d’ajuster le siège
à une hauteur plus ou moins élevée de 2-3 cm au besoin
pour l’espace des jambes à proximité du banc dans le bac.
L’ajustement dépend du type de transporteur Maxi Cosi.
Schieben Sie beide Halterungen (mit den Halterungsarmen
nach außen gerichtet) über die Halterungen in der
Lastenrad-Box. Befestigen Sie beide Arme so tief wie
möglich - jedoch unbedingt auf der gleichen Höhe - mit
zwei M6-Schrauben pro Seite an den Halterungen. Bitte
beachten: Bei Bedarf, ist es möglich, den Träger um 2-3 cm
in der Höhe zu verstellen, soweit dies der Beinfreiheit bei der
Bank in der Box dient. Abhängig vom jeweiligen Modell des
Maxi-Cosi-Halterung, kann die Einstellung variieren.
1
2
EN
NL
FR
DE
Insert the two Maxi-Cosi adapters into the carrier until you
hear a clicking sound. Pay attention to the L (Left) and R
(right) on the adapters. Make sure that the adapters are
firmly secured.
Klik de twee Maxi-Cosi adapters in de beugels. Let op
L (links) en R (rechts) op de adapters. Controleer of de
adapters goed vast zitten.
Cliquez les deux adaptateurs Maxi-Cosi dans les anses.
Soyez attentif au L (gauche) et R (droite) sur les adaptateurs.
Vérifiez que les adaptateurs sont bien attachés.
Setzen Sie die zwei Maxi-Cosi-Adapter in die Bügel ein.
Achten Sie auf die richtige Zuordnung der Seiten, L für links,
R für rechts. Kontrollieren Sie, ob die Adapter fest eingerastet
sind.
3
Carqon as a company or Carqon dealers accept no responsibility for damage which has arisen through improper use.
Only use the cargo bike as described in this user manual. Any other use is deemed to be improper and can lead to
accidents, serious injury and damage to the cargo bike. Improper use of the cargo bike voids the warranty (see full user
manual). The cargo bike is intended for use by one person as a rider and the seating position of the cargo bike should be
set up for their body size. The cargo bike is only intended for use on roads and paths with a smooth surface. Any use on
unfinished paths which have not been paved in asphalt, cement or plaster may lead to damage to the cargo bike.
More information?
go to support.carqon.com