manuals.online logo
Brands
  1. Home
  2. •
  3. Brands
  4. •
  5. CARRON
  6. •
  7. Stove
  8. •
  9. CARRON CAST IRON STOVE User manual

CARRON CAST IRON STOVE User manual

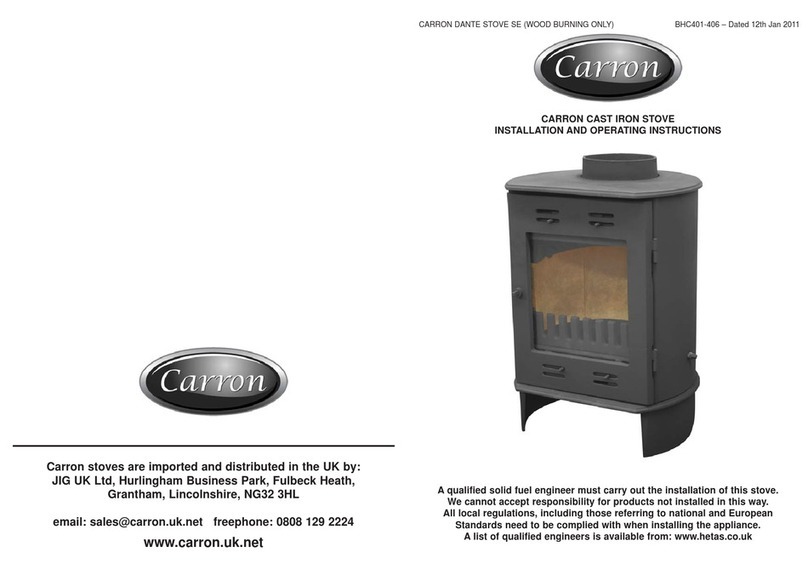
A qualified solid fuel engineer must carry out the installation of this stove.
We cannot accept responsibility for products not installed in this way.
All local regulations, including those referring to national and European
Standards need to be complied with when installing the appliance.
A list of qualified engineers is available from: www.hetas.co.uk
CARRON CAST IRON STOVE
INSTALLATION AND OPERATING INSTRUCTIONS
CARRON 7.3KW STOVE MODEL 1 JULY 2010
Carron stoves are imported and distributed in the UK by:
JIG UK Ltd, Hurlingham Business Park, Fulbeck Heath,
Grantham, Lincolnshire, NG32 3HL
email: [email protected] freephone: 0808 129 2224
www.carron.uk.net
Technical Data
Flue Connection
JIG UK Ltd
Hurlingham Business Park
Fulbeck Heath
Grantham
Lincolnshire
NG32 3HL
07
EN13240:2001
THE CARRON STOVE
Minimum distance to combustible materials:
Behind the stove: 400mm
To the side of the stove: 500mm
CO at 13% 02: 0.33%
Flue gas temperature: 309ºC
Efficiency:79.3%
Nominal Output: 7.3kW
Fuel Type: Wood
CO at 13% 02: 0.31%
Flue gas temperature: 279ºC
Efficiency:71.5%
Nominal Output: 6.6kW
Fuel Type: Smokeless fuel
Output 7.3 kW 6.6 kW
Efficiency 79.3 % 71.5 %
CO at 13% 02 0.33 % 0.31 %
Flue temperature 309 °C 279 °C
Flue draught 12 Pa 12 Pa
Flue gas mass flow 5.0 g/s 7.4 g/s
Weight of Stove 89.4 Kg 55.0 Kg
Wood Smokeless
fuel
Attach the flue outlet to the stove with the screws and nuts provided. Use a steel closure. Attach
the flue outlet to the stove with the screws and nuts provided. Use a steel closure plate to seal off
the chimney; a cleaning door must be fitted into the plate or flue, and a steel sealing collar must be
used to fit the flue into the steel plate. Seal all joins with fire cement.
Replacement parts list
1
2
3
4
5
6
78
1. Asphan (BHC082) 4. Front firebar (BHC075) 7. Handle (BHC002)
2. Grate frame (BHC077) 5. Firebrick set (BHC081) 8. Glass (BHC080)
3. Grate (BHC076) 6. Baffle plate (BHC074)
Installation instructions
Ensure that the floor has sufficient load bearing capacity.
Fit a load bearing plate if necessary.
To ensure that your chimney meets the required specifications it must: -
- be at least 5 metres high
- have no bends sharper than 45 degrees
- be swept clear of any obstructions by a qualified chimney sweep
- terminate at least 1 metre above any roof ridge
- have an internal cross-section of between 0.018m2and 0.14m2
- be free from sources of leakage
- be connected only to the one appliance i.e. not a shared flue system
- be well insulated, or have a wall thickness of at least 100mm
- Attach the legs using the bolts supplied
Place the stove on a solid non-combustible hearth extending 300mm at the front of the
stove, 150mm either side of the stove and 50mm at the rear. The hearth must have a
thickness of at least 12mm. The maximum hearth temperature attained during testing
was 83.2°C (Refer to document J of the UK Building Regulations)
Minimum Installation Clearances
Side (mm) Rear (mm)
Combustibles 400 550
Non Combustibles 150 100
Ensure there is a permanent air entry opening or openings with a total free area of at
least 550mm2per kW of appliance rated output above 5kW, ie 2kw x 550 mm2=1100
mm2.
When installing any air inlet grilles ensure they are positioned so they are not liable to
blockage.
Note: The Stove must not be installed in a room with an extractor fan operating.
Operating Instructions
Fuels suitable for use in your Carron Stove: -
Wood – logs (no larger than 250mm) should be dried for at least a year prior to
burning, for other fuels please contact the manufacturer. The stove is suitable for
intermittent operation and we recommend a refuel time of 1 hour.
Smokeless Fuels
Fuels unsuitable for use in your Carron Stove: -
Petroleum Coke – this burns with an extremely high heat and its use will cause damage
to the stove.
Household Waste – can produce dangerous fumes and should not be burnt in the
stove. No liquid fuels to be used on this stove, please remember that this stove is not
an incinerator.
Lighting the stove for Woodburning – please note that the first fire you light in your
stove should be small, with the air inlet set as low as possible. This will prevent possible
damage to the stove.
Place a small amount of screwed up paper and dry sticks, or several firelighters, at the
back of the grate, and light them. Once they are burning, fill the stove with dry fuel and
set the air control to as high as possible.
Do not fill the stove to a level higher than the bricks, and do not operate the stove with
the door open, except during refuelling.
Controlling the stove - Setting the primary air supply (the inlet below the glass door)
air control – sliding the air control to the right will allow the maximum amount of air into
the stove, and cause the fire to burn quickly. Sliding it to the left will allow the minimum
of air into the stove, and the fire will burn more slowly, and give off less heat. Setting
the secondary air supply (the inlet above the glass door) air control – is the same
operation as above. These air supplies must be kept clear of blockages and regularly
checked.
If the stove goes out with fuel still in it, the air controls are set too low. Generally the
ideal setting is to have the primary inlet almost closed and the secondary inlet 1/2 open.
However this may vary depending on the flue draught and you will need to fine tune
these settings to suit your preferred burn rate. Should the stove overheat, shut down
the stove by ensuring the door and all inlets are closed.
Cleaning the stove – To ensure the performance of your stove is not affected, regular
cleaning is necessary. To clean, allow the stove to cool, then wipe with a soft damp
cloth. The throat plate should be removed and cleaned monthly along with checking the
door seals for damage.
Do not use any abrasive cleaning products, as they will damage the finish of the stove.
The window is self-cleaning due to the “air-wash” at the top of the door. The use of
damp fuels may cause staining of the window. After long periods of non-use it is
necessary to check the flue for blockages.
Emptying ashes – ensure ashes are entirely cool before they come into contact with
plastic dustbins or bin-bags. It is important that ash does not build up to the extent that
it contacts the underside of the grate.
Precautions to note:
Carron stoves do not contain asbestos. However, please take care not to disturb any
existing asbestos when removing an old stove.
The stove is very heavy; move it with assistance.
Take care to ensure fire cement does not come into contact with skin.
In the unlikely event of a chimney fire, close the stove door and both air supplies,
evacuate the property immediately, and call the fire brigade. Do not attempt to
extinguish your stove.
Persistent fume emission should not occur if the product is properly installed and
operated. However, should this occur, take immediate action as follows:-
- ventilate the room
- extinguish the fire
- check the chimney/flue for blockages and clean if required
Seek expert advice if necessary.
The stove and flue pipe will become extremely hot during use; take care especially
when children or the infirm are present. Do not store flammable materials near to the
stove. Any combustible furnishings must be at least 500mm away.
Only use replacement parts supplied by the manufacturer and do not modify the stove
in any way.
Warranty
Carron Stoves are supplied with a 3 year stove body and 1 year inner components
warranty.
This warranty does not cover items considered consumables. These items include door
glass, fire bricks, fire rope and grates. The use of incorrect fuels would invalidate this
warranty.
This appliance must be installed by a HETAS engineer. Proof of purchase and
certificate of installation would be required in the case of a warranty claim.
Occasionally the enamel finish can show a crazing/cracking effect on the surface of the
stove during use. This effect will normally lessen as the stove cools and should not be
considered a defect. This crazing effect can be made worse by incorrect fuel or
over-fueling.

This manual suits for next models

1

Other CARRON Stove manuals

CARRON CARRON CAST IRON STOVE User manual

CARRON

CARRON CARRON CAST IRON STOVE User manual

CARRON ECO 5KW SE User manual

CARRON

CARRON ECO 5KW SE User manual

CARRON Dante 5KW User manual

CARRON

CARRON Dante 5KW User manual

CARRON CARRON REVOLUTION 5 User manual

CARRON

CARRON CARRON REVOLUTION 5 User manual

CARRON CAST IRON STOVE User manual

CARRON

CARRON CAST IRON STOVE User manual

CARRON 11KW SE User manual

CARRON

CARRON 11KW SE User manual

Popular Stove manuals by other brands

IronStrike CI1500DVF Installation and operation

IronStrike

IronStrike CI1500DVF Installation and operation

Coleman PEAK 1 user manual

Coleman

Coleman PEAK 1 user manual

FireFriend KO-6582 instruction manual

FireFriend

FireFriend KO-6582 instruction manual

ADURO Hybrid Faq

ADURO

ADURO Hybrid Faq

Harman TLC 2000 Installation & operating manual

Harman

Harman TLC 2000 Installation & operating manual

Harman Accentra Installation & operating manual

Harman

Harman Accentra Installation & operating manual

Dimplex Optiflame Electric Fireplace Operating instructions manual

Dimplex

Dimplex Optiflame Electric Fireplace Operating instructions manual

EdilKamin Alpen Installation, use and maintenance

EdilKamin

EdilKamin Alpen Installation, use and maintenance

Harman Stove Company FireLuxe Direct Vent Gas Stove With Top Cooking Burner... Installation and operating manual

Harman Stove Company

Harman Stove Company FireLuxe Direct Vent Gas Stove With Top Cooking Burner... Installation and operating manual

Rizzoli TS instructions

Rizzoli

Rizzoli TS instructions

Charlton & Jenrick ES100 Home owner's installation instructions & operating manual

Charlton & Jenrick

Charlton & Jenrick ES100 Home owner's installation instructions & operating manual

Hotblast 1300 owner's manual

Hotblast

Hotblast 1300 owner's manual

Rocal RCr USER'S GUIDE ON CHARACTERISTICS, ASSEMBLY AND OPERATING

Rocal

Rocal RCr USER'S GUIDE ON CHARACTERISTICS, ASSEMBLY AND OPERATING

Contura C 51L Lighting instructions

Contura

Contura C 51L Lighting instructions

New Buck Corporation 41 instruction manual

New Buck Corporation

New Buck Corporation 41 instruction manual

Primus ONJA user manual

Primus

Primus ONJA user manual

Harman Stove Company 3-90-70738 Installation & operating manual

Harman Stove Company

Harman Stove Company 3-90-70738 Installation & operating manual

TEK Biomasse DOMINA instruction manual

TEK Biomasse

TEK Biomasse DOMINA instruction manual

manuals.online logo
manuals.online logoBrands
  • About & Mission
  • Contact us
  • Privacy Policy
  • Terms and Conditions

Copyright 2025 Manuals.Online. All Rights Reserved.