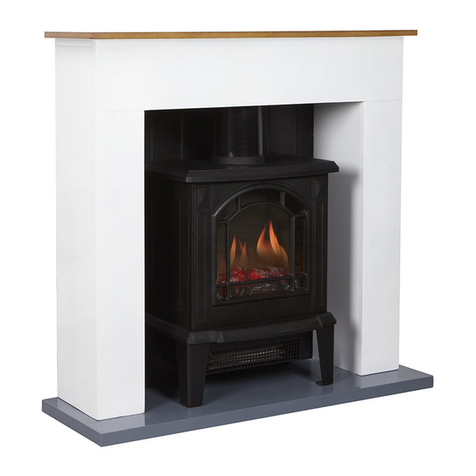
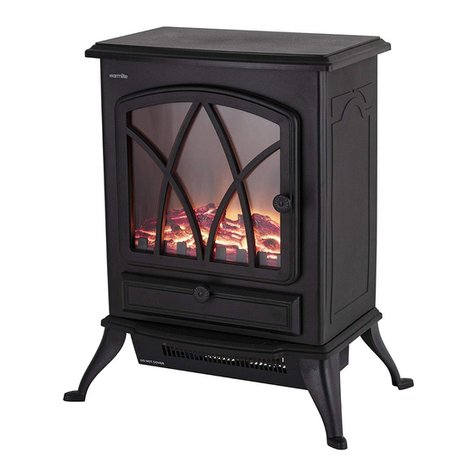
Warmlite WL46040 User manual

MODEL WL46040 All Colour Variants
YOUR SAFETY &
INSTRUCTION MANUAL
PLEASE READ CAREFULLY
1.8KW JESMOND
LOG EFFECT FIRE STOVE
www.warmlite-products.co.uk

2
SERVICE DEPARTMENT: +44 (0) 333 220 6056
TECHNICAL DATA
Description: 1.8KW Jesmond Log Eect Fire Stove
Model: WL46040 All Colour Variants
Rated Voltage: 220-240V~
Frequency: 50Hz
Power Consumption: 950-1850W
WARRANTY
This product is guaranteed for 12 months from the date of original purchase. If any defect arises due
to faulty materials of workmanship, the faulty products must be returned to the place of purchase.
Refund or replacement is at the discretion of the retailer.
The following conditions apply:
• The product must be returned to the retailer with proof of purchase.
• The product must be installed and used in accordance with the instructions contained in this
instruction guide.
• It must be used only for domestic purposes.
• It does not cover wear and tear, damage, misuse or consumable parts.
• RK Wholesale LTD has limited liability for incidental or consequential loss or damage.
• This guarantee is only Valid in the UK and Eire Only.
An extended warranty is available for this appliance.
See back page for details.

3
www.warmlite-products.co.uk
WARNING:
This Appliance MUST be Earthed
WIRING SAFETY FOR UK USE ONLY
IMPORTANT
As the colours in the mains lead of this appliance
may not correspond with the coloured markings
identifying the terminals in your plug, please
proceed as follows:
The wires in the mains lead are labelled in
accordance with the following code:
Blue neutral [N] Brown live [L]
Green/Yellow [EARTH]
Plug Fitting Details (Where Applicable). The
wire labelled blue is the neutral and must be
connected to the terminal marked [N].
The wire labelled brown is the live wire and must
be connected to the terminal marked [L].
The wire labelled green/yellow must be
connected to the terminal marked with the letter
[E].
On no account must either the brown or the blue
wire be connected to the [EARTH] terminal.
Always ensure that the cord grip is fastened
correctly.
The plug must be tted with a fuse of the same
rating already tted and conforming to BS 1362
and be ASTA approved.
If in doubt consult a qualied electrician who will
be pleased to do this for you.
Non-Rewireable Mains Plug
If your appliance is supplied with a non-
rewireable plug tted to the mains lead and
should the fuse need replacing, you must use an
ASTA approved one (conforming to BS 1362 of
the same rating).
If in doubt, consult a qualied electrician who will
be pleased to do this for you.
If you need to remove the plug - disconnect it
from the mains - then cut it o of the mains lead
and immediately dispose of it in a safe manner.
Never attempt to reuse the plug or insert it into a
socket outlet as there is a danger of an electric
shock.
FUSE
Earth
(Green/Yellow)
Fuse
Neutral
(Blue)
Live
(Brown)

4
SERVICE DEPARTMENT: +44 (0) 333 220 6056
HIGH VOLTAGE HOT SURFACE DO NOT COVER
PRODUCT SAFETY
When using any electrical appliance, basic safety precautions should
always be followed including the following:
• Check that the voltage of the
main circuit corresponds with
the rating of the appliance
before operating.
• The intended use for this unit
is described in this manual.
• DO NOT use this product
for anything other than its
intended use.
• The use of any accessory
or attachment or the
performance of any operation
with this appliance other
than those recommended in
this instruction manual may
present a risk of personal
injury.
• Retain this manual for future
reference.
• WARNING! When using
mains-powered appliances,
basic safety precautions,
including the following, should
always be followed to reduce
the risk of re, electric shock
and personal injury and
material damage.
• Always ensure that the
appliance is used on a stable,
level, and heat resistant
surface.
• Ensure that the appliance
is not positioned close to
curtains, furniture or any
combustible materials as this
could create a re hazard.
Keep the appliance 50cm
away from surrounding
objects.
• If placing the heater in an
alcove, make sure that there
is at least 150 mm of space
on all sides to ensure good air
circulation.
• DO NOT use the appliance in
areas where gasoline, paint or
ammable liquids are used or
stored.
• The appliance must not be
located immediately below a
mains socket outlet.
• If the supply cord or appliance
is damaged, stop using
the appliance immediately
and seek advice from the
manufacturer, its service
agent or a similarly qualied
person.
• DO NOT attempt to dismantle
or repair any part of the
appliance. This should only
be done by a qualied service
agent.
• DO NOT turn the appliance
on or o by inserting or pulling
out the plug.

5
www.warmlite-products.co.uk
• DO NOT immerse cords,
plugs or any part of the
appliance in water or any
other liquid.
• DO NOT let the cord hang
over the edge of a table or
counter or let it come into
contact with any hot surfaces.
• DO NOT pull the plug out by
the cord as this may damage
the plug and/or the cable.
• DO NOT carry the appliance
by the power cord.
• DO NOT use any extension
cord with this appliance.
• DO NOT use this appliance
with a programmer, timer
or any other device that
switches the appliance on
automatically.
• Always place wires in a
regular and orderly manner
to prevent the appliance from
becoming a trip hazard or the
plug from accidentally being
pulled out.
• Never route the mains supply
cable under carpet etc.
• The use of accessory
attachments is not
recommended by the
appliance manufacturer, apart
from those supplied with this
product.
• Switch o at the wall socket
then remove the plug from
the socket when not in use or
before cleaning.
• DO NOT leave the appliance
unattended while it is
operating.
• This appliance is for
household use only.
• DO NOT use the appliance
outdoors.
• DO NOT use the appliance
near water. DO NOT install
the appliance in laundry areas
or other places with water
and moisture.
• DO NOT use this appliance in
the immediate surroundings
of a bath, a shower or a
swimming pool.
• In order to avoid overheating,
do not cover the appliance.
• Children of less than 3 years
should be kept away unless
continuously supervised.
• Children between the ages
of 3 and 8 years old should
only switch the appliance
on or o when it has been
placed and installed in its
intended, normal operating
position and when they
have been given adequate
supervision or instruction
concerning safe use of the
appliance and understand the
hazards involved. Children

6
SERVICE DEPARTMENT: +44 (0) 333 220 6056
between the ages of 3 and
8 years old should not plug
in, regulate, clean or perform
user maintenance on the
appliance.
• The appliance is not to be
used by persons (including
children) with reduced
physical, sensory or mental
capabilities, or lack of
experience and knowledge,
unless they have been given
supervision or instruction.
• Close supervision is
necessary when any
appliance is used by or near
children.
• Children should not play with
the appliance.
• This appliance can be used
by children aged from 8 years
and above and persons with
reduced physical, sensory
or mental capabilities or
lack of experience and
knowledge if they have
been given supervision or
instruction concerning use of
the appliance in a safe way
and understand the hazards
involved.
• CAUTION! Some parts of this
product can become very hot
and cause burns. Particular
attention has to be given
where children and vulnerable
people are present.
• WARNING! This appliance is
not equipped with a device to
control the room temperature.
Do not use this appliance in
small rooms when they are
occupied by persons not
capable of leaving the room
on their own, unless constant
supervision is provided.
• Cleaning and user
maintenance should not
be undertaken by children
without supervision.
• Take care when any appliance
is used near pets.
• Always unplug the appliance
and allow it to cool before
moving it from one location to
another.
• DO NOT place things on the
appliance.
• Never use the re to dry
clothes etc.
• DO NOT put anything into the
air inlet and outlet.
• DO NOT use insecticide spray
or other ammable matters in
the vicinity of the appliance.
• DO NOT splash oil or water
into the appliance.
• The appliance should be
placed away from gasoline,
cooking stoves or other
combustibles and heat
sources.

7
www.warmlite-products.co.uk
• Use the appliance in a well-
ventilated area.
• The heater should not be
used in a room of which the
oor area is less than 5 m².
• CAUTION! DO NOT operate
the appliance with wet hands.
• DO NOT tip the appliance
over as this may cause
damage to the appliance and
create a re hazard.
• CAUTION! No wall xings are
provided with this replace
suite. Take care to ensure the
suite is set on a at and stable
surface and placed against a
wall to prevent it from falling
over or being dislodged.
• DO NOT switch on the
appliance until it has been
properly installed.
• In the unlikely event the
appliance develops a fault,
stop using it immediately
and seek advice from the
Customer Support Team.

8
SERVICE DEPARTMENT: +44 (0) 333 220 6056
1
2
WHAT’S IN THE BOX
Instruction Manual
Stove
1. Control Panel (behind the door)
2. Hot Air Outlet
3. Thermostat Control Dial
4. Power/ Flame Eect
ON/OFF Switch
5. 950W Low Heat Output Switch
6. 1850W High Heat Output Switch
(when pressed with switch
BEFORE FIRST USE:
1. Remove your appliance from the packaging.
2. Check that there is no damage to the cord or any visible damage to the appliance.
3. Read the Instruction Manual and retain for future reference.
4. Your appliance is now ready for normal use.
5. Dispose of the packaging in a responsible manner.
3 4 5 6
1

9
www.warmlite-products.co.uk
USING YOUR APPLIANCE
Note: When the appliance is turned on for
the rst time or when it has not been used for
some time, it may release a slight, harmless
odour. This odour is a normal occurrence
caused by the initial heating of the internal
heating elements or dust, and will disappear
after a short period of use.
The appliance is operated through the switches
and control dial located at the bottom of the
appliance behind the door.
1. Ensure all switches, and the dial, are set
to the OFF position.
2. Plug the power cord into a mains
power outlet.
3. To power the appliance ON, switch
the power ON/OFF switch to the
ON position ‘I’. The ame eect will
illuminate.
4. When the appliance is not required
switch all the switches to the OFF
position ‘0’ and unplug the appliance
from the power supply.
SELECTING THE HEAT SETTING:
This unit is equipped with a choice of LOW
950W or HIGH 1850W heat settings.
1. Once the appliance is powered ON, select
one of the two heat settings by pressing
the appropriate switch(es):
I - Low heat setting
I and II together - High heat setting
2. To turn the heating function o, switch the
heat setting switch(es) back to the ‘o’
position.
Note: The LED ame eect operates
independently from the heating function, and
will stay on even after the heat switches have
been set to the ‘OFF’ position.
SELECTING THE TEMPERATURE:
3. Once the heat setting has been activated,
the desired room temperature can be
selected by adjusting the unit’s thermostat
control dial.
4. Rotate the thermostat dial clockwise to
increase or anti clockwise to decrease the
temperature.
5. The thermostat dial must be set at
a higher temperature than the room
temperature before heat begins emitting
from the unit. There will be an audible
click to indicate the heating function has
been activated. The same clicking sound
will indicate the heating function has been
turned o when the temperature dial is
turned down.
Note: Once the desired ambient temperature is
reached, the appliance will automatically stop
heating. Whenever the ambient temperature
drops more than 2°C below the desired
temperature, the appliance will resume
operation.
SAFETY CUT-OUT:
This appliance is tted with a safety cut-o
device, which will operate if the appliance
overheats (e.g. due to blocked air vents).
For safety reasons, the appliance will NOT
automatically reset.
To reset the appliance, disconnect the
appliance from the mains supply and allow
the unit to cool down for a minimum of 10
minutes. Check for and clear any blockages.
Reconnect to the mains supply and switch on
the appliance.
CAUTION! Do not touch the appliance as it
will be hot. Set the appliance switches to OFF
and leave the appliance to cool down fully.
Do not open this product. There are no user-
serviceable parts inside. If the safety cut-o
device continues to switch the appliance o,
seek advice from the manufacturer, its service
agent or a similarly qualied person.

10
SERVICE DEPARTMENT: +44 (0) 333 220 6056
CHECK THAT YOU HAVE NOTED ALL THE
FOLLOWING INSTRUCTIONS:
Do:
Always install the appliance in accordance with
this guide. If in doubt obtain expert advice.
Always make sure the electrical socket is
accessible and located adjacent to, but not
above or behind the appliance.
Always disconnect the appliance from the
electrical supply before carrying out cleaning or
maintenance.
Always assemble the re in accordance with
this guide. If in doubt, obtain expert advice.
Always make sure the appliance is on a rm
surface.
Don’t:
Never leave children unsupervised in a room
where the appliance is ON and unguarded.
Never obstruct or cover the fan outlet or force
items into the appliance openings.
Never install or use the appliance anywhere
where water is in use, i.e. bathrooms, kitchens,
shower rooms, swimming pools etc.
Never use aerosols or steam cleaners on or
around the heater.
Never route the mains supply cable under
carpet etc.
Never install the appliance close to curtains or
combustible materials.
Never use the appliance to dry clothes etc.
Never sit or stand on the heater.
Never cut the o the plug and hard wire into a
xed fused spur.
TROUBLESHOOTING
No heat or light
Check the wall socket by plugging in a working
appliance. If the socket is functional, and the
cord or plug of the appliance is suspected to
be faulty, seek advice from the manufacturer, its
service agent or a similarly qualied person.
Light but no heat
Check that the thermostat is set above the
current room temperature.
Alternatively, the thermal cut-o may have
engaged – refer to the Safety Cut-Out section.
CLEANING AND CARE
WARNING! Always disconnect from the mains
supply before cleaning the appliance.
CAUTION! Allow the unit to completely cool
before handling or cleaning it.
• Use a slightly damp, lint-free cloth to clean
the casing of the appliance.
• The heater and glass parts should only be
cleaned carefully with a soft dry cloth.
CAUTION! Do not use polishes, harsh
detergents, chemical cleaners, solvents or
harsh abrasives or cleaners.
• Do not spray or immerse any part of the
appliance in water or any other liquid.
• Do not allow water or other liquids to run
into the interior of the product, as this
could cause a re and/or electrical hazard.
• Periodically clean the appliance by lightly
running a vacuum cleaner nozzle over the
guards to remove any dust or dirt that
may have accumulated inside or on the
unit.
• DO NOT attempt to open the case of this
heater at any time. There are no consumer
serviceable parts in this unit.

11
www.warmlite-products.co.uk
STORAGE:
• When the appliance is stored during the
o season, neatly wind the cord around
the base of the appliance to prevent any
damage to the cord.
• Protect from dust and store in a clean dry
place.
DISPOSAL OF THE UNIT
Appliances bearing the symbol shown here
may not be disposed of in domestic rubbish.
You are required to dispose of old electrical
and electronic appliances like this separately.
Please visit www.recycle-more.co.uk or
www.recyclenow.co.uk
for access to information about the recycling
of electrical items.
Please visit www.weeeireland.ie for access to
information about the recycling of electrical
items purchased in Ireland.
The WEEE directive, introduced in August
2006, states that all electrical items must be
recycled, rather than taken to landll.
Please arrange to take this appliance to your
local Civic Amenity site for recycling, once it
has reached the end of its life.
WARNING:
DO NOT IMMERSE ANY ELECTRICAL PART
OF THE APPLIANCE IN WATER SUCH AS
MOTOR UNITS OR PLUGS.
PLEASE SEE CLEANING SECTION FOR
FURTHER INSTRUCTIONS.

12
SERVICE DEPARTMENT: +44 (0) 333 220 6056
Model Identier(s): WL46040
Item Symbol Valve Unit Item Unit
Heat Output Type of heat input for electric storage, local space
heaters only (select one)
Nominal heat
output Pnom 1.7 kW Manual heat charge with integrated
thermostat N/A
Minimum heat
output (indicative) Pmin 0.85 kW Manual heat charge control with room
and/or outdoor temperature feedback N/A
Maximum
continuous heat
output
Pmax, c 1.7 kW Electronic heat charge control with room
and/or outdoor temperature feedback N/A
Auxiliary electricity
consumption Fan assisted heat output N/A
At nominal heat
output elmax 0 kW Type of heat output/room temperature control
(select one)
At minimum heat
output elmin 0 kW Single stage heat output and no room
temperature control No
In standby mode eISB 0 kW Two or more manual stages, no room
temperature control No
With mechanic thermostat room temperature
control Yes
With electronic room temperature control No
Electronic room temperature control plus day
timer No
Electronic room temperature control plus
week timer No
Other control options (multiple selections possible)
Room temperature control with presence
detection No
Room temperature control with open
window detection No
With distance control option No
With adaptive start control No
With working time limitation No
With black bulb sensor No
Contact Details: Imported by RK Wholesale LTD., Berryhill Road, Stoke-on-Trent ST4 2NL

13
www.warmlite-products.co.uk
NOTES

14
SERVICE DEPARTMENT: +44 (0) 333 220 6056
NOTES

15
www.warmlite-products.co.uk
NOTES

We hope you enjoy your appliance for many years.
As a thank you for purchasing one of our fantastic products,
we are giving you an extra year peace of mind.
To receive your extra year guarantee, register your appliance online by visiting
www.warmlite-products.co.uk
Should you have a problem
with your appliance or need any spare parts please call our
Service Department on:
+44 (0) 333 220 6056
Distributed throughout the UK by RKW LTD
0721.V1
Table of contents
Other Warmlite Stove manuals
Popular Stove manuals by other brands

THERMOROSSI
THERMOROSSI CREO installation guide

Zempire
Zempire 0180804 instructions

Lotus
Lotus Mira Series Mounting and user instructions

pleasant hearth
pleasant hearth EST-330 owner's manual

Nordica
Nordica FULVIA Instructions for installation, use and maintenance

Henley Stoves
Henley Stoves THE ACHILL user manual

Nordpeis
Nordpeis Verona installation manual

Morso
Morso 1600 instruction manual

Aarrow
Aarrow Hamlet Operating & installation manual

Regency
Regency ULTIMATE U41FS-LP Installation and operating instructions

RIKA
RIKA CONNECT PELLET F22 operating manual

Quadra-Fire
Quadra-Fire GRAND BAY 40 GB40FS Installation, operation, venting and maintenance instructions