Page 3
GAS SAFETY
• Always change over a gas cylinder away from any possible source of ignition in a well
ventilated area.
• Do not smoke whilst handling gas cylinders.
• Never store gas cylinders indoors.
• Store away from direct heat in a well ventilated area.
• Always keep the gas cylinder in an upright position on a flat surface.
• Close cylinder valve when Gas Chiminea is not in use and, if available, use a sealing plug to
prevent possible leaks.
• Do not subject gas cylinder to excessive heat.
• Do not tamper with any fitting attached to any gas cylinder. Have it taken to the manufacturer
or an authorized testing station.
• When the cylinder runs out of gas, have it refilled or swapped at an authorized testing station.
They will fill the cylinder to no more than 80% of its capacity. This allows the gas to expand
with temperatures.
• Have the cylinder inspected EVERY 10 YEARS at an authorized testing station.
TESTING FOR LEAKS
NOTE - DO NOT test for gas leaks with an open flame. If you smell gas, turn o at the source.
Before first use and periodically during the season, or whenever a gas cylinder is changed, you
must check for gas leaks.
To perform a Gas Leak Check:
• Turn gas valve to the • o position.
• Connect hose to the gas cylinder using the supplied regulator and turn on the gas cylinder.
• Brush a soap solution of one part liquid detergent and one part water to all gas connections.
• The presence of bubbles indicates a leak. Tighten or repair as necessary.
• Under no circumstances should a naked flame be used to check for leaks.
• If a gas odour is present and no leaks can be found, do not use the Gas Chiminea. Turn
the gas o at the cylinder, disconnect the hose and immediately contact your retailer for
assistance.
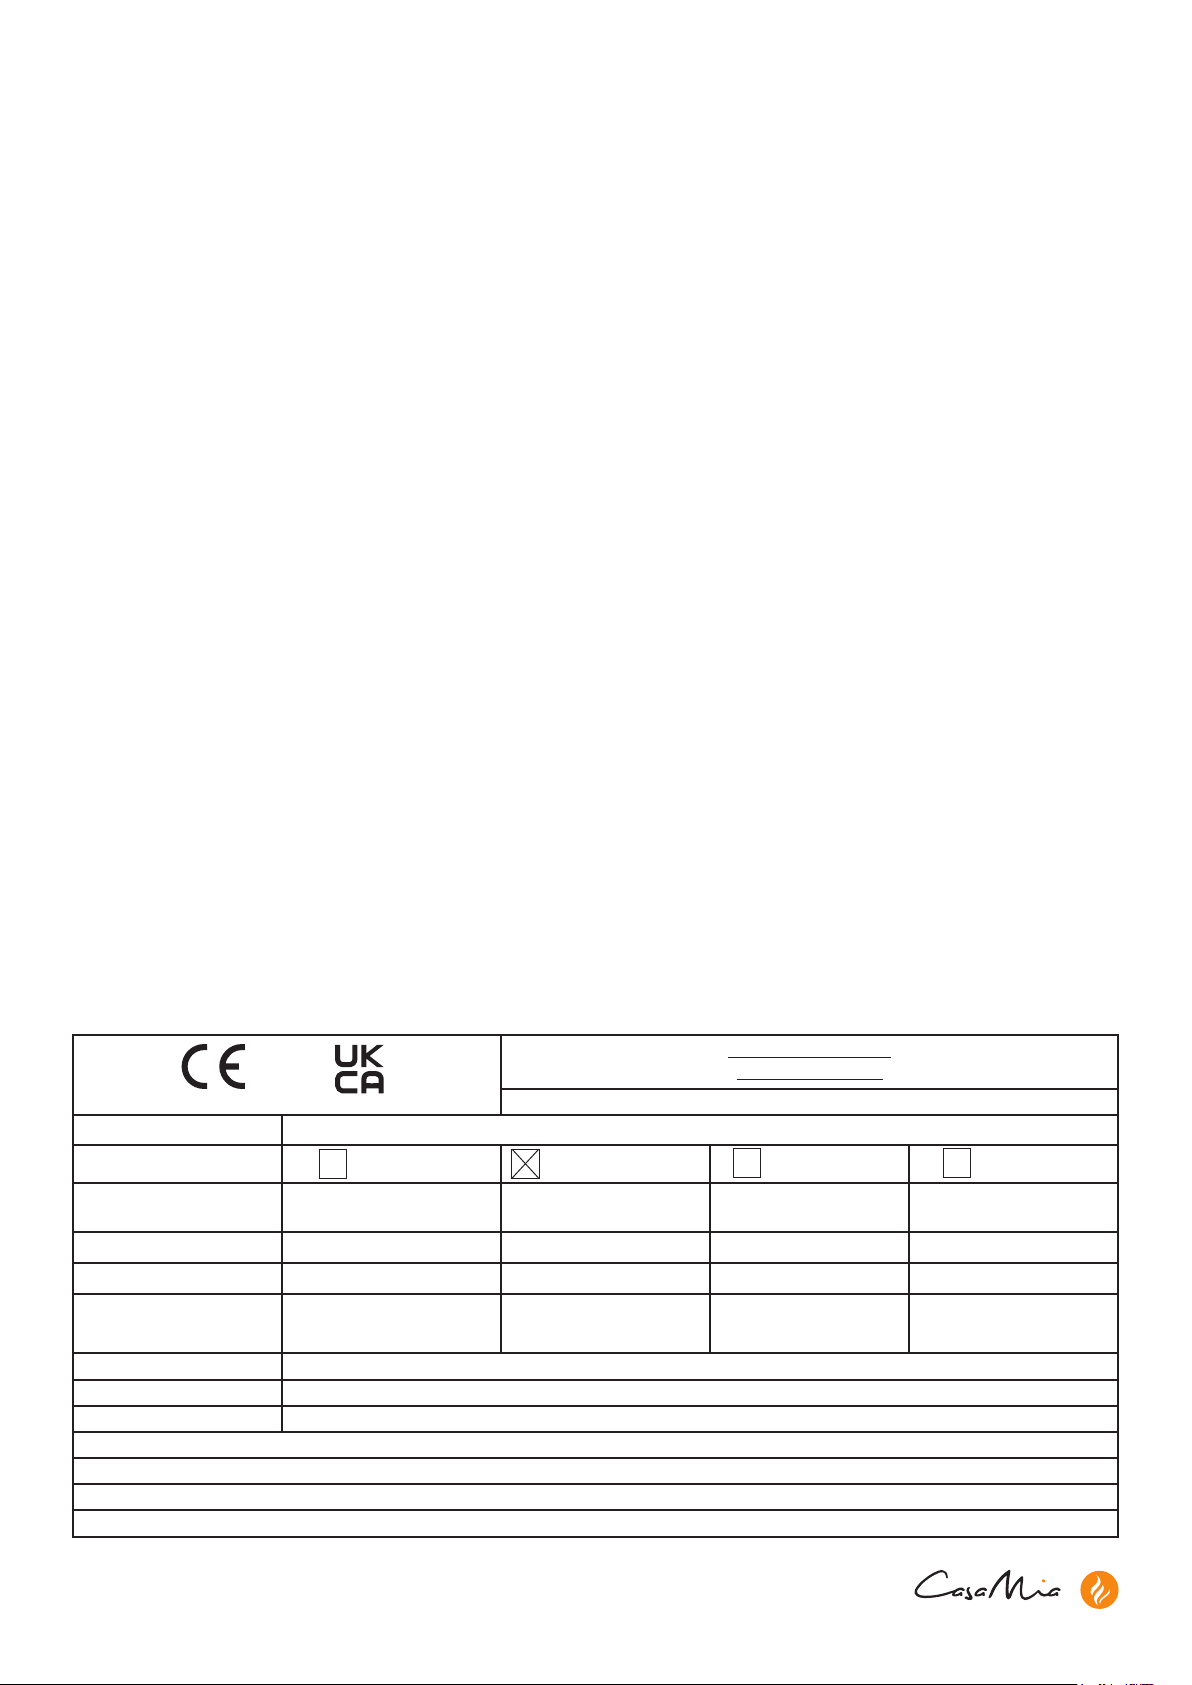
2531-22 8504-22
OUTDOOR GAS FIREPIT
MODEL NO. QL01-006
Serial No.
Heat Input (Hi) 11.7kW (G30:850g/h,G31:835 g/h) (Hs)
Gas Cat. I3B/P(30) I3+(28~30/37) I3B/P(30) I3B/P(50)
Type of Gas Propane, butane and their
mixtures Butane/ Propane Butane/ Propane Propane, butane and their
mixtures
Gas pressure (28~30)mbar (28~30)37mbar 37mbar 50mbar
Injector size Ф1.67mm Ф1.67mm Ф1.57mm Ф1.44mm
Destination Countries
LU, NL, DK, FI, SE, CY, CZ, EE,
LT, MT, SK, SI, BG, IS, NO, TR,
HR, RO, IT, HU and LV
BE, FR, IT, LU, IE, GB, GR,
PT, ES, CY, CZ, LT, SK, CH,
SI and LV
PL DE, AT, CH, LU, SK
Pin code 2531DM-0090 / 8504DN-0011
Manufacturer LEISUREGROW PRODUCTS LTD.
Address Dewmead Farm, New Inn Road, Hinxworth, Herts, SG7 5HG
Made in China
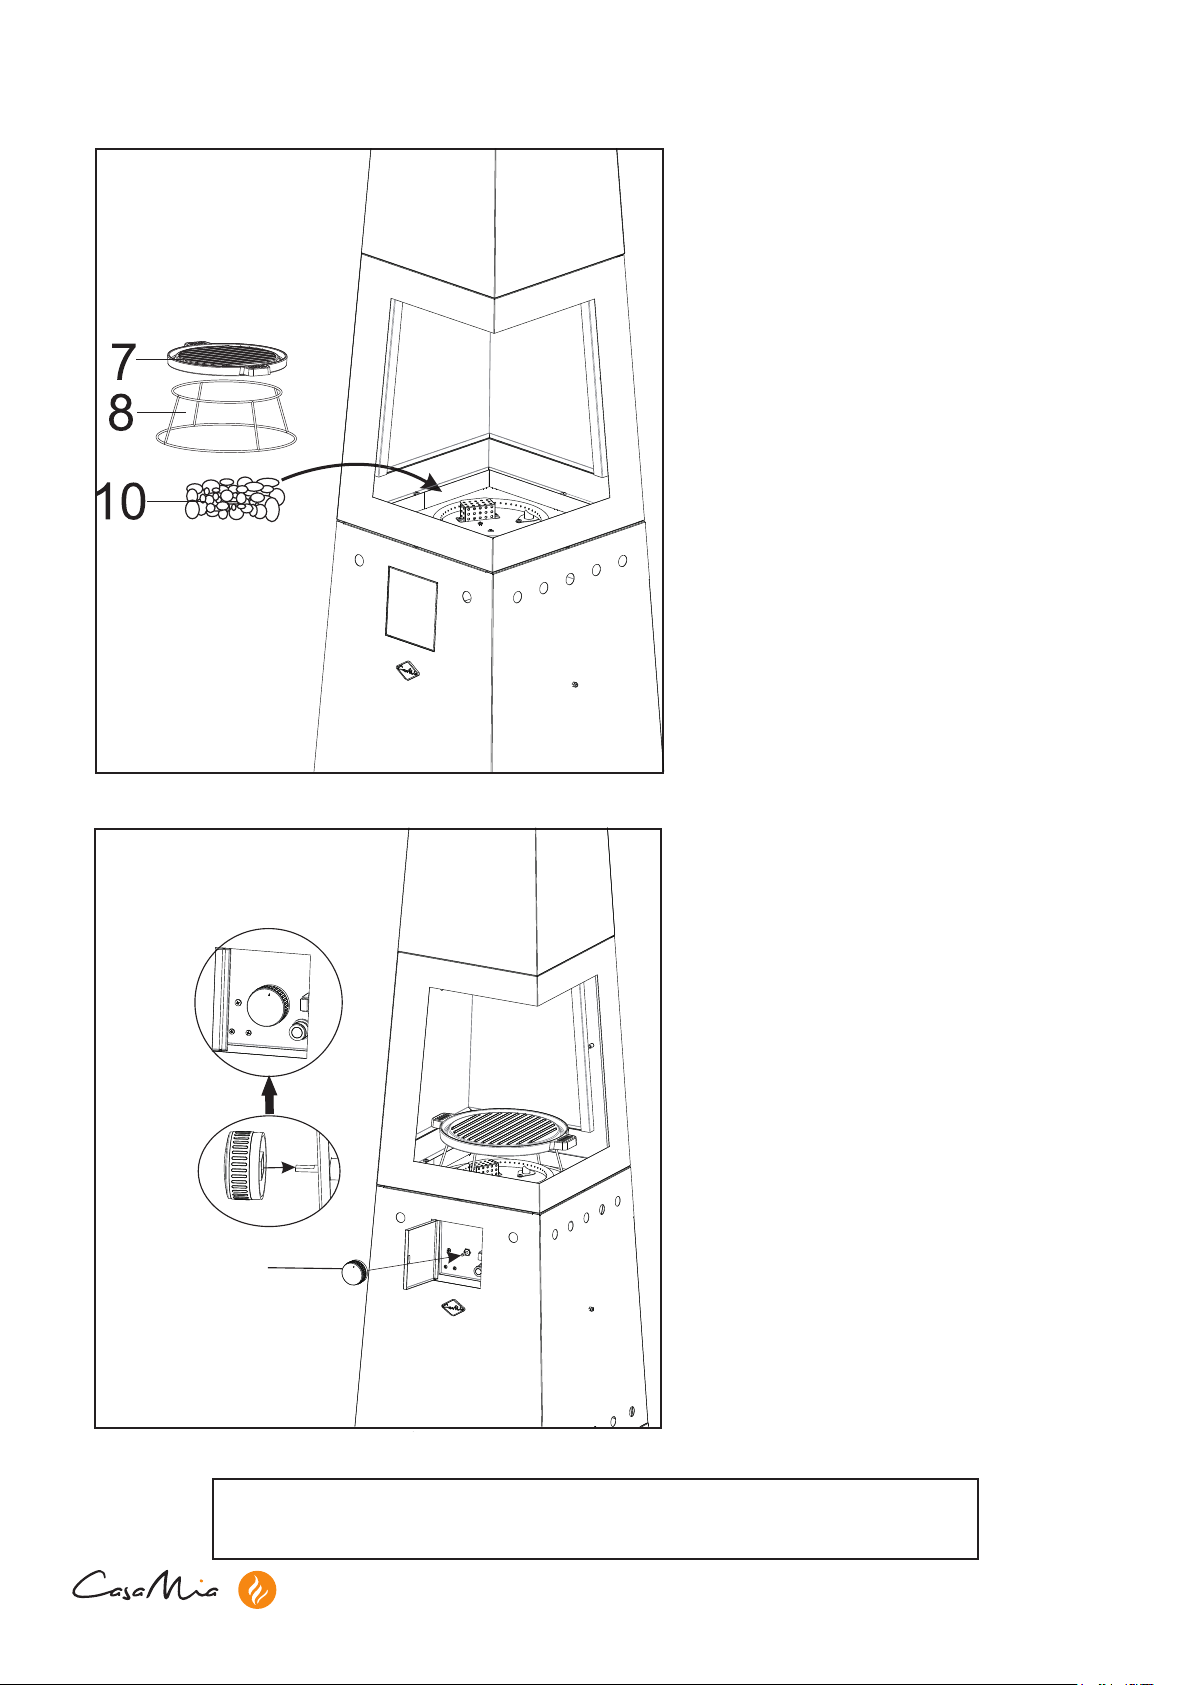
Use Outdoors Only.
Read the instructions before using the appliance.
Warning: Accessible parts may be very hot. Keep young children away.