manuals.online logo
Brands
  1. Home
  2. •
  3. Brands
  4. •
  5. Casio
  6. •
  7. Calculator
  8. •
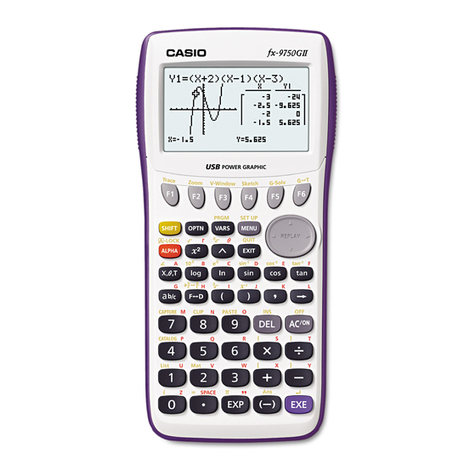
  9. Casio FX-9860GII - SOFTWARE VERSION 2-00 User manual

Casio FX-9860GII - SOFTWARE VERSION 2-00 User manual

Other manuals for FX-9860GII - SOFTWARE VERSION 2-00

8

Other Casio Calculator manuals

Casio fx-7400G Technical document

Casio

Casio fx-7400G Technical document

Casio CFX-9850G PLUS User manual

Casio

Casio CFX-9850G PLUS User manual

Casio fx-991ES PLUS User manual

Casio

Casio fx-991ES PLUS User manual

Casio FX-9860GII - SOFTWARE VERSION 2-00 User manual

Casio

Casio FX-9860GII - SOFTWARE VERSION 2-00 User manual

Casio Fx-96SG User manual

Casio

Casio Fx-96SG User manual

Casio CFX-9850G PLUS User manual

Casio

Casio CFX-9850G PLUS User manual

Casio HR-110S User manual

Casio

Casio HR-110S User manual

Casio FR-1011S User manual

Casio

Casio FR-1011S User manual

Casio ALGEBRA FX 2.0 User manual

Casio

Casio ALGEBRA FX 2.0 User manual

Casio fx-9860GII SD Installation manual

Casio

Casio fx-9860GII SD Installation manual

Casio Financial Consultant User manual

Casio

Casio Financial Consultant User manual

Casio FX-9750G User manual

Casio

Casio FX-9750G User manual

Casio AX-12V User manual

Casio

Casio AX-12V User manual

Casio HR-8TE User manual

Casio

Casio HR-8TE User manual

Casio fx-68 User manual

Casio

Casio fx-68 User manual

Casio CFX-9850G PLUS User manual

Casio

Casio CFX-9850G PLUS User manual

Casio fx-570AR X User manual

Casio

Casio fx-570AR X User manual

Casio Financial Consultant FC-100 User manual

Casio

Casio Financial Consultant FC-100 User manual

Casio DR-120XA Troubleshooting guide

Casio

Casio DR-120XA Troubleshooting guide

Casio SL-210TE User manual

Casio

Casio SL-210TE User manual

Casio MS-7UC User manual

Casio

Casio MS-7UC User manual

Casio fx-500ES User manual

Casio

Casio fx-500ES User manual

Casio FX-350W User manual

Casio

Casio FX-350W User manual

Casio SLIM FX-9860G Installation manual

Casio

Casio SLIM FX-9860G Installation manual

Popular Calculator manuals by other brands

Texas Instruments BA II Plus user guide

Texas Instruments

Texas Instruments BA II Plus user guide

Kompernass KH 2283 instruction manual

Kompernass

Kompernass KH 2283 instruction manual

Helwett Packard 9100A Operating and programming manual

Helwett Packard

Helwett Packard 9100A Operating and programming manual

Calculated Industries 3423 user guide

Calculated Industries

Calculated Industries 3423 user guide

Calculated Industries Qualifier Plus IIcx user guide

Calculated Industries

Calculated Industries Qualifier Plus IIcx user guide

HP 35s Instruction guide

HP

HP 35s Instruction guide

LEXIBOOK EL350 instruction manual

LEXIBOOK

LEXIBOOK EL350 instruction manual

HP HP-97 Service manual

HP

HP HP-97 Service manual

Canon P26-DHIII instructions

Canon

Canon P26-DHIII instructions

Sharp EL-9900 Operation manual

Sharp

Sharp EL-9900 Operation manual

Sharp WriteView EL-W506 operation instruction

Sharp

Sharp WriteView EL-W506 operation instruction

Sharp EL2192RII - Printing Calculator Operation manual

Sharp

Sharp EL2192RII - Printing Calculator Operation manual

HP 20b Business Consultant manual

HP

HP 20b Business Consultant manual

Citizen SDC-414N instruction manual

Citizen

Citizen SDC-414N instruction manual

Commodore SR6140R owner's manual

Commodore

Commodore SR6140R owner's manual

Citizen 520DPA instruction manual

Citizen

Citizen 520DPA instruction manual

Panasonic JE-850 manual

Panasonic

Panasonic JE-850 manual

HP HP-28S quick reference

HP

HP HP-28S quick reference

manuals.online logo
manuals.online logoBrands
  • About & Mission
  • Contact us
  • Privacy Policy
  • Terms and Conditions

Copyright 2025 Manuals.Online. All Rights Reserved.

Selecting the RUN Qicon will allow you to
perform general computations and arithmetic.
The function keys allow you to access the
tab (soft key) menus that will come up at the bottom
of the screen. When an u appears above theu
key, selecting uwill offer more on-screen choices.
The pkey displays every mode the calculator has.
To select a mode, you may $B to the desired icon
and press lor press the number or letter in the
lower right hand corner of the icon.
The dkey operates like the back arrow on a web
browser; it will take you back one screen each time
you select it. The dkey will not take you to the
icon menu.
The xkey is a toggle key that will change answers
or entered numbers back and forth from decimal to
fraction/root form.
The Okey will power the unit on. To turn the unit
off, press the yellow Lkey, then Okey.
Thezkey is used to obtain a fraction bar. To obtain
a mixed number, press zafter inputting the whole
number.
The l key executes operations. When data is
entered, the lbutton must be pressed to store
the data.
fx-9860GII
Quick
Reference Guide
White gradient to 50% transparency.
Note this logo is on separate layer from background
Getting Started with the fx-9860GII
ICON Menu
Name Description
QRUN This icon menu is used for general computations, including absolute value, logs of any
base, summation, derivatives, and integrals.
STATISTICS
This icon menu is used to perform single-variable (standard deviation) and paired
variable (regression) statistical calculations, to perform tests, to analyze data and to
draw statistical graphs.
eeACTIVITY
eActivity allows for the input of text, math expressions, and other data in a notebook-
like interface. Use this mode when you want to store text, formulas, or built-in
application data in a le
rSPREAD-
SHEET This icon menu is used for creating spreadsheets.
YGRAPH This icon menu is used to quickly draw, store and calculate information of functions.
Can graph polar, parametric, x=, and inequality graphs on the same screen.
UDYNAMIC
GRAPH
This icon menu is used to draw multiple versions of a graph by changing certain values
in the function.
iTABLE This icon menu is used to store functions, to generate a numeric table of different
solutions as the values assigned to variables in a function change, and to draw graphs.
oRECURSION
This icon menu is used to store recursion formulas, to generate a numeric table of
different solutions as the values assigned to the variables in a function change, and to
draw graphs
pCONICS This icon menu is used to graph parabolas, circles, ellipses, and hyperbolas. You can
input a rectangular or polar coordinate function or a parametric function for graphing.
AEQUATION This icon menu is used to solve linear equations with two through six unknowns, and
high-order equations from 2nd to 6th degree.
SPROGRAM This icon menu is used to store programs in the program area and to run programs.
dTIME VALUE
OF MONEY
This icon menu is used to preform nancial calculations and to create cash ow and
other types of graphs.
DATA
ANALYZER
LINK
This icon menu is used to control the optionally available EA-200 Data Analyzer.
For information about this icon menu, download the E-CON2 manual from
http://edu.casio.com.
FLINK This icon menu is used to transfer memory contents or back-up data to another unit
or PC.
gMEMORY This icon menu is used to manage data stored in memory.
hSYSTEM This icon menu is used to initialize memory, adjust contrast, reset memory, and to
manage other system settings.
GEOMETRY This mode allows you to draw, analyze and animate geometric objects.
The following explains the meaning of each icon on the fx-9860GII icon menu
2
Getting Started with the fx-9860GII
RUN
This section is an overview of the RUN Icon. To select an icon from the icon menu system, use
the !$BN to highlight the desired icon, then press lor press the number/letter in the
lower right corner of the icon. For the RUN menu, press 1to display the initial screen.
Note: All operations in this handout will utilize the “Math” input mode, which allows natural
input and display of certain functions, just as they appear in a textbook. To make sure your
calculator is in “Math” mode, press Lpqd from the RUN menu.
1. When performing general computations, you can press zto enter fractions and mixed
numbers. To solve the problem, input the following:
•z5N8$+Lz2$1N3l
2. To change the answer, 24
71 , to a mixed number, press LxX.
3. To change the answer to a decimal approximation, press x. xis a toggle key that will
switch entered data or answers from standard form to its decimal approximation and back.
3
Getting Started with the fx-9860GII
4. To change the displayed number of decimal places, enter the SET UP menu by pressing
Lp. Nto Display, select q(Fix) and enter the desired amount of decimal places
followed by l. For this example, 3 decimal places are used.
Note: Every icon’s SET UP menu is accessed in the same way.
• LpNNNNNNNNNNNq3ldlx
From the RUN menu, many calculations can be entered by selecting i. For example:
hyperbolic, probability/distribution, numeric (including differential and integration), conversion,
engineering, complex number and binary, octal, decimal and hexadecimal calculations.
5. To calculate the possible number of different arrangements using 4 items selected from among
10 items, enter the following from the RUN home screen:
• iue10w4l
6. To calculate -103+ 2 , enter the following from the RUN home screen:
• iewn10^3$+2l
Calculations can be performed with complex numbers and answers can be displayed in
a+bi form.
RUN
4
Getting Started with the fx-9860GII
7. To calculate (-3 + 2i ) + 15i; enter the following:
• iejn3+2qk+15ql
Sigma calculations can also be performed in the RUN menu.
8. To calculate ; enter the following:
 • iruea,s3a,+5$a,$2B6l
RUN
5
Getting Started with the fx-9860GII
GRAPH
Various icons (Run, Table, Dynamic, Recursion & Conics) will allow you to graph or analyze the
graphs of given information. This section is an overview of the GRAPH Icon and will highlight
some basic features of this mode..
The initial screen allows immediate input of functions set equal to zero. You may begin inputting
data into Y1: pressing lto store; to draw your function(s), select u.
You can change the type of graph (r = polar coordinates, parametric functions, x =, and
inequalities) by selecting the corresponding TYPE button and then press $to begin inputting.
When the TYPE of graph is changed, it only affects the current line and entries below it.
Functions already stored are unchanged.
1. To draw the graph of the function y=2x2 -5x-3 from the Icon Menu system, input the following:

• 52fs-5f-3l
To quickly change your window, you can utilize the Replay arrows. Specic changes can be
made to the viewing window by selecting V-Win e.
To analyze features of this graph (roots, maximum and minimums, y-intercepts, intersections,
determine coordinates, and integrals) select y(G-Solve).
6
Getting Started with the fx-9860GII
2. q(Root):
Note: The left-most root will always display rst. To display the next root, simply press $.
3. e(Minimum):
Note: As long as the x-value of your vertex is in the viewable domain; you do not need to see
the vertex to calculate the minimum value. However, you can change the viewing window
by selecting e(V-Window) in the graph window.
4. r(y-intercept):
5. q(y-calculation): What is the value of ywhen xis -5?
6. w(x-calculation): What is the value(s) of x when y is 1?
7. e(integral): Determine the integral value from (0,3) for the function Y1=2x2 - 5x-3.
GRAPH
7
Getting Started with the fx-9860GII
TABLE
This section is an overview of the TABLE Icon. To select this icon, you may highlight it and press
lor press 7.
The initial screen allows immediate input of functions that are set equal to 0. To change the
type of expression to be entered, press e(TYPE) and select w(r=) for polar coordinates,
e(Param) for parametric functions or r(CONV) to convert a previously entered function
to an inequality.
1. To see a table for the function , highlight Y1: and input the following:
• z2N3$f-4lu
2. The default setting for tables is: X starts at 1, ends at 5, and increases by increments of 1.
You change this by pressing dor q(FORM) to return to the initial screen and then select
y(SET).
3. However, you can enter a number anywhere in the x-column of the table and press lto see
the corresponding y-value (including fractions, decimals, even π). You can insert and delete
rows in this view by pressing e(ROW). This is a quick way to custom make tables.
8
Getting Started with the fx-9860GII
TABLE
4. From the table view screen, you can press y(G-CON) to see a connected plot linear graph or
u(G-PLT) to see a plot graph for the function you entered.
5. To see a split screen of your table and graph, press Lpto enter the SET UP menu for the
TABLE icon. Scroll down to Dual Screen, select q(T + G), d, then u i.
If you manually entered values to the previous table that you still want displayed, you can re-enter
them here, then press lto see the graph of that table.
To generate a differential number table, press Lpto enter the SET UP menu for the TABLE
icon and Nto Derivative, select q(On), d, and then u.
6. For this example, enter YI: 3x2-2 and Y2: x2then uto view the differential number table.
Note: Locating the cursor at a differential coefcient displays “dy/dx” in the top line, which
indicates differential.
9
Getting Started with the fx-9860GII
STATISTICS
This section is an overview of the STAT Icon; it will highlight just a few of the features for
single-variable data and paired-variable data. To select this icon, you may highlight it and
press lor press2.
The initial screen is the List Editor Screen that allows input of statistical data and performs
numerous statistical calculations. To input a list of single-variable data, highlight the rst cell
under List 1 and enter each number followed by l.
1. For this example, input this set of data:

2. From this screen you can display various statistical graphs depending on whether you have
single or paired-variable data (scatter-plot, line, normal probability, histogram, median box,
mean box, normal distribution, broken line, and regression: linear, quadratic, cubic, quartic,
logarithmic, exponential, power, sinusoidal and logistic).
10