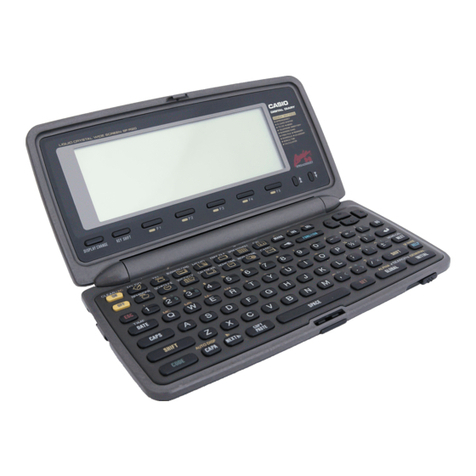
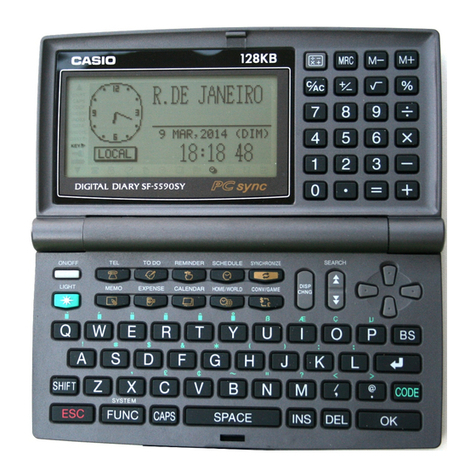
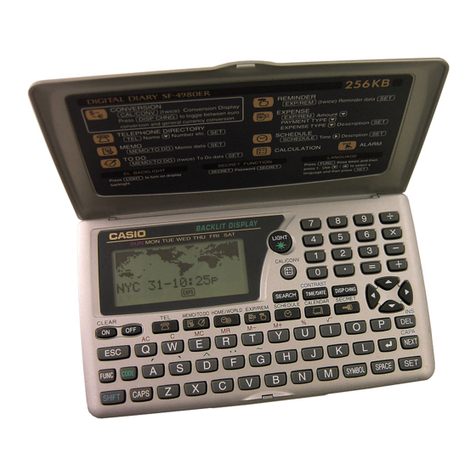
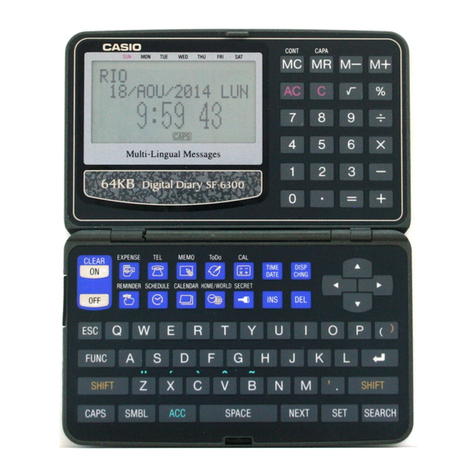
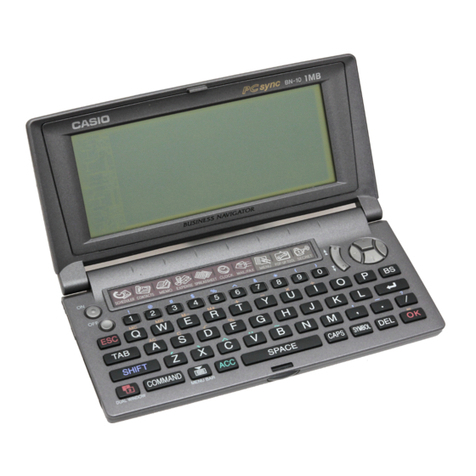
Casio SF-4700C User manual

A313705A-4BA
CASIO.
CASIO
COMPUTER
CoO.,
LTD.
6-2,
Hon-machi
1-chome
Shibuya-ku,
Tokye
151-8543,
Japan
MOg806-8
Printed
in
Malaysia
(extn
10,
8.25
PH
SF-4700C
BMIE
th
Ihe)
SF-4900C
User’s
Guide
CASIO.

GUIDELINES
LAID
DOWN
BY
FCC
RULES
FOR
USE
OF
THIS
UNITIN
THE
U.S.A.
(not
applicable
to
other
areas).
Before
using
the
unit
for
the
first
time
NOTICE
This
equipment
has
been
tested
and
found
to
comply
with
the
limits
for
a
Class
B
cigital
Use
the
following
procedure
to
load
batteries
and
reset
the
unit
before
using
it
for
device,
pursuant
to
Part
15
of
the
FCC
Rules.
These
limits
are
designed
to
provide
the
first
time.
reasonable
protection
against
harmful
interference
in
a
residential
installation.
This
equipmentgenerates,
uses
and
can
radiate
radio
frequency
energy
and,
ifnotinstalledand
1.
Glide
the
battery
compartment
cover
in
the
direction
indicated
by
the
arrow.
used
in
accordance
with
the
instructions,
may
cause
harmful
interference
to
radio
:
communications.
However,
there
is
no
guarantee
that
interference
will
net
occur
in
a
j
particular
installation.
If
this
equipment
does
cause
harmful
interference
to
radio
or
|
television
reception,
which
can
be
determined
by
turning
the
equipment
off
and
on,
the
user
is
encouraged
to
try
to
correct
the
interference
by
one
or
more
of
the
following
measures:
*
Reorient
or
relocate
the
receiving
antenna.
1
*
Increase
the
separation
between
the
equipment
and
receiver.
*
Connect
the
equipment
into
an
outlet
on
a
circuit
different
from
that
to
which
the
receiver
is
connected.
*
Consult
the
dealer
or
an
experienced
radio/TV
technician
for
help.
FCC
WARNING
Changes
or
modifications
net
expressly
approved
by
the
party
responsible
for
compliance
could
void
the
user's
authority
to
operate
the
equipment.
Proper
connectors
must
be
used
for
connection
to
host
computer
and/or
peripherals
in
order
to
meet
FCC
emission
limits.
Connector
S8-62........
SF
Unit
to
SF
Unit
Connector
FA-127
......
SF
Unit
to
PC
Declaration
of
Conformity
Model
Number:
SF-4700C/4900C
i
Trade
Name:
CASIO
COMPUTER
CO.,
LTD.
!
Responsible
party:
CASIO,
INC.
Address:
570
MT.
PLEASANT
AVENUE,
DOVER,
NEW
JERSEY
07801
Telephone
number:
973-361-5400
|
This
device
complies
with
Part
15
of
the
FOC
Rules,
Operation
is
subject
to
the
following
two
conditions:
(1)
This
device
may
not
cause
harmful
interference,
and
(2)
this
device
must
accept
any
interference
received,
including
interference
that
may
cause
undesired
cperation.
3.
Slide
the
batiery
holder
‘in
the
direction.
indicated
‘by
ihe
arrow.
in
the
illustration.
.
:
Battery
Holder
©
IMPORTANT!
.
|
Please
keep
your
manual
and
all
information
handy
for
future
reference.
:

-:
Before
using
the
unit
for
the
first
time
4,
Load
the
new
battery
into
the
battery
compartment,
making
sure
that
the
positive
(+)
side
of
the
new
battery
is
facing
up
(so
you
can
see
it).
5.
Slide
the
battery
holder
back
to
its
original
position
as
indicated
by
the
arrow
in
the
illustration.
-
Battery
holder
6.
Slide
the
battery
switch
to
the
“REPLACE
2,
3”
setting
and
repeat
steps
3
through
5
for
the
other
batteries.
«
Besuretoload
all
three
batteries,
using
CR2032
lithium
batteries
only.
Never
mix
old
batteries
with
new
ones.
:
7.
Slide
the
battery
switch
to
the
“NORMAL”
setting.
.
«
You
will
not
be
able
to
turn
the
unit
on
if
the
battery
switch
is
not
in
the
“NORMAL”
setiing,
Replace
the
battery
compartment
cover.
Press
ON
to
switch
power
on.
«
At
this
time,
one.of
the
following
messages
appears
cn
the
display.
A/ARE
YOU_USING_A
NEW
UNIT
FOR
THE.
FIRST
TIME?
Bi
CLEAR
MEMORY
AND
SET
UP_THE
UNIT
FOR
OPERATION?
We
OFF
«
IfMassage
B
appears,
skip
step
10
and
continue
from
step
11..
+
If
these
messages
do
not
appear,
apen
the
battery
compariment
and
press
the
RESET
button.
And
then
skip
step
10
and
continue
from
step
11.
10.
Use
“@
to
move
the
highlighting
to
YES,
and
press
SET.
*
This
causes
Message
B
to
appear
on
the
display.
11.
Use
<€
to
move
the
highlighting
to
YES,
and
press-SET.
«
After
the
RESET
operation
is
complete,
the
LANGUAGE
screen
appears
on
the
display.
; . . . .
12.
Use
the
procedure
under
"To
select
the
system
language”
on
page
5
toselect
a
system
language.
_
13.
Check
the
Home
Time
setting
and
make
changes
if
necessary
(page
59).
About
the
EL
backlight
About
the
EL
backlight
-
.
*
This
unit
is
equipped
with
an
EL
backlight
that
allows
easy
viewing
of
display
_,
contents
in
a
theater,
or
anywhere
else
where
lightingis
dim.
°
Note,
however,
that
frequent
or
extended
use
of
the
EL
backlight
shortens
“battery
life,
Ds
;
The
following
shows
how
backlight
use
affects
battery
life
under
controlled
test
conditions,”
,
cabot
at
[
Beckight
Operation
|
BatlewyLie
|
[Srminutes
pernour
|
Approximaiey
HOw
|
15
minutes
per
hour.
|
Approximately
30
hours
oe,
*
Test
Conditions
;
re
;
*
“Battery
Life”
is
the
number
of
hours
before
battery
failure
when
the
unit
is
left
on
with
5
minutes
of.a
processing
operation
and
55
minutes
of
continuous
:
display
only
(no
processing
operation)
per.
hour,
plus
tha
backlight
operation
described
below.
,
.
.
.
re
*
“Backlight
Operation”
is
the
number
of
minutes
the
backlight
is
turned
on
per
.
hour
during
the
display
only
{no
processing
operation)
period.
_
Important!
, ‘
.
;
_
.
.
oe
The
EL
backlight
may
fail
to
operate
when
battery
power
is
low,
inorder
te
conserve
remaining
battery
power
and
protect
cata
stored
in
mamory.

m
introduction
SF-4700C/SF-4900C
Congratulations
on
your:
selection
of
CASIO's
new
SF-4700C/SF-4900G
(referred
to
as
SF
Unit
in
this
manual}.
This
innovative
new
personai
data
management
tool
features
a
selection
of
powerful
junctions,
including:
«
Telephone
Directory
®
Memo
Mode
«
Schedule
Keeper
«
Reminder
Mode
;
«
Calendar
-
«
Clock
with
Home
Time
and
World
Time
functions
«
Galculator
«
Secret
Function
«°
Data
Communication.
Functions
are
specially
designed
to
be
easy
to
understand
and
use,
making
your
personal
data
management
easier
than
ever
befare.
Ail
data
stored
i
in
memory
is
erased
if
ihe
SF
Unit
should
malfunction,
when
you
have
if
repaired,
when
the
batteries
go
dead,
and
whenever
you
remove
the
batteries.
Be
sure
to
make
written
back
‘up
copies
of
aif
important
data.
: .
CASIO
COMPUTER
CO.,
LTD.
assumes
no
responsibility
for
any
damage
or
loss
resulting
from
the
use
of
this
manual.
CASIO
COMPUTER
CO.,
LTD.
assumes
no
responsibility
for
any
loss
orclaims
by
third
parties
which
may
arise
through
the
use
of
the
SF
Unit.
CASIO
COMPUTER
CO.,
LTD.
assumes
no
responsibility
for
any
damage
or
loss
caused
by
deletion
of
data
as
a
result
of
malfunction,
repairs,
or
battery
replacement.
Be
sure
to
back
up
all
important
data
on
other
media
to
protect
against
its
loss.
Multiple
Language
Capability
Multiple
Language
Capability
Your
SF
unit
is
capable
of
producing
messages
in
any
one
of
five
different
languages
(English,
German,
French,
ttalian,
Spanish).
Use
the
following
procedure
to
select
the
language
you
want.
To
select
the
system
language
1
phew
om
.
Press
ON
to
switch
power
on.
2.
Enter
the
Telephone
Directory
Mode.
You
could
anter
Memo,
Reminder,
Schedule
Keeper,
Calendar,
Home
Time
or
World
Time
here.
Press
FUNG
three
times
to
display
the
third
function
menu.
In
the
Calendar,
Home
Time,
or
World
Time
mode,
press
FUNC
twice.
Press
1
to
select
LANGUAGE.
The
above
operation
causes
a
list
of
five
languages
to
appear
on
the
display.
The
language
that
is
currently
selected
is
highlighted
on
the
display.
Select
the
language
you
want
to
use.
You
can
direcily
speciiy
a
language
by
pressing
the
number
key
that
corresponds
to
the
language
you
want
to
use.
*LANGUAGECL—S
a4]
DEUTS
You
can
also
select
a
language
by
using
#&
or
W,
to
move
the
highlighting
around
the
menu
until
the
language
you
want
to
use
is
highlighted.
Each
time
you
move
the
highlighting,
the
title:
LANGUAGE
(1-5)
al
the
top
of
the
screen
changes
to
the
language
that
is
currently
highlighted.
While
the
language
you
want
to
use
is
selected
(highiighted),
press
SET.
,
To
exil
the
language-selection
menu
without
changing
the
current
language,
press
ESC.
The
system
language
automatically
changes
to
English
whenever
you
perform
the
RESET
operation
(page
19).

~
[
:
About
this
manual...
This
manual
is
divided
into
7
parts.
PART
1
Getting
Started
Be
sure
to
read
this
part
of
the
manual
beforé
doing
anything
else!
It
includes
important
information
that
you
need
to
know
in
order
to
use
the
SF
Unit
correctly.
PART
2
Operation
Reference
This
part
of
the
manual
gives
you
more
‘detail
about
the
fundamental
operation
of
the
SF
Unit.
If
provides
all
of
the
detail
you
need
to
help’
you
use
.
the
SF
Unit
to
its
full
potential.
It
also
hetps
you
to
get
acquainted
with
the
keys,
fl
features,
and
functions
of
the
SF
Unit.
it
tells
you
where
everything
is
tocaied,
what
the
display
indicators
mean
how:
to
adjust
the
display
contrast,
and
other
important
|
information.
PART
3
Data
Management
Functions
This
part
of
the
manual
details
the
versatile
data
management
functions
of
|
the
SF
Unit.
It
describes
the
procedures
required
for
data
storage,
recall
and
i
editing
in
the
Telephone
Directory,
the
Memo
Mode,
the
Schedule
Keeper
and
ia
the
Reminder.
,
PART
4
Timekeeping
Functions
Your
SF
Unit
inciudes
powerful
timekeeping
functions
that
help
to
keep
you
on
time
ail
the
time.
The
Home
Time
funetion
lets
you
set
the
current
time
:
for
your
home,
specifying
12-hour
or
24-hour
format,
standard
time
or
summer
ii
time,
even
your
hometown
name.
The
World
Time
function
gives
you
instant
access
to
the
current
time
in
any
one
of
29
time
zones
around
the
globe.
|
PART
5
Calculator
Functions
The
SF
Unit
also
gives
you
the
capability
to
perform
all
of
the
mathematical
operations
available
on
today's
calculators.
‘In
addition,
you
also
(get
an
|
innovative
date
calculation
function
that
makes
it
possible
to
perform
addition
;
and
subtraction
operations
that
involve
dates.
|
Introduction
SF-4700C/SF-4900C
.
Manual
conventions
PART6
Data
Communications
The
data
communications
capabilities
of
thé
SF
Unit.
let
you
transfer
data
between
two
SF
Units,
between
the
SF
Unit
andthe
CASIO
CSF
Unitor
NX
Unit,
or
between
the
SF
Unit
and
a
personal
computer.
PART
7
Technical
Reference
This
part
of
the
manuat
provides
technical
information
on
troubleshooting,
user
maintenance,
specifications,
etc.
Manual
conventions
This
manual
uses
the
following
conventions
when
mentioning
key
operations
and
functions
within
text.
«
Keys
are
indicated
using
upper-case
bold
characters
LIKE
THESE.
e
Whena
key
has
more
than
one
function,
only
the
function
under
discussion
"
at
that
time
will
be
noted,
With
the
ON/CLEAR
key,
for
example,
ON
will
be
usedito
indicate
switching
the
SF
Unit
on,
while
CLEAR
will
be
used
te
to
indicate
the
clear
operation.
:
«
Textthatappears
on
the
display
of
the
unitis
represented
inthis
manualusing
afont
thatis
different
from
the
explanatory
text.
The
display
text
"NAME?’
for
example
represented
as:
NAME?.
»
Note
that
operation
of
this
unit's
SHIFT
key
is
different
from
that
normaly
found
on
a
computer's
keyboard.
For.
the
operation
SHIFT.
CLEAR,
for
example,
you
should
not
hold
down
the
SHIFT
key
while
you
press
CLEAR.
Instead,
you
should
press
and
then
release
the
SHIFT
key,
and
then
press
the
CLEAR
key.

Introduction
.
SF-4700C/SF-4900C
Contents
Before
using
the
unit
for
the
first
time
seceeeeecneeseeeuetneesenneserenensoeee
1
About
the
EL
backlight...
eeeeenenenteerenrensapeeereunjieoneey
ctouanenenstnasesateneaees
Introduction
—
SF-4700C/SF-4900C.
oo...
eesseescccnesenstseensseeeseescerer
4
Multiple
Language
Capability
....
About
this
manual...
.
Manual
conventions
....
PART
1
—
Getting
Started
..2....2..ccccssesseeenasseeeeessectemerrecerinressen
13
Read
this
first!
0...
eee
eee
nessa
reensseesereeeneeseeanenees
eevaecasesnateans
Make
back
up
copies
of
important
datal
.
we
About
the
“ARE
YOU
USING.....”
and
“CLEAR
MEMORY
.
General
Precautions
......
About
the
Power
Supply
‘Low
Battery
Message
....
Battery
Precautions
To
replace
the
batteries
....
Resetting
the
SF
Unit's
Memory
......
oe
To
reset
the
SF
Unit's
Memory
0...
cc
sescstecentecestecteeensesseecnsesegenrerneeeeat
PART
2
—
Operation
Reference
.....sscosscesssseesneesesiessenesrecsronns
21
General
Guide
Setting
Up
the
SF
Unit
.
To
switch
power
on
and
off
About
the
Auto
Power
Off
function...
To
turn
on
the
EL
backlight
To
adjust
the
display
contrast
To
select
a
mode
oo.
To
check
the
memory
status
......
To
use
the
FUNCTION
key
.....
About
the
SOUND
menu...
......
To
switch
the
key
input
and
alarm
tones
on
and
off
.
About
alarm
types
...
ee
aa...
aaa
Contents
Inputting.
Letters,
Numbers
and
Symbols
cesseeeeeennsnesanncecesenenennsees
Saeeee
sa
eneean
26
To
input
letters
and
numbers
..
:
‘To
input
upper-case
letters
To
shift
the
keyboard
...........
To
input
accented
characters
..
To
input
other
symbols
0.2...
27
_To
correct,
delete
or
insert
characters
..
Date
and
time
input
...
PART
3
~
Data
Management
Functions
......
To
enter
a
mode...
About
display
formats
.
Using
the
Telephone
Directory
About
Telephone
Directory
date
iterns
and
data
entries..
Inputting
Telephone
Directory
data.
......
31
To
change
a
FREE
entry
label
.
Where
to
find
other
itiformation
..
"
Using
the
Memo
Mode.....
To
input
Memo
Mode
data...
.
To
insert
a
new
Memo
Mode
data
item
between
two
items
in
memory...
34
Where
to
find
other
information
..
Using
the
Calendar
...
To
display
the
calendar
.
To
scroll
through
calendars
.
About
the
date
cursor...
.
To
specify
a
month
jor
display
in
the
Calendar
To
specify
a
month
and
date
for
display
in
the
Calendar
Made
OF
To
highlight
and
unhighlight
specific
Mates
.........sessestececeetesonees
oF
To
highlight
days
of
the
week
for
multiple
months......
a7
To
unhighlight
all
dates
in
a
specific
month.......
To
unhighlight
all
dates
up
to
a
specific
menth..
Using
the
Schedule
Keeper
........csccsesesscsesersresssnnesesasenratceneseneaseeats
To
enter
the
Schedule
Keeper
....
To
specify
a
date
About
Schedule
Keeper
data
and
initial
displays
To
input
Schedule
Keeper
data
cesses
cece
resetecesseesaseesennenenees
Introduction
SF-4700C/SF-4900C
Contenis
|__|
ooo
oon.
*
Using
Schedule
Alarms
..
.
-
To
set
a
schedule
alarm
when
inputting
‘data
.
"
.
To
set
or
change
a
schedule
alarm
for
an
existing
data
entry
43
To
view
a
data
entry's
current
schedule
alarm
settin
To
delete
a
specific
schedule
alarm
Where
to
find
other
information
..........
Using
the
Reminder
Mode......,
‘About
Rerninder
Mode
data...
Inputting
reminder
data
...
About
Reminder.
Alarms...
To
set
a
Reminder
Alarm
when
inputting
data
To
switch
Reminder
Alarms
on
and
off..
Where
to
find
other
information
Recalling
data
Stored
in
MEMOSy
jcc
reernieseneteeees
oe
—
To
locate
data
using
index
search
..................
‘To
locate
data
using
initial
character
search
..To
locate
data
using
mode
search
.
Editing,
Deleting
and
Copying
data
To
edit
a
data
item
..
To
delete
a
single
data
item
.
To
delete
all
data
items
in'a
mode
:
.
“To
delete
multiple
data
items
in
the
Schedule
Keeper
Mode
To
move
a
Schedule
Keeper
data
to
a
different.date
...:.
To
copy
a
data
item
Using
the
Secret
function
«1.0055
To
create
a
secret
memory
area
.
To
enter
an
existing
secret
memory
area
-
To
adit
an
existing
password
;
To
transfer
data
from
the
open
memory
area
to
the
secret
.
MOMOTY
AF@a
oe
eee
seaecngapereeeeteseneecequensecesensenennpeseesanane
pesneeeeenens
56
To
transfer
data
from
the
secret
memory
area
to
the
open
memory
area
.
10
PART
4—-
-
Timekeeping
FUNCTIONS
onrssereseeeoee
stanereseneapenrnescnnsnesees
OE
Using
the
Home
Time
function
....
About
Home
Time
displays...
To
display
the
Home
Time...
To
set
the
Home
Time
zone
-
To.set
the
Home
Time
..
To
switch
the
Home
Time
between
12-hour
and
24-hour
format
.
To
switch
tha
Home
Time
between
standard
and
daylight
st
saving
time
...
60
To
edit
a
city
cade
name
.
sesenesaedosee
en
oeseaesasnenseaneaesnnrenseses
weet!
BO
To
set
the
Daily
Alarm
..
,
: :
About
the
daily
alarm...
To
select
the
date
format
..
Using
the
World
Time
function
To
display
the
World
Time
..
To
set
the
World
Time
zone"
To
switch
a
World
Time
zone
between
standard
and
daylight:
saving
lime
To
edit
a
city
code
name
....,
.
City
Code
List
«00
ceeneuecaneeseaseessedieseeceorsenesavausaueusaetensensnecnencedinanes
PART
5
—
Calculator
Functions
seseaessesnzeusessaceesstenstengeteveese
5
Using
the
Calculator
..ssscssees
To
enter
the
Calculator
Mcde
..
About
the
Calculator
Mode
keys.
To
perform
calculations
...........0.
.
67
To
perform
constant
calculations
.....
To
correct
errors
in
calculations
About
calculation
errors...
...........-.,
wens
TO
CIGAT
QITOTS
....
eee
pete
eeeeasece
see
deeenednanenenaeageg
ey
canteen
teetensane
69
Performing
date
calculations
.........0
To
calculate
the
number
of
days
between
two
dates
...
Te
calculate
the
date
that
is
a
specific
number
of
days
after
ANOTH!L
Mate
oo.
ete
e
eee
seeceenee
senses
ee
eenAUAAUEPENED
rn
eten
ce
eneeneeeenmnmee
nneass
70
11

Introduction
SF-4700C/SF-49000
;
PART
1
Getting
Started
a
PART
6
—
Data
COMMUNICATIONS
—
lies
ene
neeneeee
71
‘About
data
compatibility
......c.cccccsscsscssssesssrseseescosenee
Vesaeeneseeees
desilanens
FA
Setting
Up
for
Data
Communications
..........cisesescecnedenseeenatecetietbeenseaes
72
Read
this
first!
To
connect
the
SF-4700C/SF-4900C
to
another
SE
Unit
;
You
must
be
familiar
with
the
following
information
in
order
to
use
the
SF
Unit
(Of
OSE
UMilNX
Unit)
oo
eccccecccescsseecsssedbessccssscansanpeesnecenrseeeseveserctentene
72
correctly.
It
tells
you
what
to.
do
in
order
to
avoid
losing
important
data
stored
Performing
data
communications
botwoon.
an
SF
Unit
and
—
«
in
memory.
Please
be
sure
to
read
the
following
before
using
the
SF
Unit!
a
personal
computer
To
set
the
SF
Unit
hardware
parameters
About
communications
parameters..
To
set
up
the
SF
Unit
to
receive
data
.....
4
Make
back
up
copies
of
important
data!
-
74
Your
SF
Unit
employs
electronic
memory,
which
makes
it
possible
to,
store
.
large
volumes
ot
data
and
to
recall
stored
data
quickly
and
easily.
Data
is
Sending
Data
retained
as
long
as.power
is
supplied
by
the
batteries.
This
means
that
should
‘About
data
transfer
types...
1
76
batteries
go dead,
or
if-you
make
a
mistake
while
feplacing
batteries;
the
data
To
send
all
data
items...
ee
ee
eee
re
tereeeeee
eens
77
stored
in
memory.may
be
damaged
or
lost
entirely.
Data
contents
can
also
be
To
send
one
Telephone
Directory,
Memo
Mode
or
damaged
or
lost
due
to
strong
¢
electrostatic
charge,
strong
impact,
or
extremes
Reminder
Made
item...
cee
in
temperature
and!
humidity.
°
To
send
one
Schedule
Keeper
entry
.
.
‘
To
send
one
month
of
Calendar
data
(highlights)
..
we
All
of
this
means
that
you
should
make
back
up
copies
of
important
data
ina
To
send
all
Telephone
Directory,
Memo
Mode
or
:
notebook
in
case
any
¢
of
the
above
conditions
occur.
Reminder
Mode
data
...........-::ccecccecesee
reece
see
ea
see
sasuneeenateeeeneeeeaeeeea
To
send
all
Schedule
Keeper
data
in
a
specific.
period
.
About
the.
“ARE
YOU.
USING...
and
“CLEAR
|
:
To
send
alt
Calendar
data
ina
specitic
period
.:
we
i
-
.
MEMORY.....”
messages...
PART
7
—
Technical
Reference
0...
ssc
sessesceneenseneee
eee,
B2
Whenever
you
tum
on
the
power
of
the
SF
Unit,
it
performs
a
self-check
before
. :
a
-
beginning
operation.
Ifa
problem
is
discovered
during
ihe
sell-
check,
the
SF
Unit
i
K@YS
.occccecstcasseeeeeenenanersereeepeeccsseemeessesarcesesoemieesaeeensenaraneaeaneceseneereeseeetos
82
displays
one
of
the
following
messages.
Storage
Capacity
......
Auto
Sort
Sequence
..
Message
Table
..
Specifications
-AVARE
YOU_USTHS
A
He
WNIT
eo
THE
FIRST
:
WEEN
CLEAR
MEM
SET
Fed
FOR
OPER
Note
«
The
above
messages
always
appear
in
Eriglish,
regardless
of
the,
system
language
setting.
12
13

PART
1
Getting
Started
If
this
is
the
first
time
you
ever
turned
on
the
SF
Unit...
Perform
the
RESET
procedure
under
“Before
using
the
unit
for
the
first
time”
on
page
1,
starting
from
step
9.
If
this
[s
not
the
first
time
you
are
using
the
SF
Unit...
‘There
is
probably
a
problem
with
the
data
in
memory
(data
error).,
Note
that
once
data
is
lost
it
cannot
be
recovered.
Such
data
Otrors
are
generally
caused
by
one
of
the
following
problems.
»
Interruption
of
battery
power.
«
Severe
electrostatic
charge,.impact,
change
in
temperature,
or
change
in
humidity.
«
Hardware
problem.
After
a
data
erroris
discovered,
you
will
not
be
able
to.
input
o
or
edit
data.cin
order
to
return
memory
te
normal
(allowing
further
input
and
editing
of
data),
you
must
periorm
the
RESET
operation
to-ciear
the
memory
of
all
data.
Before
doing
so,
you
may
want
to
recall
important
data
and
write
it
down
(if
you
don’t
already
have
a
copy).
You
can
then
re-input
the
data
after
clearing
the
memory.
L
The
RESET
procedure
you
should
use
depends
on
the
type
of
message
error
message
onthe
display.
“ARE
YOU
USING
A
NEW
UNIT
FOR
THE
FIRST
TIME?”
1.
Make
sure
that
NO
is
highlighted
and
then
press
SET.
If
YES
is
highlighted,
press
to
move
the
highlighting
to
NO
and
then
press
SET.
+
The
message
“DATA
ERROR!
CHECK
YOUR
USER’S
GUIDE
FOR
PRO-
CEDURE?
appears
on
the
display
at
this
time.
Aiter
this
message
appears,
you
Gan
press
CLEAR
to-clear
it
from
the
display
and
recail
data
in-order
to
_
hake
a
back-up
record
of
it
before
continuing.
.
2.
Press
the
RESET
button,
which
is
located
inside
the
battery
compartment
cover
on
the
back
of
the
unit.
«
This
causes
the
“CLEAR
MEMORY
AND
SET-UP.
THE
ONIT
FOR
GPERA-
TION?"
message
to
appear
onthe
display.
3.
Press
tomovethe
highlighting
to
YES
and
then
press
SET
to
reset
the
unit.
¢,
Highlighting
NO
and
pressing
SET
clears
the
reset
message
and
displays
the
'
Home
Time
screen.
“CLEAR
MEMORY
AND
SET
UP
THE
UNIT
FOR
OPERATION?”
1.
Make
sure
that
YESi
is
highfighted.
IF
OFF
is
s
highlighted,
press
“4
to
move
the
©
highlighting
to
YES.
*
Highlighting
OFF
and
pressing
SET
tums
off
the
unit
without
resetting
the
unit.
f
.
About
the
Power
Supply
2.
Press
SET
io
reset
the
unit.
If
you
still
have
trouble
after
trying
the
RESET
operation,
you
may
have
a
hardware
problem.
If
so,
consult
with
your
nearest
CASIO
dealer.
General
Precautions
*
Never
try
totake
the
SF
Unitapart.
+
Avoid
strong
impact
and
sudden
temperature
changes.
At
very
low
ternperatures,
the
disptay
response
time
may
slow
down
or-the
display.
may
fail
completely.
This-is
temporary
and
correct
operation
should
return
at
normal
temperature.
*
Toavoid
serious
damage
to
the
SF
Unit
caused
by
leaking
batteries,
replace
batteries
once
every
two
years,
regardless
of
how
much
you
use
the
SF
Unit
.
;
during
that
time.
*
Never
use
thinner,
benzine
orothervolatile
agents
tocleanthe
exterior
of
the
SF
Unit.
Instead,
wipe
it
off
with
a
soft
cloth
dampened
in
a
solution
of
water
and
a
mild,
neutral
detergent.
Wring
the
cloth
out
untii
it
is
almost
dry.
«
lHthe
SF
Unitis
exposed
to
strong
electrostatic
charge,
the
display
may
dim
orthe
SF
Unit
may
tock
up.
To
correct
this
situation,
switch
power
off,
and
then
remove
and
then
replace
the
batteries.”
«
Donot
press
the
keys
with
a
pen,
pencil
or
other
sharp
object.
«
The
SF
Unit
may
cause
interference
with
radio
or
television
reception.
Keep
it
away
from
such
appliances
when
you
are
using
it.
»
Note
that
pressing
SHIFT
and
then
LIGHT
causes
the
backlight
to
light
and
stay
itas
long
as
you
continue
to
cperate
the
SF
Unit,
or
until
you
press
LIGHT
again
to
turn
it
off
manually.
Leaving
the
backlight
on
for
long
periods
greaily
reduces
battery
life!
About
the
Power
Supply
The
SF
Unit
is
powered
by
three
CR2032
lithium
batteries.
Replace
batteries
as
soon
as
possible
after
low
battery
power
is
indicated
by
any
of
the
following.
«
Low
battery
message
appears
on
the
display
*
Blank
display
when
power
is
turned
on
*
Dim
display
figures
even
after
display
contrast
is
adjusted
«
Failure
of
the
backlight
to
turn
on’

PART
1
Getting
Started
Caution
«
All
data
stored
in
memory
is
lost
if
you
remove
more
than
one
battery
at
the
same
time.
«
Be
sure
that
you
keep
a.separate
copy
of
all
important
data
that
‘you
store
in
the
SF
Unit.
Low
Battery
Message
A
message
appears
on
the
display
to
warn
you
when
the
balteties
power
drops
below
a
certain
level,
Should
battery
pawer
drop
too
low,
data
in
memory
may
be
corrupted
or
last.
Whenever
a
low'battery
power
message
appears
on
the
display,
be
sure
to
stop
opération
of
the
SF
Unit
and
replace
batteries
as
scon
as
possibie.
Important!
°
‘
.
Whenever
the
message
“WEAK
BATTERIES!
CONSULT
YOUR
USER'S
GUIDE
IMMEDIATELY?”
appears,
be
sure
to
replace
all
batteries:
*
Battery
Precautions
oe
:
wal
Incorrectly
using
Batteries
can
cause
them
to
burst
of
leak,
possibly
imaging
the
interior
of
the
SF
Unit.
Note
the
follwing
precautions.
+
Ge
sure
that
the
positive
(+)
side
of
each
battery
is
facing
up
(so
you
can
see
it}.
«
Never
mix
batteries
of
differant
types.
°
Never
mix
old
batteries
and
new
ones.
_About
the
Power
Supply
Never
leave
dead
batteries
in
the
battery
compartment.
Remove
the
patteries'if
you
do
not
plan
to.use
the
e
SF
Unit
for
a
long
period.
Replace
batteries
atleast
once
every:wo
years,
no
matter
how,
much
you
use
the
SF
Uni
during
that
period.
-
‘
Never
try
to
recharge
the
batteries
supplied
with
the
SF
Unit.
Do
not
expose
batteries
to
direct
heat,
let
them
become
shorted,
or
try
to
take
them
apart...
Should
a
battery
leak,
clean
out
the
battery
compartment
of
the
SF
Unit
immediately,
taking
care
to
avoid
letting
the
battery
fluid
come
irtto
direct
’
contact
with
your
skin.”
Keep
batteries
out
of
the
reach
of
small
children.
if
swallowed,
consult
with
a
physician
immediately.
To
replace
the
batteries
ets
Before
replacing
the
batteries,
note
the
following’
precaution:
Be
surefo
replace
all
batteries
witha
full
set
of
new
ones,
and
do
not
mix
old
batteries
with
new
ones.
Fress
OFF
to
switch
power
OFF.

PART
1:..
Getting
Started
illustration.
Caution
-
Be
sure
to
remove
only
one
battery
at
a
time.
Otherwise,
you
will
lose
all
data
stored
in
memory.
k
4,
Stide
the
battery
holder
in
the
direction
indicated
by
the.
arrow:
in
the
=
-
Battery
holder
=:
5.
Replace
the
old
battery
with
anew
one,
making
sure
that
the
positive
(+)
side
of
the
new
battery
is
facing
up
(sc
you
can
see
it}.
;
2.
Slide
the
battery
compartment
cover
in
the:direction
indicated
by
the
arrow.
Resetting
the
SF
Unit's
Memory
6.
Slide
the
battery
holder
back
to
its
original
position
as
indicated
bythe
arrow
in
the
illustration,
Battery
holder
7.
Slide
the
battery
switch
to
the
“REPLACE
2,
3”
setting
and
repeat
steps
4
through
6
for
the
other
batteries.
«.
Be
sure
to
replace
all
three
batteries;
using
CR2032
lithium
batteries
only
Never
mix
old
battéries‘with
naw
onés.
-
:
8.
Slide
the
battery
switch
to
the
“NORMAL”
setting.
You
will
not
be
able
to
turn
the
unit’
on
i
the
battery
s
switch:
‘is
hot
in
the
”
"NORMAL"
setting.
.
9.
Replace
'
the
fatteny
compartment
cover.
*
Resetting
the
SF
Unit
sMemory..
coe
Warning}!
The
following
procedure
erases
ail.data
stored
in
the
memory
of
the.SF
Unit,
Parform
the
following
operation
only
when
you
want.
fo:
delete
ail.
data
and
initialize
the
settings
of
the
SF
Unit.
Alemember-
you
should
always
keep
copies
of
important.
data
by
writing
it
down,
by
transferring
it
te
a
personal
computer
or
other
SF
Unit,
i,
CSF
Unit
or
NX
Unit,
To
reset
the
SF
Unit’s
memory
1.
Press
ON
to
switch
power
on.
2.
Open
the
battery
compartment
and
press
the.
RESET
button.
RESET
button

PART
1
Getting
Started
«
At
this
time
the
following
inessage
appears
on
the.display.
:
CLEAR_MEMORY
ANC
SET
UP
THE
WHIT.
FOR
OPERATION?
Wie
HO
3.
Make
sure
that
YES
is
highlighted.
IFNOis
highlighted,
press
“@
te
move
the
highlighting
te
to
YES.
Warning!
tn
The
next
step
deletes
all
data
stored
in
the
SF
Unit
Ss
memory.
that
you
really
want
to
delete
the
date
before
yous
continual
“y
4...
Press.
SET
-to:start
the
RESET
procedure.
Afterthe
RESET
operation
is
complete,
the
LANGUAGE
screen
appears
on
the
display.
5.
Use
the
procedure
under
"To
select
the
system
language”
on
page
Sto
select
a
system
language.
»
After
you
set
the
system
language,.the
Home.
Time
Screén
appears:
*
6.
Check
the
Home
Time
setting
and
make
changes
if
necessary
(page
59).
Following
the
reset
opération
described
above,
the
Home
Time
display
appeats
and
the
SF
Unit
settings
are
initialized
as
hoted
below.
Hothe
Time:
©
LONE
oe
mo
JAN/
4/1998
THU
42:00
AM
12-hour
format
World
Time:
NYG
Daily
Alarm:
12:00-PM...
-
vee
Sound:
”
‘Schedule
alarm
—
ON
Reminder‘alarm:—
ON...
-
Daily
alarm
—
OFF
Key
—
ON
Messages:
English
Character
input:
CAPS
.
Operation
Reference
General
Guide
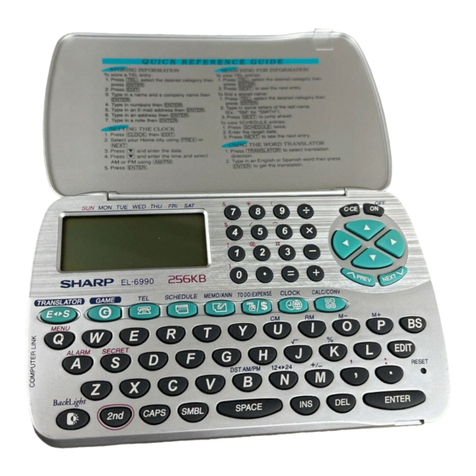
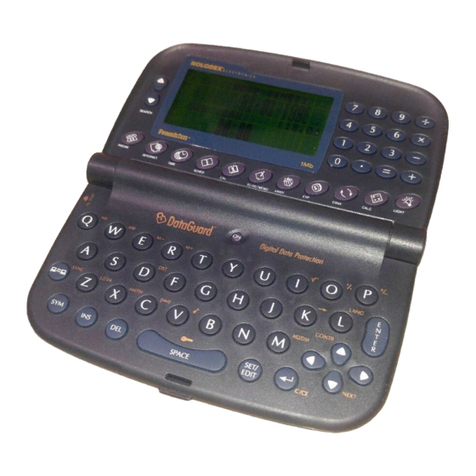
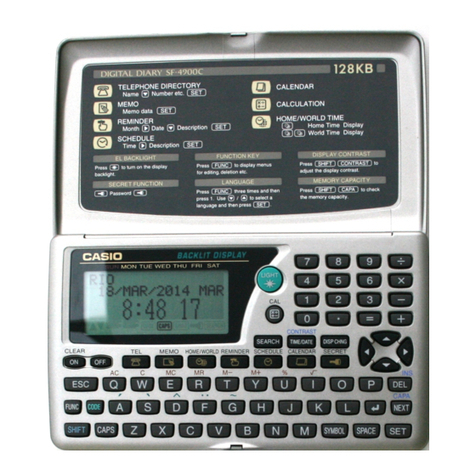
The
following
illustration
shows
the
names
of
the
main
contrels
of
the
SF-4700C/
F-49006.
Light
key
|
Numeric
Keys
=
"Cursor
Keys
:
~"
Keyboard
Power
ON/
7
.
Clear
key.
Connector
‘Mode
Keys
Taminal
Setting
Up
the
SF.Unit..
After
batteries
are
loaded,
use
the
flowing
procedures
to
set
up
the
SF
Unit
for
operation.
:
a
To
switch
power
on
and
off
1,
Press
ON
to
switch
power
on.
.
woe
*
.
The
initial
screen
for.
the
made
that
was
selected
when
you
last
switched
‘power
off
appears’
on
thé
display.
.

22
PART
2
Operation
Reference
,
«
=
Ifeither
ofthe
messages
(A
or
B)
shown
on
page
13
appears
on
the
display,
-
follow
the
procedures
described
on
page
14.
«
[fa
low
battery
power
message
appears
on
the
dispiay
or
if
the
display
remains
blank
when
you
tum
power
on,
replace
batteries
as
soon
as
possible.
2.
Press
OFF
to
switch
power
off.
About
the
Auto
Power
Off
function...
The
SF
Unitis
equipped
with
an
Auto
Power
Off
function
that
switches
power
off
automatically
whenever
you
do
not
perform
any
key
opération
for
about
six
minutes.
To
restore
power,
press
ON.
To
turn
on
the
EL:
backlight
There
are
two
ways
to
turn
on
the
backlight
of
the
display.
Pressing
LIGHT
causes
the
backlight
to
tun
on
fer
about
15
seconds,
and
then
turn
off
automatically.
.
Pressing
SHIFT
and
then
LIGHT
also
tumso
on
ithe
Backlight,
but
in
this
case
the
backlight
stays
on
as
long
as
you
keep
performing
key.operations
onthe
SF.
Unit.
The
backlight:
turns
off
‘automatically.
if
you
do.
not
perform
any
key
operation
for
about
15
seconds,
Leaving
the
backlight
on
for
lang
periods
greatly
reduces:
battery
life!
You
can
manuaily
turn
the
backlight
off
by
pressing
LIGHT
again.
Failure
of
the
backlight
to
turn
an
indicates
low
battery
power.
Replace
batteries
as
soon
as
possible.’
me
To
adjust
the
display
contrast’
-
-
be
1.
Enter
the
Telephone
Directory
Mode.
on
»
You
could
enter
any
mode
except
the
Calculator
Mode
here,
2.
Press
SHIFT
CONTRAST.
3.
Use
the
and
>
keys
to
adjust
the
contrast.
-
woRERCONTRAST
Hee
|
aCLIGHTERS
CDARKER?
|.
=
4.
After
you
aré
finished;
press
ESC
to
Clear
the
contrast
adjustment
display.
Setting
Up
the
SF
Unit
wR
To
select
a
mode
:
Press
one
of.
the
mode
keys
to
select
the
mode
you
want.
(FR)
TEL
Telephone
Directory
Mode
jor
storage
of
telephone
1
num-
bers,
names,
addresses,
and
six
user-definable
entries.
MEMO
Memo
Mode
for,
storage
of
unformatted
data
in
a
kind
of
electronic
notebook.
-.
HOMEWORLD
Home
TimeAVorld
Time
Modes
for
display
of
the
current
time
in
your
hometown
and
other
locations
around
the
globe.
For
example,
you
can
set
New
York
as
your
home
time
and
London
as:ihe
world
time,
Reminder
Mode
to
create
reminders
‘and
alarms
for.
an,
nual,
monthly,
-and
daily
events.
Schedule
Keeper
Mode
for
storage.
of
appointments
scheduled
for
specific
dates
and
times,
and
setting
of
Schedule
Alarms
to
remind
you
of
your
appointments.
Displays
any
monthly
calendar
from
dainuaty
4
a0
through
December
2099,
:
Calculator
Mode
for
basic
calculations
with
the
touch
ofa
key.
.
-
a
AEMINDER
(@)
SCHEDULE
-.
(Gi)
CALENDAR
@
CAL
To
check
the
memory.
status
Press
SHIFT
and
then
hold:
‘down,
CAPA
to
display
a
screen
that
shows
the
current
memary
status.
To
clear
the
memory
status
display,
release
CAPA.
You
can
enter:any
mode
except
the
Calculator
Mode
and
Home/World
Time
Made
here.
feeKCAPAC
DT
tet
ELOY
Remaining
memory
capacily
:
Total
number
of
characters
stored
in
memory
Note
a
The
screen
example
shown
here
is
the
SF
4g00c.
The
capacity
values
(FREE
and
USED
total)
is
different
on
the
SF-4700C
display.
23

PART
2.
Operation
Reference
To
use
the
FUNCTION
key
Press
the
FUNC
key
to
display
a
function
menu
that
makes
it
t
possible
to
perform
functions
that
are
not
marked
on
the
unit’
Ss
keys.
“
“To
SECRET
AREF
~
oe,
‘ALL
_DELET.
LABEL
EDIT
DATA
COMP,
Just
like
inthe
above
example
display,
all
of
the
functions
included
in
a
function
menu
have
a
number
at
the
beginning.
Press
the
number,
key
that
sorresponds
to
the
function
you
wart
to
perform,
Whenever
a
function
manu
item's
leading
humber
is
replaced
by
“Eg”,
it
means
you
can't
select
that
menu
item
in
the
operation
you
are:performing..:
About
the.
SOUND.
Bien
‘
The
sound
menu
lets
you
switch
the
key
input
tone
and
the
various
alarms
of
the
SF
Unit
on
and:
off.
elle
oe!
. :
The
Gn/off
status
of
each
SOUND
menu
item
is:indicated
by
a
dot
(@)}.as
8
shown
above,
Z
;
ep
ses
pe
|
To
switch
the
key
input.
and
alarm
tones.
on
1
and
off
Press
FUNC
once
to
display
the
first
function
menu.
Press
4
to
select
the
SOUND
menu
item.
Use
the
.&
and
W
keys
to
move
the
dot
to
the’
ita
you
want
to
change.
Use
<4
and
>
to
switch
the
key
input
tone
or
an
alarm
tone
on
and
off.
Repeat
steps
3
and
4
to
change
other
items
if
you
want.
Press
SET
to.store
your
setting
and
clear
the
SOUND
menu.
:..>
-
Oo
bw
--
Setting
Up
the
SF
Unit
About
alarm
types
This
unit
has
three
types
of
alarms:
the
Daily
Alarm,
Schedule
Alarm,
and
Reminder
Alarm.:The
follawing.describes
each
of
these
alarms.
Daily
Alarm
ac
athe
Daily
Alarm
sounds
at
the
same
time,
everyday,.when
the
Home-
.
Time
reaches
the
time
you
have
set
as
the
Pally
Alarm
(page
61).
Reminder.
Alarm
:
The
Reminder
Alarm
sounds
onthe
same
date
eeach
month
or
each
year,
or
atthe
same
time
everyday.
Use
the
Reminder
Mode
to
set
this
type
ofalarm
(page
47).
Schedule
Alarm
eit
The
Schedute
Alarm
sounds
at
the
specified
|
time
ena
specitied
date.
Use
.the
Schedule
Keeper
Mode
to
set
this
type_of
alarm
(page
42).
An
alarm
tone
sounds
for
about
20
seconds
and
analarm
message
appears
on
the
display
whenever
an
alarm
time
is
reached,
even
if
unit
power
is
switched
off.
You
can
stop
the
alarm
by
pressing
any
key.and
then
press
ESC
to
return.to
the
display
that
was
shown
before
the
alarm
began
to
sound.
important
An
alarm
will
not
sound
if
that
type
of
alarm
is-switched
off.on.the
SOUND
_.
menu.
This
is
especially
important
to
remember
when
you
want
to
use
’
Reminderand
Schédule
Alarms,
Fordetaits
on
how
to
switch
alarms
on,
see
‘
“About
the
SOUND
menu...”
on
page
24.
«
Ifthe
Daily
Alarm
set
in
the
Home
Time
Made
and
a
Daily
Reminder
alarm
setin
the
Reminder
Mode
are
set
for
the
same
time,
the
Daily
Reminder
alarm
takes
precedence.
This
means
that
the
Daily
Reminder
message
appears
on
the
display
when
the
alarm’tima
is
reached.
-
*
The
alarm
does
not
sound
if
you
are
performing
a
data:
‘communications
operation
when
the
alarm
time
is
reached.
*
e
The
alarm
may
fail
to
sound
if
battery
power
is
too
low.
Note
Ifthe
message
“SECRET
DATA?”
appears
on
the
display,
it
means
that
an
alarm
time
set
in
the
secret
memory
area
(see
page
54)
was
reached.
~

26
PART:
2:
Operation
Reference
Inputting
Letters;
Numbers
arid
Syrnbols
Inputting
Letters,
Numbers
and
Symbols
The
following
describes
the
basic
input
operations
for-the
SF
Unit.
Note
that
you
can
use
the
folléwing
operations.
to‘Input
data
only
in
the
Telephone
Directory,
the
Memo
Mode,
the
Schedule
Keeper
and
the
Reminder.
Inallofthé
following
operations,
the
input
or
correction
is
performed
atthe
current
cursor
location.
To
move
the
cursor
around
the
display,
use
the
z,
W,
“,
and
»
cursor
keys,
Press
SHIFT
and
then
@
io
make
the
cursor
jump
to
the
first
character
of
an
entry,
or
SHIFT
>
to
jump
to
the
end
of
an
h
entry.
:
Note
:
se
.
*
Every
character
and
symbol
you
input
is
counted
as
an
input
character.
Next
(4)
and
new-line
(41)
symbols
are
also
counted
as
input
characters.
The
maximum
number
of
input
characters
that
can
be
stored
for
each
data
item
is
384.
When
the
number
of
characters
you
are
inputtirig
into
the
current
data
item
exceeds
374,
the
cursor
changes
shape
from
“_"
to.“W’.
This
indicates
that
you
can
input
only
10
more
characters
for
the
current
data
item.
Ta:
input
letters
and
numbers
.
.
Press
the
key
that
is
marked
with
the
letter
or
Aumber
that
you
want
to
Input.
To
input
upper-case
letters
Press
CAPS
to
switch
the
keyboard
between
t
upper-case
and
lower-case
letters.
The
indicator
“CAPS"
on
the
display
s
shows
that
the
keyboard
is,
shiftlocked
for
upper-case-letters.
_
.
.
The
upier-caseflower-case
setting
you
make
with
CAPS
remains
in
effect
until
you
change
it,
even
when
you.switch
the
SF
Unit
off.
/
*
A
shift-lock
operation
using.
CAPS
affects.
the
letter
keys
only.
It
does
not
shift
the
number
kéys
for
punctuation
symbol
input.
; ,
To
shift
the
keyboard
Press-
SHIFT.
to
temporarily
shift
the
keyboard
between
upper-case
and
lower-case
letters:
The
indicator
“SHIFT”
on
the
display
shows
that
the
keyboard
is
shifted.
«
If
the
keyboard
is
shift-locked
for
upper-case
input;
pressing
SHIFT
shifts
to
lower-case.
If.
the
keyboard
is
set
for.lower-case
letters
(by.
the
CAPS
key},
pressing
SHIFT
changes
to
upper-case,
+
With
SHIFT,
the
keyboard
remains
shifted
for
input
of
one
character
oniy.
As
soon
as
you
input
one
character,
thé
keyboard
switches
back
to
the
status
se?
by
CAPS.
rene
To
input
accented
characters
Press
the
CODE
key
and
confirm
that
the
“CODE”
indicator
is
on
the
display.
Next,
input
the
character.
The
following
character
accents
are
available.’
«
Umiaut
(A,
E71,
6,
0,
4,
6,
7,
6,
a)
*
Acute
Accent
(A,
E,
1,
0,
U,
4,
&
i,
6,
0)
..
.
‘Grave
Accent
(A,
E,
1,
0;
U;
a,
@,7,
6;
u)..
«)
Circumflex
(Ay
E:T,
O,
U,a,
4,
7,
6,0
+
Tide
(A,
0,
fi,
a,
6,
A)
...
CODE.
...
CODE
..
CODE
CODE
-
..
CODE
Ouarn
To
input
other
symbols
1.
Press
SYMBOL
to
display
a
menu
of
numbered
symbols,
*
There
are
a
total
of
8
symbol
menu
screens.
§
!
"
#
$
%
&
°
( j
mo
UF
:
;
<
>
?
@[—
\
]
A
¢
(i
yo
-~
jf
€
WN
AG
A
@©8
7¢
jf
&
¢
4
@
£€
¥
@
7
8
x
=
+
9
2
8
nh
w®
%
Ff
|
Frew
vw
«
Toclear
the
symbol
menu
from
the
display
without
inputting
a
symbol,
press
ESC.
2.
Use
#
and
¥
io
scroll
through
the
symbol
menu
screens
until
the
one
that
contains
the
symbol
you
want
appears
on
the
display.
3.
Press
the
number
key
(1
thru
8)
that
matches
the
number
to
the
left
of
the
symbol
you
want
to
input.
The
symbol
is
input
at
the
current
cursor
position
and
ihe
symbol
menu
is
cleared
from
the
display.
pza

28
PART
2
Gperation
Reference
To
correct,
delete
or
insert
characters
Te
correcta
character,
simply
move
the
cursorioihe
location
ofthe
charadtérand
input
the
character
you
want
to’
‘change
to.
To
delete
a
character,
move
the
cursarto
the
character
you
\
‘want,
to
delete
and
press
DEL.
To
insert
a
character,
move
the
cursor
to
the
desired
position,
Press
SHIFT
INS
and
then
type
the
character
you
want.
Date
and
time:
input
The
following
guidelines
apply
t
to
inputting
dates
and
times
in
the
Schedule
Keeper
and
Reminder
Modes.
-
*
Yearscan
be
inputwithinthe
range
of
1901
through
2099.
You
can
enter
20th
century
years
using
only
two
digits
(98
for
1998,
for
example).
21
st
century
years
must
be
entered:in
four
digits.
+
Use
12-hour
format
if
the
Home
Time
is
set
for
12-hour
format
or
24-hour
format
if
the
Home
Time
is
set
for
24-hour
format.
«
You
do
not
have
to
input
the
minutes
if
they
are
“00”.
:
*
lfyouare
using
12-hourtime
format,
press
Ato
specify
AM
orP
40
specify
|
PM.
«
All
illegal
input
(13
for
thé
month,
for
example)
is
ignored_”
Data
Management
Functions.
This
part
of
thé
manual
describes
how
to
input
and
store
data
in
the
Telephone
Directory,
Memo,
Schedule
Keeper
and
Reminder
Modes.
It
also
describes
how
the
Calendar
Mode
can
be
used
in
combination
with
the
Schedule
Keeper
Mode.
To
enter
a
mode
:
Press
the
mode
key
that
corééspands
to
the
mode
that
you
want
to
enter.
When
you
enter
the
Telephone.
Directary,
Memo
Mode
or
Reminder
Mode,
an
initial
screen
appears
on
the
display...
ZEEE
TELEPHONE
ZZE
(ems
DATA
ITEMS
ais
MAME?
About
display
formats
There
are
two
display
formais
used
in
the
Telephone
Directory,
Memo
Mode,
Schedule
Keeper
and
Reminder
Mode:
a
data
display
format
and
an
index
display
format.
The
data
display
shows
all
of
the
data
entries
contained
ina
data
item,
while
an
index
display
abbreviates
each
data
item
into
one
or
two
lines.
The
index
display
makes
it
possible
to
quickly
scroll
through
data
items
to
find
the
one
that
you
want.
You
can
switch
between
the
data
display
and
index
display
formats
at
any
time
by
pressing
DISP
CHNG.
Data
Display
ANDERSON
JACK
4-278-3335
1716
_T.0,
Street
Los
Angeles
CA
ey
29

|
30
PARTS
Data
Management
Functions
-
You
can
scroll
through
a
data
display
line-by-line
using
the
\&
and
¥
cursor
keys.
If
you
press
SHIFT
before
#&
and
W,,
the
display
scrotls
data
item-by-data
item.”
Index
Display
ANDERSON
JACK
__
334-228-8533
666-6666
|.
aoe
|.
You
can
scroll
through
an
index
display
data
item-by-data
item
Using
the
A
and
¥
cursor
keys.
if
you
press:
SHIFT
before
om
and
*,
the
display
scrol!s
one
screen
at
a
time.
[ean
‘Using
the
Telaphone
Directory
Using:
the
Telephone
Directory
~
The
innovative
Telephone
Directory,Mode
of
the
SF
Unit lets
yau
input
names,
telephone
‘iumbers,.and
addresses
for
instant
look.
up
when
you
need
them.
It
everi
gives
you
a
total
of
six
User-definable
items
that
you
can
use
to
fecord
birthdays,
hobbies,
or
any
other
information
you
want,
Each
Telephone
Directory
data
item
can
contain
up
to
384
characters
(including
next
and
newline
symbols).
About
Telephone
Directory
data
items
and
data
entries...
Telephone
Directory
information
is’stored
in
units
called
data
items.
Each
data
item
is
made
up
of
a
number
of
data
entries.
Telephone
Directory
data
items
are
made
up
of
nine
eniries:
Name,
Number,
Address
plus
6
FREE
entries
(FREE
1
~
FREE
6).
These
“FREE”
entries
can
be
used
to
store
any
type
of
data
you
want.
You
can
even
change
the
FREE
labels
fo
create
your
own
named
entries.
.
Inputting
Telephone
Directory
data
Use
the
following
procedure
to
input
Telephone
Directory
data,
Note
»
Telephone
Directory
data
is
automatically
sorted
according
to
name
entries.
See
“Auto
Sort
Sequence”
for
information
on
how
this
unit
sorts
data.
To
input
Telephone
Directory
data
Example:
To
input
the
following
data.
Name:
ERIC
JACKSON
Phone
Number:
123-4567,
9875432.
Address:
570
Casio
Avenue
Seattle
WA
1.
Enter
the
Telephone
Directory
Mode.
At
this
time,
you
coutd
press
CLEAR
to
clear
the
initial
Telephone
Directory.
screen
and
change
to
the
name
input
soreen.
Vee
Prompt
for
name
input
31

“PART.3
.
Data
Management
Functions
a.
3.
en
the
name
entry.
.
‘put
the
e
telephone
number
Input
the
name
with
the
last
name
first,
since
the
data
is
sorted
according
to
Press
NEXT.
You’
‘can
press.
the
.
f
in
place’
of
the
NEXT
Key.
The
“NUMBER?”
prompt
appears
to
ask
you.
to
input
the
telephone
number.
“(JACKSON
ERICA
HUMBER?
JACKSON
ERICA
173-456
987-
sags"
al
.
.
Afterinputtinga
telephone
number,
press
NEXT
to
advance
to
dddress'input.
JACKSON
ERICs«
ji2g~-4o67TeH
1987-54524
ADDRESS
feral
Input
the
address.
ane
wo
The
display
scrolls
automatically
as
you
input
more
data.
oy
7.
After
inputting
an
address,
ptess
NEXT
to.
advance
to
the
FREE
input.
32
SOT-h43aae
orf
Casia
Avenue
|
-
Seattle
WA
FREE
i?
.
Input
any
other
information
you
want.
Gp
Using
the
Telephone
Directory
9.
After
inputting
all
of
the
data
you
want,
press
SET
to
store
it
in
memory.
TAgK
SON
ERIC
ood
3f8
Casica
AvErue,
ey
You
can
press
SET
at
any
pointin
the
above
procedure
to.store
the
data
you
_have
input
up
to
that
point,
To
change
a
FREE
:
entry.
label
eon
*
Press
TEL
and
display
the
initial
screen
of
the
Telephone
Directory
Mode.
Press
FUNC
twice
to
display
ihe
second
function
menu.
Préss
3
to
select
LABEL
EDIF.
To
clear
the
function
menu
without
selecting
anything,
press
ESC.
.
Use
&
and
W
to
move
the
cursor
between
the
FREE
labels.
fo
cancel
the
editing’
operation
without
making:
any
changes,
press
ESC
or
CLEAR.
When
the
cursor
is
located
at
the
text
your
wantio
ctiange,
enter
the
text
you
want.
Labels
can
be
up
to
14
characters
long.
After
making
the
changes
you
want,
press
SET
to‘store
them,
The
labels
you
create
appear
as
prompts
when
you
are
inputting
Telephone
Directory
data.
Where
to
find
other
information
For.’
information’
on
searching
for
and
recalling
-
data
already
stored
in
memory,
seé
“Recalling
data
stored
in
memory”
on
page
48.
For
information
on
editing,
deletirig
and
copying,
data
already.
stored
in
memory,
see
“Editing,
Deleting
and
Copying
data”
on
page
51.
:
)
33

34
PART
3
Data
Management
Functions
©
Using
the
Memo
Mode
The
Memo
Mode
of
the
SF
Unitis
like
a
pad
of
electronic
memo
paper
that
lets”
you
store
information
in
any
format
you
want.
You
can
input
Memo
Mode
data
by
adding
new
memos
to
the
end
of
data
already'in
memory,
or
you
car
insert
new
memo
data
between
two
existing
Memo
Mode
data
items.
Each
Memo
Mode
data
item
can
contain
up
te
384
characters
{including
newline
symbols).
To
input
Memo
Mode
data
©
+,
Enterthe
Memo
Mode.
At
this
time,
you
could
press
GLEAR
to
clear
the
initial
Memo
Mode
screen
and
change
to
the
memo
input
screen.
Prompt
for
memo
input
2.
Input
the
first
line
of
memo
data
you
want
to
store:
Note
that
the
first
line
of
mamo
data
is
treated
as
the
memo’s
name.
Because
of
this,
itis
a
good
idea
to
use
a
short
descriptive
title
as
the
first
line.
3.
Input
the
rest
of
your
data.
,
JBHOPPING
LIST
TOWEL
$4.9
al
“$4,954
$1,240.
Newline
symbol
SOAP
SHAMPOO
4.
After
inputting
all
of
the
data
you
want,
press
sriogee
it
in
memory.
To
insert
a
new
Memo
Mode
data
item
between
two
items
in
memory
1.
Enter
the
Memo
Mode.
2.
Recall
the
data
item.you
want
to
come
after
the
new
data
item
you
are
about
‘to
input;
and
move’
the
name
of
the
data
item
into
the
top
line
of
ihe
display.
(See
“Recalling
data
stored
in
memory’
on
page
48)
.
3.
Input
the
new
data‘item.
Using
the
Memo-Mode
iN
4.
Press
SHIFT
SET
to
store
the
new
data
item.
+
Ifyou
press
SET
without
pressing
SHIFT,
the
new
data
item
i
is
=
atoratically
stored
at
the
end
of
the
data
already
existing
i
in
memory.
©
Where
to
find
other
information
»
For
information
on
searching
for
and
recalling
data
already
stored
in
memory,
see
“Recalling
data
stored
‘in
memory”
on
page
43.
e
For
information
on
-éditing,
deleting
and
copying
data
already
stored
in
memory,
see
“Editing,
Deleting
and
Copying
data”
on
page
51.

x
.
Reo
“PART
3.
Data
Management
Functions
36
Using
the
Calendar
The
calendar
i
is
pre-
programmad
to
display
fullstionih,
calendars
of
any
month
from
January
1901
through
December
2099.
To
display
the
calendar
;
Press
CALENDAR
t6
enter
the
Calendar
Mode.
The
dates
on
each
calendar
are
shown
starting
from
Sunday
(on
the
far
left)
through
Saturday
(on
the
far
right).
The
above
procedure
displays
the
calendar
that
contains
the
date
currently
set
in
the
Home
Time
display.
If
you
press
CALENDAR
while
the
Home
Time
display
is
shown,
the
calendar
appears
with
the
current
date
flashing
within
the
calendar.
When
you
press
CALENDAG
right
after
you
are
in
the
Schedule
Keeper,
the
calandar
that
contains
the
Schedule
Keeper
date
you
were
viewing
appears.
In
this
case,
the
Schedule
Keeper
date
you
were
viewing
appears
flashing
within
the
calendar.
To
scroll
through
calendars
.
Press
CALENDAR
to
display
the
Calendar
Mode.
Use
the
£&
and
W
cursor
keys
to
scroll
sequentially
through
the
calendars.
Holding
down
either
key
scrolls
at
high
speed.
The
above
procedure
works
only
when
the
date
cursor
is
not
flashing
in
the
calendar.
To
clear
the
date
cursor
from
the
calendar,
press
ESC.
About
the
date
cursor...
The
date
cursor
flashes
at
a
date
in
a
calendar
to
indicate
that
the
date
is
selected,
Ifa
calendar
is
already
shawn
on
the
display,
press
the
cursor
key
to
make
the
date
cursor
appear
at
the
first
date
in
the
calendar,
or
the
4
cursor
key
to
make
it
appear
at
the
last
date
in
the
calendar.
Using
the
Calendar
i
a
.
i
«
Youcan
make
the
date
cursor
appear
at
any
specific
date
within
a
displayed
calendar
by
entering
that
date.
For
example,
pressing-1
2
causes
the
12th
to
starl
flashing
in
the
displayed
calendar.
«
Youcan
move
the
date
cursor around
the
‘calendar
using
the
.
A,
Yd.
and
»
cursor
keys.
«
Toclear
the
date
cursor
from
a
calendar,
press
-ESC,
To
specify
a
month
for
display
in
the
Calendar
Mode
1.
While
a
calendar
is
displayed,
press
CLEAR.
2,
Input
the
year
of
the.calendar
you
want
to
display
and
press
TIME/DATE.
3.
Input
the
month
of
the
calendar
you
want
to
display.
4.
Press
CALENDAR.
The
calender
for
the
month
you
specified
is
displayed.
To
specify
a
month
and
date
for
display
in
the
Calendar
Mode
While
a
calendar
is
displayed,
press
CLEAR.
Input
the
year
of
the
calendar
you
want
to
display
and
press
TIME/DATE.
Input
the
month
of
the
calendar
you
want
to
display
and
press
TIME/DATE.
Input
the
date
and
press
TIME/DATE
or
CALENDAR
to
display
the
calendar
for
the
month
you
specified.
The
date
cursor
is
flashing
within
the
calendar
at
the
date
you
specified.
BOS
To
highlight
and
unhighlight
specific
dates
1.
Press
CALENDAR
to
display
the
Calendar
Mode.
2,
Display
the
calendar
that
contains
the
date
you
want
to
highlight.
*
‘You
can
either
seroll
through
calendars
using.
and
‘W,-or
you
can
specify
the
month.
Use
the
date
cursor
to
seleat
the
date
that
you
want
to
highlight.
Press
SET
to
highlight
the
date
currently
selected
by
the
date
cursor.
©
To
unhighlight
the
date,
press
SET
again.
After
you
highlight
the
dates
you
want,
press
ESC
to
clear
the
date
cursor
from
the
calendar.
ge
ae
To
highlight
days
of
the
week
for
multiple
n
months
1.
Press
CALENDAR
io
display
the
Galendar
Made.
Other manuals for SF-4700C
1
This manual suits for next models
1
Table of contents
Other Casio Organizer manuals

Casio
Casio SF-5580 User manual

Casio
Casio SF-A7 User manual

Casio
Casio SF-9700 User manual

Casio
Casio SF-7200SY User manual

Casio
Casio CSF-7950 User manual

Casio
Casio SF-5580 User manual

Casio
Casio SF-4300R User manual

Casio
Casio SF-7900 User manual

Casio
Casio SF-5300B User manual

Casio
Casio SF-5590SY User manual

Casio
Casio PV-S460/PV-S660 User manual

Casio
Casio BN-10 Troubleshooting guide

Casio
Casio SF-9300 User manual

Casio
Casio SF-4900Z User manual

Casio
Casio SF-4300A User manual

Casio
Casio CSF-4450 User manual

Casio
Casio SF-3000 User manual

Casio
Casio My Magic Diary JD-5000 User manual

Casio
Casio SF-4700C User manual

Casio
Casio SF-4990 User manual