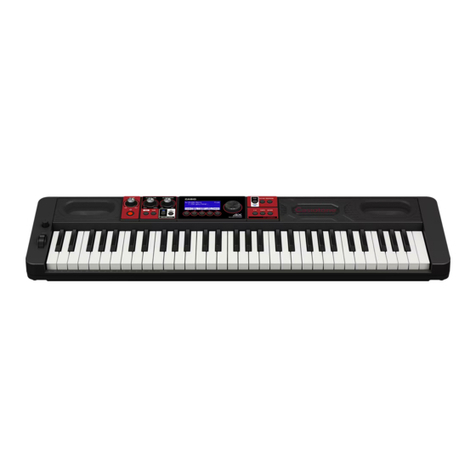
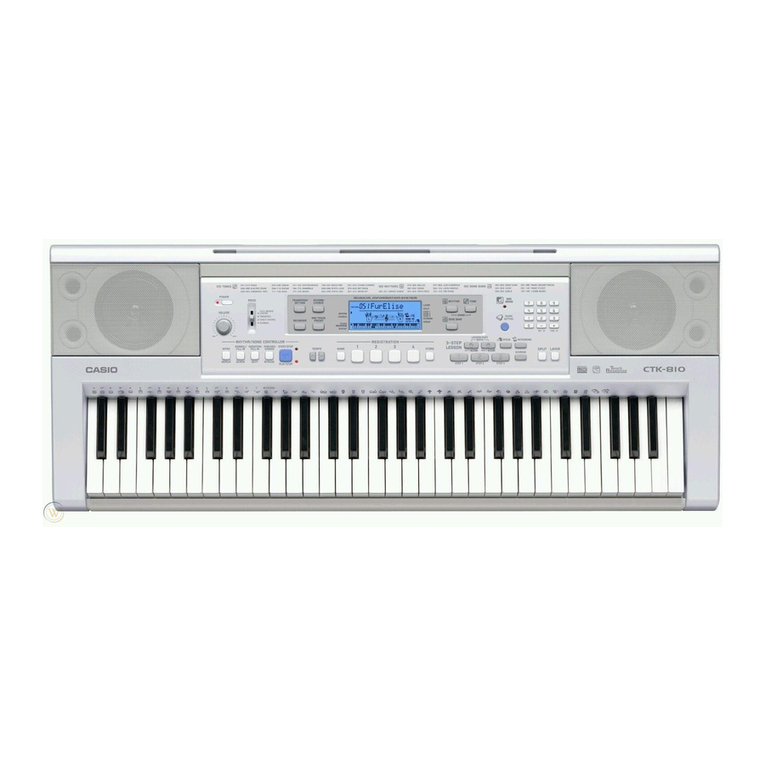
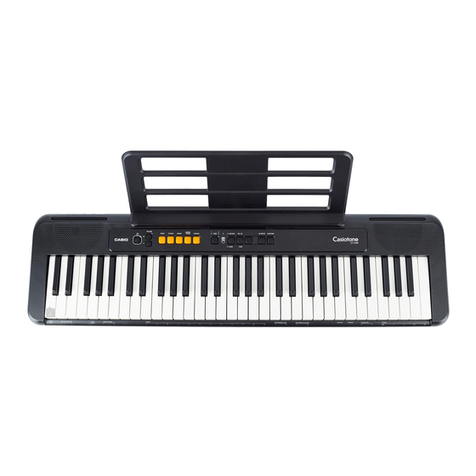
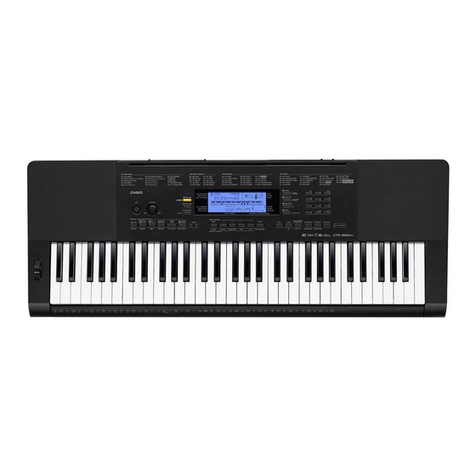
Casio CTK-495 User manual

fa
USER’S
GUIDE
GUIA
DEL
USUARIO
P
ae
CTK495-ES-1

i
Welcome...
To
the
happy
family
of
satisfied
CASIO
electronic
musical
instrument
owners!
To
get
the
most
out
of
the
many
features
and
functions
of
the
keyboard,
be
sure
to
carefully
read
this
manual
and
keep
it
on
hand
for
future
reference.
Important!
When
using
batteries,
be
sure
to
replace
them
or
shift
to
one
of
the
alternate
power
sources
whenever
you
notice
any
of
the
following
symptoms.
*
Dim
power
supply
indicator
*
Instrument
does
not
turn
on
Display
that
is
flickering,
dim,
or
difficult
to
read
Abnormally
low
speaker
/headphone
volume
Distortion
of
sound
output
Occasional
interruption
of
sound
when
playing
at
high
volumes
Sudden
power
failure
when
playing
at
high
volumes
Flickering
or
dimming
of
the
display
when
playing
at
high
volume
Continued
sound
output
even
after
you
release
a
key
A
totally
different
tone
may
sound
Abnormal
rhythm
pattern
and
Song
Bank
play
e
e
e
€
°
@
*
GUIDELINES
LAID
DOWN
BY
FCC
RULES
FOR
USE
OF
THE
UNIT
IN
THE
U.5.4.
trot
applicable
to
other
areas).
NOTICE
This
equipment
bas
been
tested
and
found
to
camply
with
the
limits
for
a
Class
B
digital
device,
pursuant
to
Part
15
of
the
FCC
2
mable
protection
agair
and,
if
not
installed
and
aASiTUCHIONS,
is
no
guar’
ce
wift
nef
ocent
in
a
radio
or
television
reception,
which
can
be
determined
rorrect
the
interference
by
one
or
more
of
the
following
may
canse
harmful
is
particular
installation.
If
thi
mea
*
Reorien
*
Increase
the
separ
@
Connect
the
equ
«
Consult
the
¢
ale
the
re
ion
be:
ment
in
ing
antenna
een
the
equ
ment
3
FCC
WARNING
sor
modifications
not
expressly
approved
by
the
parts
ipment
ponsible
for
compliance
could
void
the
user's
authorit
CASIO
ELECTRONICS
CO.,
LTD.
C
€
Unit
6.
1900
North
Circular
Road
London
NW2
7JD,.
UK.
This
mark
is
valid
in
the
EU
countries
only.
Please
keep
all
information
for
future
reference.
8208-E-003A
E-1

Introduction
Congratuiations
upon
your
selection
of
this
CASIO
musical
instrument.
This
keyboard
provides
you
with
the
following
features
and
functions.
(1100
tones
*
Choose
from
among
orchestral
sounds,
synthesized
sounds,
and
more.
[1100
rhythms
°
100
versatile
rhythms
help
to
add
plenty
of
life
to
all
your
keyboard
performances.
Auto
Accompaniment
°
Simply
play
a
chord
and
the
corresponding
rhythm,
bass
and
chord
parts
play
automatically,
[1
100-tune
Song
Bank
¢
A
wide
selection
of
favorites
including
“ODE
TO
JOY’
and
“JINGLE
BELLS”
is
yours
for
your
listening
enjoyment
or
play
along
fun.
A
simple
operation
cuts
out
the
melody
part
or
accam-
paniment
part
of
the
tune,
allowing
you
to
play
along
on
the
keyboard,
(J
Musical
Information
System
*
Abig
LCD
screen
graphically
shows
you
fingerings,
keyboard
keys
to
be
pressed,.and
notes,
making
keyboard
piay
more
informative
and
enjoyable
than
ever
before.
/
E-2

sem
=
NN
EEE
Various
symbols
are
used
in
this
user’s
guide
and
on
the
product
itself
to
ensure
that
the
product
is
used
safely
and
correctly,
and
to
prevent
injury
to
the
user
and
other
persons
as
well
as
damage
to
property.
Those
symbols
along
with
their
meanings
are
shown
below.
Z\
WARNING
This
indication
stipulates
matters
that
have
the
risk
of
causing
death
or
serious
injury
if
the
product
is
oper-
ated
incorrectly
while
ignoring
this
indication.
Z\
CAUTION
‘This
indication
stipulates
matters
that
have
the
risk
of
causing
injury
as
well
as
matters
for
which
there
is
the
likelihood
of
occurrence
of
physical
damage
only
if
the
product
is
operated
incorrectly
while
ignoring
this
indication,
Symbol
Examp!|es
sssummesssssmsesammsmmmeusss:
rN
This
triangle
symbol
(/°s,)
means
that
the
user
should
be
careful.
(The
example
at
left
indicates
electrical
shock
caution.)
This
circle
with
a
line
through
it
(©)
means
that
the
indicated
action
must
not
be
performed.
Indications
within
or
nearby
this
symbol
are
specifically
prohibited.
(The
example
at
left
indicates
that
disas
sembly
is
prohibited.)
The
black
dot
(
€&
)
means
that
the
indi
cated
action
must
be
performed.
Indica-
tions
within
this
symbol
are
actions
that
are
specifically
instructed
to
be
performed.
(The
example
at
left
indicates
that
the
power
plug
must
be
unplugged
from
the
electrical
socket.)
820A-E-0058
womecmcee
/)\
WARNING
amsnmemessesn
Piease
use
caution
regarding
the
handling
of
the
AC
adaptor.
*
Do
not
use
a
voltage
other
than
the
indi
cated
power
supply
voltage.
Use
of
a
volt
age
other
than
that
indicated
may
cause
fire
or
electrical
shock
If
the
power
cord
should
become
damaged
(exposed
wires,
disconnection,
ete
),
pur-
chase
a
new
AC
adaptor.
Use
of
a
damaged
power
cord
may
cause
fire
or
electrical
shock.
Do
not
cut
or
damage
the
power
cord.
Also
do
not
place
hea
vv
objects
on
top
of
it
or
subject
it
10
excessive
heat.
Damage
to
the
power
cord
may
cause
fire
or
electrical
shock.
Do
not
attempt
to
shape
the
power
cord
or
subject
it
to
excessive
bending,
twisting
or
pulling.
This
may
cause
fire
or
electrical
shock.
Please
use
the
adaptor
specified
for
this
instrument.
Use
of
another
adaptor
may
cause
fire,
electrical
shock,
or
malfunction,
a
Do
not
iocate
the
instrument
or
its
stand
on
an
uneven
or
unstable
surface.
*
Locating
the
instrument
or
its
stand
on an
uneven
or
unstable
surface
can
cause
it
to
fall,
creating
the
danger
of
personal
injury.
Do
not
place
containers
containing
water
or
ihier
lig-
uids
on
the
instrument.
*
Do
not
place
the
following
objects
on
the
instrument.
Placing
such
objects
on
the
in-
AN
strument
may
cause
fire
or
electrical
sfigek
if
they
spill
and
get
inside
the
instrument.
*
Containers
filled
with
water
or
other
liq-
uids
(including
vases,
potted
plants,
cups,
(S)
cosmetics
and
medicines)
*
Small
metal
objects
(including
hairpins,
sewing
needles
and
coins)
*
Flammable
objects
{n
the
event
a
foreign
object
should
happen
to
get
inside
the
instrument,
please
take
the
following
actions:
I.
Turn
power
off
2.
Unplug
the
AC
adaptor
from
the
wall
outlet.
3.df
there
are
any
batteries
loaded
in
the
keyboard,
remove
them
*
Do
not
touch
the
batteries
directly
with
your
hands
when
removing
them.
They
may
be
hot
or
battery
fluid
may
be
leak-
ing
from
them
4.
Consult
with
the
dealer
where
you
pur
chased
the
keyboard
or
with
an
autho-
rized
CASIO
service
provider:
Eo

Do
not
disassemble
or
modify
the
instrument.
*
Never
attempt
of
take
apart
or
modify
the
instrument,
separately
sold
options.
Doing
so
may
cause
fire,
elec-
trical
shock
or
malfanction.
Consult
your
dealer
concerning
all
inspection,
adjustment
or
repair
of
internal
conyponents.
ts
accessories,
0
Do
not
use
if
there
is
an
abnormality
or
maffanction.
*
Do
not
use
the
instrament
if
there
appear
to
be
abnornialities
such
as
the
presence
of
smoke
or
abnormal
odor,
Also
do
not
use
the
instrument
if
there
appear
to
be
mal-
functions
such
as
the
power
not
coming
on
or
sound
not
being
produced.
Use
under
such
conditions
may
cause
fi
electrical
shock,
in
such
cases,
take
the
following
ac-
“ons
immediately.
Never
attempt
to
repair
the
instrument
yourself,
1.
Turn
power
off.
2.
Unplug
the
AC
adaptor
from
the
wall
outlet,
3.1
there
are
any
batteries
loaded
in
the
keyboard,
remove
them.
*
Do
not
touch
the
batteries
directly
with
your
hands
when
removing
them.
They
may
be
hot
or
battery
fluid
may
be
leak
ing
from
them
4,
Consult
with
the
dealer
where
you
pur-
chased
the
keyboard
or
with
an
autho
rized
CASIO
service
provider
When
the
instrument
has
been
dropped:
*
Io
the
case
the
instrament
has
been
dropped
or
damaged,
take
the
following
actions
Continued
use
may
cause
fire
or
electrical
shock.
1.
Turn
power
off.
2.
Unplug
the
AC
adaptor
trom
the
wall
outlet,
3,
Jf
there
are
any
batteries
loaded
in
the
keyboard,
remove
them.
¢
Do
not
touch
the
batteries
directly
with
your
hands
when
removing
them.
They
may
be
hot
or
battery
fluid
may
be
leak-
ing
from
them.
4.
Consult
with
the
dealer
where
you
pur-
chased
the
keyboard
or
with
an
autho-
nized
CASIO
se
ce
provider,
Be
careful
of
the
bags
around
children,
®
Never
allow
anyone
to
place
the
plastic
bags
of
the
instrument,
fis
accessories,
and
its
separately
sold
options
over
their
heads.
Doing
so
may
cause
suffocation.
Particular
caution
is
required
in
homes
with
smail
children.
E-4
An
LTRS
LN
CAUTION
|
seme
AC
Adaptor
*
Do
not
locate
the
power
cord
in
close
prox
unity
to
heaters
or
other
heating
appliances.
This
may
cause
the
cord
to
melt
leading
to
possible
fire
or
electrical
shock
When
unplagging
the
AC
adaptor
from
an
electrical
outlet,
always
make
sure
to
pull
on
the
adaptor
itself
and
not
the
cord.
Pull-
ing
excessively
on
the
cord
may
cause
it
to
be
damaged
or
break
leading
to
possible
fire
or
electrical
shock
Do
not
touch
the
AC
adaptor
with
wet
hands
when
it
is
plagged
in.
This
may
cause
electrical
shock
When
not
using
the
instrument
for
an
ex-
tended
period
such
as
when
traveling,
al-
ways
make
sure
to
unplug
the
AC
adaptor
from
the
electrical
outlet
for
safety
reasons.
After
use
turn
off
the
power
switch
of
the
instrument
and
unplug
the
AC
adaptor
from
the
electrical
outlet
«
»
Batteries
*
lmproper
battery
use
may
cause
batteries
to
rupture
and
leak.
This
may
cause
injury,
malfunction
of
the
instrument
or
discolora-
tion
of
furniture
and
other
articles
that
come
into
contact
with
battery
fluid.
Take
care
to
observe
the
following.
*
Install
batteries
so
their
polarity
(+/~)
matches
that
tadicated
on
the
instrument.
For
safety
and
to
prevent
possible
leak
of
battery
Auid,
awed
hake
Cee
move
batteries
from
the
instrament
when
you
do
not
plan
to
use
it
for
a
long,
time.
Always
make
sure
that
the
battgries
mak~
ing
up
a
set
are
all
of
the
same
ype,
Never
combine
new
batteries
with
old
ones.
Never
dispose
of
batteries
by
incinerat
ing
them.
Never
short
or
disassemble
bat-
teries,
and
do
not
expose
them
to
exces:
sive
heat.
°
°
Replace
dead
batteries
a
*
Ne
soon
as
possible.
or
attempt
to
recharge
batteries.
Transport
*
When
transporting
the
instrument,
always
make
sure
to
unplug
the
AC
adaptor
from
the
electrical
outlet
and
confirm
that
all
other
external
connections
have
been
dis-
connected.
Only
then
should
the
instrument
be
tra
cord
may
be
damaged
leading
to
possible
fire
or
electrical
shock
msported,
If
the
above
is
not
done,
the
aN
0968

Care
«
Whenever
caring,
make
sure
to
first
un-
plug
the
AC
adaptor
from
the
electrical
out-
let.
Also
remove
the
instrument's
batteries
if
battery
power
is
being
used.
Location
*
Never
locate
the
instrament
in
areas
sub-
ject
to
high
humidity
or
heavy
accumula-
tion
of
dust.
Doing
so
may
cause
fire
or
electrical
shock
«
Never
locate
the
instrument
in
areas
sub-
ject
to
grease
splatters
or
steam,
such
as
in
a
en
or
near
a
humidifier,
Doing
so
may
se
fire
or
electrical
shock
Do
not
place
keyboard
on
lacquered
furniture.
*
The
instrument’s
silicone
rubber
feet
may
eventually
blacken
or
scar
Jacquered
sur-
faces.
Use
felt
cloth
pads
to
insulate
the
feet
or
preferably
use
a
CASIO
musical
instru-
ment
stand
designed
for
your
keyboard.
Do
not
place
heavy
objects
on
the
instrument.
°
Do
not
place
heavy
objects
on
the
instru-
ment.
This
may
cause
the
instrument
to
tip
over
or
break
resulting
in
injury.
Volume
¢
Very
high
volume
levels
can
damage
hear-
ing.
Avoid
using
the
instrument
at
very
high
volume
settings
for
long
periods.
Con-
sult
with
a
physician
immediately
if
you
experience
impaired
hearing
or
ringing
in
the
ears,
Liquid
Crystal
Display
(LCD)
Precautions
*
Avoid
subjecting
the
keyboard's
LCD
to
strong
impact,
which
can
erack
or
break
the
CD's
glass
creating
the
danger
of
personal
injury
Should
the
LCD
glass
ever
crack
or
break,
do
not
allow
the
liquid
inside
the
LCD
to
come
into
contact
with
your
skin,
which
can
cause
inflammation
and
reddening.
“Should
the
LCD
liquid
get
into
your
mouth,
immediately
wash
out
your
mouth
with
water
and
then
consult
a
physician.
“Should
the
LCD
liquid
get
in
your
eyes
or
on
your
skin,
immediately
fhish
with
wa-
ter
for
at
least
15
minutes
and
then
consult
a
physician.
Do
not
get
onto
the
instrument
or
stand.*
@
Do
not
craw!
on
top
ot
the
instrument
or
optional
stand.
Particular
caution
is
re-
quired
in
homes
having
small
children.
This
may
cause
the
instrument
or
stand
to
tip
over
and
break
resulting
in
injury.
820A-E-0078,
]
Optionai
Stand*
¢
Carefully
assemble
the
stand
following
the
ssembly
instructions
that
come
with
it.
Se-
curely
tighten
all
bolts,
nuts,
and
fasteners,
and
make
sure
that
you
mount
the
instru-
ment
correctly
onto
the-stand.
Incorrectly
or
insufficiently
tightening
screws,
or
in-
correctly
mounting
the
instrument
onto
the
stand
can
cause
the
stand
to
tip
over
or
the
instrument
to
fall
off
the
stand,
possibly
leading
to
injury
*
The
stand
is
available
as
an
option.
*,
E-5

Avoid
heat,
humidity
or
direct
sunlight.
De
net
overexpase
the
rument
to
direct
st
Hy
hot
hi,
or
place
it
near
Do
not
use
near
a
TV
or
radio.
This
mstrument.can
cause
video
or
audio
interferen
radio
reception.
Hf
this
happens,
move
the
instrument
&
Voor
radio,
Hh
TV
and
from
the
Do
not
use
lacquer,
thinner
or
similar
chemi-
cals
for
cleaning.
Clean
the
keyboard
with
a
soft
cloth
dampened
ina
solution
of
Avoid
use
in
areas
subjected
to
temperature
extremes.
Extreme
heat
«
and
difficult
on
the
LCD
sere
ition
showd
©
to
become
dim
itseli
when
the
aNOTESs
You
may
notice
lines
in
the
finish
of
the
ar
esult
of
the
molding
They
are
not
cracks
or
br
E-6
WEICOME...
...csercceureesssnensensvener
Ed
Introduction
sessuadiivietsdansextrsave
Me.
Safety
Precautions
.....1.0000.
E-3
Care
of
your
keyboard
..........E-6
COMENES
.eeceseeccerssnernereceeneces
EO
General
Guide
....ccccccccsscesenneee
EB
Rear:
PAaNel:cswceditieeamieaaaveoay
Song
Bank
Quick
Reference
......cccccc0.
E-T
To
play
back
a
Song
Bank
tune
............
E-11
COMNMECHIONS
..eesecscccccsseonsensee
EVD
Power
SUPPLY
----reevsenervariiroens
E-14
Using
batteries
ooo
cere
rete
Using
the
AC
Adaptor
AULO
POWEI
OND
soils
slices
smecgiete
adie
Basic
Operations
.......0000.
E16
To
play
the
keyboard
oo
E-16
Selecting
a
Tone
oes
E-16.
|
B2DAE
OBA

}
|
|
:
Auto
Accompaniment
.........
E-18
Selecting
a
Rhythm
Playing
a
Baythm
oo...
eee
E-18
Adjusting
the
Tempo
Using
Auto
Accompaniment
Using
a
Fill-in
Pattern
200.0
E-21
Synchro
Starting
Accompaniment
with
Rhythm
Play
00.0...
E-21
Adjusting
the
Accompaniment
Volume
..E-21
Using
the
Song
Bank.
..........E-22
To
play
back
a
Song
Bank
tune.............E-22
Song
Bank
Mode
Display
...0..00.0.04.
E-23
Adjusting
the
Tempo
of
a
Song
Bank
Tune
oo.
E-23
To
Change
the
Tone
of
a
Song
Bank
Tune'S
MElOdy
oo.
eeecesesseesserecneeeeees
E-24
Playing
Along
with
a
Song
Bank
Tune...
£-24
Applause
Sound
oo...
cee
reeeeeee
E-25
Yo
consecutively
play
back
all
Song
Bank
tunes
oon
teneees
E-25
Using
the
Chord
Book
........E-26
To
Look
Up
a
Chord
Using
the
Chord
Book
oo
eesseeereeetecees
E-26
Keyboard
Settings...............E-29
Transposing
the
Keyboard...
E-29
Tuning
the
Keyboard
620A-E-008A,
Fingered
Chord
Chart
0.0.0.
Percussion
Assignment
List...
Troubleshooting
......000c0.00
EGO
Specifications
css
EDT
APPONIX
oo
eseesessettessernerenees
And
LAS
E-7

#b
increment
decrement
the
displayed
value
procera
.
eroeerereeceeanmtrinieini
7
i
@
SONG
BANK
CONTROLLER
whe
/
STOP
button
a
REW
button
FF
button
{
SONG
i
i
:
wor
mae
wn,
¢
)
2
(
lll
~
y
|
LEFT
ON
/OFF
RIGHT
ON/OFF
buiten
(ACCOMP)
|
button
(MELODY)
PLAY/PAUSE
button
eT
ee
a
ee
TOTS
spn
OdN
MMAR
PSE
SUNNY
IE
i
NILAS
ANSON
LUD
IMIDE
|
m
&

Rear
Panel
)
SUSTAIN
jack
terminal
DC
9V
jack
PHONES
/QUTPUT
jack
{
i
:
j
:
@
Rhythm
list
2B)
MAIN
VOLUME
buttons
iD
TEMPO
buttons
i
ACCOMP?
VOLUME
button
®D
TRANSPOSE
/TUNE
button
@
CHORD
BOOK
button
‘2
Song
bank
fist
(®)
Display
TONE
button
10
RHYTHM
button
WU}
SONG
BANK
button
49
Number
buttens
(Chord
specification
buttons)
"a
Tone
list
iy
SONG
BANK
CONTROLLER
*
Attachment
of
the
Score
Stand
insert
be
(PLAY/PAUSE,
STOP,
REW,
FE,
LEFT
ON
/OFK
RIGHT
ON/OFF)
Speaker
»
Chord
name
W?)
Percussion
instrument
list
48
Power
indicator
@
POWER/MODE
switch
@
SYNCHRO/FILL-IN
button
@)
START/STOP
button
G20A-E-011A,
E-9

TONE
RHYTHM
*
This
is
the
how
the
display
appears
while
the
Song
Bank
is
in
use
An
indicator
appears
next
ta
the
type
of
setting
you
are
currently
performing
(TONE,
RHYTHM,
SONG
BANK).
Yone
number,
chythay
number,
song
number,
keyboard
settings
value
Rhythm,
aute-accompaniment,
Song
Bank
tune
beats
Tone
name,
rhythm
name,
song
name,
mode
name,
keyboard
settings
name
mA
mw
Musical
staf!
representation
of
notes
ane
depressed.
An
octave
indicat
octave
higher
than
that
sho
sords
vou
play
on
the
keyboard.
A
pedal
indicator
p,)
appears
when
the
keyboard's
pedal
is
(REA)
appears
when
you
play
notes
in
the
range
from
C%
to
C7
to
indicate
that
their
actual
notation
is
one),
pon
display
Uses
a
graphic
keyboard
to
show
notes
and
chords
played
on
the
keyboard
or
played
during
Song
Bank
tune
playback
Auto-accompaniment,
Song
Bank,
chord
book
chord
names
Dots
indicate
fingerings
during
Song
Bank
playback.
“L”
and
“R™
indicate
hand
and
right-hand
parts.
g.
snan
on
Rhythm,
auto-accompaniment,
Song
Bank
tune
tempo
~
=
SOEON
GD
Rhythm,
auto-accompaniment,
Song
Bank
tune
tempo;
volume
setting
~
Song
Bank
controller
indicators
<i
aNOTE
§
an
Display
exarmg
shown
in
this
Users
Guide
are
intended
for
illustrative
purposes
only.
The
actual
text
and
values
that
appear
on
the
display
may
differ
fror
the
examples
shown
in
this
User’:
E-10
.

SEs
ere
|
MAIN
VOLUME
SONG
BANK
RIGHT
ON/OFF
POWER/MODE
PLAY/PALISE
A
selection
of
100
Seng
Bank
tunes
come
muilt
in
for
your
listen:
bah
pleasure
or
play
g
simple
operation
cuts
out
the
melody
=
*.
Press
the
PLAY/PAUSE
bufton
to
stant
play
of
the
tune.
part
or
accompanitent
part
of
the
hane,
allowing
you
to
play
aloy
*
The
tune
plays
in
an
endless
loop,
re-starting
after
it
reaches
on
the
keyboard.
See
"Using
the
Song
Bank”
on
page
E-22
for
details
=
the
end
on
playing
along,
with
Song
Bank
tunes
i
the
keyboard
keys
(on
the
graphic
keg
with
the
fingering
indicators),
mursical
and
chord
names.
To
play
back
a
Song
Bank
tune
a
used
'
Set
the
POWER/MODE
switch
ta
NORMAL
TONE
ates
(on
the
sta
HY
THM
5
Vy
i
Use
ihe
MAIN
VOLUME
buttons
to
lower
the
key
”
Oh
hoard
volume
to
a
relatively
low
level,
Jerderedromeemponuanaeeond
Lestarus
TEMPO
A)
fAAIN
VOLUME
|
a
7
Press
the
SONG
BANK
butten
to
enier
the
Si
og
Bank
Keyboard
keys
used
Chord
name
State
Bisplay
Mode,
Appeors
when
SONG
BANK
button
is
pressed
}
B..
Press
the
RIGHT
ON/OFF
button
to
tum
olf
the
right
hand
melody
part
and
try
playing
Yorgion
the
key
{
4
e w
:
i
Pboegat'
Fi
hoard
BMY
se
i
fg
HTH
HE
dpeepsa
fee
:
*
The
displey’s
graphic
keyboard
and
fingering
SONG
BANK
show
you
the
melody
notes
to
TONE
rlicators
Lise
the
Song
Bank
list
to
find
the
tune
you
want
to
play
back,
and
then
use
the
number
buttons
to
input
5
the
tune’s
two-digit
number,
Fone
SONG
BANK
:
m0
BLOA-E-O1SA
£-17

STOP
REW
VUNG
RIGHT
ONAOFF
Press
the
RIGHT
ON/OFF
button
again
to
turn
the
melody
part
back
on.
*
You
can
also
turn
the
accompani
pressing
the
LEFT
ON/OFF
button
ent
part
on
and
off
by
Press
the
STOP
button
to
siop
playback
of
the
Song
Bank
tune.
Press
the
TONE
button
to
exit
the
Song
Bank
Mode
and
return
to
the
tone
and
rhythra
selection
screen.
indicator
turns
off
TORE
|
=e
pas
:
m
FeTeTHA|
Pie
many
|
SONG
BANK
|
uu
PAH
dk
#NOTER
You
can
also
pertorm
the
following
operations
during
play
of
a
Song
Bank
tune
*
Pause:
Press
the
PLAY/PAUSE
button.
+
Fast
Forward:
Press
the
FF
(last
forward)
button
*
Rewind:
Press
the
REW
(rewind)
button:
vtalon
E-12
620N-E-0T

SS
{ereetceansweaeee
Phones/Output
Terminal
Before
connecting
ph
tum
down
the
volume
settings
¢
equipment.
You
can
then
adju
nections
are
complete
i
the
keyboard
and
the
connected
{Rear
Panel]
PHOMESTOUTPUT
Ter
Audio
connection
|
Stereo
standars
plug
Ne,
IN
plug
AUX
IN
oF
of
audio
Connecting
Phones
(Figure
@)
Connecting
phones
cuts
off
output
from
the
kevboard’s
built-in
speak-
ers,
so
you
can
play
even
late
at
aight
without
disturbin
anyane
Audio
Equipment
(Pigure
@)
Connect
the
keyboard
to
a
audio
equipment
using
a
commercially
available
cornecting
cord with
astandard
plug
on
end
and
two
PIN
phags
on
the
other
end.
Nete-that
the
standard
plug
you
connect
to
the
keyboard
must
be
a
stereo
plug,
otherwise
you
will
be
able
to
outpat
only
one
of
stereo
channels.
in
this
configuration,
you
nar-
mally
set
the
input
selector
of
the
audio
equipment
to
the
termine
{astrally
marked
AUX
IN
or
something
similar)
where
the
cord
from
the
keyboard
is
connected.
See
the
aser
documentation
that
comes
with your
audio
equipment
for
full
details.
Musical
Instrument
Amplifier
(Figure
@)
Use
a
commercially
available
connectit
10
a
anusical
instrument
amplitier.
ard
to
connect
the
keyboard
aNOTE®
sure
to
use
a
Connecting
cord
that
ha
stereo
standard
plug
on
the
and
you
connect
to
the
keyboard,
and
a
connector
thal
provides
dual
chan-
nel
(left
and
right)
input
lo
the
amplifier
to
which
you
are
connecting.
The
4
ype
of
connector
at
either
end
can
cause
one
of
the
stereo
chan-
nels
to
be
fost
When
connected
to
a
musical
instrument
amplifies,
set
the
volume
of
the
keyboard
to
a
relatively
low
level
and
make
output
volume
ad-
justments
using
the
amplifier’
S$
controls.
[Connection
Exampte]
PIN
plug
(red)
PIN
yack
To
ke
PHON
terminal
Sterec
Keyboard
guitar
amp
Standard
plug
620A-E016A
#8
or
other
external
equipment,
be
suce
to
first
volume
to
the
desired
level after
con-
tain
pedal
(SP-2
or
SP-10)
to
the
SUS.
he
capabilities
described
below
SUSTAIN
JACK
Terminal
SP-10
Sustain
Pedal
*
With
piano
tones,
depressing
the
pedal
causes
notes
to
Linger
mach
like
2
piano’s
damper
pedal
*
With
organ
tones,
depressing
the
pedal
causes
aotes
to
continue
to
sound
until
the
pedal
is
released
Accessories
and
Options
Lise
¢
Uy
the
accessories
and
options
specified
for
this
keyboard,
Use
#
non-authovized
jtems
creates
the
danger
of
fire,
electrical
shock,
and
personal
inpary.
Shon
a,
a.
@
E-13

This
keyboard
can
be
powered
by
curtent
from
a
standard
house-
Ad
wall
outlet
(using
the
specified
AC
adaptor)
or
by
batteries.
Al-
hc
ys
make
sure
sTaake
sure
you
tum
off
the
key
eared
before
loading
or
re-
placing
batteries
To
load
batteries
Remove
the
battery
compartment
cover.
Load
6
AA-size
batieries
into
the
battery
compartment.
+
Make
sure
that
the
positive
(+)
and
negative
(-)
ends
are
fac
ing
correctly.
4
;
.«
Insert
the
tabs
on
the
battery
compartment
cover
into
the
holes
provided
and
close
the
cover
The
keyboard
may
not
function
correctly
if
you
load
or
repli
teries
with
power
turned
on.
Uf
this
happens,
burning
t
off
and
then
back
on
again
should
return
functions
back
ton
nat
yboard
nal
important
Battery
information
¥@_
The
following
shows
the
approxiniate
battery
life
Manganese
batterie
2
hours
The
above
value
is
standard
battery
life
at
normat
temper.
with
the
keyboard
volume
at
medium
set
tremes
or
playing
at
very
loud
volume
settings
can
shorten
bat
tery
life,
BB
Any
of
the
following
symptom:
place
batteries
as
soon
as
possi
icate
low
battery
power.
Re-
le
whenever
any
of
the
foHow
x
OCCUES.
¢
Dim
powers
supply
indicator
*
Jastrument
does
not
turn
on
*
Display
that
is
tlickering,
dim,
or
difficult
to
cead
*
Abnormally
low
et/headphone
volume
.
ortion
of
sound
output
*
Occasional
interruption
of
sound
when
playing
at
high
vol-
umes
+
Sudden
power
failure
when
playin
+
Flickering
or
dimming
of
the
disp]
volume
*
Cortinued
sound
output
even
after
you
release
a
key
*
4
totally
different
tone
may
sound
\phormal
rhythm
pattern
and
Song Bank
plas
E-14
IMPORTANT!
5
improper
handling
of
batteries
can
cause
them
te
burst
andl
which
creates
the
danger
of
personai
injury
or
damage
due
tog
tact
with
battery
acid.
Be
sure
to
note
the
following
important
pres
tions.
°
Always
make
sure
that
the
p
@
(+)
and
negative
facing
th
indicated
near
the
battery
compartment,
To
avoid
@
caused
by
leaking
batteri
battei
from
ihe
keyboard
whenever
you
leave
it
unatlended
long
periods
(such
as
when
leaving
on
a
trip)
Never
mix
batteries
of
different
tvpas
Never
mix
old
batteries
with
new
ones
Never
discard
batteries
by
incinerating
them,
do
not
allow,
thei
poles
to
be
shorted
(connected
to
each
other),
never
take
batterie
apari,
and
do
not
expose
batteries
to
direct
heat.
a
*
Replace
batte:
ting
weak.
Never
attempt
to
recharge
batteries.
Using
the
AC
Adaptor
a
Make
sure
thal
you
use
only
the
AC
adaptor
specified
for
this
ke
board
Sueetiied
AC
Stator:
AC
qutput
Also
note
the
following
important
warnings
and
precautions
when
using
the
AC
adaptor
x
WARNING!
«
e
:
age
to
or
breakage
of
the
power
cord,
Nav
abjects
on
the
power
cord
or
expose
it
to
direct
heat
Doing
so
creates
the
danger
of
power
cord
damage,
fire,
and
alectiical
shock.
ae
Use
only
the
specified
AC
adaptor.
Use
of
another
type
of
adaptorcre:
ates
the
danger
of
fire
and
electrical
stock.
i
CAUTION!
*
For
safety
be
sure
to
unplug
the
AC
adaptor
from
the
wail
ott
whenever
leaving
the
keyboard
unattended
for
a
long
time
(sue
ing
trip)
*
Always
urn
off
the
keybs
outlet
when
you
ara
not
IMPORTANT!
Make
sure
that
the
keyboard
is
turned
off
before
NNVCtiAg:
disconnecting
the
AC
adaptor
Using
the
AC
adaptor
for
a
Jong
time
can
cause
if
to
become
wal
to
the
touch.
This
is
normal
and
does
not
indicate
malfunction,
BAORE
OT

EES
key
Pi
dutlet
thas
naa
Auto
Power
Off
When
you
are
using
battery
pov
matically
whenever
you
leave
it
on
without
perform
n
for
about
6
minutes,
When
this
happens,
ase
th
switch
to
tarn
power
back
on.
aNOTE
#
Auto
Power
Off
is
disabled
{it
does
not
tur
Xe
tor
to
power
the
keyboard
To
disable
Auto
Power
Off
TONE
button
while
turning
on
the
Auto
Power
Off
vboard
te
dis-
*
When
Auto
Power
Gif
is
disabled,
the
keyboard
does
not
turn
off
automatically
no
matter
how
long
it
is
left
with
ho
operation
b
per
*
All
keyboaed
settings
are
retumed
to
their
initial
defaults
«
hhenev
keyboard
power
1s
tumed
back
on
after
being
turned
off
by
op-
erahion
of
the
POWER/
MODE
switch
or
Auta
Power
Off
1:9
BQDA-E-017A
et,
keyboard
power
turns
off
auto-
iB
any
opera-
you
are
using
the
E-15

MAIN
VOLUME
POWER/MODE
Thi
erations
n
provides
information
on
performing
basic
keyboard
ap
To
play
the
keyboard
Set
the
POWER/MODE
switch
to
NORMAL
ws»
Use
the
MAIN
VOLUME
buttons
to
lower
the
key-
board
volume.
*
it's
always
a
go
tively
low
lee
+
Pressing
{a&]
or
[¥]
causes
the
current
vo
pear
on
the
display.
Press
fa]
or
(¥}
setting.
e
keyboard
volume
ata
rela
otting
te
apy
sain
to
chang
‘3
o>.
Play
something
on
the
keyboard
Selecting
a
Tone
This
keyboard
comes
with
100
built-in
tones.
Use
the
following
pro:
cedure
to
select
the
tang
you
want
to
use
To
select
a
tone
Find
the
tone
you
want
to
use
in
the
keyboard's
tone
list
and
note
its
tone
number.
LA,
Press
the
TONE
button.
Appears
when
TONE
button
is
pressed
4
TONE
j
t
. .
a
a
iter
RHYTHM
pully
concaan,
WAST
oad
2.
Use
the
number
buttons
to
input
the
two
digit
tone
number
for
the
tone
you
wani
to
select.
a
S”.
input
2
and
then
6.
Example:
To
sel
TONE
fa
ten,
[ae
ES
san
eae
ne
~
Col
tithe
oe
SONS
BANK
Oe
Ge
ERE
TOR)
sash
aatE
oer
*
Now
notes
played
on
the
keyboard
will
be
played
using
an
acoustical
wood
bass
sound.
E-16
Nurnber
buttons
7
NOTES
#
a
*
Always
input
both
digits
for
the
tone
number,
including
a
leading
zere
any).
Hf
you
input
one
digit
and
stop,
the
display
will
automatically
ol
your
input
after
a
few
seconds.
.
a
nt
the
displayed
tone
number
by
pre
Sound
effect
tone
keyboard
key
depre
Combination
tones
The
following
describes
the
two
types
of
combination
tones
oat
available
Layered
Tones
(Tone
Numbers:
80
through
89)
80
STR
PIANO
.
This
fone
layers
a
strings
tone
with
a
piano
tone
go
they
both
sont
when
a
keyboard
key
is
pressed
:
Exam,
Split
Tones
(Tone
Numbers:
90
through
96)
00
BASS
/TIANQ
This
tone
splits
the
keyboard
so
one
cange
is
assigrnd
@
bass
tone
F
ee
ag
and
another
range
is
assigned
a
pian
tone.
&*
Exany
BASS
PIANO
HA
Percussion
sounds
sounds
to
the
kewhoard,
S¢
£
He
9
PERCUSSION
3
for
full
details.
This
tone
a:
Percussion
/
i
ns
various
percu
Sound
Effect
Tones
With
sound
effect
tones
77
depends
on
the
octav
PHONE
is
selected
avai
TONE
2,
RING
T,
RING
is
docated.
Wher
PUSH
TONE
1,
PUI

Polyphony
The
term
polyphony
refers
to
the
maximum
number
of
notes
play
at
the
same
time.
The
keyboard
has
12-note
polyphony,
which
includes
the
notes
you
play
as
well
as
the
rhythms
and
auto-accom-
panument
patterns
that
are
played
by
the
keyboard.
This
means
that
when
a
rhythm
or
auto-accompaniment
pattem
is
being
played
b:
the
keyboard,
the
number
of
notes
(polyphony)
available
te
board
play
is
reduced.
Also
note
that
some
of
the
tones
offer
only
6-
nate
polyphony
*
When
rhythm
or
auto
ace
ompaniment
is
playing,
the
aumber
of
sounds
simultaneously
played
is
reduced,
Digital
Sampling
ther
of
the
tones
that
are
available
with
this
keyboard
have
A
nun
been
recorded
and
processed
using
a
technique
called
digital
sam-
©
2
pling.
To
ensure
a
high
level
of
tonal
quality,
samples
are
taken
inthe
7
ant
low,
mid,
art
high
ranges
and
then
combined
to
provide
you
with
{
sounds
that
are
amazingly
close
to
the
originals.
You
may
notice
very
light
differences
in
volume
or
sound
quality
for
some
tones
when
you
play
them
at
different
positions
on
the
keyboard.
This
is
an
un-
pero
(if
Volear
avoidable
result
of
multiple
sampling,
and
it
is
not
a
sign
of
malfunc
a
i
tion
Gang
feop
a
7
5
a
i
:
[og
7
ye
tare
Gi
a
‘
1
2
q
>
:
oy
5
und
a
;
i
i
fone
GE
|
al
N
:
a
;
_
c
$0
78
i
|
“oan
B20A-E-019A,

POWER/MODE
TEMPO
RHYTHM
Number
butions
Playing
a
Rhythm
Use
the
following
procedure
ty
start
and
stop
rhythm
play.
rd
p
hat
are
automatically
thm
you
are
using.
All
of
this
means
that
vou
get
full,
realis
accompaniments
for
the
melody
notes
you
play
with
your
right
haad,
creating
the
mood
of
an
one-person
ensemble
To
play
a
rhythm
Set
the
POWER/MODE
switch
to
NORMAL.
Selecting
a
Rhythm
i
a
This
keyboa
ides
you
with
J00
exciting
rhythas
that
you
can
N
‘
i
the
START/STOP
button
to
star
play
or
the
ey
AI
select
using
the
following
procedure
:
renily
selected
rhythni.
7
j
rete
oo
+
To
stop
rhythm
play,
press
the
START/STOP
but!
‘
To
select
a
rhythm
H
again.
F.
Find
the
rhyit
>
use
in
the
keyboards
|
{MOTE
frp
EI
RG
ANe
yim
you
want
fo
use
in
the
keyboard’s
—¢
aiot
the
keyboard
keys
are
melody
keys
while
the
POWER/MODE.
aii
rhythm
list
and
note
its
rhythm
number
is
set
to
NORMAL
Za
Press
the
RHYTHM
bution
Appears
when
RHYTHM
button
is
pressed
ab
“3
Use
the
number
buttons
to
inpui
the
two
number
for
the
rhythm
you
want
to
selec
Exunple:
To
select
“64
WALTZ”.
input
6
and
then
4
*
MAIN
VOUUME
ENOTES
#
+
*00
CLUS
POP"
is
the
inibai
detautt
rhythm
setting
whenever
you
tun
on
keyboard
pa
+
You
can
also
increment
the
displayed
rhythm
number
by
pressing
[+]
and
decrement
it
by
pressing
[-}.
E-18
ROA
-B-

ikon
Adjusting
the
Tempo
You
can
adjust
the
tempe
of
chythm
play
within
a
range
of
20
to
beats
per
minute.
The
tempo
setting
is
applied
to
Auto
Accompan'
ment
chord
play,
and
song
bank
operations.
To
adjust
the
tempo
Use
the
TEMPO
buttons
(&
,
%)
to
adjusi
the
tempo.
A
increments
displayed
value
(increases
tempo)
¥
:
Decrements
displayed
value
(decreases
tempo)
Example:
Hold
down
the
¥
button
until
the
tempe
value
110
is
on
the
display.
MAIN
VOLUM
ANOTE#
Pressing
both
TEMPO
buttans
(&
and
'¥)
at
the
sarne
tin
tempo
to
the
default
value
of
the.currently
selected
rhythm.
About
the
Graphic
Metronome
‘The
graphic
metronome
appears
on
the
display
along
with
the
tem-
po
value
and
beat
of
a
rhythm
oy
built-in
tune.
The
graphic
metro-
nome
helps
you
keep
in
time
as
you
play
along
with
a
chythm
or
built-in
tune
Beat
ATUS
|
cae
repo
|
{
ad
:
P
MAIN
VOLUME;
Tempo
value
Graphic
metronome
620A-E-021A
Using
Auto
Accompaniment
The
following
procedure
describes
how
to
use
the
keyboard's
Auto
Accompaniment
feature.
Before
starting,
you
should
first
select
the
rhythm
you
wart
to
use
and
set
the
tempo
of
the
rhythm
to
the
value
you
want
To
use
Auto
Accompaniment
Set
the
POWER/MODE
switch
to
CASIO CHORD
or
FINGERED.
<<»
Press
the
START/STOP
button
to
start
play
of
the
cur-
rently
selected
rhythm.
Play
a
chord
*
The
actual
procedure
you
should
use
to
play
a
chord
depencs
on
the
curcent
POWER
/
MODE
switch
position.
Refer
to
the
following
pages
for
details
on
chord
play
CASIO
CHORD.
F
Page
E-20
INGERED
wo.
ccsctnsennenntnnnne
Page
E-20
Chord
name
TONE
RY
THI
|
SONG
BANK
“STATUS
|
sn
Pathe
\
MAIN
VOLUME
|
Basic
fingering
of
current
chord
(May
be
different
from
chord
actuatly
being
played
on
the
keyboard.)
oh
To
stop
Auto
Accompaniment
play,
press
the
START/
STOP
button
again
“oe
Other manuals for CTK-495
2
Table of contents
Other Casio Synthesizer manuals

Casio
Casio CTK-601 User manual

Casio
Casio WK-6000 User manual

Casio
Casio CTK-4000 User manual

Casio
Casio Casiotone CT-S1 User manual

Casio
Casio LK-70s User manual

Casio
Casio Cosmo CZ-1 User manual

Casio
Casio ToneBank CT-420 User manual

Casio
Casio LK-130ES User manual

Casio
Casio CASIOTONE CT-380 User manual

Casio
Casio CTK-551 User manual

Casio
Casio Privia PX-500L User manual

Casio
Casio Casiotone CT-S1 User manual

Casio
Casio Privia PX-300 User manual
Casio
Casio PL-40R User manual

Casio
Casio Casiotone CT-S100 User manual
Casio
Casio Cosmo CZ-230S User manual

Casio
Casio CTK-530 User manual
Casio
Casio CT-S300 User manual

Casio
Casio CTK-531 User manual

Casio
Casio CZ Series User manual