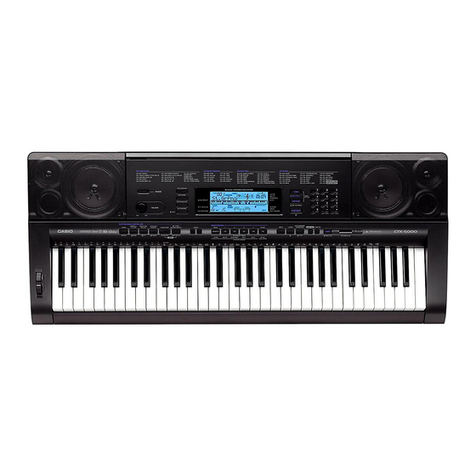
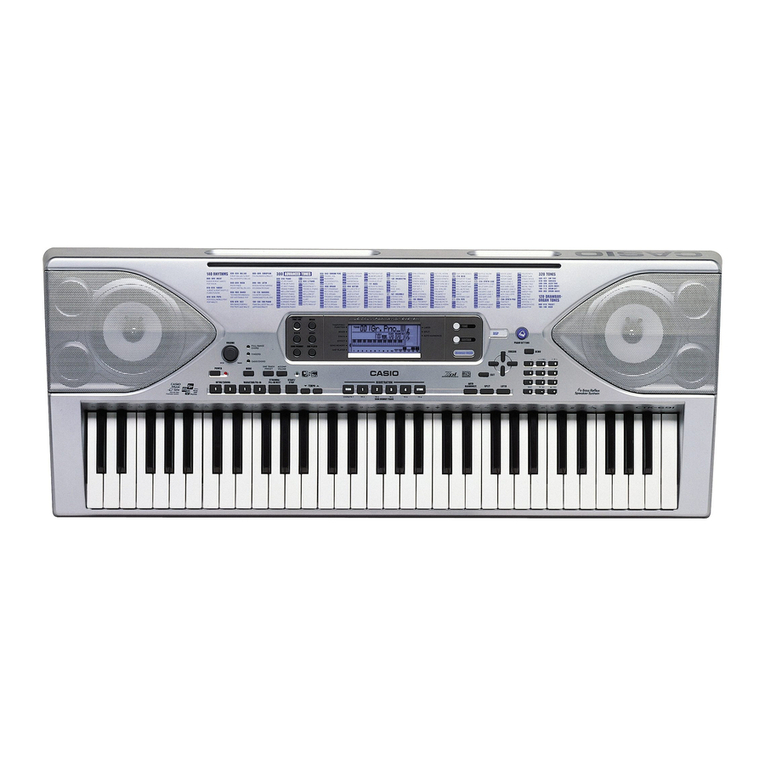
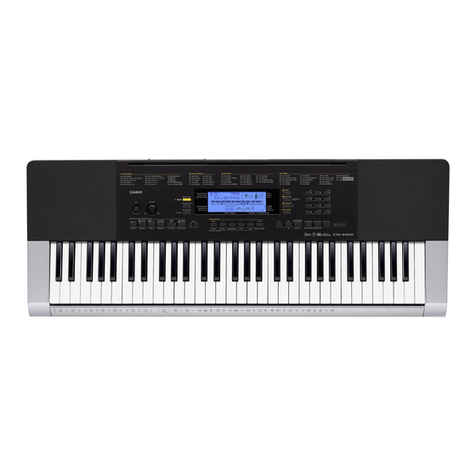
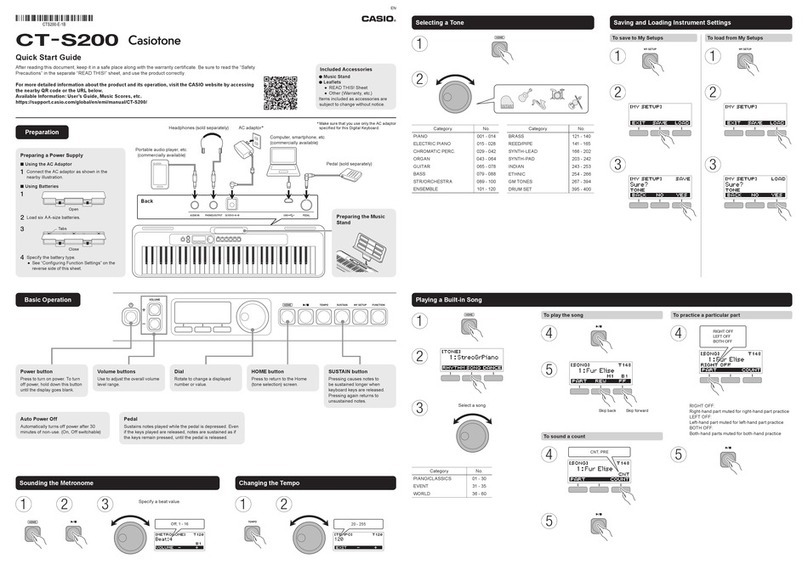
Casio CTK-531 User manual

CTK-S31/8533
CTK-54
1
|
USER’S
GUIDE
GUIA
DEL
USUARIO
$0
CASIO

Welcome...
To
the
happy
family
of
satisfied
CASIO
electronic
musical
instrument
owners!
To
get
the
most
out
of
the
many
features
and
functions
of
the
keyboard,
be
sure
to
carefully
read
this
manual
and
keep
it
on
hand
for
future
reference.
Important!
When
using
batteries,
be
sure
to
replace
them
or
shift
to
one
of
the
alternate
power
sources
whenever
you
notice
any
of
the
following
symptoms.
*
Dim
power
supply
indicator
©
Instrument
does
not
turn
on
*
Display
that
is
flickering,
dim,
or
difficult
to
read
*
Abnormally
low
speaker/headphone
volume
*
Distortion
of
sound
output
*
Occasional
interruption
of
sound
when
playing
at
high
volumes
*
Sudden
power
failure
when
playing
at
high
volumes
*
Flickering
or
dimming
of
the
display
when
playing
at
high
volume
*
Continued
sound
output
even
after
you
release
a
key
*
A
totally
different
tone
may
sound
+
Abnormal
rhythm
pattern
and
Song
Bank
play
*
Loss
of
power,
sound
distortion,
or
low
volume
when
playing
from
a
connected
computer
or
MIDI
device
GUIDELINES
LAID
DOWN
BY
ICC
RULES
FOR
USE
OF
THE
UNIT
IN
THEUS.A.
(not
applicable
o
other
areas)
NOTICE
This
equipenent
hasbeen
Rules,
These
lsiteare
‘sjulpment
generates
use
ac
he
lnaqeney
tnay
cause
harmful
interference
to
radio
communications
However.
there
poricala
installa.
I
this
equipment
does
cause
harm
increresce
Ey'turing
the
equipment
of
anon,
the
user
ls
encouraged
to
try
to
cote
ante
that
interference
wil nol
occu
In
8
can
be
determined
pte
ane
ee
pent
ino
an
outlet
mn
cult
dflerent
trom
that
to
which
the
necever
connected
‘ran
experience
wep
FCC
WARNING
snot
expres
approved
by
the
party
responsible
for
compliance
could
void
the
user's
authority
to
oper
Changes
or
moxi
the
stapes
|
~_
easioetecrmowes-co.
cro
ce
sees
Not
etl
noag
ten
ie
aS
This
mark
is
valid
in
the
EU
countries
only.
Please
keep
all
information
for
future
reference.

Introduction
Congratulations
upon
your
selection
of
this
CASIO
musical
instrument.
This
keyboard
provides
you
with
the
following
features
and
functions.
(1100
tones
*
Choose
from
among
orchestral
sounds,
synthesized
sounds,
and
more.
(1100
rhythms
+
100
versatile
rhythms
help
to
add
plenty
of
life
to
all
your
keyboard
performances.
(Auto
Accompaniment
*
Simply
play
a
chord
and
the
corresponding
rhythm,
bass
and
chord
parts
play
automatically.
(7100-tune
Song
Bank
+
Awide
selection
of
favorites
including
"Ode
to
Joy”
and
“Jingle
Belis”
is
yours
for
your
listen-
ing
enjoyment
or
play
along
fun.
A
simple
operation
cuts
out
the
melody
part
or
accompani-
ment
part
of
the
tune,
allowing
you
to
play
along
on
the
keyboard.
(Musical
Information
System
*
Abig
LCD
screen
graphically
shows
you
fingerings,
keyboard
keys
to
be
pressed,
and
notes,
making
keyboard
play
more
informative
and
enjoyable
than
ever
before.
A
built-in
backlight
keeps
the
display
easy
to
read,
even
in
total
darkness.
MIDI
compatibility
*
Connecting
to
another
MIDI
device
lets
you
sound
notes
on
both
this
keyboard
and
the
connected
device
by
playing
on
this
keyboard.
You
can
even
playback
commercially
avail-
able
pre-recorded
MIDI
data.
2
ssn
eso
—
Symbols
Various
syn
product
its
and
cortecth
persons
a8
along
with
Awa
This
ind
causing
¢
ated
inco
the
prod
indieatio
Symbol
|

rovides
jaticlly.
Safety
Precautions
Symbols.
Various
symbols
are
used
in
this
user's
guide
and
on
the
product
itself
to
ensure
that
the
product
is
used
safe
find
correctly,
and
to
prevent
injury
to
the
user
and
other
Persons
as
well
as
damage
to
property.
Those
symbols
along
with
their
meanings
are
shown
below
ZX
WARNING
This
indication
stipulates
matters
that
have
the
risk
of
causing
death
ar
serious
injury
if
the
product
is
oper
ated
incorrectly
while
ignoring
this
indication
ZX
CAUTION
‘This
indication
stipulates
matters
that
have
the
risk
of
‘causing
injury
as
Well
as
matters
for
which
there
is
the
likelihood
of
occurrence
of
physical
the
product
is
operated
incorrectly
whi
indication,
age
only
if
ignoring
this
This
triangle
symbol
(
\,)
means
that
the
user
should
be
careful.
(The
example
at
left
indicates
electrical
shock
caution.)
symbol
unl
——
This
circle
with
a
line
through
it
(@)
‘means
that
the
indicated
action
must
not
Se
a
palecios
ena
nesy
(]
tad
Smt
are
opestesly
prone
(riche
sete
inontey
a
Cay
ieteabtted)
The
black
dot
(
@)
means
that
the
indi
Bearer
ered
idles
Sots
RIN
pyar
toons
Guat
(E_sspcoay
mie
iobeperored
finrevacigat
let
indicate
tat
the
Se
aged
fee
tne
cel
shat}
—
A\
WARNING
Please
use
caution
regarding
the
handling
of
the
AC
is
a
lage
oer
tad
nd
ar
nare
serra
sro
vel
BRE
oa
ca
teattnes
os)
Ge
fever
ctl
hack
Ta
pee
cn
a
Uap
(epect
vine
dpomeson
ey
rie
Goro
nchaman
un
ruienet
me
Dees
OSS
Fie
ERS
depot
pace
envy
cbjeca
ota
ICOE/AN,
Seetiio
ene
fea
on
eee
onan
curt
shock.
Do
not
attempt
to
shape
the
power
cord
or
subject
it
to
excessive
bending,
twisting
or
pulling,
This
may
cause
fire
or
electrical
shock.
Please
use
the
adaptor
specified
for
this
instrument,
Use
of
another
adaptor
may
Jectrical
shock,
of
malfunction
cause
fi
Do
not
locate
the
instrument
or
its
stand
on
an-uneven
cor
unstable
surface.
*
Locating
the
instrument
or
its
stand
on
an
‘uneven
of
tunstable
surface
can
cause
it
to
fall,
creating
the
danger
of
personal
injury
Do
not
place
containers
containing
water
or
other
liq:
uuids
on
the
instrument
*
Do
not
place
the
following
objects
on
the
instrument,
Placing
stich
objects
on
the
in-

el
¢
Gem
SS
Do
not
disassemble
or
modify
the
instrument.
*
Never
attempt
of
take
apart
or
modify
the
®
instrument,
is
accessories,
or
separately
sold
options.
Doing
so
may
cause
fire,
elec-
trical
shock
oF
malfunction.
Consult
your
dealer
concerning
all
inspection,
adjustment
‘or
repair
of
internal
components.
Do
na
uae
If
there
isan
abnormally
or
malfunction
o
Desnot
ta
he
estrument
there
oppest
Fe
eee
te
YN
pete
Serer
iron
the
innturment
f
there
appen
fo
Be
mal
lon
bbek
ta
ba
center
nol
eng
on
Cea
terbaeg
rotoees
Ure
det
sua
conlons
ay
cute
Ree
slctcal
Tone
Insuch
ewe
ake
the
follwing
2
Toe
mmediely:
Never
amp
opi
eee
Iran
power
ERG
NE
strom
hal
Qe
iro
are
any
bated
Tonle
the
pee
ie
«
Buln
touch
ie
bein
wih
Yoo
hands
When
nemo
tems
They
very
be
hot
obey
ok
ay
been
popes
1
Chroaewih
the
dele
where
you
pu
Gave
he
baghoard
orn
en
alo:
fund
CASIO
serie
provide
When
the
instrument
hasbeen
dropped
ie
as
irre
he
beee
dpe
Lae
ee
nermeeee
TAN
Sick
atone
ERR
Neato
wae
sale
But
there
ace
any
batteries
loaded
inthe
Sane
«Beet
beds
day
with
Fo
kegs
when
emerge
ey
ean
tay
beens
‘use
may
cause
fire
of
electrical
4.
Consult
with
the
dealer
where
you
pur-
chased
the
keyboard
or
with
an
auttho-
rized
CASIO
service
provider.
[Be
careful
of
the
bags
around
children.
*
Never
allow
anyone
to
place
the
plastic
bags
Of
the
instrument,
its
accessories,
and
its
separately
sold
options
over
their
heads,
Doing
so
may
cause
suffocation.
Particular
‘caution
is
required
in
homes
with
small
children,
——
/{\
aul’
———
AC
Adspior
2S
otetnene
he
poe
crdin
ce
pros
Pete
comeing
ies
AN,
Th
may
ens
thecrd
me
eating
post
feo
decal
hk
«
Wem
npogging
the
AC
depo
man
eerie
Coens
Seitcadapr
ef
an
oth
cord
Fal
Sere
ae
ten
om
BE
Sanaged
or
beat
lending
pombe
plein
«Do
nt
touch
the
AC
adap
with
we
Raaawhent
is
plogedin
sy
ce
Seenlace
2
What
pt
el
the
instrument
fora
tended
prod
Such
an
when
venga
spats
urstounping
tn
AC
ots
Fob
cet
outet
sty
enone
a
bs
ena
tars
lf
peer
ori
tt
frattument
tnd
ungloy
the
NC
aap
tome
duction
Batteries
«
Improper
battery
use
may
cause
batteries
torupture
and
leak.
This
may
cause
injury,
malfunction
of
the
instrument
or
discolora:
tion
of
fumnitureand
other
articles
that
come
{nto
contact
with
battery
fluid.
Take
care
to
observe
the
following.
«
Install
batteries
so
their
polarity
(+/-)
matches
that
indicated
on
the
instrument
‘+
Forsafety
and
to
prevent
possible
le
‘of
battery
fluid,
always
make
sure
‘move
batteries
from
the
instrument
w!
you
do
not
plan
to
use
it
fora
long
time.
‘+
Always
make
sure
that
the
batteries
mak-
ing
up
a
set
are
all
of
the
same
type.
‘=
Never
combine
new
batteries
with
old
+
Never
dispose
of
batteries
by
incinerat-
ing
them.
Never
short
or
disassemble
bat-
teries,
and
do
not
expose
them
to
exces-
sive
heat.
+
Replace
dead
batteries
as
soon
as
possible.
‘=
Never
attempt
to
recharge
batteries
oo
oe
et
cece
ee
Care
+
Whenever
plug
the
ACs
Tet,
Also
rem
iffbattery
pon
Location
+
Never
locat
ject
to
high
tion
of
dust
clectrical
sh
#
Never
loca
‘cause
fre
oF
Do
not
place}
The
instrom
entually
faces,
Use
‘or
preferabh
ment
stand
Do
not
place}
*#
Do
not
plag
ment.
Thisti
cover
or
bre
Volume
+
Very
highy
ing.
Avoid
high
volum
sult
witha
experience!
the
ears,
Liquid
Cryst
+
Avoid
su)
‘trong
imps
LCD's
las
jury
+
Should
the
lo
not allo
come
into
can
cause
Should
th
mouth
in
with
wate
|
Should
the
‘on
your
sh
ter
foratl
a
physica
Do
not
goto
+
Donoteray
optional
s
quired
in
may
cause
overand
bi

o
8
©
[|
pecon
Care
+
Whenever
caring,
make
sure
to
first
un-
plug
the
AC
adaptor
from
the
electrical
out-
let,
Also
remove
the
instrument's
batteries
if
battery
power
is
being
us
Location
#
Never
locate
the
instrument
in
areas
sub
ject
to
high
humidity
or
heavy
accumulla-
tion
of
dust.
Doing
so
may
cause
fire
or
electrical
shock.
+
Never
locate
the
instrument
in
areas
sub-
{ect
to
grease
splatters
or
steam,
sich
as
in
a
kitchen
or
neara
humidifier.
Doing
so
may
«cause
fire
or
electrial
shock.
Do
not
place
keyboard
on
lacquered
furniture,
+
The
instrument's
silicone
rubber
feet
may
eventually
blacken
or
scar
lacquered
su
faces.
Use
felt
cloth
pads
to
insulate
the
feet
or
preferably
use
a
CASIO
musical
instru
ment
stand
designed
for
your
keyboard.
Do
not
place
heavy
objects
on
the
instrument.
*
Do
not
place
heavy
objects
on
the
insteu-
‘ment.
This
may
cause
the
instrument
to
tip
over
or
break
resulting
in
injury.
Volume
©
Very
high
volume
levels
ean
damage
he
ing.
Avoid
using
the
instrument
at
very
high
volume
settings
for
long
periods,
Con:
sult
with
a
physician
immediately
if
you
nce
Impaired
hearing
o¢
ringing
in
Crystal
Display
(LCD)
Precautions
*
Avoid
subjecting
the
keyboard's
LCD
to
strong
impact,
which
can
crack
or
break
the
LCD's
glass
creating
the
danger
of
personal
injury
Should
the
LCD
glass
ever
crack
or
break,
ddo
not
allow
the
liquid
inside
the
LCD
to
nto
contact
with
your
skin,
which
{inflammation
and
reddening
*Should
the
LCD
liquid
get
into
your
mouth,
immediately
wash
out
your
mouth,
‘with
water
and
then
consule
a
physician,
*Should
the
LCD
liquid
get
in
your
eyes
or
‘on
your
skin,
immediately
flush
with
wa-
ter
for
at
least
15
minutes
and
then
consult
a
physician,
Do
not
get
onto
the
instrument
or
stand.*
*
Do
not
crawl
on
top
of
the
instrument
or
its
optional
stand.
Particular
caution
is
re-
4uited
in
homes
having
small
children.
This
‘may
cause
the
instrument
or
stand
to
tip
over
and
break
resulting
in
injury
Optional
Stand*
+
Carefully
assemble
the
stand
following
the
assembly
instructions
that
come
with
it
Se-
ccurely
tighten
all
bolts,
nuts,
and
fasteners,
and
make
sure
that
you
mount
the
instr
‘ment
correctly
onto
the
stand.
Incorrectly
or
insufficiently
tightening
screws,
or
in
correctly
mounting
the
instrument
onto
the
stand
can
cause
the
stand
to
tip
over
or
the
instrument
to
fall
off
the
stand,
possibly
leading
to
injury
+The
and
is
availab
as
an
option
E5

Care
of
your
)
Avoid
heat,
humidity
or
direct
sunlight.
Do
not
overexpose
the
instrament
to
diet
sunlight
of
place
it
esr
sn
air
conditioner,
ori
any
extremely
Bot
place
‘Do
not
use
near
a
TV or
radio.
This
instrument
can
cause
video
or
adio
interference
with
TV
a
this
happens
hove
the
istrument
away
fo
Do
not
use
lacquer,
thinner
or
similar
chemi-
cals
for
cleaning.
extreme:
6
Welcome........
Introduction
....
~E-2
Safety
Precautions...
Care
of
your
keyboard
..........
E-6
Contents...
General
Guide.
Rear
Panel...........-.-
nos
5
el
=)
Using
the
Display
son
EVO
Song
Bank
Quick
Reference...
we
E17
To
play
back
a
Song
Bank
tune
sesso
E11
Connections.....
E-13
Power
Supply..
E-14
Using
batteries...
wh.
E14
Using
the
AC
Adaptor
recite
=
Auto
Power
Off
seg
BS
Basic
Operations.
E-16
To
play
the
keyboard
suse
E16
Selecting
a
Tone
.......
perils
Auto
A
Selectir
Playing
Adjustir
Using
A
Using
a
Synchr
with
Rh
Adjust
Using
1
To
play
Song
B
Adjust
a
Song
To
Cha
Tunes
Playing
Applau
To
cons
Song
B
Using
t
To
Lool
the
Che
Keybos
Transpe
Tuning
Using
(CTks

Eee
Auto
Accompaniment
.........E-18
Selecting
a
Rhythm...
:
E48
Playing
a
Rhythm.
EAB
Adjusting
the
Tempo
1.0.
won
EAD
Using
Auto
Accompaniment...
E19
Using
a
Fill-in
Pattern...
i
E21
|
‘Synchro
Starting
Accompaniment
with
Rhythm
Play
{
E21
‘Adjusting
the
Accompaniment
Volume...£-21
Using
the
Song
Bank
E-22
To
play
back
a
Song
Bank
tune
sreeees
E22
‘Song
Bank
Mode
Display
E-23
Adjusting
the
Tempo
of
a
Song
Bank
Tune
s.r
£23
Jo
Change
the
Tone
of
a
Song
Bank
Tune’s
Melody
. e
E24
|
Playing
Along
with
a
Song
Bank
Tune...
E-24
Applause
Sound
2...
pero!
To
consecutively
play
back
all
|
Song
Bank
tunes
ns
pn
E25
Using
the
Chord
Book
........E-26
To
Look
Up
a
Chord
Using
the
Chord
Book
E-26
Keyboard
Settings...
E-29
|
Transposing
the
Keyboard
..
.E-29
Tuning
the
Keyboard
£29
Using
Touch
Response
(CTK-541
Only)...
sant
E-30
MIDI.
E-31
What
is
MIDI?
E31
General
MID}
.....
essen
E-31
‘Changing
MIDI
Settings...
B82
Troubleshooting
..
Specifications
Appendix...
Note
Table
Fingered
Chord
Chart
..socssssessoctensesrrneee
AB
Percussion
Assignment
List
"
Aa
MIDI
Implementation
Chart
ET

General
Guide
Rear
Panel
«Key,
button
and
other
names
ae
indicate
inthe
text
ofthis
manual
using
bold
type
{stration
inthis
User's
Gute
shows
the
CTS
9
@
MIDIOUT
@
MIDIIN«
@
SUSTAIN]
®
PHONES/
@
DCwpad
D
Tone
lst
®
Rhythm
list
@
SONG
BANK
CONTROLLER
)
MAIN
VOU
LEFT
ON/OFF
button
@
TEMPO
but
STOP
button
(ACCOMP)
®
ACCOMPY
TRANSPOS
)
CHORD
BO
®
Display
®)
SONG
BAN
(PLAY/PAU
4)
TONE
butt
RIGHT
ON/OFF
button
)
RHYTHM
(MELODY)
(@
SONGBAN
PLAY/PAUSE
button
@
Number
{®
Song
bank
B
Speaker
Chord
nam
th
Percussion
1
Power
ind
Number
buttons/
"
Chord
specification
buttons
GET
batans
+
orto
muerte
he
POWER/M
‘ese
ISIQGOQ|
Stem
oa
eae
ena
ton
ont
4
‘hen
i
he
Chor
Book
one
ine”
§=I|OOQEe
;
EB
woacons
inci

Boa
Rear
Panel
‘Attachment
of
the
Score
Stand
Firmly
press
the
mask
stand
provided
with
the
keyboard
Sil
he
way
into
the
groove
onthe
top
of
te
keyboard
@
MIDIOUT
terminal
@
MIDIIN
terminal
@
SUSTAIN
jack
terminal
@
PHONES/OUTPUT
jack
DC
9V
jack
D
Tone
list
(CTK541
only)
®
Rhythm
list
TOUCH
RESPONSE
button
2
MAIN
VOLUME
buttons
©
TEMPO
buttons
®
ACCOMP VOLUME
button
TRANSPOSE/TUNE/MIDI
button,
D
CHORD
BOOK
button
Display
SONG
BANK
CONTROLLER
(PLAY/PAUSE,
STOP,
REW,
FF,
LEFT
ON/OFF,
RIGHT
ON/OFF)
®
TONE
button
{)
RHYTHM
button
®
SONG
BANK
button
Number
buttons
(Chord
specification
buttons)
@
Song
bank
list
1B
Speaker
®
Chore
name
Percussion
instrument
list
18
Power
indicator
@
POWER/MODE
switch
@
START/STOP
butto
@
SYNCHRO/FILL-IN
button
9

=
(
ee
Using
the
Display
P
Time
keyboard
Se
‘on
playing
ang
the
how
the
diplay
appears
wile
‘Song
Bak
ne
To
play
bat
1,
s
=
Use
the
M
board
vou
the
PO}
NS
“Aningkator
appears
nest
the
typeof
setting
you
are
currently
performing
(TONE,
RENTHM,
SONG
BANK).
ibe,
heyboant
settings
value
Tone
mtbr,
hythen
umber,
4
i!
2
‘3.
Rythm.
aut-accompaniment
Song Bank
tune
beats
4
5
Tone
name,
hythm
ame,
song
name,
mode
name,
keyboard
stings
name
"yon
the
Keytar.
A
pds
(Gta)
appears
when
the
yy
me
nd
anpe
foe
CoC?
Hoc
that
he
acta
Musical
st
tes
and
chord
you
Aipresse
An
octave
indicator
(30)
appears
hen:
(slave
higher
than
that
shown
on
display
‘Uses
a
graphic
keyboard
to
show
notes
aed
chords
played
on
the
heybourd
orp
indicate
Fethard
and
righthand
parte
3.
Press
thes
played
during
Song
Bank
tune
playback
‘Autoraccompaniment,
Sng
Bank,
chord
book
6
7
{8
Dots
indicate
fingerings
during
Song
Bank
playback
“L"
and
9
0
tytn,
autosccompaninent
Song
Bank
tn
Mode,
40
knyth,autoaccompaniment
Song Bank
tan
temp
volume
sting
14
Song
Hk
contro
inditors
08
ern
ores
pee
{NOTES
sos
nown
nis
User
Gat
rect
tae
pupones
ey
The
aca
lexan
value
at
pee
on
apy
ray
ier
Be
|
from
earls
ann
ns
Uses
Gad.
_
fame
zaps
shown
na
oma
urate
rma
et
hou
ed
nT
oes
nt
nate
mafueton
and
bins
ws
Slabazo
aha
afew
seconds
4,
Use
thes
b
en
play
back
“Te
back
Tghg
le
day
prove
by
a
Norecert
ig
ich
mst
ghia
ver
ver
nape
of
ne.
When
his
happen
thetune’s
The
back
hig
ot
malo
4
CASIO
worsce
provider
aus
have
the
Backght
replaced.
Not
tat
you
wil
be
charged
fo
such
replace
tape
T
one
|
‘Ske
|
E10
|

aia
hos
my
te
pines
0
[
)
Song
Bank
Quick
Reference
‘De
PLAYIPAUSE
To
play
back
a
Song
Bank
tune
1.
s
POWER/MODE
switch
to
NORMAL
le
MAIN
VOLUME
buttons
to
lower
the key
volume
to
a
relatively
low
level
%
Ce
3.
Press
the
SONG
BANK
button
to
enter
the
Song
Bank
{80
IboTtFor
ee-l@-—]
f
nk
list
to
find
the
tune
you
want
to
1en
use
the
number
buttons
to
input

_!
7.
Press
the
RIGHT
ON/OFF
button
again
to
turn
the
‘melody
part
back
on
1
You
cat
also
turn
the
accompaniment
part
on
and
off
by
presing
the
LEFT
ON
/OFF
bution
8.
Press
the
STOP
button
to
stop
playback
of
the
Song
Bank
tune,
yb
9.
Press
the
TONE
button
to
exit
the
Song
Bank
Mode
‘and
return
to
the
tone
and
thythm
selection
screen,
welll
og
ae
&
INore®
{scan
ako
pero
the
owing
operons
dug
play
of
«Song
Dank
Iho
PLAVPAUBE
button
Pros
ha
FF
(tas
foward)
baton.
ng
rose
the
REW
(em)
Buon
E12
Cc
Phones/Output
tom
down
te
eam
‘cupment
Youn
ons
tre
conn
[Rear
Panel)
XD
Keyan
a
Connecting
Phones
Connecting
phone
fr
youean
PAY
Audio
Equipment
Connect
he
haya
valid
connecting
PIN
plays
on
tha
‘ult
only
one
oa
vein
your
aude
Musical
ramen
Use
a
comely
too
musical
astra
anoTes
Be
sue
10
us
a
cam
‘end
you
cone
oa
fon
ai
on
‘ong
onl
oma
When
connec
to
the
keyboard
1a
Justinents
ung
tea
{Connection
Exampl
Tonojtouds
at
‘tre
sues
hi

ae)
Connections
Phones/Output
Terminal
Bele
connecting
phone
or
ther
eeu
epipment
be
ie
at
{tom
down
the
volume
stg
ofthe
yan
end
the
connec
(crip:
You
can
far
ses
vehane
the
sed
rl
afte
‘cto
are
compl
(Wear
Panel]
Connecting
Phones
(Figure
@)
Connecting
phones
cut
ot
audio
equipment
using
commercially
svaiable
connecting
cord mith
a
andar
plug
on
one
en
oa
oe
PIN
plugs
on
the
ater
end
Note
thatthe
stand
plug
you
connect
to2he
hoard
mast
bea
ee
pl
terse
ou
wit
ae
‘output
only
ants
In
this
coniiguraion
{ually
marked
AUXIN
or
something
the
hepbourd
is
conimested
See
the
ne
‘with
your
audio
equipment
fr
fl
des
lat}
where
the
cord
fom
sumentatice
that
come
‘Masical
Instrument
Ampliier
Figure
@)
Use
acommerialyaallable
connecting
cord
to
connect
the
keyboard
toa
misia
instriment
amplifier
sa
a
connecting
cotd
at
has
ancard
pha
on
the
fend
you
correct
the
war,
tra
econac
hat
ose
cha
olan
rg
wp
ote
apr
to
when
you
arcane.
The
‘org
typeof
comact
teren
can
use
rte
ee
a
When
connected
to
musical
instrument
amplifier,
set
the
volume
ot
the
Keyboard
toa
relatively
low
level
and
wake
cutp
justnents
using
the
amplier's
controls
{Connection
Example)
SZ
2
cede
See
‘Sustain
jack
Terminal
Yio
can
connect
an
optional
ystan
pedal
(St
TAIN
JACK
termina
tenable
the
capsbilities
described
below
SUSTAIN
JACK
Termina
ano
tones,
depressing
the
psa
cas
notes
finger,
mc
like
a
piano’
damper
ped.
+
With
ngan
tines
depressing
the
pedal
cases
notes
to
continue
to
sound
antl
the
pedals
elas
Accessories
and
Options
the
acemories
and
options
specified
fr
this
heya.
Use
cnet
tems
creates
the
danger
of
ire,
eectial
shock,
E43

Power
Supply
This
keyboard
can
be
powered
by
curent
from
4
standard
Downe:
Iho
wall
ule
using
te
specified
AC
adaptor
or
by
bates.
Al
trays
make
sure
you
tum
the
keyboard
off
whenever
you
a
Rot
Using
batteries
pci
baer
To
load
batteries
7.
Remove
the
batw
Compartment
cover
,
t
2.
Load
6
D-size
batteries
into
the
battery
compar
+
Make
ue
tht
the
pve)
an
negative)
end
Ing
corel
Gor
ai
3..
Insert
the
tabs
on
the
battery
compartment
cover
into
the
holes
provided!
and
close
the
cover.
o_o
a)
vom
asf
The
keyboard
may
not
funct
erie
with
power
tamed
on
‘ff
and
then
back
on
agai
3h
Important
Battery
Information
{Te
following
shows
the
approximate
batery
ie.
Manganese
battedes
Shouts
Tae
seve
value
ie
standard
Battery
ie
at
normal
temperature,
wrth
he
Leyboand
Volume
at
medium
setting,
Temperature
ox
{emer
or
playing
et
very
loud
volume
stings
can
shorten
Bat
Layo
the
following
symptoms
indicate
low
hatery
power
Re
place
batters
as
sono
posable
whenever
any
of
he
fll
geccur.
Dim
power
supply
indicator
rument
docs
not
tr
ot
play
that
fe
flickering,
dim,
or
dificult
nally
lowe
apa
beadphone
sound
ostpan
rruptet
of
sound
when
playing
at
high
vol
«+
Sten
peer
lature
when
playing
at
high
volumes
1
Fickering
or
dimming
of
the
dinplay
when
playing
at
high
«+
Continued
sound
output
even
fer
you
release
a
hey
A
toully
differen
one may
sound
1
Abrmalehyth
puters
anal
Sony
Bank
play
{
Tse
of
power,
sound
distortion,
or
low
vafume
when
playing
from
a
connected
computer
of
MIDI
Seve
IMPORTANT!
—————
Iinproper
hansing
of
attones
can
causo
them
to
burst
and
leak
‘src
ereaon
Bie
dangat
o
personal
jury
oF
damage
duo
1
co:
‘act
wen
baer
ad
Bo
sure
to
nto
tha
flowing
enporcantprecau-
P
Raye
make
sure
Pat
he
postvo
(+)
and
negative
(-}
poles
are
facing
camey
an
ecscaed
nea
Bw
batlory
compartment
+
To
avold
damage
cavsod
by
leaking
batteries,
ba
sure
fo
remove
Lbateres
trom
tho
keyboard
whenaver
you
lene
unaonded
fr
{ong
ert
(auch
an
whon
leaving
on).
+
Never
me
bats
of
dierent
8
1
Never
mat
og
battenes
wah
new
ons
*
Never
dscare
batteries
by
ininerating
them,
donot
allow
thei
{oles
to
be
shoring
conpectod
to
oach
ther),
never
take
barerios
[par
snd
do
nt
expose
batlones
to
doc
hat
+
Hlplacebattores
a
soon
as
posible
afer
any
sign
they
are
get
ng
wee
«+
Noveratempt
to
recharge
bate
a
Using
the
A
Make
that
ou
board.
“
species
hi
oe
‘Also
noe
the
low
‘hing
the
AC
aap
WARMING!
saacan
one
vay
tony
Boing
0
reat
+
Ute
ony
ap
‘he
danger
at
caumion
or
any
saab
vienever
ang
t
Van
avg
ona
+
Aya
tun
a
‘et
en
yo
a
Mao
eure
tha
sconnecing
tha
+
Uning
the
AO
ap
torte
touch
Ti

temperate,
hore
bt
pppoe
Re-
Bde
flow
thigh
vl
rng
thigh
hey
shen
playing
pcos
aro
petornove
rows
or
ction
tole
ah
tron
thoy
ae
get
Using
the
AC
Adaptor
Make
sure
that
you
use
only
the
AC
adaptor
specifi
for
this
key
oan
=
teen
et
t
Alo
note
the
following
important
warnings
and
precautions
when
Suing
the
AC
adaptor,
WaRnina!
Boing
30
ceates
he
cangor
of
power
cord
dorago,
re.
ana
ect
+
Use
ony
the
spectiod
AC
adaptor.
Use
of
acinar
type
of
adaptor
ce
‘to
the
danger
o
re
end
ware
shock
cauriont
Foray
sao,
bo
ar
ur
AC
dar
Kon
te
wal
tat
“when
leaving
on
a
trip)
aaa
+
Tt
ob
yous
nd
cg
AC
a
ae
wa
IMPORTANT!
+
Make
sure
tat
tho
keyboard
is
tuned
of
Belore
connecting
or
‘disconnecting
thw
AC
adaptor
+
Using
ne
AC
adaptor
or
aang
tne
can
cause
it
to
Beceme
warm
tothe
ouch.
This
anormal
and
dons
nt
incate
mabtuntion
DET
Auto
Power
Off
‘Winen
you
are
wing
battery
power
keyboand
power
turn
of
au
‘mutually
whenever
you
leave
son
without
performing
shy
opera
ton
for
about
6
minute.
When
this
happens,
ee
the
POWER/
MODE
steht
turn
power
Back
on
snores
Aid
Power
OM
is
estied
(2
dows
nat
hton
when
you
are
using
he
AC
asap
power
te
weyooare
To
disable
Auto
Power
Off
Hold
dows
the
TONE
burton
while
tuning
onthe
eybount
to
dis
able
Auto
Power
Of
+
When
Auto
Power
Of
i
disabled
the
Keyboard
doesnot
tur
off
‘tomatically
no
mater
how
lng
its
ef
wit
no
operation
Bing
performed
«
Ritkeybord
settings
ae
returned
their
inital
defaults
whenev
fr
keyboard
powers
ture
Hock
on
ater
being
turns!
of
by
OP
‘tation
ofthe
POWER/
MODE
switch
or
Auto
Hower
Off
E15

Basic
Operations
Tis
ection
provides
information
on
performing
bsic
heybosnd
op-
To
play
the
keyboard
1...
Set
the
POWER/MODE
switch
to
NORMAL
2.
Use
the
MAIN
VOLUME
buttons
to
lower
the
key
board
volume.
sWealway
ihe
heyboard
vol
tel
toe
eve
lying
+
Prosing
[al
or
¥
causes
the
cutent
volume
setting
©
ap
pear
om
the
display:
Press
[aj
or
[¥1
again
to
change
the
3.
Play
something
on
the
keyboard
Selecting
a
Tone
This
heybos
crslure
tos
jes
with
10)
built-in
tones.
Use
the
flow
ng
pe
To
select
atone
1.
Find
the
tone
you
want
to
use
in
the
keyboard's
tone
list
and
note
its
tone
number.
2.
Press
the
TONE
button.
ee"
"
BO
Pi
ara
1
eee
lé
Use the
number
buttons
to
input
the
two
digit
tone
‘number
for
the
tone
you
want
to
select.
ample:
To
select
"26
WOOD
BASS",
input
2
and
then
&
"26
nod
Bass.
played
on
the
keyboard
willbe
played
using
an
sound
E16
sworess
J
Senyn
ep
both
ig
fr
he
tone
nanberncutng
aang
20
‘tye
ut
one
dig
and
sop,
te
Spy
wt
aumatedy
Car
uit
aa
fom
soon.
+
Wulcaaieo
nerement
he
drayes
tne
numb
by
posting
+]
and
Sectement
tty
presung
=]
+
Scne
eect
ws
such
ss
77
VEHICLE
sound
best
when
you
eyioa
key
sopressed
Combination
tones
The
following
describes
the
two
types
of
combination
Layered
Tones
(Tone
Numbers:
80
through
89)
80
STRPIANO
‘when
a
eybond
hey
is
presacd
‘Split
Tones
(Tone
Numbers:
90
through
96)
Example
$0
BASS/TIANO
This
tone
spits
the
heybound
0
one
1
and
another
range
te
assigned
pla
Hae
Percussion
sounds
ssson
sours
to
the
keyboard
See
the
espa
Ao
or
fl
details
‘Sound
Effect
Tones
With
sound
effect
snes
77
through
7,
the
typeof
sound
produced
‘Sepends
onthe
octave
sy
you
pe
rvhen
8
HON
Se
sound
types
are
PUSH
TONE
3,
PUSH
dBUSY
SCNAL
TONE
2
RING
1,
RING:
Polyphony
The
em
polypha
ply
a
the
sae
Tichudes
he
nt
panmen
patent
Then
a
sythmoes
the
Keyboed
te
bond
pay
eda
not
polypony
nen
hth
ae
round
ta
Digital
Samp!
‘A
number
of
thet
Seer
cde
and
oval
{vosable
elo

esng
210
resng
ent
pre
youtoap
nH
od.
Se
hs
ite
ound
pale!
se
When
78
RON
Pus
Polyphony
The
texm
polyphony
refers
tothe
maximum
namber
of
nates
you can
Play
atthe
sme
tne
The
eybourd
has
Ie
note
polyphony
includes
the
notes
you
pay
a
wellas
the
shyt
and
aut
paniment
patterns
that
are
playes
by
Uh
keyboard
This
m
the
heyboand,
the
number
of
notes
(polyphony)
thud
play
ts
redaced”
Also
mote
that
home
Of
‘hythm
ve
auto
accompaniment
is
playing.
the
number
of
Sounds
smultancounly
played
i
edced,
Digital
Sampling
A
numberof
the
tones
been
rene
and
proceed
sng
a
eh
pling,
To
ensures
hag
fevelo
tonal
quality,
smples
ae
taken
in
the
Forth,
and
high
ranges
an
then
com
provide
you
with
dsthar
are
amazingly
hme
once
very
oWable
rel
of
muleple
sampling
and
itso

Auto
Accompaniment
POWER
MODE
J
This
keybou
withthe
Ing
sou
‘hye
you
are
an
that
you
et
fll
real
companiment
play
with
your
right
hand
renting
the
mod
of
an
One-pernon
ensemble
Selecting
a
Rhythm
Thi
with
10
enciing
shyt
that
you
can
rocedute
To
select
a
rhythm
1.
Find
the
rhythm
you
want
to
use
in
the
keyboard's
rhythm
lst
and
note
its
rhythm
number
2.
Press
the
RHYTHM
button.
OO
FriksPorl
&
git
ehythm
sample
T
eet
"65
WALTZ"
wong
85
Waltz
ge
&
snoress
FSOFUNKY
POP”
te
inal
deta
rythm
seting
whenever
you
“+
You
can
seo
increment
the
Gsplayed
rhythm
mamber
by
eressing
[+]
Und
decrement’
by
pressing
E18
ae
RHYTHM,
Playing
a
Rhythm
Use
the
following
proces
to
start
and
stop
hth
play.
To
play
a
rhythm
1.
Set
the
POWER/MODE
switch
to
NORMAL
2
2.
P109s
the
START/STOP
button
to
start
play
of
the
cur
tently
selected
thythm.
snores
‘Acti
bryos
keys
ae
meta
hays
whe
he
POWENMODE
switch
(Seto
NORMAL
—
Adjusting
t
ads
thet
nate
Th
i
play
a
To
adjust
the
Use
the
TEMPO
b
Tere
ih
Decrement
vamp
Hold
down
dla,
ee
sNoTer
Frovaig
boy
TEMP
tempo
seta
About
the
Gra
The
graphic
moto
at

\L
y
ofthe
cur.
TOP
button
RODE
omen
Adjusting
the
Tempo
‘orca
aust
te
tp
fy
ply
within
ange
£20255
feispereniartatepecunplaaspieaiines
noampe
Pere
Sell
te
tas
To
adjust
the
tempo
Use
the
TEMPO
buttons
(&.,
¥)
to
adjust
the
tempo,
2
Increments
displayed
value
increases
texapo)
'¥
Decrements
displayed
vale
(decrease
et
cane
Hold
down
the
¥
bation
wat
fe
teanpovalue
10
the
‘play
rrom|
qf]
vote]
110
Prosting
both
TEMPO
buttons
(ard
¥)
atthe
same
Ue
resets
th
fumpo
othe
elaut
value
of
ha
curenty
sects
mye
‘About
the
Graphic
Metronome
ine
Te
pee
Play
along
with
x
ehytho
or
The
graphic
metronome
appear
jo
value
and
beat
of
hytoen
oF
Frome
heips
you
keep
in
ime
a8
y
frllsintine
Beal
K'
wottn
Using
Auto
Accompaniment
Tong
protest
bart
th
bear
Ada
conyers
ous
nt
ipectpatcetountier
suerctresaytone
Orvnint
To.use
Auto
Accompaniment
1.
Set
the
POWER/MODE
switch
to
CASIO
CHORD
or
FINGERED.
2.
Press
the
START/STOP
button
t0
start
play
of
the
cur
rently
selected
rhythm,
ay
a
chord.
The
aca
procedure
you
should
use
to
play
«chord
depens
othe
carte
POWER
MODE
swish
poniion-
Refer
othe
{allowing
pape
fr
etal
on
chord
pla.
CASIO
CHORD.
E
{ay
be
Stren
fram
hors
aetaaly
Sey
payed
onthe
teypooas
4.
To.stop
Auto
Accompaniment
play,
press
the
START/
STOP
button
agai.
Other manuals for CTK-531
2
This manual suits for next models
2
Table of contents
Other Casio Synthesizer manuals

Casio
Casio CT-S500 User manual

Casio
Casio MZ-X500 User manual

Casio
Casio CTK-551 User manual

Casio
Casio VZ-1 User manual

Casio
Casio Casiotone CT-S410 User manual

Casio
Casio Cosmo CZ-1 User manual

Casio
Casio Privia PX-300 User manual

Casio
Casio Casiotone MT-100 User manual

Casio
Casio CZ-101 Cosmo User manual

Casio
Casio CTK-530 User manual

Casio
Casio CTK-495 User manual

Casio
Casio CDP-S105 User manual

Casio
Casio CTK-495 User manual

Casio
Casio Casiotone 1000P User manual

Casio
Casio CTK-691 User manual

Casio
Casio LK-280 User manual

Casio
Casio CTK-555L User manual

Casio
Casio MA-150 User manual

Casio
Casio CT-S1BK User manual
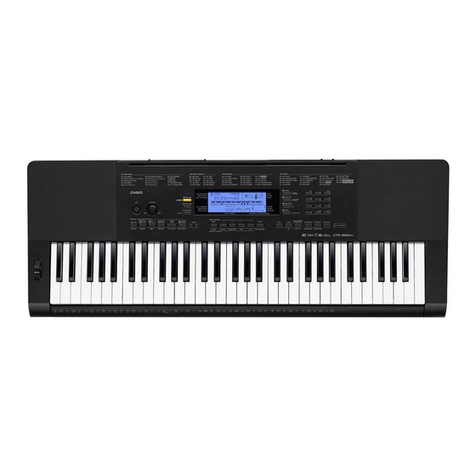
Casio
Casio VZ-1 User manual