MI/2029 - 2aed. DEU - 06/2017 PLANO bollard Mono/Bi-Emission
1
Das Produkt entspricht den Richtlinien
der Europäischen Gemeinschaft
Montageanleitung - Instandhaltung
WICHTIGER HINWEIS: diese Montageanleitung informiert den Anwender über die korrekten Wartungsmaßnahmen und den Austausch der Lampen. Jede Manipulation und/
oder Veränderung des Geräts, das in dem gelieferten Zustand installiert und verwendet werden muss und den nationalen Normen für Anlagen entspricht, ist verboten.
Bei unsachgemäßer Installation verfallen jegliche Garantieansprüche und die Firma haftet nicht für Schäden aufgrund einer unsachgemäßen Installation. DIE INSTALLATION
MUSS VON QUALIFIZIERTEM FACHPERSONAL DURCHGEFÜHRT WERDEN.
Qualitätskontrolle: Sollten Sie Reklamationen haben, wenden Sie sich an unsere Firma oder an unsere Verkaufsorganisation unter Angabe des Bestelldatums
und der Kennummer des Geräts
. / Technische Anderungen vorbehalten!
3
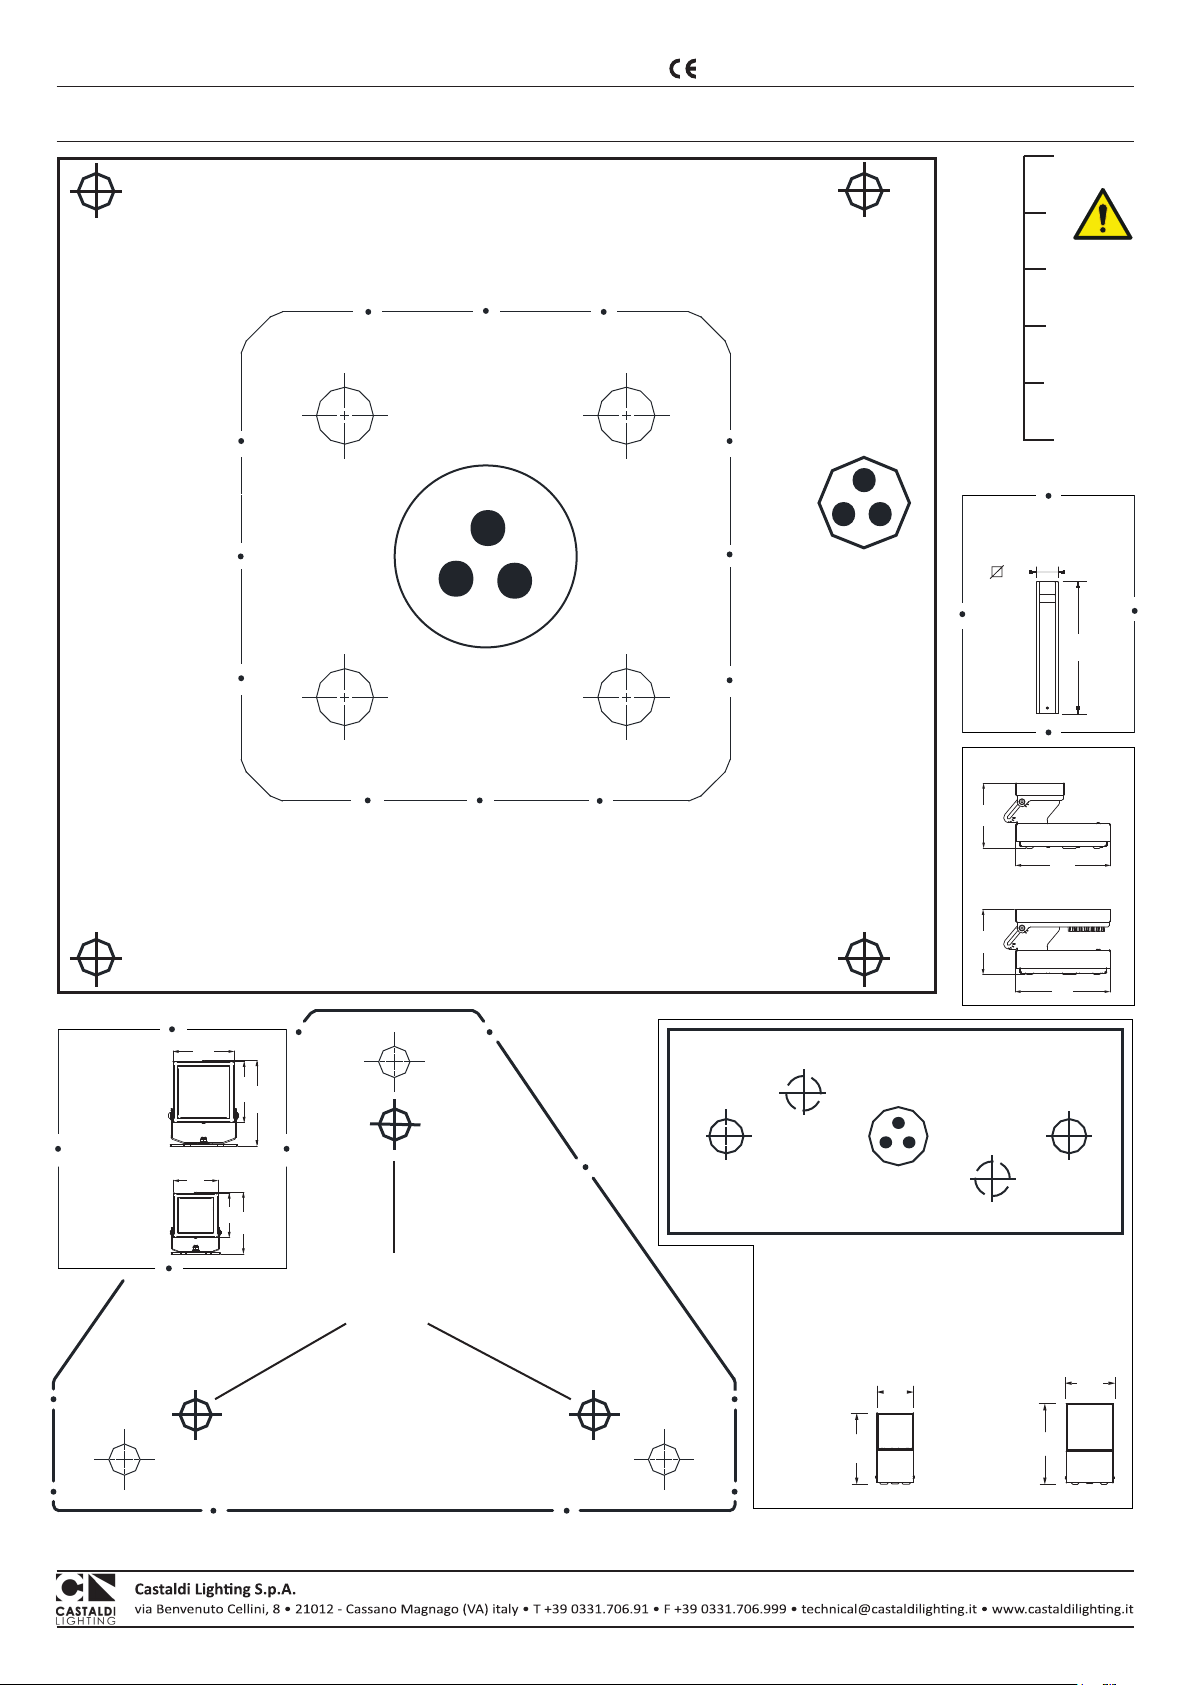
MAX Ø10 mm
x4 x4
2
4
3
L
N
Ø7 - Ø12 mm
92
A(mm) B(mm) H(mm)
SLED Cluster
1 SLED (X4) sink W
6Kg
3,5
5522801 92
Cod.
H
B
A
70
45°
x4
1 2
H
B
A
Cod. 2802
Cod. 2801
902802
1 SLED (X4) flat 6 2,8
55290
2a
Cod. D53/1-TF
Versions
Eigenschaften - Bedeutung der Symbole auf dem Typenschild:
IP65
Das Gerät ist vollständig
gegen Staub geschützt.
Geschützt gegen
Spritzwasser aus allen
Richtungen.
Es ist verboten, das Gerät im Hausmüll zu entsorgen.
Das Gerät muss am Ende der Lebensdauer
ordnungsgemäß entsorgtwerden.
“WEEE-Zugehörigkeitskonsortium: Ecolight”.
Nr. Nationles Herstellerregister: IT0801000000166
Ersetzen die Module mit
beschädigten Bildschirme.
Wenden Sie sich an unsere
Firma oder an einen
unserer Händler.
Einfache Isolierung:
erfordert eine
Schutzerdung.
Klasse I
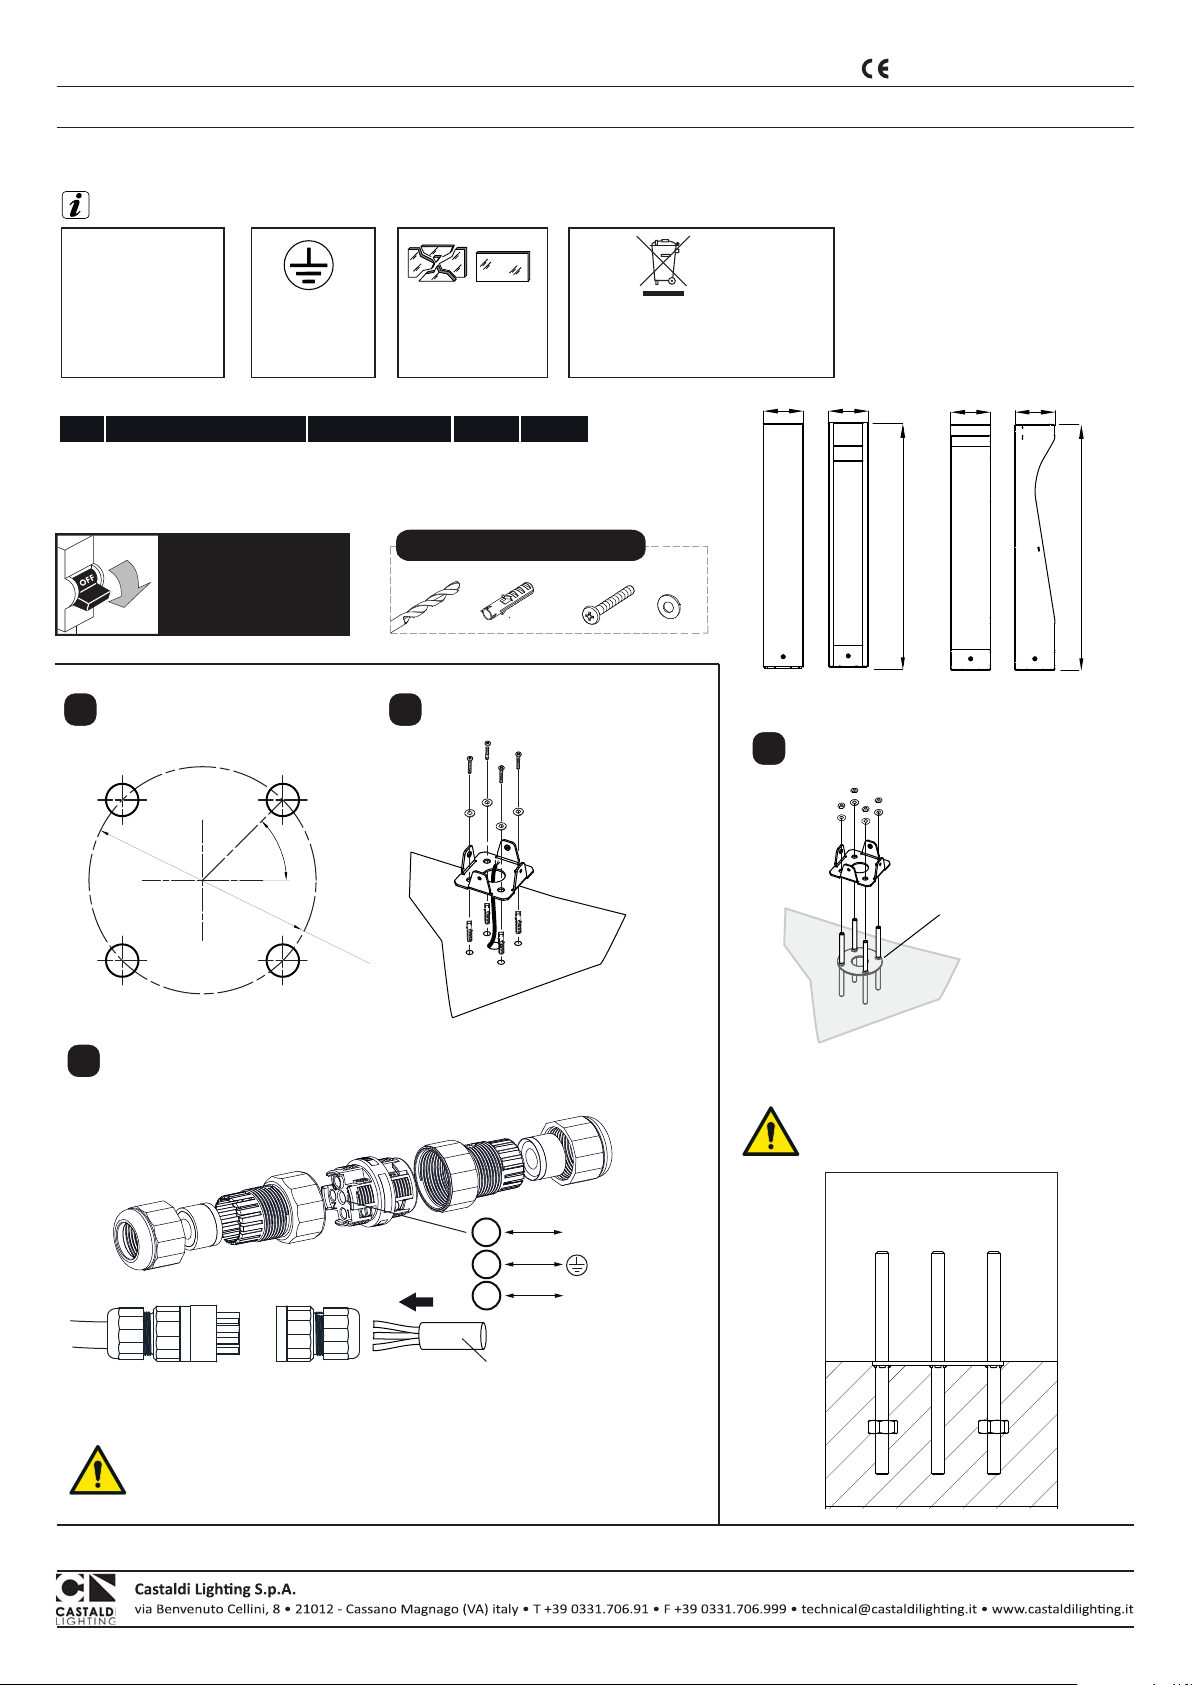
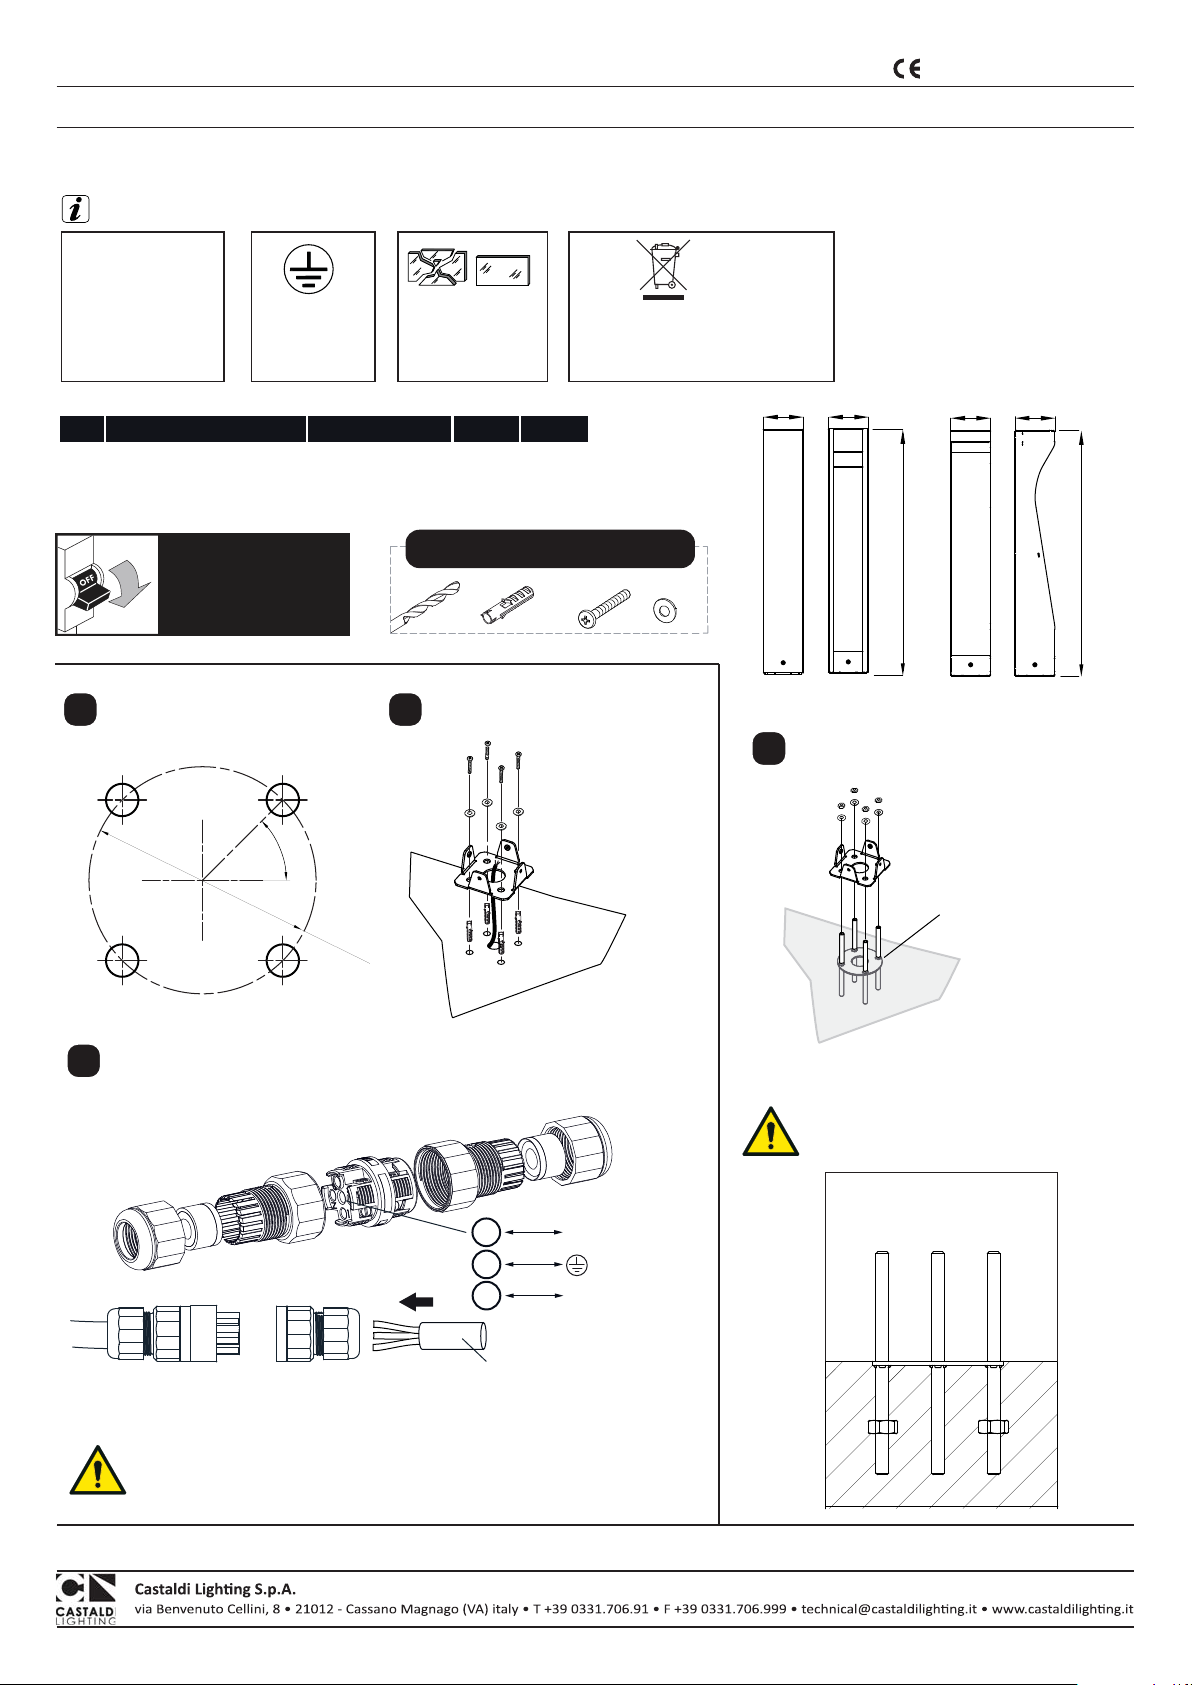
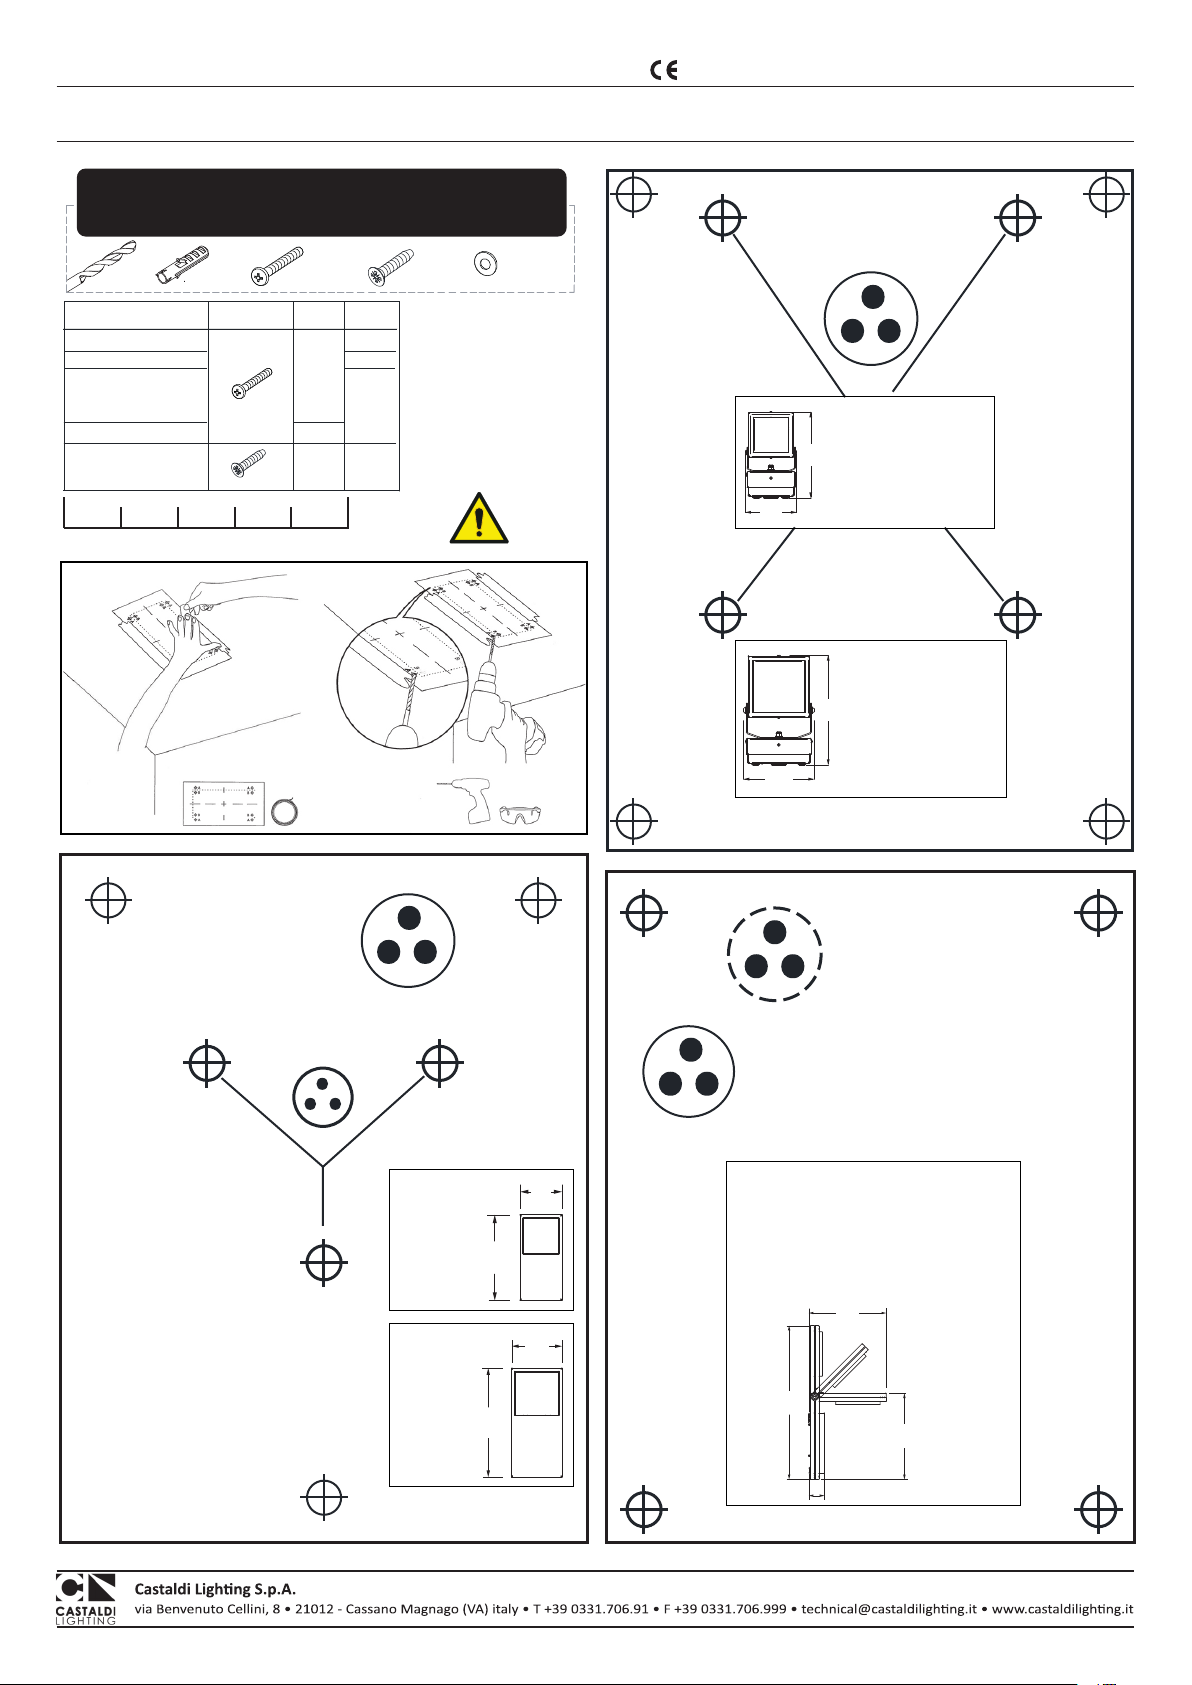
Hinweis: Der Lieferumfang enthält keine Werkzeuge,
Schrauben, Unterlegscheiben und Dübel
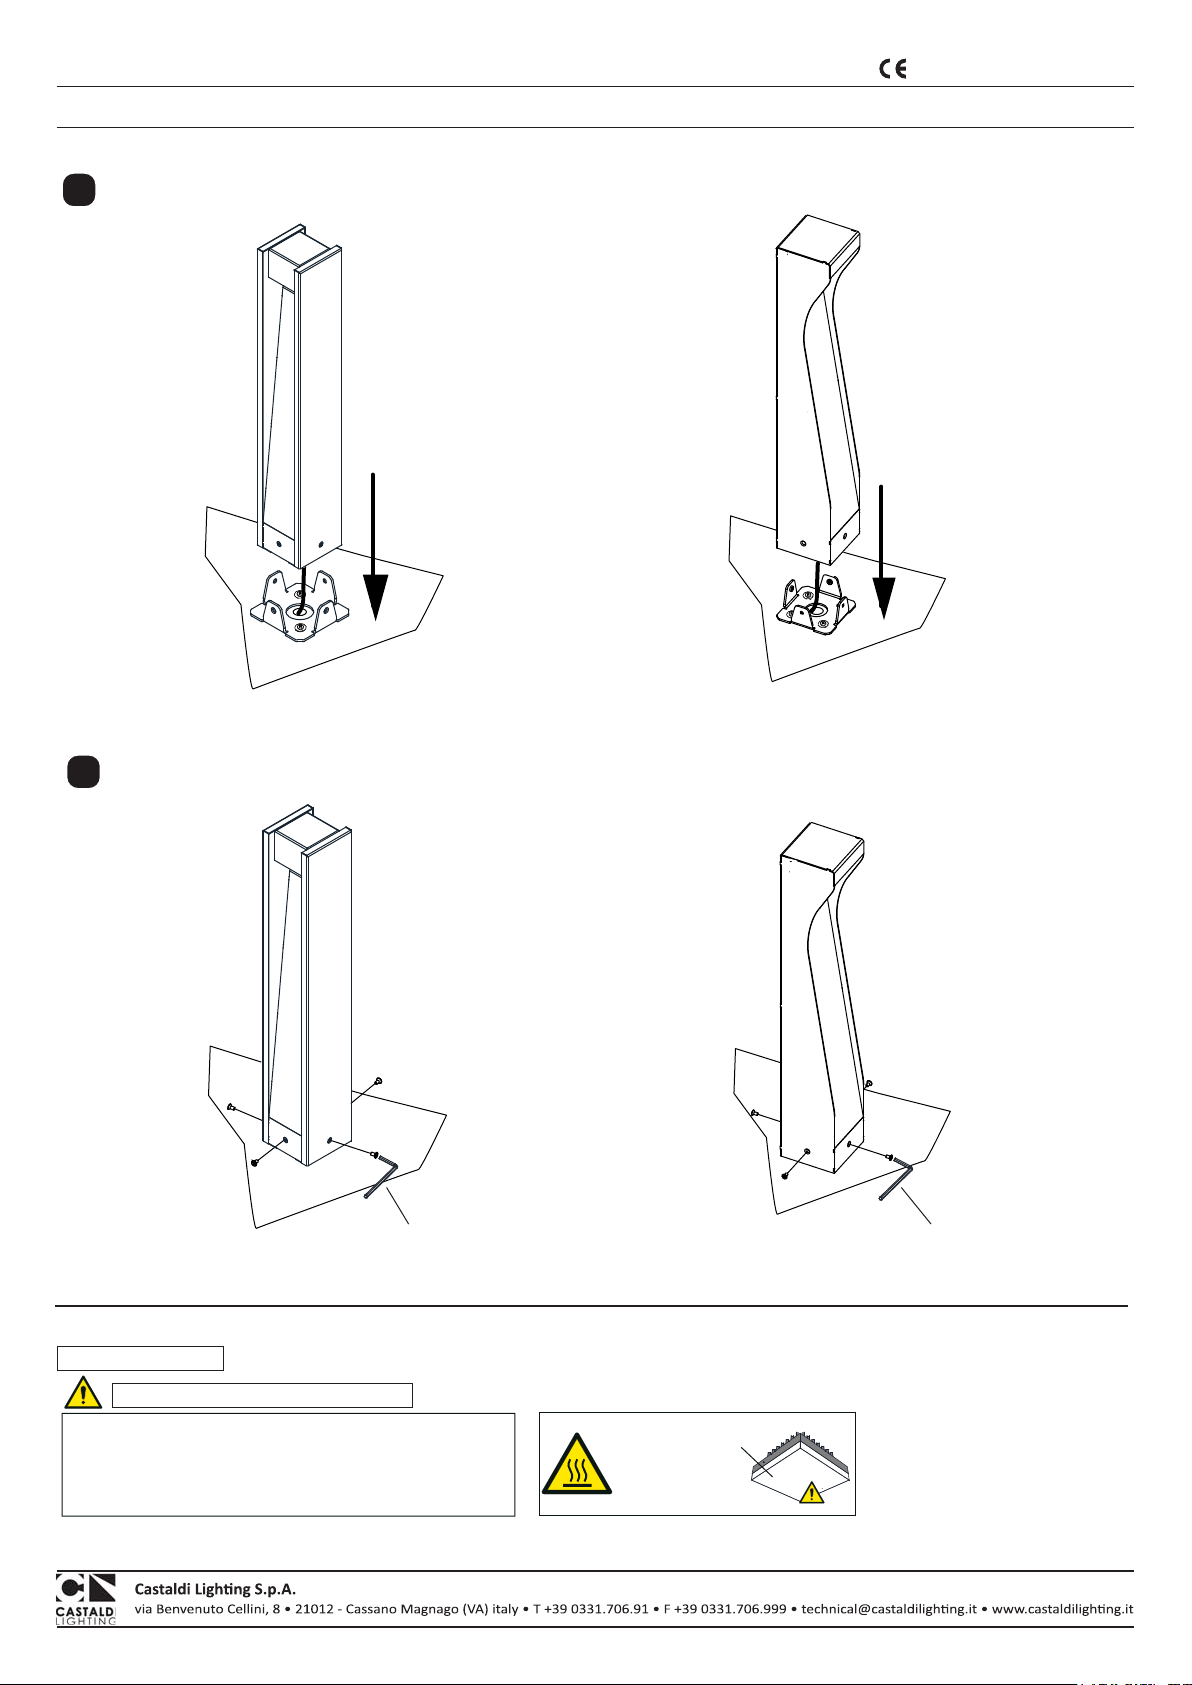
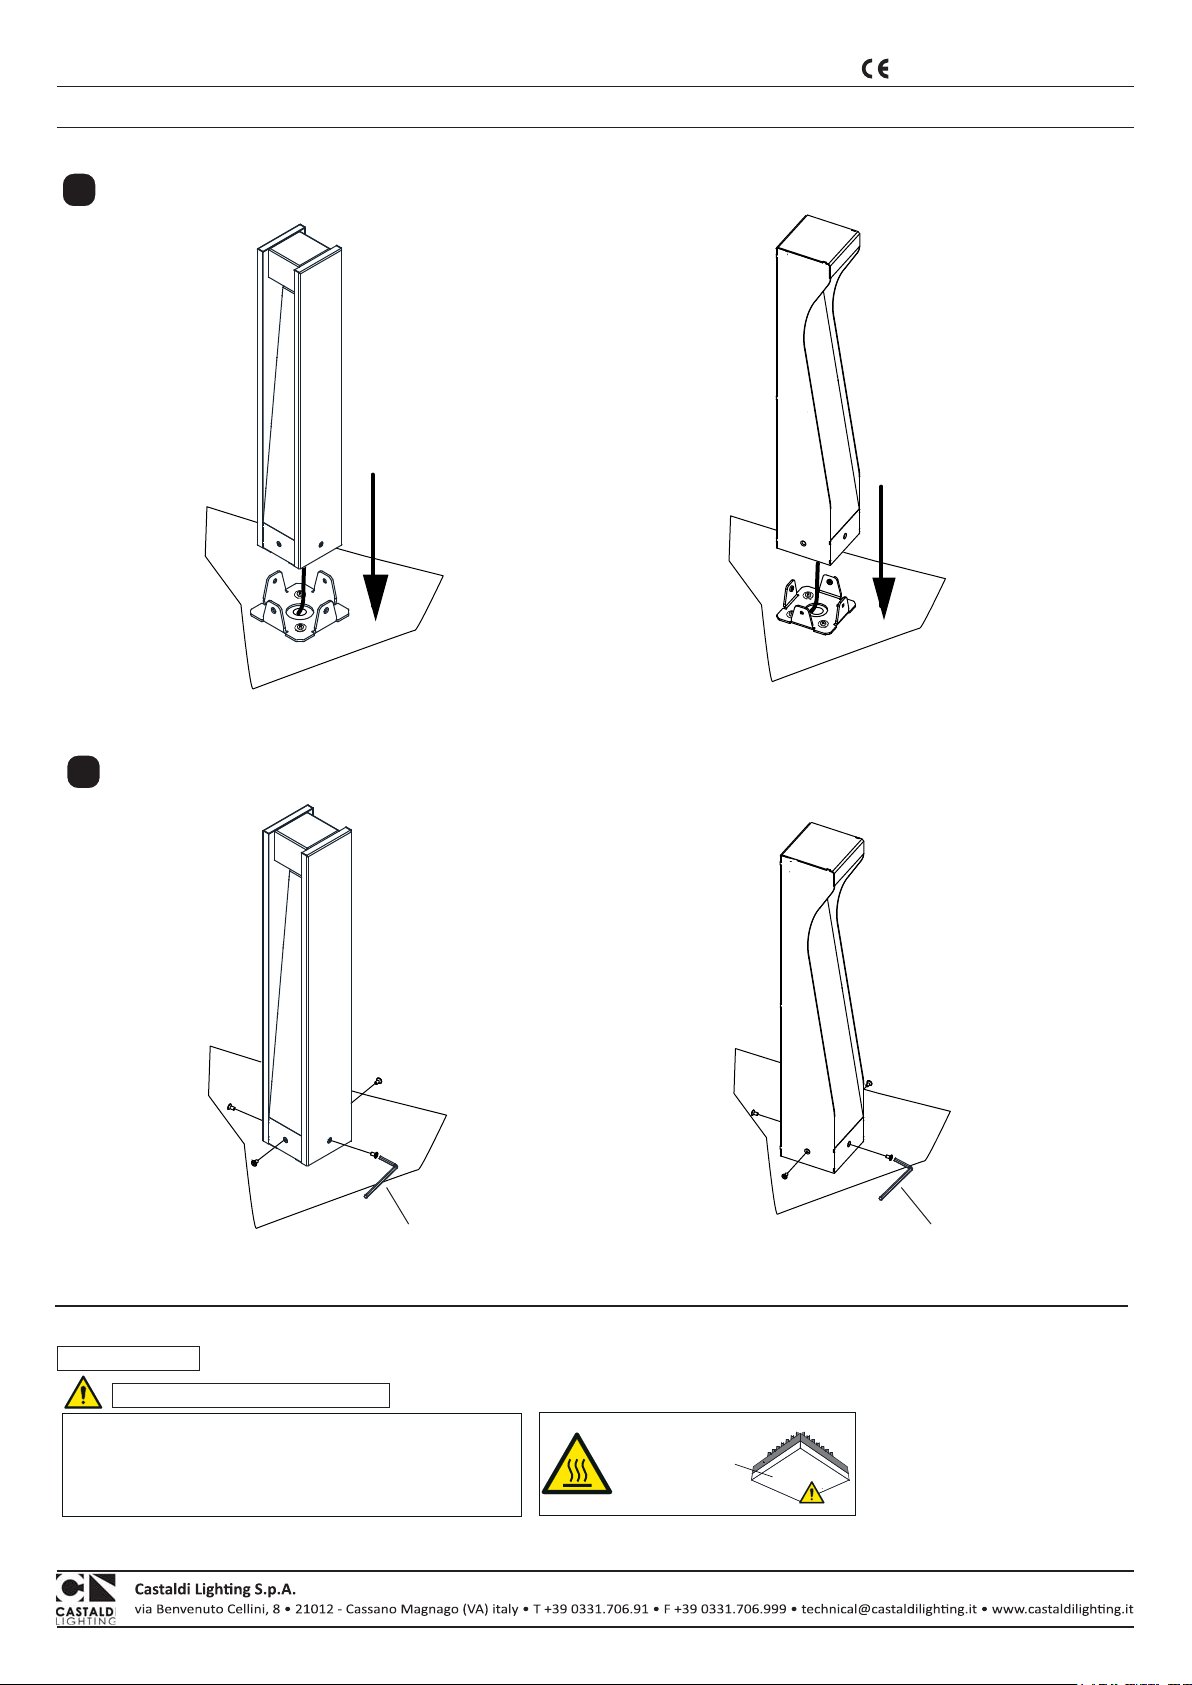
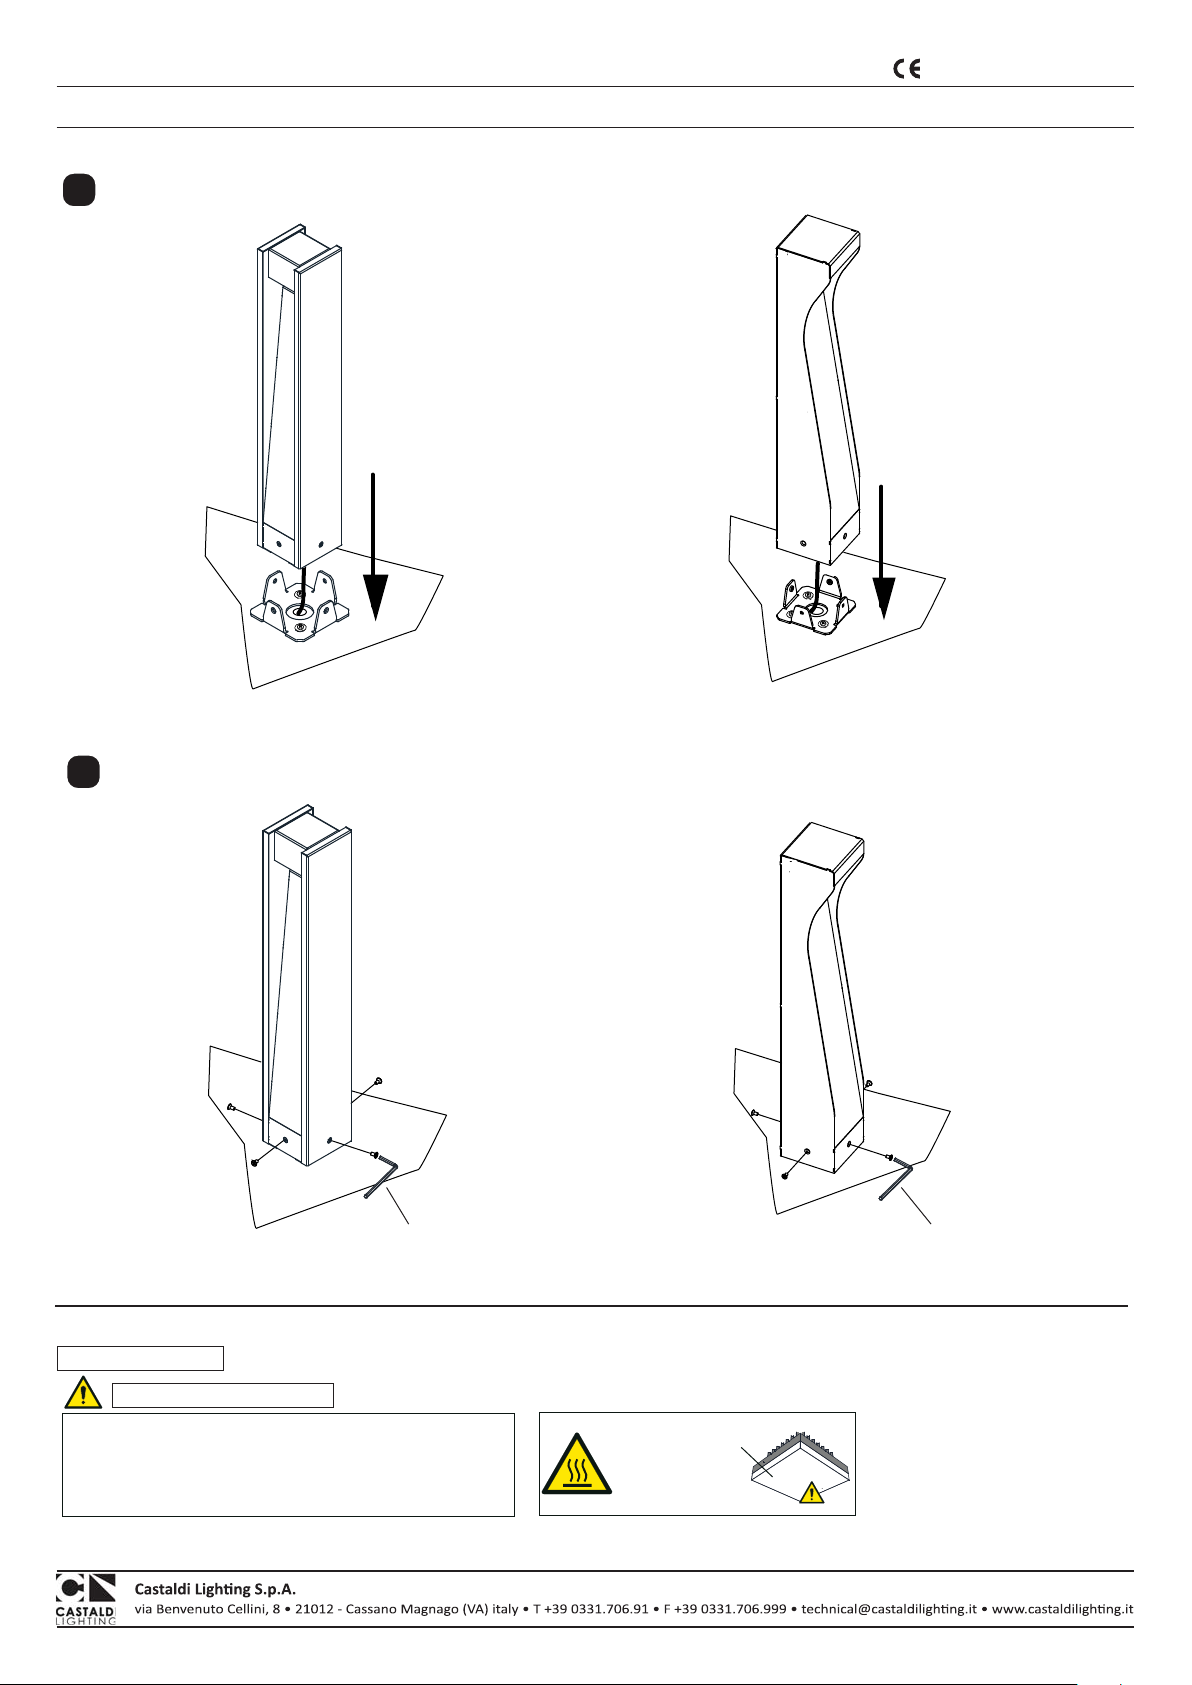
Bei der Montage anbohren und für die Art der verwendeten
Halterung geeignete Schrauben verwenden.
Trennen sie das gerät
von der netzspannung,
bevor sie arbeiten jeder
art ausführen!
ACHTUNG
Versorgungsanschluss: Die Stromkabel anschließen, dabei die korrekte Polung beachten.
ANSCHLUSS AN DAS STROMNETZ:
BOHRUNGEN AUF DER
MONTAGEFLÄCHE AUSFÜHREN
GRUNDPLATTE MIT DEN SCHRAU-
BEN, DÜBELN UND UNTERLEG-
SCHEIBEN BEFESTIGEN
ACHTUNG: VERBINDER MIT
2,5 NM FESTZIEHEN
RICHTIGER EINBAU FÜR
DIE NR. D53/1-TF
NUR ein dreipoliges flexibles Neoprenkabel vom Typ H07RN-F.
KEIN PVC. KEINE EINPOLIGEN KABEL (EN 60598-1).
OPTIONALES BEFESTIGUNGSSYSTEM
(Cod.D53/1-TF)
Stützplatte und Zuganker mit Mörtel vergießen, dann
die Grundplatte mit den beiliegenden Muttern
und Unterlegscheiben daran befestigen.
STECHKLEMMENVERSION