CBC DDK3000 User manual


- 1 -
Before Using This Product
The use of surveillance devices may be prohibited by law in your country. The DDK-3000 Video Encoder
is a high-performance, web-enabled encoder that can be part of a flexible surveillance system. It is the
user’s responsibility to ensure that the operation of such devices is legal before installing this unit for its
intended use.
It is important to first verify that all contents received are complete according to the list in the “Package
Contents” chapter. Take notice of the warnings in the “Quick Installation Guide” before the DDK-3000
Video Encoder is installed, then carefully read and follow the instructions in the “Installation” chapter to
avoid problems due to faulty assembly and installation. This will also ensure that the product is used
properly.
The DDK-3000 Video Encoder is a network device that can be easily deployed by those who have a basic
understanding of TCP/IP networks. The “Troubleshooting” chapter in the Appendix provides remedies to
the most common errors in setup and configuration. You should consult this chapter first if you encounter
difficulties or a system error.
The DDK-3000 Video Encoder is designed for various applications including video sharing, general
security/surveillance, etc. The “How to Use” chapter suggests ways to best utilize the DDK-3000 Video
Encoder and ensure proper operations. For more advanced users, the “URL Commands of The DDK-3000
Video Encoder” chapter serves as a helpful reference to customize existing homepages or integrate the
device with other web servers.
The reader should take care to understand completely the warnings in paragraphs preceded by .
Ignoring these warnings may result in serious hazard or injuries.

- 2 -
Table of Contents
Before Using This Product............................................................................................................. 1
Table of Contents............................................................................................................................ 2
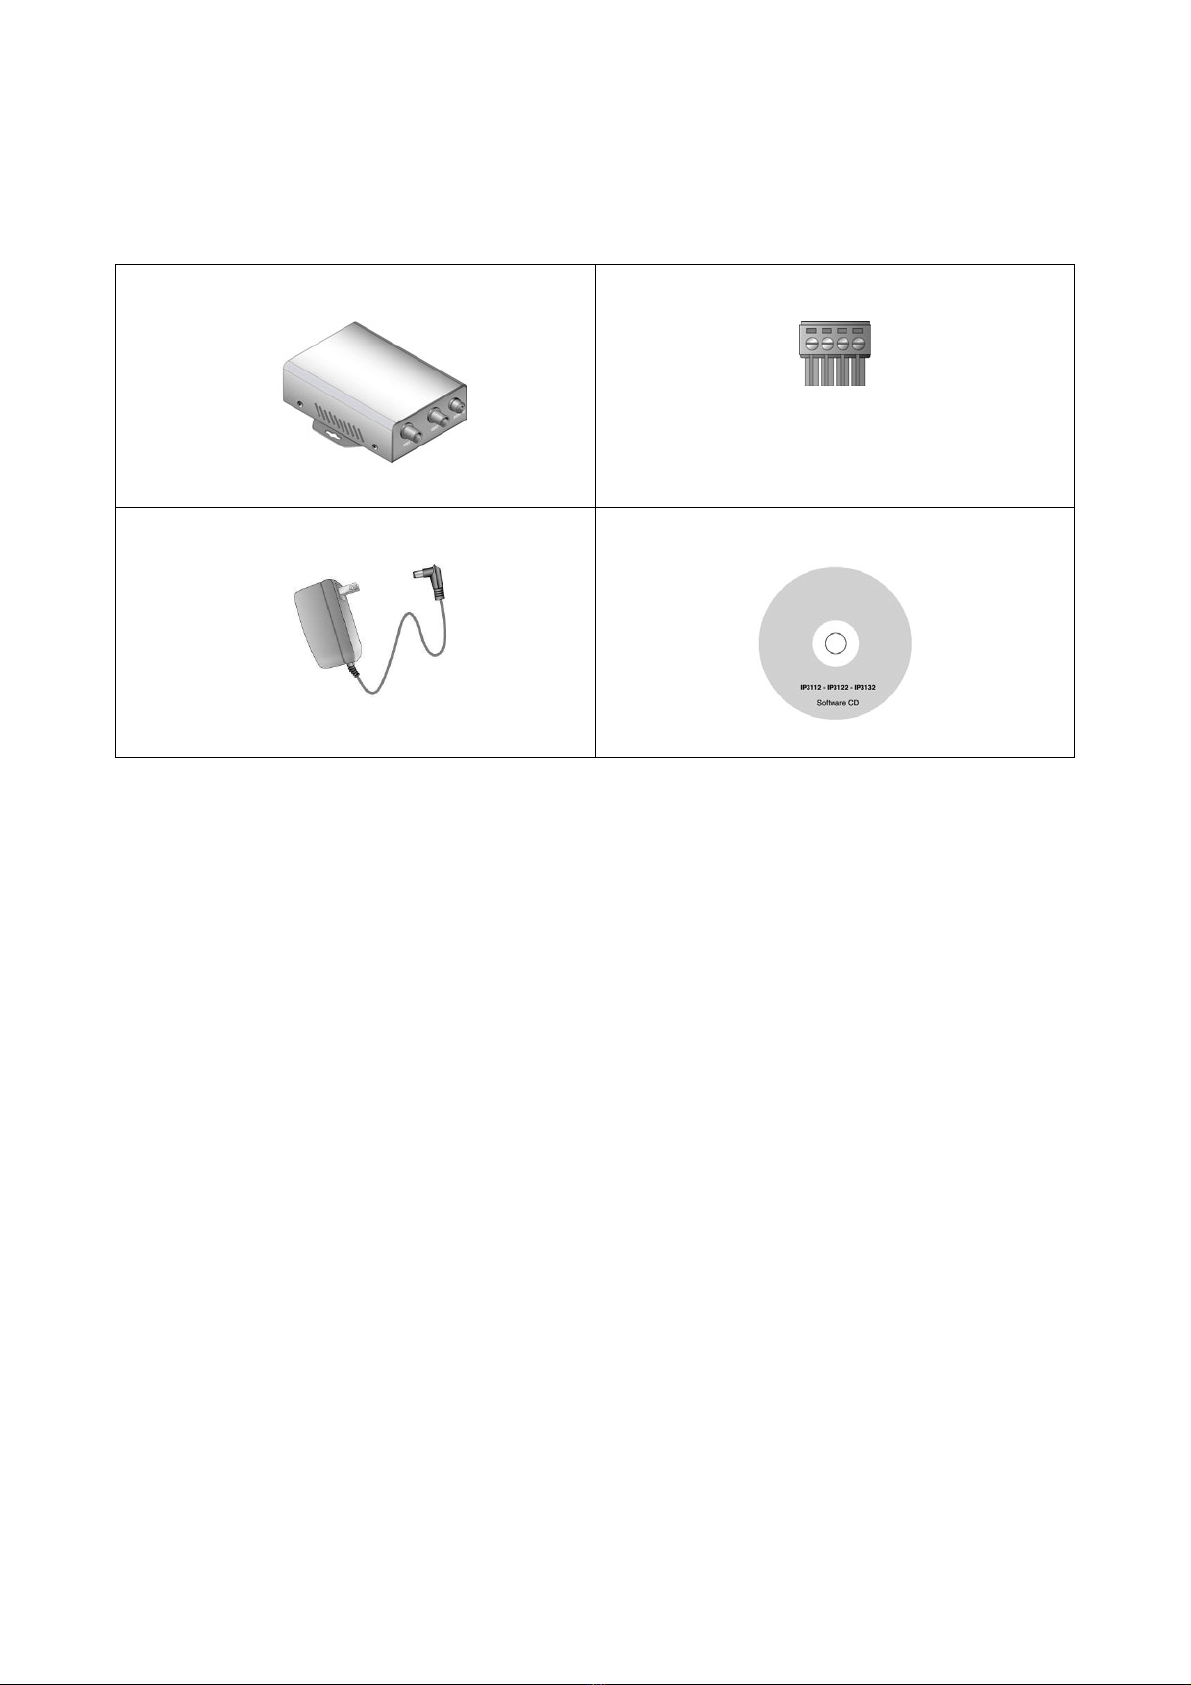
Package Contents............................................................................................................................ 3
Physical Description....................................................................................................................... 4
Front Panel .............................................................................................................................. 4
Rear Panel ............................................................................................................................... 5
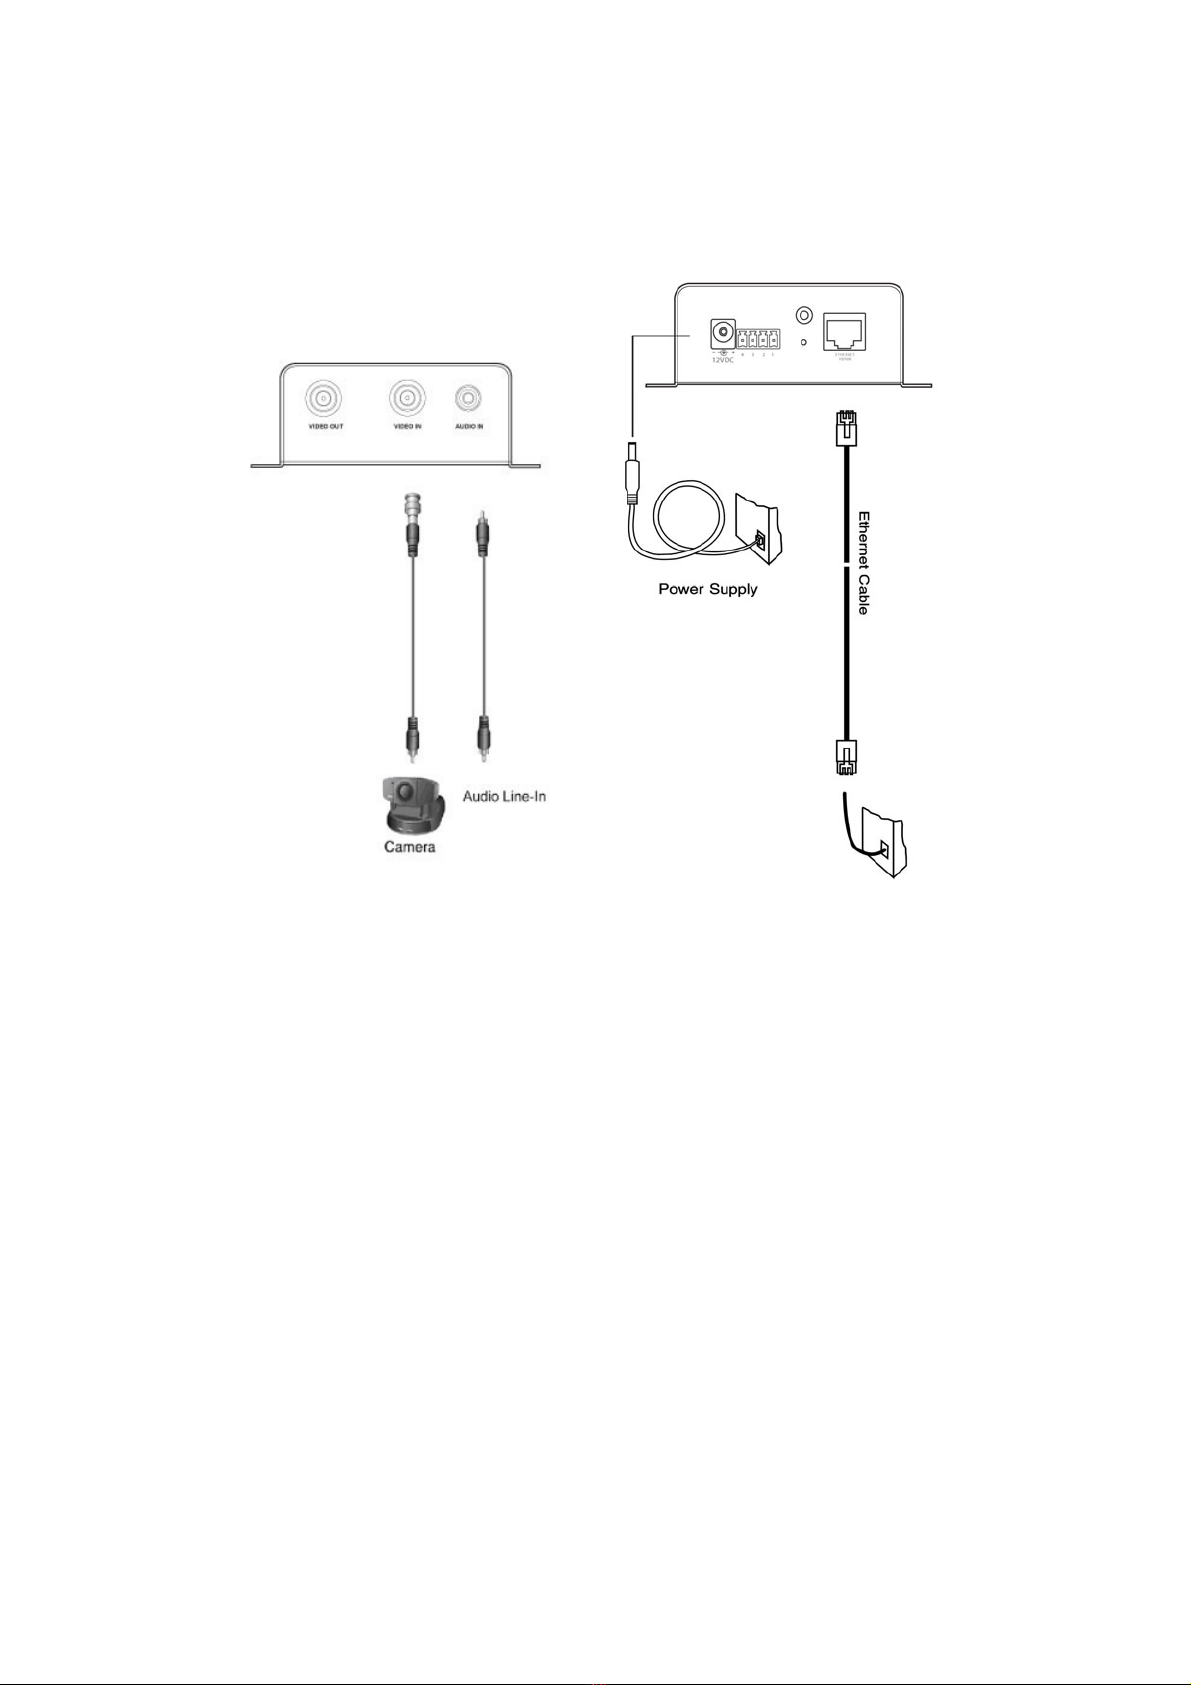
Installation ...................................................................................................................................... 6
Hardware installation.............................................................................................................. 6
Installation............................................................................................................................... 6
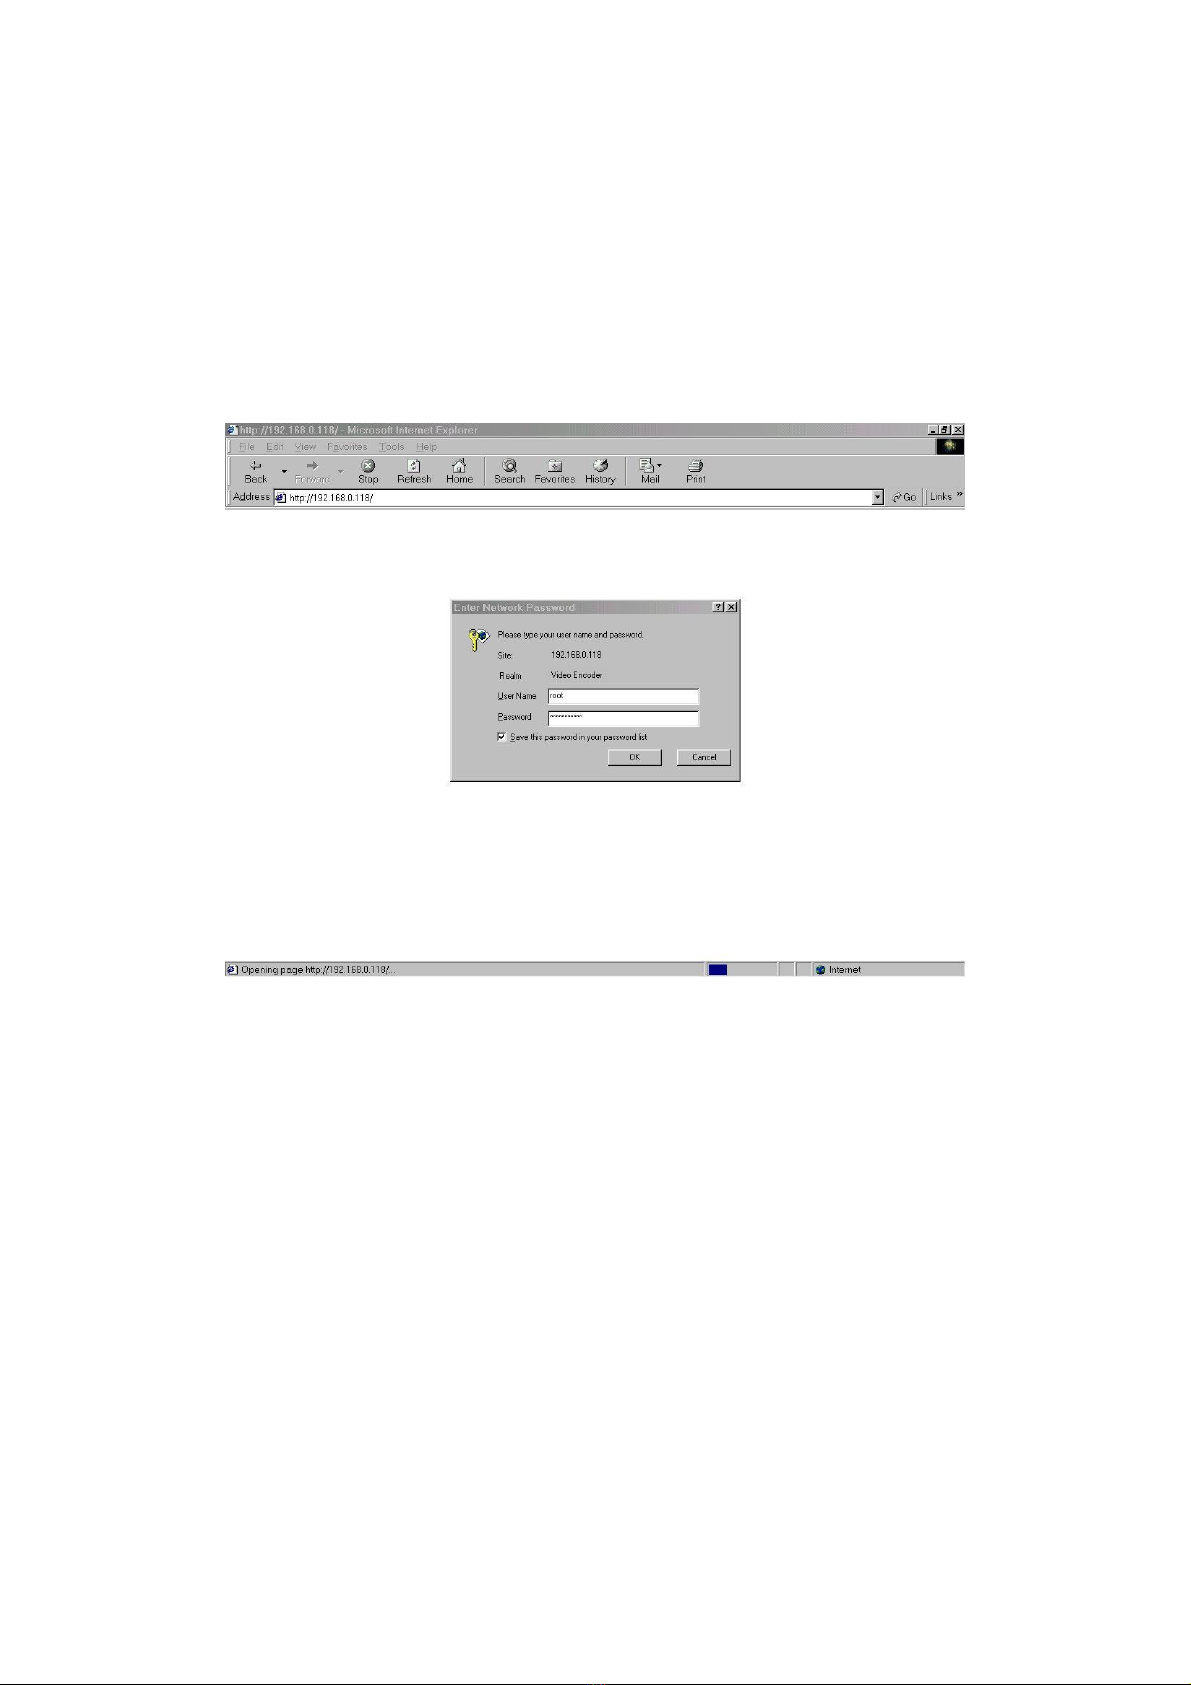
Initial Access to the Video Encoder........................................................................................ 7
How to Use.............................................................................................................................. 8
Installing Plug-in..................................................................................................................... 9
User Accessibility ................................................................................................................. 10
Administrator Accessibility .................................................................................................. 13
Configuration Settings.................................................................................................................. 24
System parameters ................................................................................................................ 24
Security settings .................................................................................................................... 25
Network settings ................................................................................................................... 25
DDNS and UPnP settings ..................................................................................................... 28
Video codec parameters........................................................................................................ 28
Motion detection ................................................................................................................... 30
Application settings .............................................................................................................. 31
Homepage layout settings..................................................................................................... 32
Viewing system log............................................................................................................... 33
Viewing system parameters .................................................................................................. 33
Restore factory default settings ............................................................................................ 33
Appendix....................................................................................................................................... 34
A. Troubleshooting ............................................................................................................... 34
B. Frequently asked questions.............................................................................................. 35
C. URL commands of the Video Encoder............................................................................ 37
D. Technical specifications ................................................................................................... 46

- 3 -
Package Contents
DDK-3000 Video Encoder
I/O terminal block connector
12VDC power adapter
Software CD

- 4 -
Physical Description
Front Panel
BNC video input
The 75Ohms resistance video port should be used for connecting an external camera. To ensure that the
video modulation type is properly detected, the camera should be attached and powered on before the
DDK-3000 Video Encoder is powered on.
BNC video output
The looping video-out port can be used to pass through the analog video signal to an NTSC monitor or
recording device.
RCA audio input
Audio input is configured via the RCA mono-audio, line-in connector. A pre-amp is required to drive an
external microphone used to capture audio.

- 5 -
Rear Panel
Ethernet 10/100 socket
The RJ45 port should be used to connect the DDK-3000 Video Encoder to an Ethernet network via a UTP
category 5 cable. Ensure that the encoder is connected to the local area network before applying power to
the unit. Distance between the DDK-3000 Video Encoder and the network switch should not exceed 300
feet.
Status LED
The DDK-3000 Video Encoder provides an LED to show its status. Refer to the “Troubleshooting”
appendix for detail.
General I/O terminal block
1 DI- INPUT (Initial state of DI is low)
2 DI+ INPUT (Max. 50mA, 12VDC)
3 SW_COMMON OUTPUT (open from SW_OPEN at initial state) (close with
SW_OPEN when set DO to ON)
4 SW_OPEN OUTPUT (Max. 1A, 24VDC or 0. 5A, 125VAC)
The DDK-3000 Video Encoder provides a general I/O terminal block with one digital input and one relay
switch for device control. Pin 1 and pin 2 can be connected to an external sensor device and the state of
voltage will be monitored from the initial state ‘LOW.’ The relay switches of pins 3 and 4 can be used
to turn the external device on or off.
Restore button
A recessed button on the back of the unit can be used to restore the system to factory default settings.
Refer to the “Troubleshooting” appendix for details.
Power adapter
To activate the unit, connect the power jack of the included 12VDC power adapter. Connecting the power
adapter should be the last operation when physically installing the DDK-3000 Video Encoder.
Consult with the dealer of peripheral devices for correct installation.

- 6 -
Installation
Hardware installation
Before installing one or more DDK-3000 Video Encoders at their desired locations, the administrator
should record the serial numbers that can be found on both the unit and on the packing carton.
Cable connection
To install the DDK-3000 Video Encoder, the unit should first be connected to
a network switch via the RJ45 socket. The Ethernet cable should meet UTP
category 5 standards and not exceed 300 feet.
Power on
Make sure all cables are correctly and firmly connected before powering the DDK-3000 Video Encoder.
Turn on cameras, sensors, or any other alarm inputs and then plug in the 12VDC power adaptor of the
DDK-3000 Video Encoder to an AC power socket. When the power adapter is plugged into the utility
socket, the front LED will alternate between green and red for several cycles. After completing the self-
test, the LED will remain green, indicating that the Video Encoder is in standby mode for receiving an IP
address. After getting an IP Address, the LED should blink green every second. Otherwise refer to
Appendix A for troubleshooting.
Installation
In this manual, “User” refers to whoever has access to the DDK-3000 Video Encoder, and
“Administrator” refers to the person who can configure the encoder and grant user access to the device.
Following the hardware installation, users can utilize the Installation Wizard program included in the
product CD-ROM to locate the DDK-3000 Video Encoder on the network. If multiple encoders are
present on the local network, users can differentiate the devices by their serial numbers. The serial number
is printed on the packing carton and also on the DDK-3000 Video Encoder. Please refer to the user’s
manual of the Installation Wizard for detail.
Once installation is complete, the Administrator should proceed to the next section, “Initial Access to the
Video Encoder,” for necessary checks and configurations.
Connect the jack of the power adapter to DDK-3000 Video Encoder prior to plugging the utility end
into the utility power socket. This will reduce accidental electrical surge.
Consult with the dealer of the peripherals for correct installation.

- 7 -
Initial Access to the Video Encoder
Check Network Settings
Once the Installer program has been used to assign an IP address to the DDK-3000 Video Encoder, the
unit can be accessed immediately over the local network. The Administrator should complete the network
settings on the configuration page of the unit, including the correct subnet mask and IP address of
gateway and DNS. Ask your network administrator or Internet service provider for this information.
Unless programmed otherwise, the DDK-3000 Video Encoder requires that the Administrator run the
Installer program each time it reboots. If the network settings are to remain unchanged, this option should
be disabled. Refer to “Network settings” on the System Configuration page for details. If any setting is
entered incorrectly and the unit cannot proceed with system setup, the encoder should be reset to factory
default settings. Follow the steps in the “Troubleshooting” chapter of the Appendix.
Add Password for Authentication
The default Administrator’s password is blank and the DDK-3000 Video Encoder initially will not prompt
the user for a password. Following installation, the Administrator should immediately assign a new
password as a matter of prudent security practice. Once the Administrator’s password is saved, the DDK-
3000 Video Encoder will ask for the user’s name and password before granting access. The Administrator
can set up a maximum of twenty (20) user accounts. Each user can access the DDK-3000 Video Encoder
but only the Administrator’s password will provide access to the system configuration menus. Some
critical functions are exclusive to the Administrator, such as system configuration, user administration,
and software upgrades. The user name for the Administrator is permanently assigned as “root.” Once the
password is changed, the browser will display an authentication window to ask for the new password.
Once the root password is set, there is no provision for the Administrator to recover it. The only option is
to restore the unit to the factory default settings.

- 8 -
How to Use
Authentication
After the user opens the Web browser and enters the URL of the DDK-3000 Video Encoder, an
authentication window will appear requesting a username and password. Upon connection, the following
images are displayed.
The first image below shows the login address window and the second shows the authentication screen.
The user may check the option box to save the password for future convenience.

- 9 -
Installing Plug-in
During initial access to the DDK-3000 Video Encoder in Windows, the web browser will normally
prompt for permission to install a pop-up plug-in for the DDK-3000 Video Encoder. The permission
request depends on the Internet security settings of the user’s PC or notebook. If the highest security level
is selected, the computer may prohibit installation of the plug-in. This plug-in has been registered for
security and is required to display the video in the browser. Users should click on to proceed. If
the web browser does not allow the user to continue to install, check the Internet security options and
lower the security levels or contact your networking supervisor for help.

- 10 -
User Accessibility
Main screen with camera view
The main page layout has two parts:
• Configuration functions: The encoder can be configured using this interface.
• Camera View: What the camera sees.
Click on the configuration link to the left of the image window to enter the configuration page.
Digital Zoom
Selecting the magnifier icon under the camera view will enable the digital zoom control. Uncheck
“Disable digital zoom” and use the slider control to change the zoom factors.
Digital Output
Clicking the “On” or “Off” button turns the digital output to either on or off status. This feature can be
used to activate a relay switch remotely, turn on a light, etc.
Snapshot
An image can be captured through the web browser by clicking the button, after which a new
window will pop up to show the snapshot. Right-clicking on the image will display an option to save the
image to the user’s hard drive.

- 11 -
Client settings
When first accessing the “Connection type” page in Windows, the web browser will prompt the user for a
new plug-in installation to support the DDK-3000 Video Encoder. This plug-in has been registered for
certification and is required to change the PC parameters at the client’s site. The user should click
to install the plug-in. If the web browser does not allow the user to complete the installation, check the
Internet security settings to lower the security level or contact the IT or networking supervisor.

- 12 -
There are two options listed on the Client settings page:
• Media Option, which allows users to specify if audio should be muted
• Protocol Option, which lists the available communication protocols that can be established between the
client and the encoder
There are three protocols choices to optimize usage:
• UDP
• TCP
• HTTP
The UDP protocol enables real-time audio and video transmission. However, some packets may be lost
during heavy network traffic bursts, which can impact the video quality.
Selecting the TCP protocol will normally result in less packet loss, thereby producing better video quality.
Choosing this protocol may, however, increase latency resulting in a slight delay in the video transmission
depending upon the network infrastructure.
The HTTP protocol should be selected if the network is protected by a firewall and only allows HTTP
Port (80) to be opened. In this mode, only video is available and audio will not be sent. If no special need
is required, UDP protocol is recommended.
Generally speaking, the client’s choice will be in the order of UDP — TCP — HTTP. After the DDK-
3000 Video Encoder is successfully connected, “Protocol Option” will indicate the selected protocol. The
selected protocol will be saved to the user’s PC and will automatically be established during the next
connection. If the network environment changes, or the user wants to manually change the transmission
protocol, simply open the Client settings page, select the desired option, save, and return HOME to re-
connect.
<url> http://<DDK-3000 Video Encoder>/protocol.html
<DDK-3000 Video Encoder> is the domain name or the original IP address of the DDK-3000 Video
Encoder.

- 13 -
Administrator Accessibility
Fine-tuning for Optimum Performance
Optimum performance of the DDK-3000 Video Encoder generally equates to having a high frame rate,
high-resolution video image at the lowest possible network bandwidth. The three factors, “Maximum
frame rate,” “Fix bit rate,” and “Fix quality,” on the Video Configuration page, should be adjusted to
achieve the best possible performance based on the available bandwidth.
For Best Real-time Video Images
To achieve optimum real-time video, the available network bandwidth should be capable of transmitting a
minimum of 20 image frames per second. If a broadband network is available, transmission rates will
normally exceed 1 Mbps. In this environment, set the “Fix bit rate” to 1000Kbps or 1200Kbps, and set
“Fix quality” at the highest quality. The maximum frame rate is 25 fps in a PAL system and 30 fps in an
NTSC system.
For instance, if network bandwidth is limited to 384 Kbps, you can fix the bit rate at a lower setting and
set the maximum frame rate to 25 fps or 30 fps. If the video images are inconsistent, you may want to
slow the maximum frame rate down to 20 fps in order to lower the rate of data transmission. This will
produce better video quality. If your network bandwidth is below 384 Kbps, set the “Fix bit rate”
according to your bandwidth and try to get the best performance by fine-tuning the “Maximum frame
rate.”
On a slow network, choosing a higher frame rate will decrease the video quality. It is therefore important
to test a combination of settings to achieve the best overall video quality. Another way to improve the
video image quality is to select “Half” in the “Size” option, which will reduce the screen size. Video
quality will also be impacted by the number of users simultaneously connected to the encoder, even when
the parameters have initially been finely tuned.

- 14 -
Optimum Quality Images
To achieve the best video quality, the “Fix quality” setting should be “Detailed” or “Excellent,” and the
“Maximum frame rate” should match your network’s bandwidth. If your network is slow and you
encounter distortion in the video images, go to the TCP protocol in “Connection type” and choose a
different mode of transmission. This may increase the amount of latency in the video, although the quality
should improve.
Somewhere Between Real-time and Clear Images
If you have a broadband network, set “Fix quality” at “Normal” or better, rather than setting “Fix bit rate.”
You can also fix the bandwidth according to your actual network speed and adjust the frame rate. It is
recommended that you start at 30 fps and adjust downward for best results, but not below 15 fps. If the
image quality does not improve, select a lower bandwidth setting. Once again, it is important to test a
variety of settings in order to identify the combination that works best in your particular network
environment.
Establishing accounts for new users
Protecting DDK-3000 Video Encoder with passwords
By default, the DDK-3000 Video Encoder is shipped without a password. That means anyone can access
the DDK-3000 Video Encoder and its configuration settings, as long as the IP address is known. It is
necessary for the administrator to assign a password if others will have access to the DDK-3000 Video
Encoder. This will allow multiple users to view the video without having access to the configuration
menu. The administrator should enter a root password and confirm it in section 1 above. This password is
used to identify the administrator. Up to 20 additional users (without administrator rights) can then be
added in section 2. An option to access DI/DO (digital input/output) is also provided for each account,
allowing the administrator to prohibit certain users from controlling any devices attached to the encoder.
Users can be deleted from section 3.

- 15 -
More flexible options for viewers
As indicated in section 4 above, options are available to accommodate additional users. Selecting the first
option will allow anyone using “demo” as the user name to connect without a password. The
Administrator can also decide if additional users should be allowed to access the video when the number
of simultaneous users exceeds the limit. If this option is enabled, the users who are creating the overload
will have access only to snapshot images rather than motion video.
Change homepage layout
To change the subject text of homepage
1. Click the “Configuration” on homepage.
2. Change the text in “Host name.”
3. Click the “Save” button.

- 16 -
To change the font color
1. Click “Configuration” on homepage.
2. Click “Homepage layout” in the left column.
3. Find “Font color” and pull down the list to choose a color.
4. Click the “Save” button.
* The font color you select should contrast against the background.
To change the background
1. Click “Configuration” on homepage.
2. Click “Homepage layout” in the left column.
To display simple color without any image:
1. Find “Background graph” and choose “blank.”
2. Find “Background color” and pull down the list to choose a color.
3. Click the “Save” button.
*Choose an appropriate background color that will contrast with the font.
To use an image from another website as your background:
1. Find “Background graph” and choose “URL.”
2. Type the URL of the image on the Internet in the edit box, for example:
http://dgl.microsoft.com/thumbnails/j023/j0235217(t).gif
3. Click the “Save” button.
To change the default background image stored in the DDK-3000 Video Encoder:
1. Find “Background graph” and choose “default.”
2. Click the “Save” button.
3. Prepare an image file with size less than 131000 bytes and rename it as “wallppr.jpg.”
4. Open an FTP client program and connect to the DDK-3000 Video Encoder. The user name and
password is the same as the Administrator’s.
7. Transfer wallppr.jpg from the local folder to the DDK-3000 Video Encoder.
8. Close the FTP program and reload the homepage of the DDK-3000 Video Encoder.

- 17 -
To change the image logo at the upper left corner of the homepage:
1. Click “Configuration” on the homepage.
2. Click “Homepage layout” in the left column.
To remove any logo:
1. Find “Logo graph” and choose “blank.”
2. Click the “Save” button.
To use an image from another web site as your logo:
1. Find “Logo graph” and choose “URL.”
2. Type the URL of the image on the Internet in the edit box, for example:
http://dgl.microsoft.com/thumbnails/j023/j0234430(t).gif
3. Click the “Save” button.
To change the default logo stored in the DDK-3000 Video Encoder:
1. Find “Logo graph” and choose “default,”
2. Click the “Save” button,
3. Prepare an image file with size less than 65000 bytes and rename it to logo.gif.
4. Open an FTP client program and connect to the DDK-3000 Video Encoder. The user name and
password is as same as the Administrator’s.
5. Transfer logo.gif in local folder to the DDK-3000 Video Encoder.
6. Close the FTP program and reload the homepage of the DDK-3000 Video Encoder.
To add a hyperlink to the logo image:
1. Find “Logo link” and type the hyperlink in the edit box, for example: http://www.mywebsite.com.
2. Click the “Save” button.

- 18 -
How to design a homepage to replace the current one
1. Prepare a homepage with size less than 65000 bytes and rename it to “user.htm.”
2. Insert the html codes of the video object, the bold text in the following example, into the appropriate
position in user.htm. Note that the codes of the video object must be copied exactly, including the
letter case.
3. Open an FTP client program and connect to the DDK-3000 Video Encoder. The user name and
password is the same as the Administrator’s.
4. Transfer user.htm in the local folder to the DDK-3000 Video Encoder.
5. Close the FTP program and reload the homepage of the DDK-3000 Video Encoder.
6. Click “Configuration” on homepage.
7. Click “Homepage layout” in the left column.
8. Check “Use the customized homepage.”
9. Click the “Save” button and return to homepage.
* The user.htm only provides plain text content that scripts and URL of external resources can be used
to adorn the homepage. Refer to tutorials of writing HTML and scripts.
****** Example homepage begin ******
<html>
<head>
<title>Example – custom homepage</title>
</head>
<body background="/pic/wallppr.jpg">
<p>
<a href="/setup/config.html">
<img src="http://dgl.microsoft.com/thumbnails/j023/j0234430(t).gif" align="left"
width="64" height="64">
</a>
<font size="7" face="Comic Sans MS" color="#FF0000">
DDK-3000 Video Encoder Demo
</font>
</p>
<p align="left">
<!-- Copy the next bold line to where you want to show the image coming from DDK-
3000 Video Encoder. This line is remark only and is hidden on homepage. //-->
<OBJECT ID=VAMCtrl></OBJECT>
</p>
</body>
</html>
****** Example homepage end ******

- 19 -
Build a multimedia web attraction site
Demo on multiple sites – mid-scale service
The DDK-3000 Video Encoder can support up to 10 users simultaneously. After installation, any camera
attached to the DDK-3000 Video Encoder can be viewed simply by entering the IP address of the encoder
in the web browser.
Product demo for e-business – large-scale service
If the number of users exceeds the limit, the DDK-3000 Video Encoder can allow the “overload” viewers
to see the snapshots in JPEG mode, on the homepage. These are still images and will be periodically
refreshed automatically. It needs a script function supported by the web browser.
1. Click “Configuration” on homepage.
2. Click “Security” in the left column.
3. Go to the page bottom and check “Allow more viewers with snapshot mode.”
4. Set the snapshot interval to refresh the still image automatically. The longer the snapshot interval is,
the better the snapshot mode works for more viewers.
To increase substantially the number of simultaneous viewers, a host server, capable of handling a large
volume of network traffic, can be configured on the network to receive and refresh incoming images from
the DDK-3000 Video Encoder. The host should be set up as an FTP server with the DDK-3000 Video
Encoder configured as an FTP client to upload the pictures. Access to the DDK-3000 Video Encoder will
then be independent of the number of viewers and the picture quality will remain constant.
To set up the FTP function:
1. Click “Configuration” on homepage.
2. Click “Network” in the left column.
3. Enter the FTP-related settings including Encoder, user name and password, and the upload path if
specified by the web space.
4. Click save and wait for system restart.
If the customized homepage goes wrong and cannot display, link to the “Homepage layout” page,
“http://<IP address of DDK-3000 Video Encoder>/setup/layout.html,” to disable “Use the customized
homepage.”
Table of contents