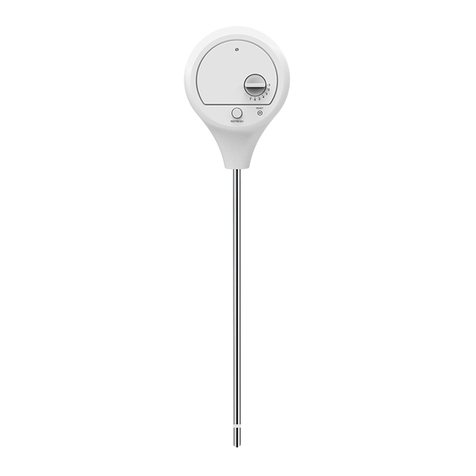
WIRELESS THERMO-HYGRO SENSOR
WIRELESS SOIL MOISTURE & TEMPERATURE SENSOR
Model: C3127A
User Manual
Thank you for selecting this Wireless Soil Moisture & Temperature sensor. This manual
is used for EU, US or AU version. Please read the instructions carefully according to the
version you purchased and keep the manual well for future reference.
IMPORTANT NOTE
- Read and keep these instructions.
- Do not cover the ventilation holes with any items such as newspapers, curtains
etc.
- Do not clean the unit with abrasive or corrosive materials.
- Do not tamper with the unit’s internal components. This invalidates the warranty.
- Only use fresh batteries. Do not mix new and old batteries.
- Do not dispose old batteries as unsorted municipal waste. Collection of such
waste separately for special treatment is necessary.
- Attention! Please dispose of used unit or batteries in an ecologically safe
manner.
- Technical specications and user manual contents for this product are subject to
change without notice.
CAUTION
- Danger of explosion if battery is incorrectly replaced. Replace only with the
same or equivalent type.
- Battery cannot be subjected to high or low extreme temperatures, low air
pressure at high altitude duning use, storage or transportation.
- Replacement of a battery with an in correct type that can result in an explosion
or the leakage of ammable liquid or gas.
- Disposal of a battery into re or a hot oven, or mechanically crushing or cutting
of a battery, that can result in an explosion.
- Leaving a battery in an extremely high temperature surrounding environment
that can result in an explosion or the leakage of ammable liquid or gas.
- A battery subjected to extremely low air pressure that may result in an explosion
or the leakage of ammable liquid or gas.
- An appliance is only suitable for mounting at height ≤ 2m.
OVERVIEW
2
7
1
6
5
4
1. Transmission status LED
2. Sensor metal probes
3. Moisture sensor
4. Wall mounting holder
5. [CHANNEL] slide switch
to assign the sensor to
Channel 1,2,3,4,5,6 or 7
6. [ RESET ] key
7. Battery compartment
3
DIFFERENCES BETWEEN EU AND US VERSION
Below table show the dierences between the Europe(EU), United State(US) and
Australia(AU)
EU version US version AU version
Front
side
rating
868MHz
SOIL SENSOR
915MHz
SOIL SENSOR
917MHz
SOIL SENSOR
GETTING STARTED
1. Remove the battery door.
2. Slide the [ CHANNEL ] slide switch to choose a channel.
3. Insert 2 x AA size batteries into the battery compartment according to the polarity
mark on the battery compartment..
4. Close the battery door.
5. After inserting batteries, the transmission status LED will light up 1 sec.
NOTE:
- Ensure to assign dierent channels of dierent sensors, in case you need to pair more
than one sensors.
- Once the channel is assigned to a Wireless Soil Moisture & Temperature sensor, you
can only change it by removing the batteries or resetting the unit.
- Avoid placing the sensor in direct sunlight, rain or snow.
PAIRING THE WIRELESS SENSORS WITH THE CONSOLE
The console will automatically search and connect to your wireless sensor(s). Once
your sensor(s) pair up successful, the sensor(s) signal strength indication and weather
information will appear on your console display.
NOTE:
During signal transmission, the LED indicator of the sensor will ash.
TEMPERATURE DISPLAY
On the display of the console which the soil sensor is linked to, temperature reading will
be displayed.
SOIL MOISTURE DISPLAY
Soil moisture can be claried into 5 dierent levels: Very Dry, Dry , Moist, Wet and Very
Wet.
To determine the moisture of soil, the sensor calibrate the moisture into 16 points, and
correlate them into percentage value:
Points Percentage Level
1 0%
Very Dry
27%
3 13%
420%
527%
6 33%
Dry
7 40%
8 47%
9 53%
10 60%
Moist11 67%
12 73%
13 80% Wet
14 87%
15 93% Very Wet
16 99%
NOTE:
The measurement accuracy of the sensor can be aected by the soil condition. For
example, the loose soil may get lower moisture level that compare with the dense soil.


