1
2
5
3
8
8B
front
8A
9
4
6
7
7
3
8A
1
2
6
5
Thank you for purchasing the Discgear®Browser 100. Please take
time to get to know your Browser 100 and its many benefits. Then
fill your Browser 100 with your favorite discs.
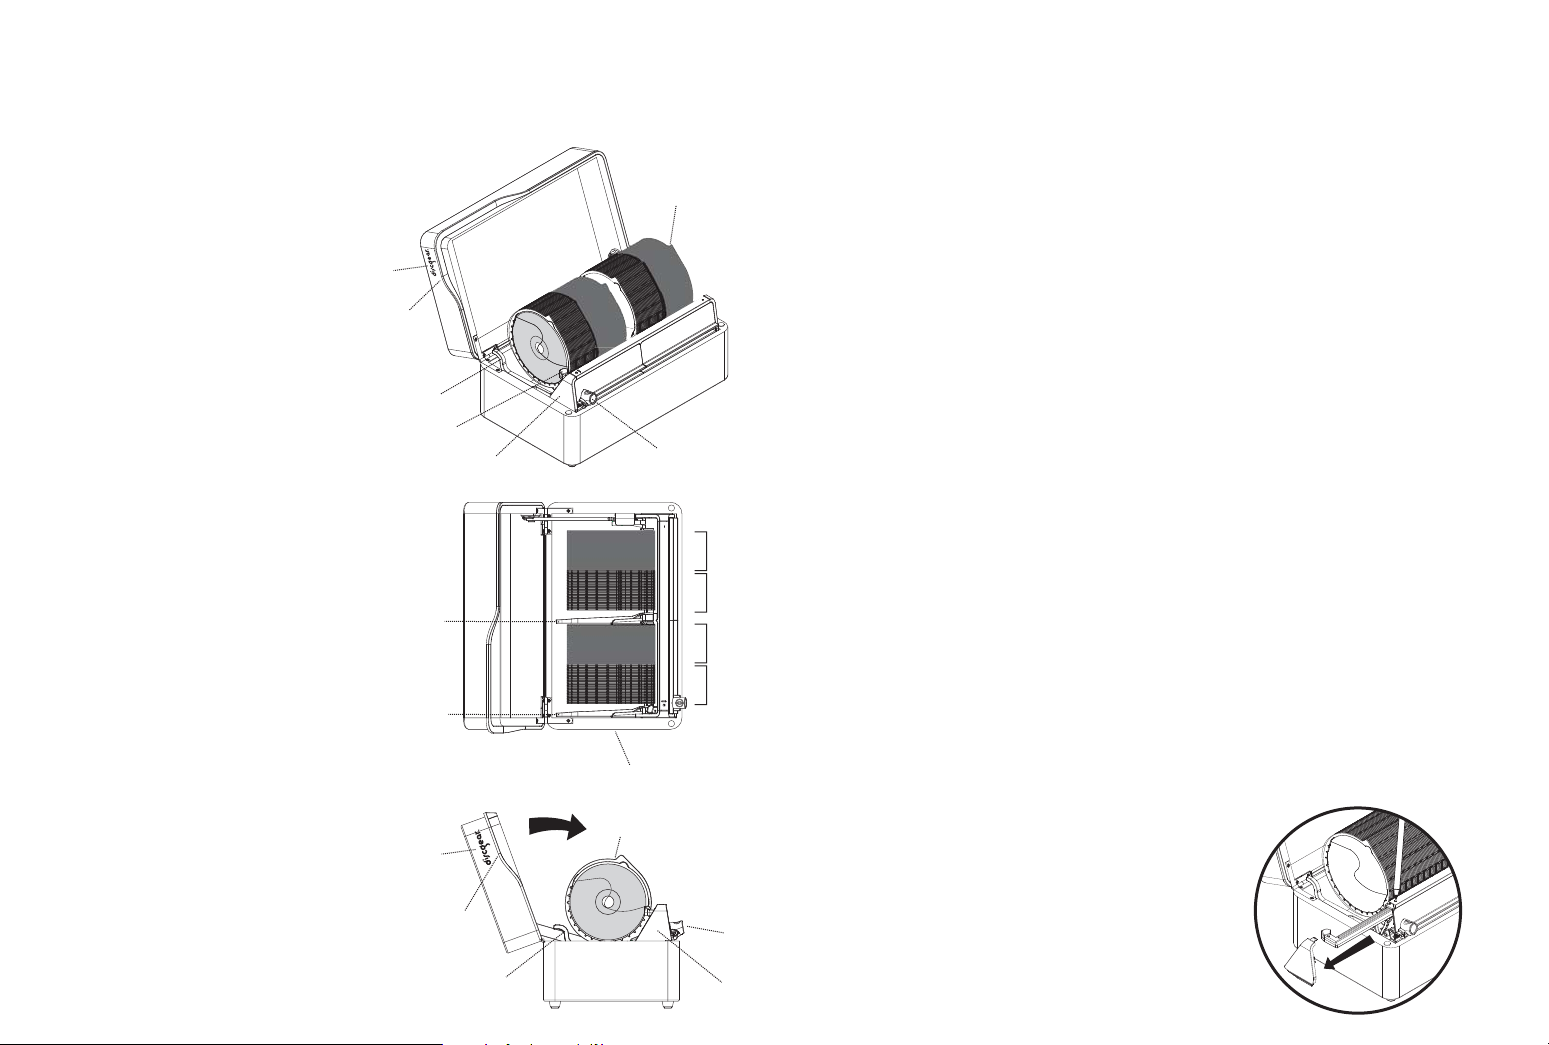
Getting to know your Browser 100
1. Front facing – The Discgear®logo
marks the “front” of the unit.
2. Silver rail – Used to open the unit.
3. Finger notch on the disc packet –
Allows you to reset the disc packets
manually.
4. LED light – Allows you to view the
discs in dim lighting. The small on/off
switch on top of the light enclosure,
allows for manual override of the LED
light feature.
5. LED battery enclosure – Access the
battery enclosure thru the silver end
cap located at the front of the unit
(see instructions, D).
6. Slider button – To select a disc, start
with the disc packets up and the
slider at the front of the unit. Gently
push down and slide the button until
you find the disc of your choice.
7. Colored Disc Packets– Each section
of 25 discs is categorized by color to
give you a general idea where your
discs are located.
8. Reset lever(s) – The reset lever A
allows you to reset discs 1-50. Lever
B resets discs 51-100.
9. Closing the Browser – The Browser
lid can be closed manually when the
discs are in the up position or down
position. Gently close the lid.
Browser 100 Instructions
A. Opening your Browser. To open, simply lift the silver rail. As you open the
Browser, the 100 disc packets will raise automatically so that you may begin
browsing.
B. Fill your Browser.Start at the front of the unit and insert your first disc into
the first disc packet. Then press the slider down and move it towards the back
to trip/reveal the 2nd packet. Repeat for all 100 discs.
C. Browsing for discs. Press the slider down and move it front to back to scan or
browse through your 100 discs. (NOTE: Do not browse for discs from back to
front.)
1. The disc packets are organized by color every 25 discs. For example, discs
1-25 and 51-75 are black while 26-50 and 76-100 are dark gray. This will
help give you a general idea of where your favorite discs are located as
you become more familiar with your disc collection.
2. Did you pass your desired disc while browsing? If so, simply use your
finger to lift the individual disc packet(s) until you find your desired disc.
3. To reset all of your discs, lift the reset lever(s) located at the front and
middle of the Browser. Each lever resets 50 disc packets.
D. Using the LED light. Located at the front of your Browser, the LED light helps
you see the discs as you scan through them. The LED light will automatically
turn on when the Browser is open and turn off when the Browser is closed. To
override this LED light feature, set the on/off switch to the off position.
E. Removing your discs. Insert your thumb in the disc hole and use your middle
finger to grab the edge of the disc. (NOTE: The disc packets are not
removable.)
F. Closing your Browser.The Browser can be closed manually when the discs
are in the up position or down position. Gently close the lid.
G. Cleaning your Browser.Polish with a soft, dry cloth. If necessary, use a
common glass cleaner and wipe with a clean, soft cloth to remove fingerprints
(test first in inconspicuous spot).
H. Installing or replacing LED batteries.
Using a ball-point pen, press down on the
button that releases the front end cap (see
diagram). Pull the end cap off. Pull the
battery enclosure out. Insert three AAA
batteries as marked on the enclosure. Insert
the battery enclosure back into the
Browser. Snap the end cap back in place.


