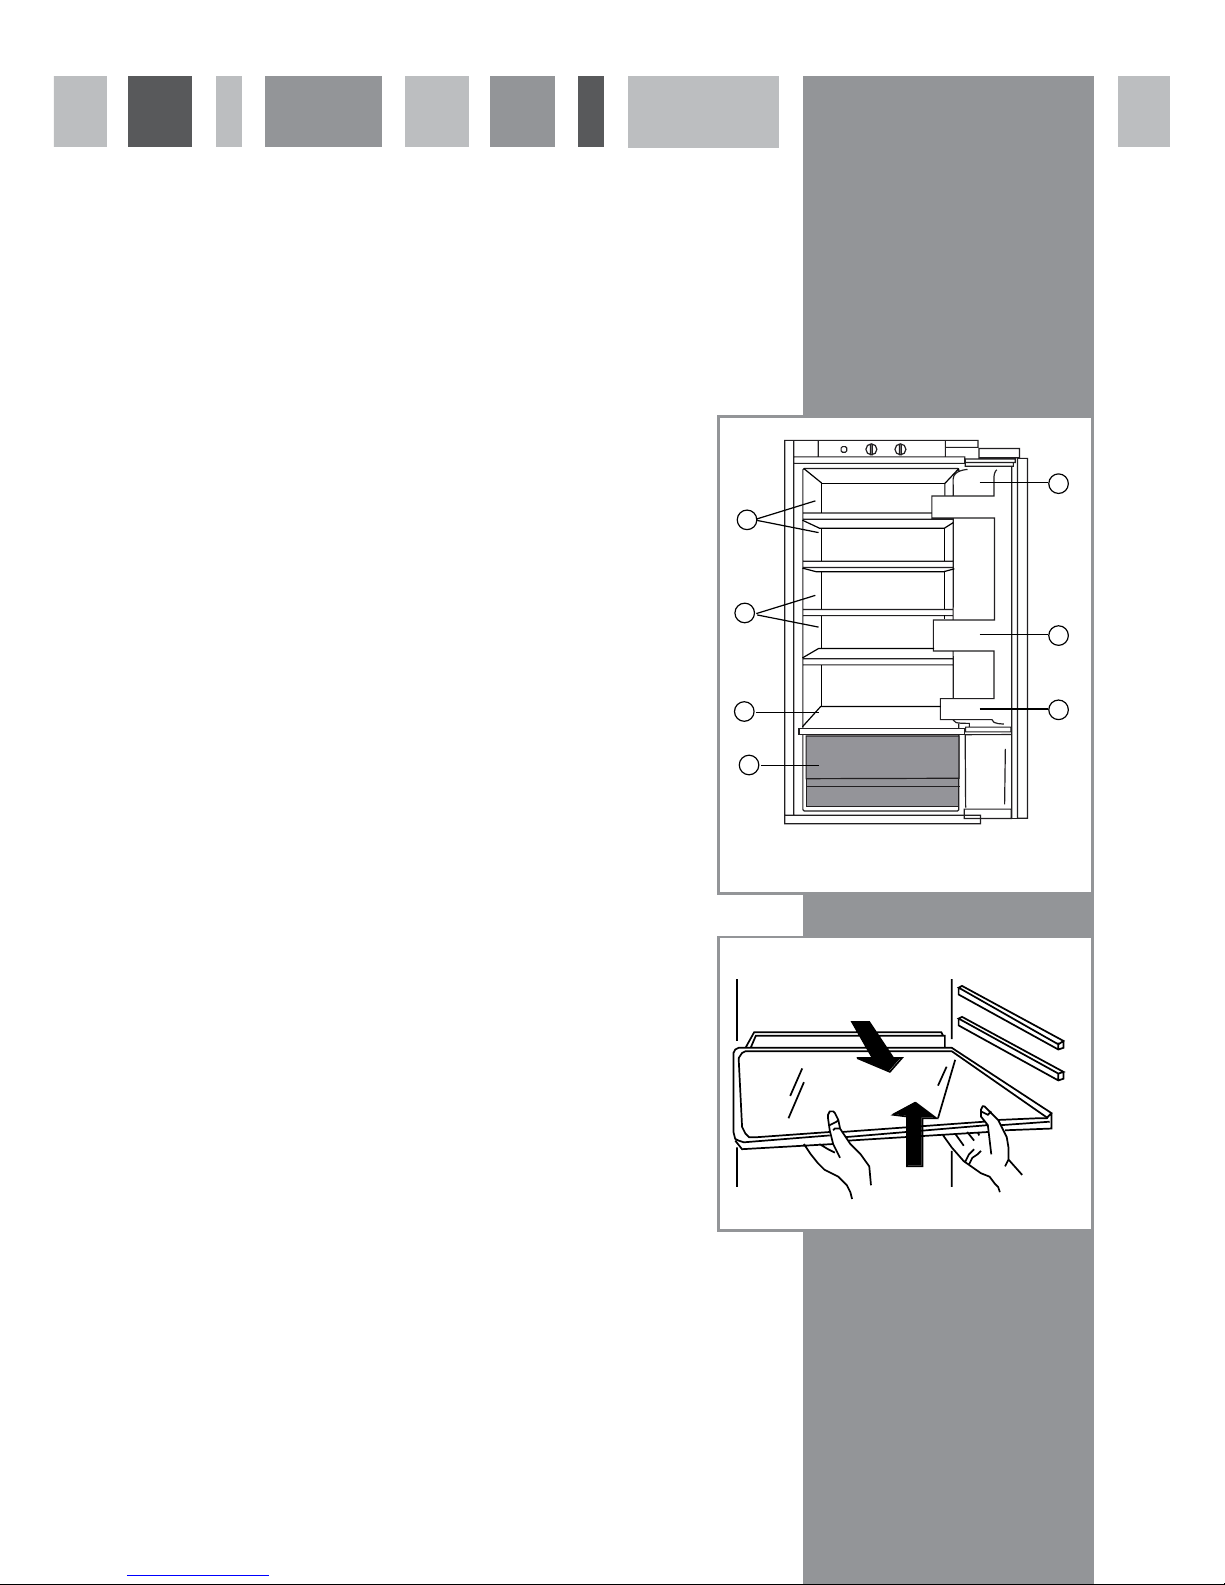
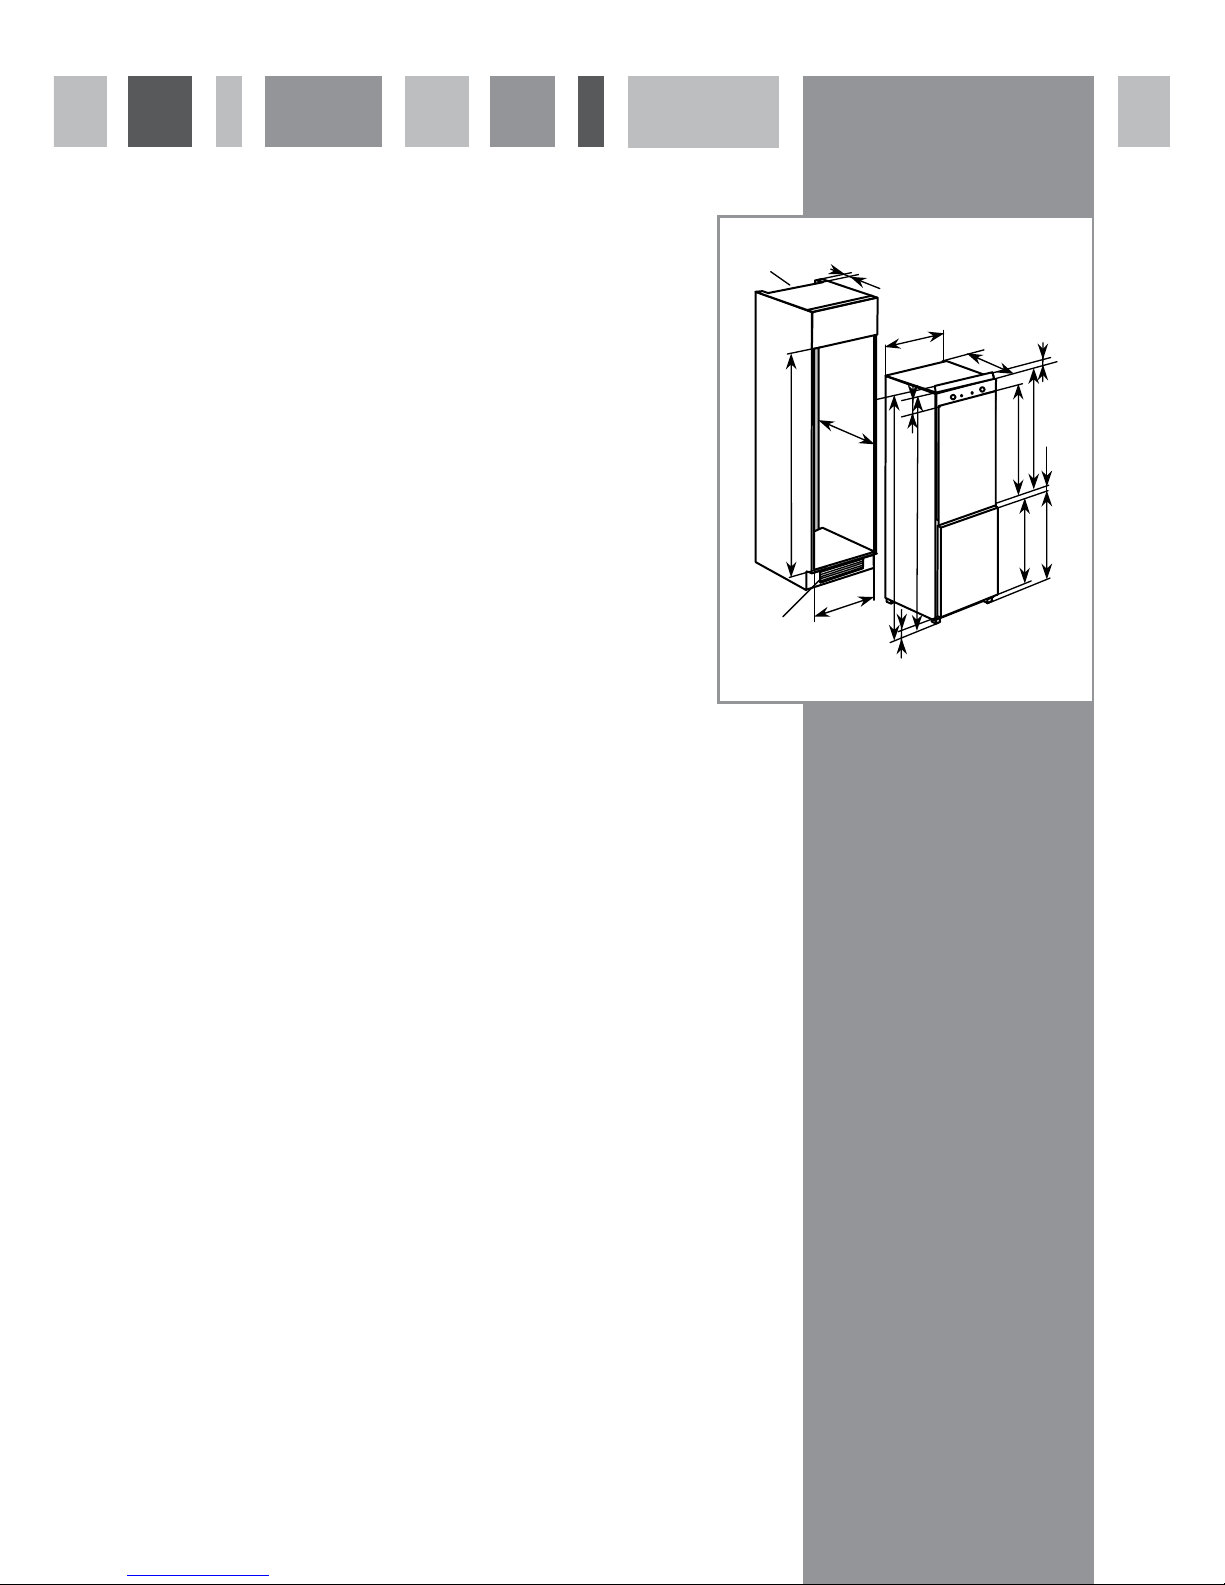
Fitting the product into the cabinet
1. Remove the gasket protection pieces:
The gasket protectors prevent excessive seal compression during
transport and are required during the installation process. Remove the
gasket protector from each door (fig 5) and proceed with the installation.
Cover caps are provided to fill the hole; take care when inserting these.
2. Fitting the top fixing brackets:
Secure the two top fixing brackets to the top of the product using two
screws for each bracket, as shown in (fig 6) (a).
3. Fitting the front shelf trim:
The front shelf trim fits to the top of the unit by hooking into slots on
the top edge of the product (b). The trim piece should be fitted loosely at
this stage to allow access to the top fixing brackets.
4. Fitting the magnetic seal strips:
Two magnetic seals are supplied to fill the gap between the cabinet and
the edge of the products. These simply fit against the left and right
edges. To make it easier, it is useful to apply a little sticky tape to the top
and bottom of each strip to prevent curling. Note that the seal may need
to be cut to length.
5. Sit the appliance in the housing:
Lift the appliance onto the supporting shelf (Ensure ventilation
requirements have been met) and push the unit into until it is standing
proud by between 50 and 75mm (Not important as long as the machine
is stable). We recommend that you seek the help of another individual
when handling this product.
6. Fitting the width spacers:
For cabinets with 15mm thickness sides a small spacer is required to be
fit. The spacer is shown in the next image. This ensures perfect alignment
when installed. There are four spacers, two for the top hinges and two for
the bottom hinges; these simply push into position on each hinge.
7. Fit the top hinge alignment guides (i.e. Gasket protection pieces):
The gasket protection pieces double up as guides to ensure that the
product is at the required depth in the cabinet when installed. Fit one to
the top hinge and one to the bottom hinge, as shown in figure 8.
fig. 5
fig. 6
fig. 7
fig. 8
A
B
Width spacer (One
to be fitted top
each hinge when
15mm cabinets are
used)
Door protection
piece being used as
a guide.
Guide piece simply slotted
in to the fixing bracket