ceadesign.it
PROBLEMA
PROBLEM
INDICATORE
INDICATOR
CAUSA
CAUSE
SOLUZIONE
SOLUTION
Non esce
sapone /
No soap
coming out
La spia rossa del sensore
lampeggia e il motore
continua a funzionare /
Red light in the sensor
flashes and the motor is
operating
Livello del sapone basso o
sapone completamente
finito / Soap has run low or
completely out
Riempire il sapone
Refill the soap tank
Il contenitore del sapone è
stato riempito ma il sapone
non ha raggiunto la bocca
di erogazione / The soap
tank has been filled but
soap has not reached the
spout
Premere il pulsante di
ricarica situato nella parte
inferiore della pompa finché
il sapone non riprende ad
uscire / Press the refill
button located at the bottom
of the pump until soap
starts to come out
I connettori tra il motore e
l’alimentatore non sono
collegati correttamente / the
connectors between the
motor and the power source
are not connected properly
Collegare correttamente i
connettori in modo che
l'o-ring bianco non sia
visibile / Connect the
connectors properly so that
the white o-ring is not visible
La spia rossa del sensore
lampeggia e il motore
funziona con difficoltà /
Red light flashes and
the motor operates with
difficulty
La solidificazione del
sapone nel tubo / Soap
solidification in the pipe
Riempire la bottiglia con
acqua calda a 50/60 °C ed
azionare continuamente la
pompa / Fill the bottle with
hot water at 50/60 °C and
run the pump constantly
Non esce
sapone /
No soap
coming out
La spia rossa del sensore
non lampeggia quando le
mani dell’utente sono
all'interno del campo del
sensore / Red light in the
sensor does not flash when
user's hands are within the
sensor range
Riflessioni dal lavabo o da
altri oggetto / Reflections
from the washbasin or
another objects
Eliminare la causa della
riflessione / Eliminate cause
of reflection
I connettori tra l'unità
elettronica e l’alimentatore
sono scollegati o non
collegati correttamente /
Connectors between the
electronic unit and power
source are disconnected or
not properly connected
Collegare i connettori
dell'unità elettronica e
dell’alimentatore / Connect
the electronic unit
connectors to the power
source connector
Il sapone
continua a
uscire / Soap
comes out
from the spout
does not stop
I connettori tra il motore e
l’alimentatore non sono
collegati correttamente / the
connectors between the
motor and the power source
are not connected properly
Collegare correttamente i
connettori in modo che
l'o-ring bianco non sia
visibile / Connect the
connectors properly so that
the white o-ring is not visible
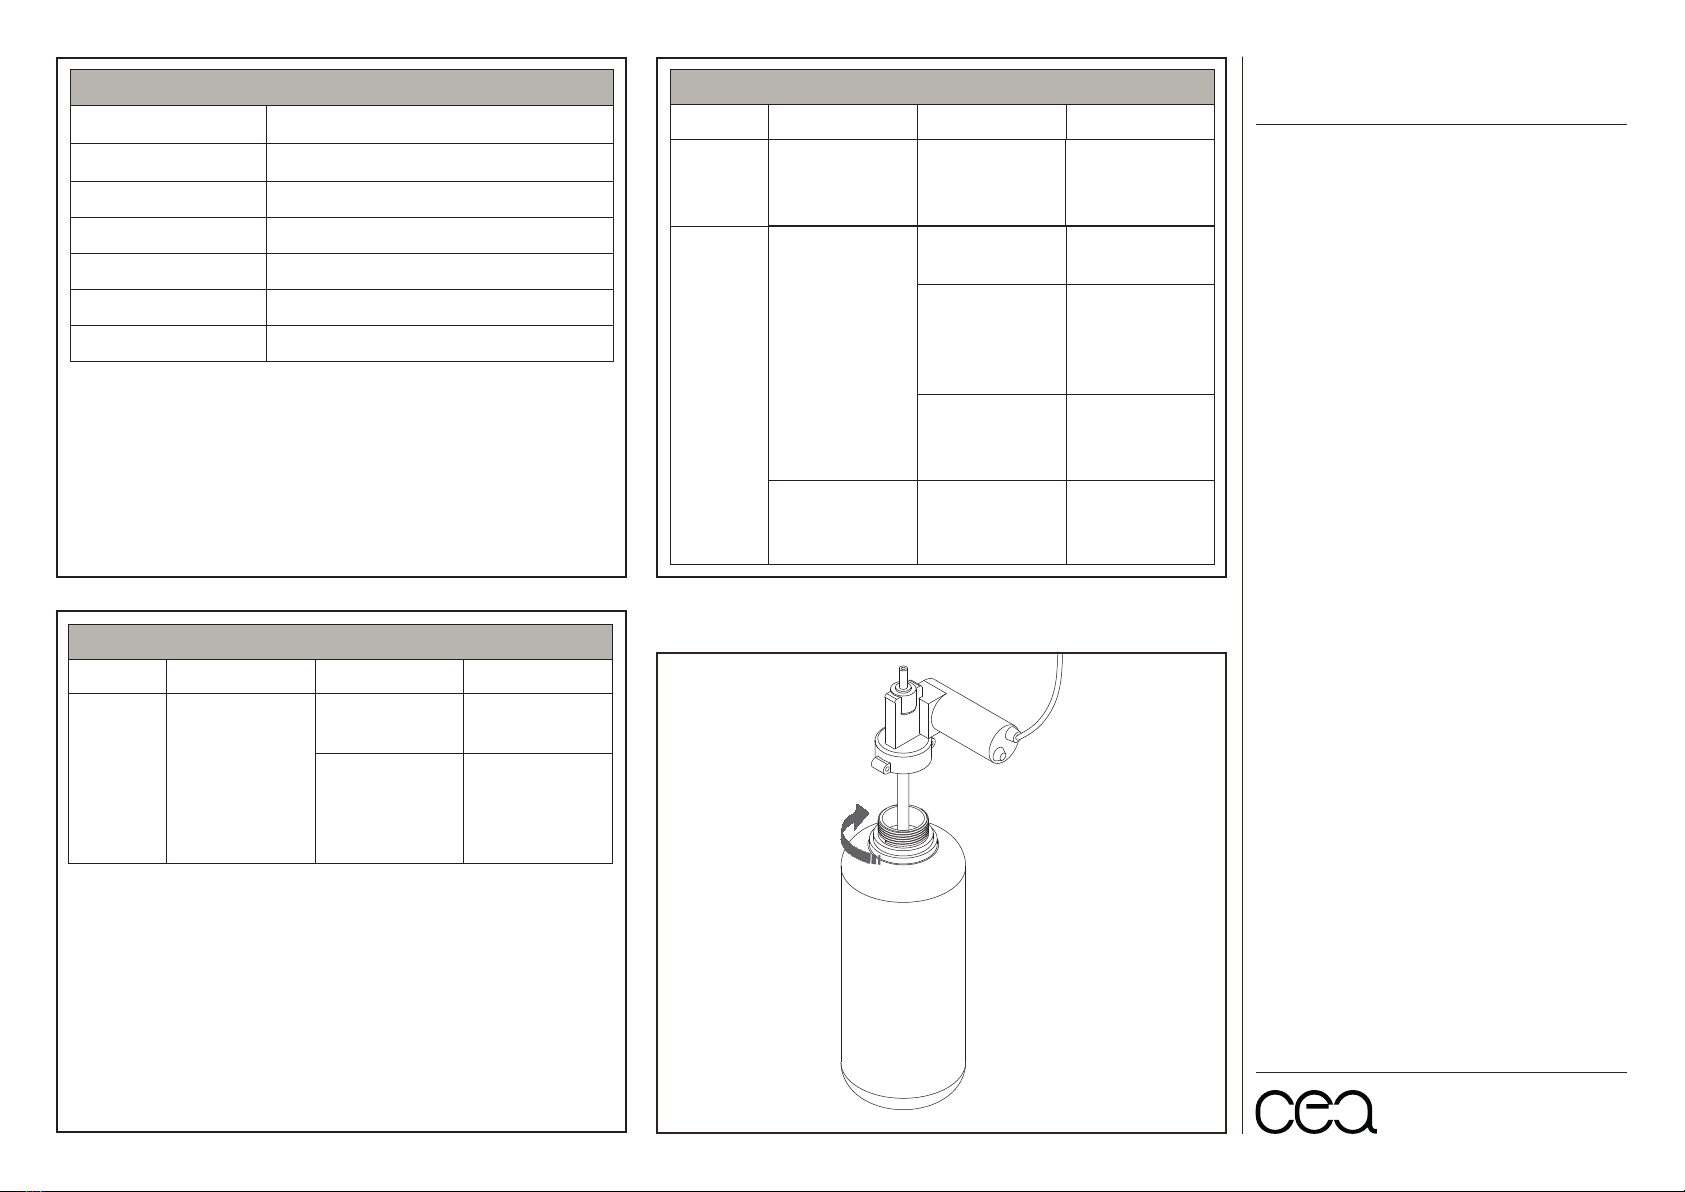
RISOLUZIONE DEI PROBLEMI / TROUBLE SHOOTING
PROBLEMA
PROBLEM
INDICATORE
INDICATOR
CAUSA
CAUSE
SOLUZIONE
SOLUTION
RISOLUZIONE DEI PROBLEMI / TROUBLE SHOOTING
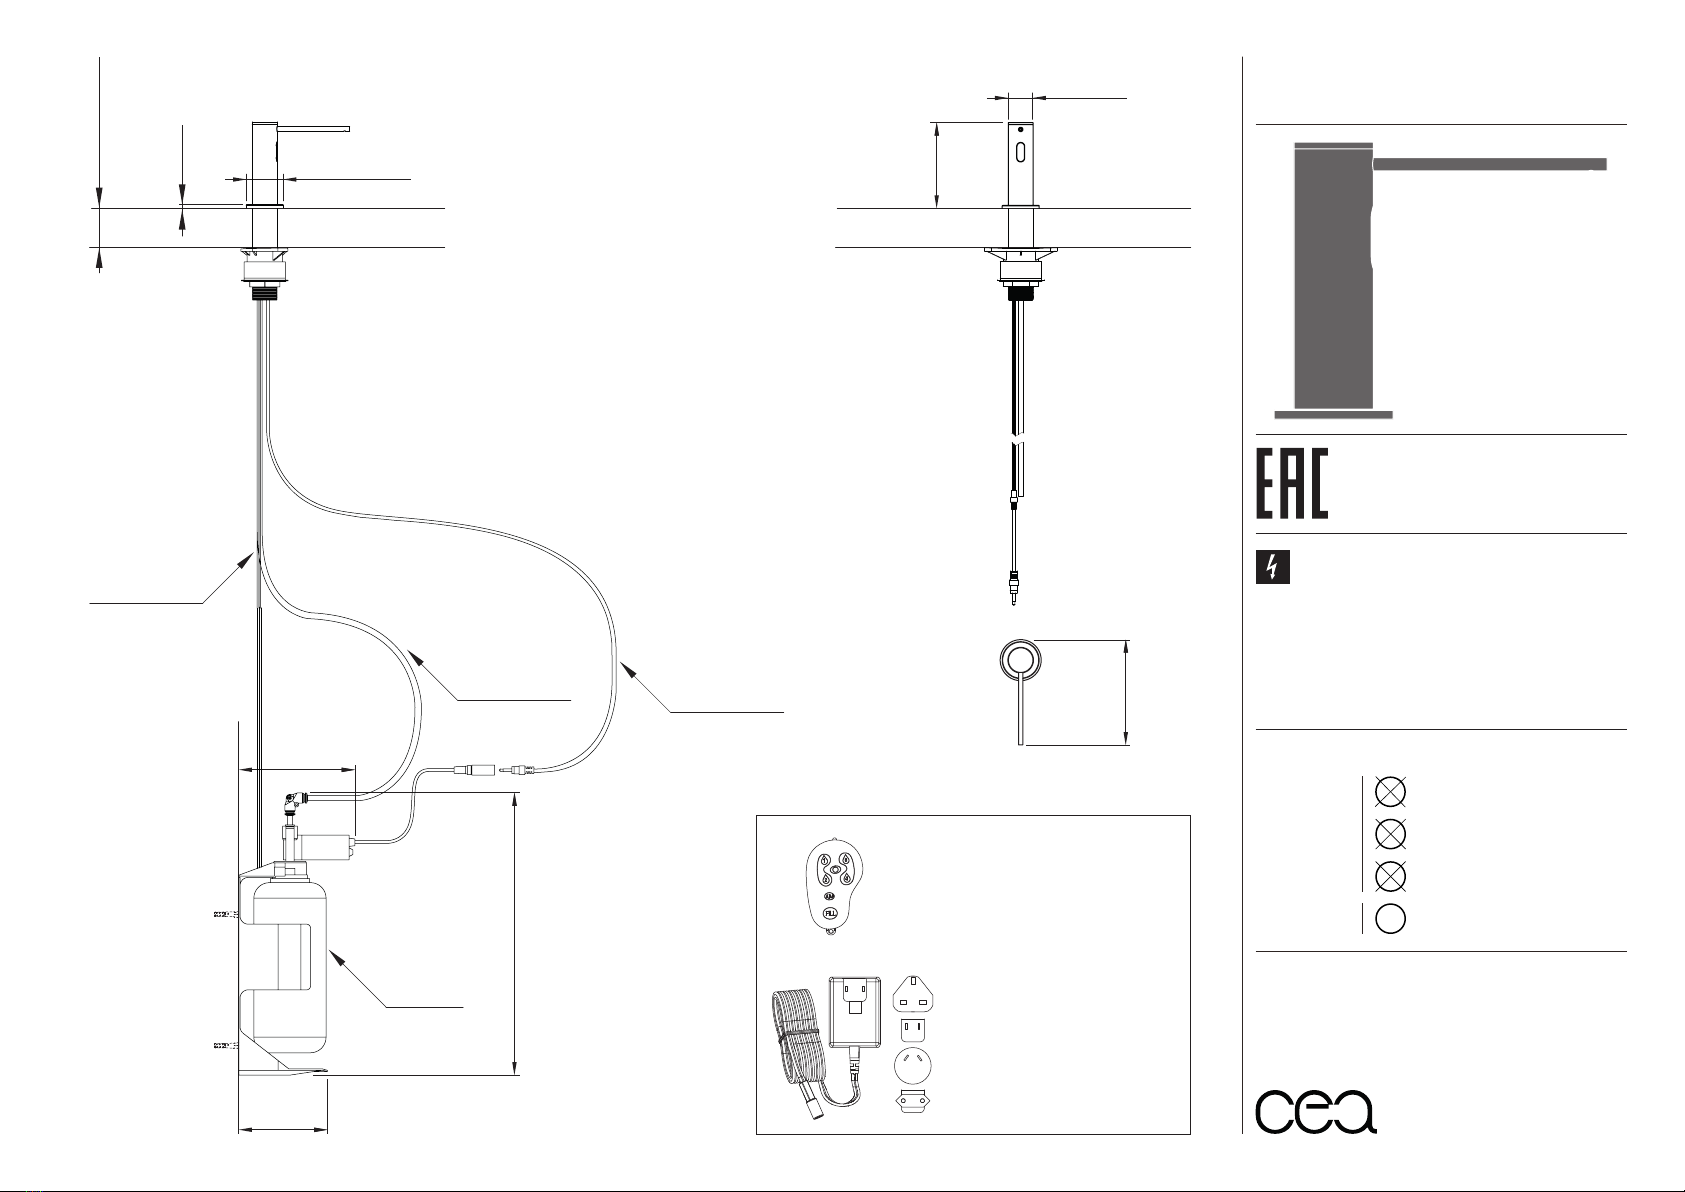
CARATTERISTICHE TECNICHE / TECHNICAL DATA
Capacita’
Capacity
Alimentatore
Power supply
Dose standard
Standard discharge
Distanza MAX. sensore
MAX. sensor range
Distanza MIN. sensore
MIN. sensor range
Distanza preimpostata
Preset sensor range
Viscosità del sapone
Soap viscosity
1 L
OUTPUT 12V
INPUT 100 - 240V 0.2A 50/60HZ
1,4 ml / 1,4 cc
155 mm +/- 10mm
35 mm +/- 10mm
80 mm +/- 10mm
100 - 380 cPs
RICARICA SAPONE / SOAP REFILL / SEIFEN NACHFÜLLBEUTEL /
RECARGA JABÓN / RECHARGE DE SAVON
DOS08_ REV11