manuals.online logo
Brands
  1. Home
  2. •
  3. Brands
  4. •
  5. Celestron
  6. •
  7. Camera Accessories
  8. •
  9. Celestron 93606 User manual

Celestron 93606 User manual

ENGLISH 1
INSTRUCTION SHEET
MODEL #93606
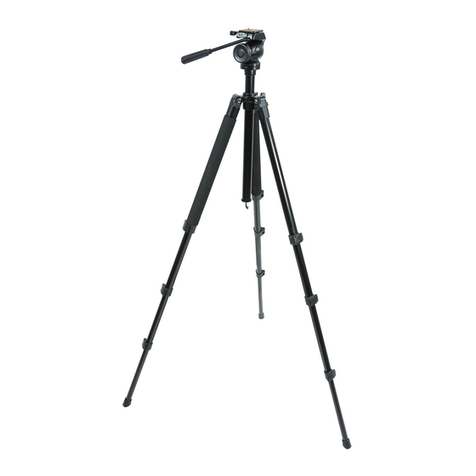
The Celestron Photographic Tripod is a stable platform for a camera, spotting scope, video camera, or pair of binoculars (with the
appropriate adapter). The tripod legs are made of heavy-duty tubular aluminum, which eliminates unwanted flexure and increases
rigidity. The three-way pan head makes vertical and horizontal panning smooth.
The diagram below highlights the various parts of the tripod.
PHOTOGRAPHIC / VIDEO TRIPOD
Pan Handle
Quick Release Plate
Center Column
Extension Handle
Storage Hook
Altitude Locking Knob
Leg Clamps
Carrying Handle
SETTING UP YOUR TRIPOD
The Celestron Photographic Tripod comes fully assembled.
To set up the tripod for use, remove the tripod along with the
pan handle from the box and its soft case. Loosen the Center
Column Tension Adjustment by turning it counterclockwise.
Pull the legs away from the center column so that the tripod
will stand by itself. Tighten the tension adjustment. To collapse
the tripod after use, loosen the tension adjustment again and
fold the legs back to the center.
2IENGLISH
TRIPOD MOUNTING
To attach an instrument to the tripod, remove the quick-release
plate from the tripod. To do this, pull back the quick release
lock lever, slide the platform towards the lock lever and lift it
out of the tripod head.
Next, place the tripod adapter of the instrument over the
1/4x20 screw on the quick-release plate. Keep in mind that
the plate is not on the tripod at this time. Tighten the screw
(located on the underside of the plate) until secure. Directly
in front of the 1/4x20 screw is a small peg used to secure an
instrument to the tripod. If the instrument you are mounting
does not have a hole for this peg, it will push down into the
tripod head.
Pull the plate lock lever back again, and replace the quick
release plate with the instrument back on the tripod head.
Slide the front of the plate in first, and then pivot the back in.
Once the quick release plate is properly positioned, push the
plate lock lever until it touches the under side of the tripod
head, securing the plate in place.
USING YOUR TRIPOD
For photography, your camera can be oriented in a vertical
or horizontal position. To change position, loosen the locking
screw at the opposite end of the pan handle. This will allow
you to move the camera from the horizontal position to the
vertical position, or anywhere in between. Once the camera is
in the desired orientation, retighten the locking screw.
To change the altitude angle of the tripod head, loosen the
large altitude locking knob while holding the pan handle.
Aim the instrument in the desired direction and retighten the
locking knob to hold the tripod head in place. If you are trying
to follow a moving object, you may not want to retighten the
clamp completely.
To move the tripod head horizontally, loosen the horizontal
locking knob underneath the pan handle. This will allow you
to rotate the tripod head 360 degrees. Point the instrument
in the desired direction and retighten the knob to hold the
position. Again, if you are trying to follow a moving object,
leave the knob slightly loose.
The tripod legs have two extension tubes that allow you to
vary the height at which the tripod stands. To extend the legs,
release the leg clamps and pull the legs out, away from the
tripod head. Once extended, retighten the clamps to hold the
legs in place. Repeat this process with all three legs until they
are extended to the desired height. (Note: The lower the tripod
is to the ground, the greater its rigidity and sturdiness.)
To retract the legs, release the leg clamps and slide the legs
back toward the tripod head.
When the legs are fully extended, the tripod can be raised
further using an extension mechanism in the center column.
To raise the column, loosen the center column extension lock
located next to the bubble level. Turn the extension crank
clockwise to raise the tripod head. Once the tripod reaches
the desired height, retighten the extension lock. To lower the
tripod head, loosen the extension lock WHILE holding the pan
handle. Turn the crank and retighten once fully lowered.
(Note: Failure to hold the handle while loosening the lock will cause the tripod head to fall
quickly, possibly damaging the tripod or the instrument on it.)
©2013 Celestron • All rights reserved. • www.celestron.com
2835 Columbia Street • Torrance, CA 90503 U.S.A.
Telephone: 1(800) 421-9649 • Printed in China 2013
This product is designed and intended for use by those 14 years of age and older. Product design and specifications are subject to change without prior notification.
Other Celestron Camera Accessories manuals

Celestron Hummingbird Monopod User manual

Celestron

Celestron Hummingbird Monopod User manual

Celestron Dew Shield DX User manual

Celestron

Celestron Dew Shield DX User manual

Celestron StarSense AutoAlign 94006 User manual

Celestron

Celestron StarSense AutoAlign 94006 User manual

Celestron TRAILSEEKER CELE-82050 User manual

Celestron

Celestron TRAILSEEKER CELE-82050 User manual

Celestron STARPOINTER 51630 User manual

Celestron

Celestron STARPOINTER 51630 User manual

Celestron Regal Tripod User manual

Celestron

Celestron Regal Tripod User manual

Celestron 93606 User manual

Celestron

Celestron 93606 User manual

Celestron ASTROMASTER 93610 User manual

Celestron

Celestron ASTROMASTER 93610 User manual

Celestron Ultima Pan Tilt Head Tripod User manual

Celestron

Celestron Ultima Pan Tilt Head Tripod User manual

Popular Camera Accessories manuals by other brands

DeWalt DCB184B Original instructions

DeWalt

DeWalt DCB184B Original instructions

Antigravity Batteries RE-START Series user manual

Antigravity Batteries

Antigravity Batteries RE-START Series user manual

Belden Grass Valley EyeCatcher EC 270 user guide

Belden

Belden Grass Valley EyeCatcher EC 270 user guide

Waterbird Multi Slider Swift user manual

Waterbird

Waterbird Multi Slider Swift user manual

Sanyo Twicell HR-5/4AAAU Specifications

Sanyo

Sanyo Twicell HR-5/4AAAU Specifications

Seto COMPACT Instructions for use

Seto

Seto COMPACT Instructions for use

Paul C. Buff RFT1TX manual

Paul C. Buff

Paul C. Buff RFT1TX manual

CamFi CamFi quick start guide

CamFi

CamFi CamFi quick start guide

ARRI LMB-6 user guide

ARRI

ARRI LMB-6 user guide

PhaseOne PhotoPhase 85280002 user guide

PhaseOne

PhaseOne PhotoPhase 85280002 user guide

Minox 8x11 Viewfinder manual 

Minox

Minox 8x11 Viewfinder manual 

Sanyo Twicell HR-4/3FAUP Specification sheet

Sanyo

Sanyo Twicell HR-4/3FAUP Specification sheet

Videotec VIP6A1 operating instructions

Videotec

Videotec VIP6A1 operating instructions

Olympus PER-E01 instruction manual

Olympus

Olympus PER-E01 instruction manual

Zircon SuperScan A2 user manual

Zircon

Zircon SuperScan A2 user manual

GEN ENERGY G-B100 quick start guide

GEN ENERGY

GEN ENERGY G-B100 quick start guide

Z&X PRECISE P1 user guide

Z&X

Z&X PRECISE P1 user guide

Philips LongLife R6LS4A Specifications

Philips

Philips LongLife R6LS4A Specifications

manuals.online logo
manuals.online logoBrands
  • About & Mission
  • Contact us
  • Privacy Policy
  • Terms and Conditions

Copyright 2025 Manuals.Online. All Rights Reserved.