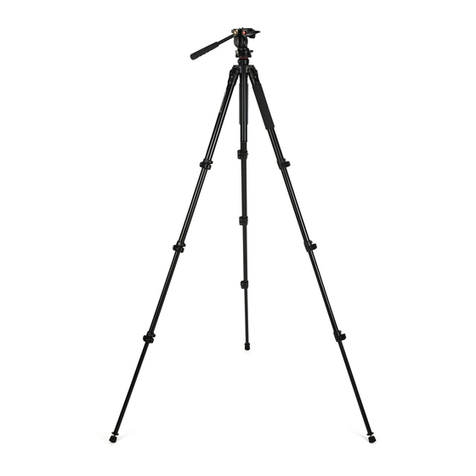
Celestron TRAILSEEKER CELE-82050 User manual

TRIPOD | TRÉPIED
TRÍPODE | STATIV | TREPPIEDE
TRIPOD | TRÉPIED
TRÍPODE | STATIV


ENGLISH ..................................2
FRANÇAIS................................12
ESPAÑOL .................................22
DEUTSCH.................................32
ITALIANO ..................................42

2 IENGLISH
Thank you for purchasing your Celestron TrailSeeker Tripod. This tripod will provide you with years
of enjoyment and faithful service. Before using your tripod for the first time, read these instructions
carefully to ensure proper use and care.
celestron®trailseeker tripod
Fluid Pan Head
Bubble Level Quick Release Plate
QR Plate Lock Lever
Pan Tilt Handle
Leg Angle Adjustment Latch
Padded Leg Wraps (2)
Pan/Tilt Tension Knob
Aluminum Legs
Center Column
Center Column Lock Knob
Set Screws (3)
Balance Hook
Leg Lock Levers
Rubber Feet
Carry Case
Hex Keys
Fig. 1

ENGLISH I3
The fluid pan head of the TrailSeeker tripod
has a single control for adjusting both
horizontal and vertical movement. To pan or
tilt the tripod, loosen the pan/tilt tension knob
and move to the desired position using the
pan/tilt handle. Once the tripod is in position,
tighten the tension knob to secure.
The TrailSeeker tripod will provide you with a stable platform for your spotting scope, binocular or
camera in the field. With four leg sections, three leg angles and an adjustable center column, the
tripod can be set in multiple configurations to get the exact height or stance needed for your terrain
and conditions. The TrailSeeker is the perfect tripod for any outdoor excursion from bird watching to
stargazing and everything in between.
Using YoUr tripod
adjUsting the FlUid pan head
Pan Tilt Handle
Pan/Tilt Tension Knob
Fig. 2

4 IENGLISH
The quick release plate allows you to quickly
attach your optics to the tripod. To remove the
quick release plate from the fluid pan head,
push the lock lever to the left until it locks.
Attach the quick release plate to any device or
optic with a ¼”-20 mount thread by placing the
front of the quick release plate into the head.
Next, slide the plate into place. When the plate
is fully seated, press down. The lock lever will
automatically lock the plate into place.
QUick release plate
Quick Release Plate
Lock Lever
Fig. 3

ENGLISH I5
The center column of the TrailSeeker tripod
can be extended to raise the tripod head when
additional height is needed. To extend the
center column, loosen the lock knob and move
the center column to the desired height. Once
the head is in place, tighten the lock knob to
secure.
adjUsting the center colUmn
Center Column
Lock Knob
Center Column
adjUsting the leg length
The length of each leg section of the
TrailSeeker tripod can be adjusted. To adjust
the length of a leg section, release the leg lock
lever and extend the leg section to the desired
height. Press the leg lock lever back into
position to secure it. Repeat the process for all
leg sections. The legs will extend to a maximum
of four sections.
Leg Lock Levers
Fig. 4
Fig. 5

6 IENGLISH
adjUsting the leg angle
The legs of the TrailSeeker tripod can be set
at three different angles. To change the angle,
slightly push the leg in towards the center
column and pull out the leg angle adjustment
latch. Pivot the leg outward until it reaches
the end of its travel to obtain the widest angle
setting.
To use the middle setting, start at the widest
angle setting and slowly push the leg inward
while pressing on the leg angle adjustment
latch. When the middle angle setting is reached
the latch will depress and lock into place,
preventing it from pivoting outward.
To return to the standard leg angle, continue to
push the leg inward while pressing on the leg
angle adjustment latch until it locks into place.
The angle of each leg can be set independently
of the other two legs.
Note: The leg angle adjustment latch only prevents the legs from pivoting
outward. The tripod legs can always be pushed inward regardless of the
position of the adjustment latch.
Leg Angle Adjustment Latch
Fig. 6

ENGLISH I7
Balance hook
BUBBle levels
The balance hook on the TrailSeeker tripod
can be used to provide added stability in windy
conditions. To keep the balance hook out of
the way, it is retracted into the bottom of the
center column with a spring mechanism that
can easily be pulled out when needed. To
use the balance hook, pull it down from the
center column. Hang a heavy object, such as a
backpack, from the hook.
To ensure that the tripod legs and pan head are
level, reference either of the two bubble levels
on the TrailSeeker tripod.
Balance Hook
Bubble Levels
Fig. 8
Fig. 7

8 IENGLISH
removing the FlUid pan head
The TrailSeeker tripod ships with the fluid pan
head attached to the tripod legs, but it can be
removed. The head of the tripod is threaded
onto the tripod legs and held in place with three
set screws. To remove the head, loosen the
set screws located under the center column
with the included hex key. With the pan/tilt
tension knob tightened, turn the tripod head
counterclockwise until it unthreads from the
center column.
Note: If the tripod head loosens from the tripod legs while panning,
tighten the set screws under the center column. Fig. 9

ENGLISH I9
care and storage
Your Celestron tripod will provide you years of
dependable service if it is cared for and stored
properly.
1. Protect the tripod from impact and do not
force any of the moving parts beyond their
limits.
2. Do not exceed the maximum specified load.
3. Store your tripod in a cool, dry place
whenever possible.
4. Do not leave the product in the sun for long
periods of time. Avoid hot environments, like
the inside of a car. Do not place the tripod
near anything that generates heat as this
may cause damage.
5. Clean your tripod with a mild detergent and a
soft cloth. Wipe away any dust, dirt or water
on the tripod or inside moving parts as soon
as possible to prevent damage.
service and repair
If warranty problems arise or repairs are
necessary, U.S. and Canadian residents should
contact Celestron Technical Support. If you
live outside of these countries, contact the
dealer that sold you your tripod or the Celestron
distributor in your country. You’ll find a full list of
our distributors at www.celestron.com.

10 IENGLISH
WarrantY
Celestron warrants your tripod to be free from
defects in materials and workmanship for two
years. Celestron will repair or replace the tripod
which, upon inspection by Celestron, is found to
be defective in materials or workmanship and
within the definitions of the limits described
below.
This warranty does not cover products that
have been subject to abuse, misuse, physically
damaged, altered, or had unauthorized repairs
or modifications. This warranty does not cover
defects due to normal wear and tear and other
conditions.
This warranty is valid to U.S.A. and Canadian
customers who have purchased their tripod
from an authorized Celestron dealer in the
U.S.A. or Canada. For products purchased
outside of the U.S.A. or Canada please contact
your local Celestron Distributor or authorized
Dealer for applicable warranty information.
Additional warranty information and eligibility
details can be found on the Celestron website.
This product is designed and intended for use by those 14 years of age and older.
Product design and specifications are subject to change without prior notification.
For complete specifications and product
information:
www.celestron.com
2835 Columbia Street • Torrance, CA 90503 U.S.A
Tel: 800.421.9649


TRÉPIED
FRANÇAIS

14 IFRANÇAIS
Nous vous remercions d’avoir acheté votre trépied Celestron Trailseeker. Ce trépied vous donnera
des années de plaisir et de loyaux services. Lisez ces instructions avec attention avant la première
utilisation de votre trépied pour garantir son utilisation correcte et son entretien.
trépied celestron®trailseeker
Tête de mouvement
panoramique fluide
Niveau à bulle
Plateau à retrait rapide (RR)
Levier de verrouillage du plateau RR
Poignée de mouvement
vertical/horizontal
Loquet de réglage de l’angle
des pieds
Enveloppes de pieds
matelassées (2)
Bouton de tension de
mouvement horizontal/vertical
Pieds en aluminium
Colonne centrale
Bouton de verrouillage de la
colonne centrale
Vis (3)
Crochet d’équilibre
Leviers de verrouillage
des pieds
Patins en caoutchouc
Étui de transport
Clefs hexagonales
Fig. 1

FRANÇAIS I15
La tête de mouvement panoramique fluide
du trépied TrailSeeker possède un contrôle
unique pour le réglage de ses mouvements
horizontaux ou verticaux. Pour régler le trépied
horizontalement ou verticalement, déserrez
simplement le bouton de tension, puis
effectuez l’orientation à l’aide de la poignée.
Une fois la position désirée obtenue, serrez le
bouton pour la conserver.
Le trépied TrailSeeker constitue une plateforme stable pour votre lunette de recherche, vos jumelles
ou appareil photo sur le terrain. Équipé de pieds à quatre sections, de trois angles pour les pieds et
d’une colonne centrale, le trépied peut être installé de multiples manières pour obtenir l’élévation
et la position adaptée aux conditions du terrain. Le TrailSeeker est le trépied parfait pour vous
accompagner dans vos excursions en plein air, de l’observation des étoiles à l’étude des oiseaux,
en passant par toute utilisation qui vous convient.
Utiliser votre trépied
réglage de la tête de moUvement panoramiQUe FlUide
Poignée de mouvement
vertical/horizontal
Bouton de tension de mouvement
horizontal/vertical
Fig. 2

16 IFRANÇAIS
Le plateau de retrait rapide permet d’attacher
rapidement vos optiques au trépied. Pour
retirer le plateau de retrait rapide de la tête de
mouvement panoramique fluide, poussez le
levier de verrouillage vers la gauche jusqu’à son
enclenchement. Fixez le plateau de retrait rapide
à votre appareil ou optique à l’aide d’une vis
de montage de ¼”-20, en positionnant l’avant
du plateau de retrait rapide dans la tête. Faites
ensuite glisser le plateau en position. Une fois
le plateau complètement inséré, appuyez vers
le bas. Le levier de verrouillage verrouillera le
plateau automatiquement.
plateaU de retrait rapide
Plateau à retrait
rapide (RR)
Levier de
verrouillage
Fig. 3

FRANÇAIS I17
La colonne centrale du trépied TrailSeeker
peut être étendue pour élever la tête du trépied
lorsque nécessaire. Pour étendre la colonne
centrale, déserrez le bouton de verrouillage puis
réglez la colonne centrale à la hauteur requise.
Une fois la position désirée obtenue, serrez le
bouton pour la conserver.
réglage de la colonne centrale
Bouton de verrouillage de
la colonne centrale
Colonne centrale
réglage de la haUteUr des pieds
La longueur de chaque section des pieds du
TrailSeeker peut être réglée. Pour régler la
longueur d’une section de pied, déverrouillez le
loquet de verrouillage puis étendez la section
du pied à la hauteur désirée. Remettez le
loquet en place pour conserver le réglage.
Répétez ce processus pour chaque section de
pied. Les pieds peuvent s’étendre au maximum
sur 4 sections.
Leviers de verrouillage
des pieds
Fig. 4
Fig. 5

18 IFRANÇAIS
réglage de l’angle des pieds
Les pieds du TrailSeeker peuvent être réglés
selon trois angles différents. Pour modifier
l’angle, poussez légèrement le pied vers
la colonne centrale, et tirez sur le loquet
de verrouillage. Faites pivoter le pied vers
l’extérieur au maximum pour obtenir l’angle le
plus large.
Pour sélectionner le réglage du milieu,
écartez le pied au maximum puis poussez-le
doucement vers l’intérieur tout en appuyant
sur le loquet de réglage d’angle. Une fois le
réglage du milieu atteint, le loquet s’enfoncera
pour se verrouiller, empêchant tout mouvement
supplémentaire.
Pour retourner au réglage standard, continuez à
pousser le pied vers l’intérieur tout en appuyant
sur le loquet de réglage d’angle, jusqu’à son
verrouillage. L’angle de chaque pied peut être
réglé indépendamment de celui des autres.
RemaRque: Le loquet de réglage de l’angle empêche seulement les pieds
de pivoter vers l’extérieur. Les pieds peuvent toujours être poussés vers
l’intérieur, quelle que soit la position du loquet.
Loquet de réglage de l’angle des pieds
Fig. 6
Table of contents
Languages:
Other Celestron Camera Accessories manuals
Celestron
Celestron 93606 User manual

Celestron
Celestron Dew Shield DX User manual

Celestron
Celestron 93606 User manual

Celestron
Celestron Hummingbird Monopod User manual

Celestron
Celestron ASTROMASTER 93610 User manual

Celestron
Celestron Ultima Pan Tilt Head Tripod User manual

Celestron
Celestron StarSense AutoAlign 94006 User manual

Celestron
Celestron Regal Tripod User manual
Celestron
Celestron STARPOINTER 51630 User manual