manuals.online logo
Brands
  1. Home
  2. •
  3. Brands
  4. •
  5. Celestron
  6. •
  7. Telescope
  8. •
  9. Celestron NEXSTAR 60SLT User manual

Celestron NEXSTAR 60SLT User manual

Extend tripod legs 6 to 8 inches by
loosening the tripod leg locking knob
and pulling the leg to desired length and
re-tightening knob.
Assemble tripod by spreading the legs
out until the center leg brace is fully
extended.
Item #31132
Quick Set-up Guide
123
All three legs should be the same length to
provide a level platform for the telescope. A
bubble level is included (inset) to assist in leveling.
4
7
Hold the telescope fork arm and place
the bottom of the base inside the tripod
mounting platform as shown.
Place accessory tray on top of center leg
brace by lining up the grooves on the
tray to the post on the brace.
5
Once grooves are aligned, turn accessory
tray until it snaps into the clips on each
leg brace.
6
Thread the coupling screw into
the hole at the bottom of the fork arm
base. Tighten screw to secure the
entire fork arm.
8
Slide the optical tube dovetail into the fork
arm as shown above.
9
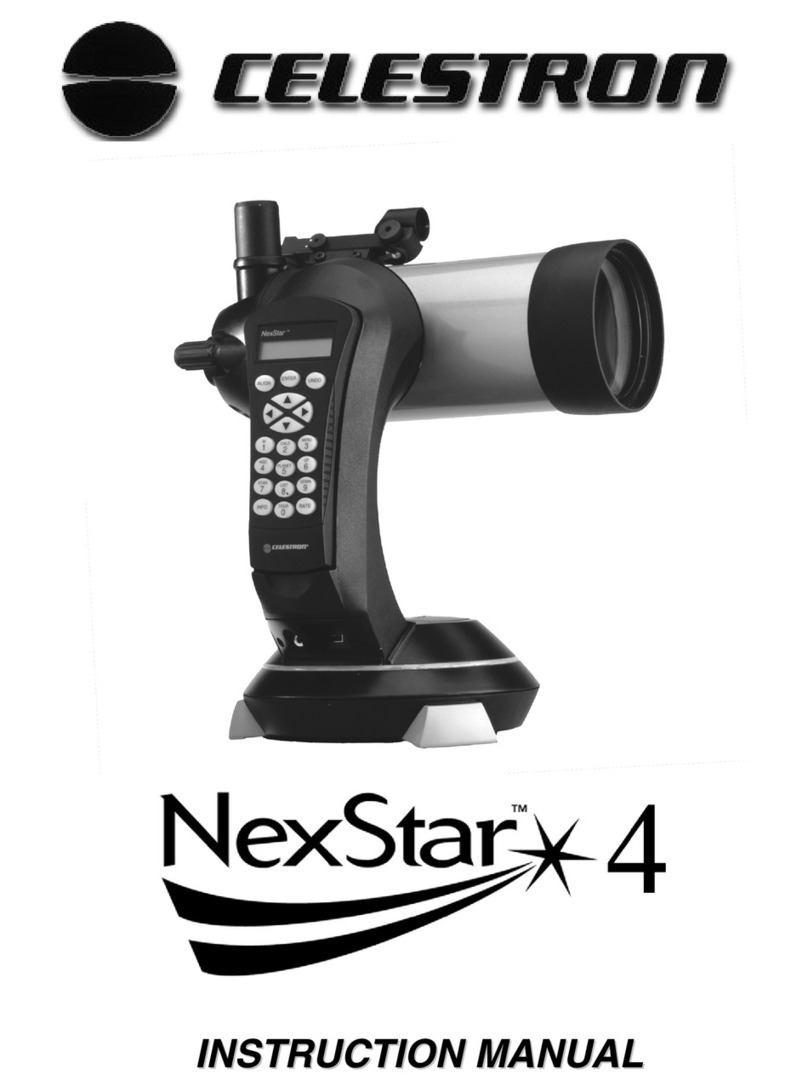
NexStar 60SLT
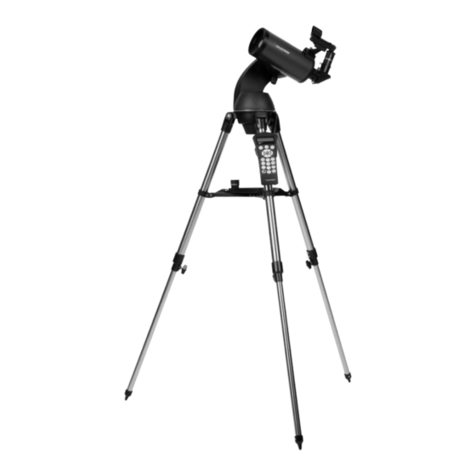
Your NexStar 60SLT includes: optical tube;
fork arm; pre-assembled tripod;
computerized hand control; hand control
holder; star diagonal; two eyepieces;
finderscope; accessory tray; documentation
including an owner’s manual, The Sky® CD
and NSOL Telescope Control Software.
Item #22076
Coupling screw
Quick Set-up Guide [cont]
Secure optical tube to fork arm by
tightening the screw located on the
inside of the fork arm assembly.
11
To attach the finderscope, loosen the silver
screw and slide finderscope into mounting
platform .
12
Secure finderscope to mounting platform by
tightening the silver screw. The glass window of
the finderscope should be facing towards the
front of the telescope.
13
Insert the chrome barrel of the star
diagonal into the focuser and tighten the
two silver screws to secure
in place.
14
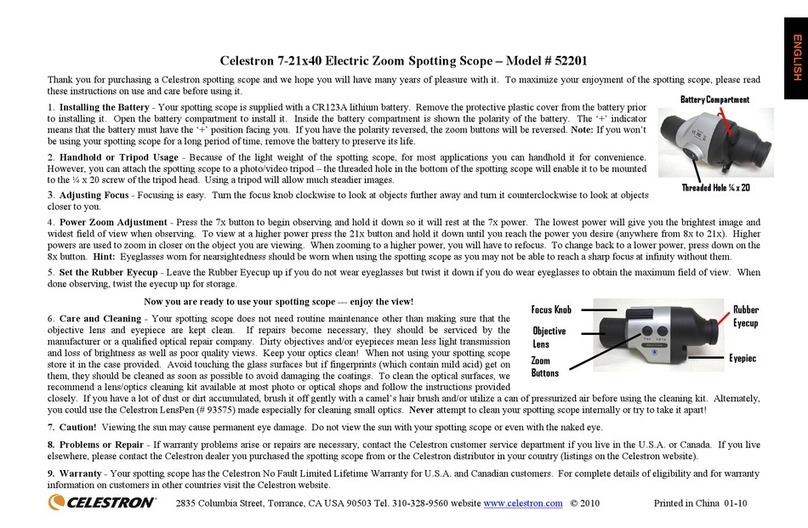
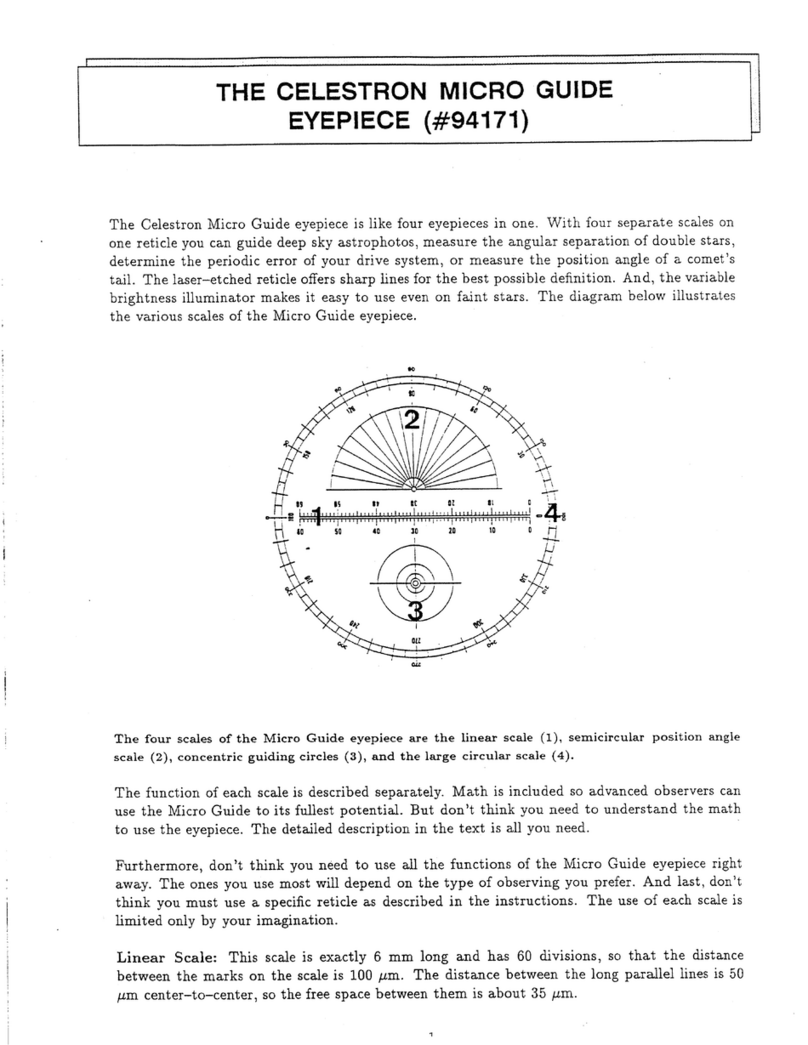
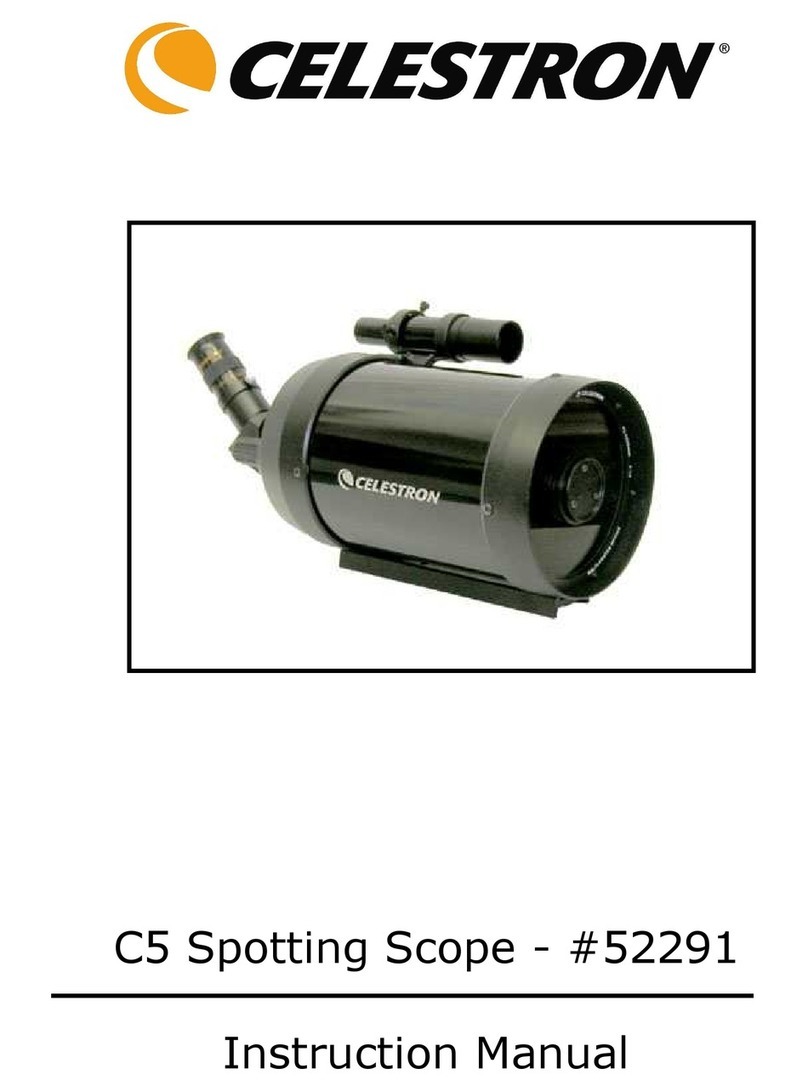
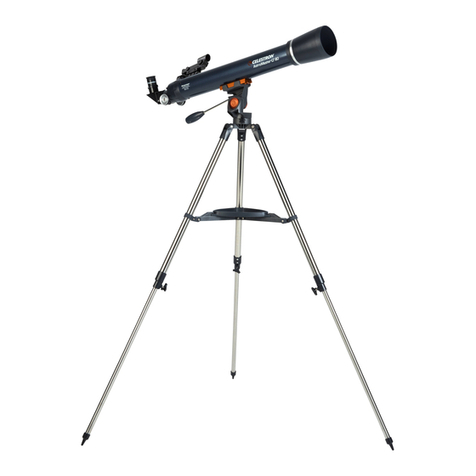
Select the low power (25mm) eyepiece
and insert it as shown above. Tighten
silver screw to secure.
15
Attach plastic hand control holder to the
tripod leg.
16
Slide Computerized Hand Control into
the hand control holder as shown above.
17 18
Before you begin viewing, please
remember to remove tube lens cap.
19
While observing, tube should be
positioned as shown above.
10
Plug Computerized Hand Control into
the “Hand Control” port on the fork arm.
Before you can begin observing,you must setup your hand control,
align your finderscope and align your telescope. Step by step
instructions are included in the following Hand Control Setup section.
20
Before you can use your telescope, you
must insert 8 AA batteries.
21
Place AA batteries inside the battery
compartment located at the base of the
fork arm.
Hand Control Guide
1
Turn power switch (located on the side of
the fork arm) to “on”position. The light will
come on and the hand control will
display “NexStar SLT”.
2
You will notice that there are directional
arrows in the center of the hand control.
These only move the telescope. They
cannot be used to scroll through
menu features.
3
Now you will need to align the finderscope.
Turn on the red LED light by turning the
knob shown above. When used for the first
time, remove the clear plastic disk that is
located between the battery clip and the
battery. See inset.
4
Use the hand control direction arrow
buttons to point telescope at a distant
land object, like a telephone pole or at
night you can use the moon. Center and
focus the object in the 25mm eyepiece
of the telescope.
5
In order to accurately center an object
in the eyepiece it may be necessary to
change the slew speed of the motors.
To change the slew speed, press the
RATE button then select a number from
1 (slowest) to 9 (fastest).
Before you can begin using your NexStar 60SLT, you must setup your computerized hand control and go through
the SkyAlign alignment procedure. In order for the NexStar to accurately point to the objects in the sky, it must first
be aligned with known positions (stars) in the sky. With this information, the telescope can create a model of the
sky, which it uses to locate any object in its database
Once you have aligned your finderscope,
make sure to turn off the LED light to
conserve the battery. Now you are ready
to align the telescope. This will have to
be done at night.
79
Use the UP and DOWN scroll buttons
(located on #6 and #9) to select
“SkyAlign” then press ENTER. Now you
will need to enter your site/time
information.
With the object centered in the eyepiece,
use the azimuth (right/left) and altitude
(up/down) adjustment knobs on the
finderscope to place the red alignment
dot directly over the centered object.
10
The hand control will display the last
entered time and site information. Since
this is your first time using the NexStar,
press UNDO to enter your site and time
information.
11 12
Using the numeric key pad enter your
time information. Press ENTER to
continue. Press UNDO to backspace.
Press ENTER to select City Database. Use
the Up and Down scroll buttons (located
on #6 and #9) and choose the closest city
to your present location. Press ENTER
after selecting the country, state and city.
8
When the display reads NexStar SLT,
press ENTER to begin the alignment
procedure.
6
Hand Control Guide [cont]
If you have questions or problems with set-up, please contact
Celestron Technical Support: 310.803.5955
16
If the finderscope has been properly
aligned, the alignment star should now
be visible in the field of view of the
eyepiece.
17
The hand control will prompt you to
center the bright alignment star in the
center of the eyepiece. Once centered,
press ALIGN. This will accept the star as
your first alignment position.
18
19
Repeat the process for the third
alignment star. When the telescope has
been aligned to the final star, the display
will read “Match Confirmed”. Press UNDO
to display the names of the three bright
objects you aligned to, or press ENTER to
accept these three objects for alignment.
20
Now that your telescope is properly
aligned, you are ready to find your first
object. Press the TOUR button on the
hand control. The hand control will
display a list of objects that are visible for
the date and location entered.
TOUR
For the second alignment object, choose
a bright star or planet as far from the first
alignment object as possible. Once again
use the directional arrow buttons to
center the object in the finderscope and
press ENTER. Once object is centered in
the eyepiece, press ALIGN.
15
Use the directional arrow keys on the hand
control to slew (move) the telescope
towards any bright celestial object in the
sky. Center the object in the finderscope
and press ENTER.
13
Now, using the Up and Down scroll
buttons (located on #6 and #9), verify the
time zone you are in and press ENTER.
14
Using the numeric key pad enter the
date. Press ENTER to continue. Press
UNDO to backspace.
21
Press INFO to read information about the
object displayed. Press the DOWN scroll
key to display the next object. Press
ENTER to slew (move) to the displayed
object.
INFO
For general usage information,please consult your user’s manual.

Other Celestron Telescope manuals

Celestron OMNI XLT 102 User manual

Celestron

Celestron OMNI XLT 102 User manual

Celestron 1510 User manual

Celestron

Celestron 1510 User manual

Celestron StarSense Explorer DX User manual

Celestron

Celestron StarSense Explorer DX User manual

Celestron Novice 60 User manual

Celestron

Celestron Novice 60 User manual

Celestron Firstscope 80 AZ User manual

Celestron

Celestron Firstscope 80 AZ User manual

Celestron AstroMaster 102AZ User manual

Celestron

Celestron AstroMaster 102AZ User manual

Celestron Inspire 90AZS User manual

Celestron

Celestron Inspire 90AZS User manual

Celestron SkyScout Scope 90 User manual

Celestron

Celestron SkyScout Scope 90 User manual

Celestron Travel Scope 70 User manual

Celestron

Celestron Travel Scope 70 User manual

Celestron PowerSeeker 127EQ Specification sheet

Celestron

Celestron PowerSeeker 127EQ Specification sheet

Celestron Ultima 52248 User manual

Celestron

Celestron Ultima 52248 User manual

Celestron StarSense Explorer DX 130AZ User manual

Celestron

Celestron StarSense Explorer DX 130AZ User manual

Celestron AstroMaster LT User manual

Celestron

Celestron AstroMaster LT User manual

Celestron PowerSeeker 127 User manual

Celestron

Celestron PowerSeeker 127 User manual

Celestron 11074-XLT User manual

Celestron

Celestron 11074-XLT User manual

Celestron G-9.25 User manual

Celestron

Celestron G-9.25 User manual

Celestron SkyProdigy 102 User manual

Celestron

Celestron SkyProdigy 102 User manual

Celestron PowerSeeker 114EQ User manual

Celestron

Celestron PowerSeeker 114EQ User manual

Celestron FirstScope 60AZ User manual

Celestron

Celestron FirstScope 60AZ User manual

Celestron PowerSeeker Square 60 User manual

Celestron

Celestron PowerSeeker Square 60 User manual

Celestron NexStar 8 User manual

Celestron

Celestron NexStar 8 User manual

Celestron 80ED User manual

Celestron

Celestron 80ED User manual

Celestron 21056-K User manual

Celestron

Celestron 21056-K User manual

Celestron TRAVEL SCOPE 60 DX User manual

Celestron

Celestron TRAVEL SCOPE 60 DX User manual

Popular Telescope manuals by other brands

PlaneWave CDK700 manual

PlaneWave

PlaneWave CDK700 manual

Astronomy Technologies Astro-Tech AT80LE product manual

Astronomy Technologies

Astronomy Technologies Astro-Tech AT80LE product manual

Meade LX200 CLASSIC instruction manual

Meade

Meade LX200 CLASSIC instruction manual

Omegon AC 70/400 BackPack AZ instruction manual

Omegon

Omegon AC 70/400 BackPack AZ instruction manual

Rowan Astronomy AZ100 manual

Rowan Astronomy

Rowan Astronomy AZ100 manual

iOptron SmartStar-E 8500 quick start guide

iOptron

iOptron SmartStar-E 8500 quick start guide

Levenhuk Strike 900 PRO user manual

Levenhuk

Levenhuk Strike 900 PRO user manual

Leica APO Televid 62 Specifications

Leica

Leica APO Televid 62 Specifications

Orion EZ Finder 7228 manual

Orion

Orion EZ Finder 7228 manual

Meade Adventure Scope Series instruction manual

Meade

Meade Adventure Scope Series instruction manual

Meade ETX-80AT-BB instruction manual

Meade

Meade ETX-80AT-BB instruction manual

TeleVue NP101is operating guide

TeleVue

TeleVue NP101is operating guide

Meade Autostar Software guide

Meade

Meade Autostar Software guide

Seben 900/60 owner's manual

Seben

Seben 900/60 owner's manual

Kenko SKY WALKER SW-0 operating instructions

Kenko

Kenko SKY WALKER SW-0 operating instructions

NATURE & DECOUVERTES MIZAR manual

NATURE & DECOUVERTES

NATURE & DECOUVERTES MIZAR manual

Omegon Maksutov Telescope 90/1250 OTA instruction manual

Omegon

Omegon Maksutov Telescope 90/1250 OTA instruction manual

National Geographic Telescope With Equatorial Mount operating instructions

National Geographic

National Geographic Telescope With Equatorial Mount operating instructions

manuals.online logo
manuals.online logoBrands
  • About & Mission
  • Contact us
  • Privacy Policy
  • Terms and Conditions

Copyright 2025 Manuals.Online. All Rights Reserved.