manuals.online logo
Brands
  1. Home
  2. •
  3. Brands
  4. •
  5. CellaVision
  6. •
  7. Laboratory Equipment
  8. •
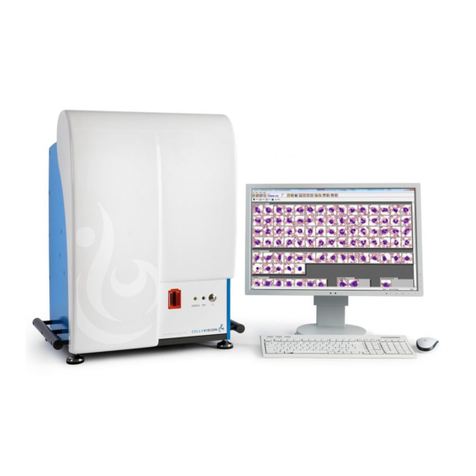
  9. CellaVision DM96 User manual

CellaVision DM96 User manual

Quick Guide — CellaVision
®
DM96
Copyright © 2005-2009 CellaVision AB PM-10113 2009-08-12
Startup Operator Checks
Verify the following before powering on:
-there is enough immersion oil for the day’s analysis,
-the input and output drawers are empty,
-all hatches are closed.
Starting the System
1Switch on the slide scanning unit.
2Switch on the system computer.
3Wait until the status lamp on the slide scanning unit
is continuously lit.
4In the Log On dialog, type username, password and
select database.
5Click OK.
Sample Analysis
1. Loading Slides
-Load the slide into the magazine with the barcode
upwards and towards the operator.
-12 slides can be loaded into a magazine.
-The slide positions in the magazine are numbered 1-
12 from the bottom up.
-The slide in position 1 is processed first.
2. Processing Slides
1Open the input hatch and put the magazines on the
conveyer. The magazines must have the barcode
turned upwards and the open end of the magazine
inwards.
2Click on the Start button .
OR
if Autostart is enabled the process starts
automatically when a magazine is inserted into the
system.
3. Verifying Processed Slides
Refer to CellaVision DM96 User’s Manual (Verifying
Processed Slides) for details.
3.1. Reviewing WBC
-All cell images must be verified before a slide can be
signed and the result can be released.
-WBCs are presented, by class, in galleries. The main
gallery is always shown together with up to two
additional galleries.
-WBC Full Screen View displays all WBCs sorted by
class
-Click WBC galleries to choose view.
-Reclassify WBCs by:
oDragging and dropping them from one
gallery to another.
oDragging and dropping them from one
gallery to WBC or non-WBC panel.
oRight-click on a cell and reclassify cell.
3.2. Red Blood Cell Characterization
-There are two ways to report the RBC result:
oReport all as normal.
OR
oUse characterization. If you disagree with
a pre characterization, click the dot that
corresponds to your opinion.
3.3. Estimating Platelets
-Refer to CellaVision DM96 User’s Manual
(Estimating Platelets) for details.
4. Signing Slides
-Click Sign. The Sign Slide dialog appears.
-Enter User name and Password.
-Activate/deactivate the automatic options Sign order
when signing slide, Send to LIS and Print order.
-Click OK.
Quality Control Analysis -
Cell Location
1Select a blood sample with a WBC count in the
normal WBC range. To reduce processing time a
WBC count above 7x10
9
/l is recommended.
2Put a QC label on it.
3Put the slide in a magazine, place it in the DM 96 and
process the slide.
4When the slide has finished open Tool/ Cell
Location.
5Select the new slide at the top of the slide list.
6Go through all the images belonging to the slide and
examine them for missed nucleated cells. Enter the
number of missed cells, if any, in the input field for
each image.
7When all images have been examined the result will
appear at the end.
8Check that the result is within the laboratory’s
established limits.
Handling of Stat Slides
1Eject the magazine.
2Load the STAT slide in slide position 1 in a new
magazine.
3Open the input hatch and put the magazine to the left
of the other magazines.
Shutting Down the System
1Eject any remaining magazines from the system.
2Select Exit in the File menu.
3Switch off the system computer.
4Switch off the slide scanning unit.
Quick Guide — CellaVision
®
DM96
Copyright © 2005-2009 CellaVision AB PM-10113 2009-08-12
Maintenance Procedure
Notes for all Maintenance
-Refer to CellaVision DM96 User’s Manual
(Maintenance) for details and images.
-Refer to CellaVision DM96 User’s Manual for
cautionary notes.
Daily Maintenance
1Make sure there are no magazines in the system.
2Shut down the system according to the instructions in
this manual.
3Open the main hatch.
4Clean the XY stage from immersion oil with a lint-
free soft cloth.
5Close the main hatch.
Weekly Maintenance
1. Cleaning of Objectives
1Make sure there are no magazines in the system.
2Shut down the system according to the instructions in
this manual.
3Open the main hatch.
4Clean the lens on all objectives by wiping them
gently with lens paper. Always use a fresh lens paper
to avoid oil contamination. To reach all lenses,
carefully turn the objective turret.
5Apply step 5-11 only on the high power wet
objectives. Put a drop of isopropyl alcohol on a piece
of crumbled lens paper. Do not use an excessive
amount of solvent.
6Wipe the objective once to remove most of the oil.
Do not use a circular motion to clean lenses as this
increases the risk of scratching the surface.
7Take a new piece of lens paper and put a drop of lens
cleaner in the middle.
8Place the lens paper over the objective.
9Use a cotton swab to gently hold the paper against
the objective while you drag the lens paper away
from the objective.
10 The cotton swab should remain over the center of the
objective and the lens paper under it should be wet. If
the lens paper dries out then repeat starting on a wet
(but non-oily) spot on the lens.
11 Repeat once from step 5.
2. Database Performance
-To maintain a high database performance, it is very
important to control the size of the database.
-It is also recommended to restart the system
computer at least once a week.
As Needed Maintenance
1. Immersion Oil Refill
1Open the main hatch.
2Remove the screw cap from the oil canister.
3Fill up with specified oil, using a clean funnel, to the
black line of the glass tube of the funnel. We
recommend not filling up more oil than will be used
in 6 months. A full oil canister of 500 ml corresponds
to about 10 000 slides. Do not fill up above the black
line.
4Clean the system from immersion oil spillage with a
lint-free soft cloth.
5Refit the screw cork.
6Close the main hatch.
2. Bulb Exchange
-----Warning -------------------------------------------
Switch off the SSU and wait for the lamp housing
and lamp bulb to cool before touching.
-----Caution --------------------------------------------
Do not touch the new bulb with bare hands.
1Loosen the 2 non-detachable screws, which hold the
lamp hatch, about half a turn counter clockwise,
using a 3 mm Allen key.
2Remove the hatch by pulling it outwards and then
upwards.
3Loosen the non-detachable screw of the lamp house
cover using a 3 mm Allen key.
4Lift and remove the cover of the lamp house.
5Press the bulb clamping levers and gently withdraw
the old bulb from the lamp housing.
6Press the bulb clamping levers and fully insert the
bulb pins into the pin holes.
7Gently release the bulb clamping levers to their
original position to secure the bulb.
8Refit the lamp house cover.
9Tighten the screw of the lamp house cover.
10 Refit the lamp hatch.
11 Tighten the screws of the lamp hatch.
Preventive Maintenance
-No preventive maintenance by the user is necessary.
Preventive maintenance is to be performed by
CellaVision authorized personnel.

Other CellaVision Laboratory Equipment manuals

CellaVision DM1200 User manual

CellaVision

CellaVision DM1200 User manual

CellaVision DM1200 User manual

CellaVision

CellaVision DM1200 User manual

Popular Laboratory Equipment manuals by other brands

Cognionics Quick Series manual

Cognionics

Cognionics Quick Series manual

Socket In-Hand Scan Card Imager user guide

Socket

Socket In-Hand Scan Card Imager user guide

Gerhardt Vapodest 30 instruction manual

Gerhardt

Gerhardt Vapodest 30 instruction manual

IKA HELISTAND manual

IKA

IKA HELISTAND manual

Ultravation UVMATRIX SI Seris owner's guide

Ultravation

Ultravation UVMATRIX SI Seris owner's guide

Agilent Technologies 8860 Site preparation guide

Agilent Technologies

Agilent Technologies 8860 Site preparation guide

WPI PV850 instruction manual

WPI

WPI PV850 instruction manual

Telstar Bio II Advance Plus Service manual

Telstar

Telstar Bio II Advance Plus Service manual

erlab Captair Bio Smart Series user manual

erlab

erlab Captair Bio Smart Series user manual

MELAG MELAdem 53 user manual

MELAG

MELAG MELAdem 53 user manual

RADWAG HRP.5Y.KO Series Startup guide

RADWAG

RADWAG HRP.5Y.KO Series Startup guide

Applied Photophysics LIBS-6 user manual

Applied Photophysics

Applied Photophysics LIBS-6 user manual

Ametek Solartron Analytical ModuLab XM ECS installation guide

Ametek

Ametek Solartron Analytical ModuLab XM ECS installation guide

Thermo Scientific BF51842C Installation and operation manual

Thermo Scientific

Thermo Scientific BF51842C Installation and operation manual

DLAB Laboratory Instruments D3024 user manual

DLAB Laboratory Instruments

DLAB Laboratory Instruments D3024 user manual

COMINOX Sterilclave 6 B Speedy Use and maintenance manual

COMINOX

COMINOX Sterilclave 6 B Speedy Use and maintenance manual

Thermo Scientific Applied Biosystems VeritiPro quick reference

Thermo Scientific

Thermo Scientific Applied Biosystems VeritiPro quick reference

Prior Queensgate NANOSCAN SP Series Quick start instructions

Prior

Prior Queensgate NANOSCAN SP Series Quick start instructions

manuals.online logo
manuals.online logoBrands
  • About & Mission
  • Contact us
  • Privacy Policy
  • Terms and Conditions

Copyright 2025 Manuals.Online. All Rights Reserved.