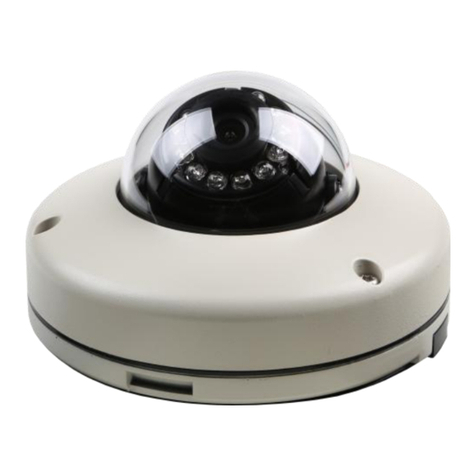
Cellinx CamPilot MR330 User manual

1
CamPilot MR330
IP
Flat Dome
Camera
User Manual
Before installing and using the product, please read
this manual carefully.
Be sure to eep it handy for later reference.
Detail Model Name
MR330 - CBR95H
D i g i t a l D N A m a k e s y o u D I VA
Adapter and LAN cable are not included in the pac age.
2
Precaution
WARNING
:
TO PREVENT THE RISK OF FIRE OR ELECTRIC SHOCK,
DO NOT EXPOSE THIS APPLIANCE TO RAIN OR MOISTURE.
CAUTIONS
■ Do not open or modify
Do not open the case, as it may be dangerous and cause damages.
■ Do not put objects inside the unit
Make sure that no metal objects or flammable substances get inside the camera. It could cause
fire, short-circuits or damages.
■ Be careful when handling the unit.
To pre ent damage, do not drop the camera or subject it to strong shock or ibration.
■ Install away from electric or magnetic fields.
■ Protect from humidity, dust and high temperature.
CamPilot MR330 is for indoor use and ulnerable to water and/or moisture.
An additional case that is temperature-controllable, damp-proof and waterproof is required for
outdoor use.
■ Cleaning
Dirt can be remo ed from the case only by wiping it with a soft cloth moistened with a soft
detergent solution.
■ Mounting Surface
The mounting surface material must be strong enough to support the camera.
■ CamPilot MR330 can be used for surveillance purpose.
Be thoroughly informed of related regulations prior to installation to ensure compliance with such
regulations.
3
Overview
FEATURES
CamPilot MR330 is an IP Camera that transmits real-time high-resolution digital ideo
and audio data with H.264 high compression rate o er Internet or Intranet.
CamPilot MR330 contains digital ideo/audio compressor, web ser er and network
interface. Users can simply connect power source and network cable for operation.
Additional operation equipments or programs are not required.
APPEARANCE
▶ Top
▶ Side
▶ Bottom
▶ Rear
Cable Hole
▶ Front
Cable Hole (Rubber Co er)
120mm 58mm
Power/Ethernet Cable
▶ Accessories
The pin
connectors
for DIO,
Audio Out
are optional
item on
order
Wrench for dome cover
Pin connector (option)
4
Specification
Items CamPilot MR330-CBR95
Camera
De ice SONY 1/3” Interline Transfer CCD
Effecti e Pixels NTSC : 380K Pixels [768(H) x 494(V)] / PAL : 440K Pixels [752(H) x 582(V)]
Min. Illumination 0.1 Lux (f1.2)
Lens Mount Fixed Lens
IR Cut Filter Remo e TDN5 (Optional)
Electric Shutter 1/60~1/100,000 (NTSC) / 1/50~1/100,000 (PAL)
White Balance Manual / Auto
BLC Low / Middle / High / Off
S/N Ratio 50 dB
Encoder
CPU ARM9
Flash Memory 8MB
RAM DDR2, 256MB
OS Embedded Linux
Video Output N/A
Audio Input / Output MIC Input / 1ch Line Le el Output (option pin connector)
Image
Size
NTSC : D1(720X480), 4CIF(704X480), VGA(640x480), CIF(352x240),
QVGA (320x240), QCIF(176x112), QQVGA(160x112)
PAL : D1(720X576), 4CIF(704X576), VGA(640x480), CIF(352x288),
QVGA (320x240), QCIF(176x144), QQVGA(160x112)
Codec H.264, MJPEG
Bandwidth 32Kb~4Mb
Transmission Up to 30fps (at 720X480)
Network
Interface RJ45 (10/100 Base-T)
Connection Up to 10
Protocol TCP/IP, ICMP, HTTP, ARP, SMTP, FTP, PPP, PPPoE, DHCP, NTP, SNMP, UPnP
Firmware Update A ailable on Web browser
Security
Password Authentication
O
User Authentication O
DIO (Digital Input / Output) 1 in / 1out (option pin connector)
Pan / Tilt / Zoom N/A
Motion Detection O
Dynamic IP support O (DHCP, PPPoE support)
Recording Micro SD/SDHC card support (less than 32GB, SD card is sold separately)
FTP, Email Transmission O
Power PoE support, DC 12V 1A (sold seperately)
All manuals and user guides at all-guides.com
all-guides.com

5
Installation and Connection
INSTALLTION
1. Removing the dome cover
Determine where to install and use a wrench to remo e the dome co er.
(From the next step, it is assumed that the power and network connectors are pre-installed.)
2. Networ connection
Connect a RJ 45 jack to the ETHERNET connector of the Power / ETHERNET cable.
(Refer to PoE IEEE802.3af If you use PoE.)
3. Power connection
Connect a DC 12V 1A adaptor jack to the power connector of the Power / ETHERNET cable to
the. (The power connection is not necessary if you use PoE.)
4. Mounting
Mount the CamPilot MR330 on the installation point.
Use the fixing holes on the bottom plate.
5. Assigning an IP address
Assign an IP address. (Refer to the “Network Setting” at p.7~8.)
6. Adjusting the camera module
Adjust the direction of the camera module monitoring the ideo.
(Lens adjustment is not a ailable.)
7. Replacing the dome cover
Replace the dome co er with the wrench.
▶ Fi ing holes (bottom)
6
Internet
or
Intranet
Installation and Connection
REF Monitoring PC Requirements
Item Specification
Monitoring
PC
Processor Pentium Core2 Duo or more
RAM 2GB or more
Graphic Card 512MB or more
OS Windows 2003 / XP / Vista / 7
Monitor Resolution 1024 X 768 pixels or more
Network 10/100 Base-T LAN
CamPilot MR330
·
··
·
·
··
·
·
··
·
1 2 N
Power
Power
Power
HUB
General Connection
Monitoring PC Monitoring PC
Local Network
Public Network
LAN (UTP) Cable
LAN (UTP) Cable
LAN Cable
Router
7
Networ Setting
Setting an IP address of a CamPilot MR330
TIP If a monitoring PC is on 192.168.1.xxx network area, the connection is a ailable without
any change on CamPilot MR330. The initial IP address on CamPilot MR330 is 192.168.1.2.
In case of the direct connection, the monitoring PC (Note Book) should be changed into
192.168.1.xxx
When changing the network setting, use ENCP program.
1. Download ENCP (Easy Networ Configuration Program)
• Please, refer to the link as below
http://cellinx.co. r/files/board.3/5_NVS4.1%20(2011.04.06%201121).zip
• After unzipping the downloaded file and executing “Setup.exe”, you can run ENCP.
(Windows start button / All Programs / NVS 4.1)
2. Assigning an IP address on CamPilot MR330
• Click the button “Scan”, select an CamPilot MR330
• Input the IP address, Subnet Mas , Gateway and DNS Server IP address, click the button
“Apply”
• If you don’t ha e a proper IP address, ask the network administrator or refer to User Manual.
▶
▶▶
▶
Clic for Scanning
▶
▶▶
▶
Clic
for Applying
8
Networ Setting
3. Accessing to CamPilot MR330 with a web browser
Open a web browser on a monitoring PC and enter the IP address assigned to a CamPilot
MR330 as following
Example> http://192.168.1.2
• The page as below shows up after the connection is completed.
ID / Password :
root / pass (Initial Value)
Monitoring button :
mo es to Monitoring Page
Guest Login :
connects by “guest” account
(The guest has no setting permission)
< The Initial Page >
< Monitoring >
All manuals and user guides at all-guides.com

9
Networ Setting
Basic Information
The initial IP address of a CamPilot MR330 is 192.168.1.2, which is an IP address of
192.168.1.xxx (1~255) assigned to the pri ate network. If a monitoring PC doesn’t ha e an IP
address of the same network (192.168.1.1~255), the user ha e to change the IP address of the
CamPilot MR330 (Refer to ENCP at p.7)
Chec the IP address of a monitoring PC (networ information)
1. Get to a command prompt. (START / run / cmd).
2. Type “ipconfig” on the command prompt window and press “Enter”.
Determine the IP address for a CamPilot MR330 after checking the PC information as table.
REF xxx : the number should not be used for another PC of a same network
The subnet mask and default gateway of a PC on a same network is same to those of a
CamPilor MR330.
Chec ing the unused IP address
Type “ping xxx.xxx.xxx.xxx” on the command prompt window and press “Enter”.
If the message “Destination Host Unreachable” shows up, we can know that the IP address is
not used. But it is recommended that you should ask the address to the network administrator
for the PC of the IP address is off.
In case that a public IP address is used for the network, you ha e to ask the extra IP address to
the network administrator.
PC information example CamPilot MR330 address example
Pri ate
Network
Ex.1
IP 4 address 192.168.10.100
Subnet mask 255.255.255.0
Default Gateway 192.168.10.1
IP address 192.168.10.xxx
Subnet mask 255.255.255.0
Default Gateway 192.168.10.1
Pri ate
Network
Ex.2
IP 4 address 10.0.0.10
Subnet mask 255.255.0.0
Default Gateway 10.0.0.4
IP address 10.0.xxx.xxx
Subnet mask 255.255.0.0
Default Gateway 10.0.0.4
Public
Network
Ex.
IP 4 address 123.150.24.34
Subnet mask 255.255.255.0
Default Gateway 123.150.24.1
IP address 123.150.24.xxx
Subnet mask 255.255.255.0
Default Gateway 123.150.24.1
10
Networ Setting
Port forwarding
- Setting the router, in case that one (or more) CamPilot MR330 is connected.
- The port forwarding should be set for the connection from a public network area.
If a CamPilot MR330 is installed on a pri ate network, the port forwarding should be set for the
connection from a public network area.
As the port forwarding is a setting item of a router, a PC of the IP address on a public network
can be connected to a CamPilot MR330 on a pri ate network ia the router.
If the port forwarding is set up as below, the function works.
REF Basically the ports 80 and 1852 were used for the web and ideo connection for a
CamPilot MR330.
After executing a web browser and typing the IP address that is assigned to the router, you
can monitor the ideo of CamPilot MR330 on a PC on a public network.
REF If you want to use a specific name instead of the IP address of the router, you can use the
DDNS function of a router or a CamPilot MR330. DDNS function includes updating an IP
address for a specific name though the IP address of the router is changed. (Refer to The
function of updating dynamic IP address at p.11)
11
Networ Setting
Port forwarding in case of installing two (or more) CamPilot
MR330
A port of a router cannot be used for the two (or more) CamPilot MR330. In this case, another
port number should be added on the router.
Port forwarding example (NVS: Network Video Ser er)
Port forwarding of Router
NVS port account
Ser ice
Name Pri ate IP Protocol
Ser ice Port
(External Port)
Internal Port
NVS #1-1 192.168.1.100 TCP 8080 8080 8080 - Web
NVS #1-2 192.168.1.100 TCP 2000 2000 2000 – Video + Audio
NVS #2-1 192.168.1.101 TCP 8081 8081 8081 - Web
NVS #2-2 192.168.1.101 TCP 2001 2001 2001 – Video + Audio
NVS #3-1 192.168.1.102 TCP 8082 8082 8082 - Web
NVS #3-2 192.168.1.102 TCP 2002 2002 2002 – Video + Audio
NVS #4-1 192.168.1.103 TCP 8083 8083 8083 - Web
NVS #4-2 192.168.1.103 TCP 2003 2003 2003 – Video + Audio
참고
Though the internal ports of CamPilots are used as default in theory, it is recommended
that the ser ice port of the router and the internal port of CamPilot should be same for the
function doesn’t work by the features of a router.
12
Networ Setting
The function of updating dynamic IP address (DDNS)
1. The function DDNS of CamPilot can be used with the en ironment of one CamPilot MR330
and an internet modem.
2. The function DDNS of a router should be recommended in case that there is a router for two
(or more) CamPilot MR330 or the management (firewall) purpose.
All manuals and user guides at all-guides.com

13
14
Web Monitoring
▲
▲▲
▲
OVERVIEW
• User can monitor the ideo and audio data and manage CamPilot MR330 through a
web browser o er internet.
• User can select a type among encoder mode and decoder mode through a web
browser.
• Basic functions
- Monitoring the ideo and audio data from a CamPilot MR330.
- Changing the setup related to monitoring
(Resolution, Info. display, D/O (Digital Output), Bitrate, Audio, PTZ, and etc.)
- Confirming the status of a CamPilot MR330
(Network Status, Model Info, Connection List, Log)
- Changing the basic setting (Network, Video, Audio, E ent, Date/Time, OSD)
- Changing the expert setting (RS485, RS232, Port, Security Le el, Account,
DDNS, UPnP, Motion Detect, Firmware Update)
Monitoring
Managing
< The initial page >
15
Web Monitoring
▲
▲▲
▲
CONNECTION
• To connect to a CamPilot MR330, type the IP address that is gi en to the CamPilot
MR330 on the address window of a web browser as below.
(Refer to “ENCP 2.0” program manual to set an IP address of the CamPilot MR330)
• Connection and accounts
①
Administrator account
- It is a ailable to monitor and manage a CamPilot MR330.
- Default ID / Password of the administrator is root / pass.
- Only the password is changeable. (Administrator’s ID is fixed.)
②
Guest account
- It is a ailable to use only the functions that are permitted limitedly on monitoring.
- It is shown as inacti ated for the limited functions on monitoring page.
http:// (CamPilot MR330) IP Address)
http:// 192.168.1.2
► Type on the address window of a web browser and enter
► Example (Default IP Address)
► Login window
16
Web Monitoring
Setting page login
: Type the ID and Password of the administrator and click “Setting” button.
Monitoring page login
: Type the ID and Password of the administrator and click “Monitoring” button
Guest login
: Click “Guest Login” to enter the monitoring page of guest account
► Monitoring Page
► Ser er Setting Page
All manuals and user guides at all-guides.com

17
Web Monitoring
• Note for Monitoring Page
- When first connecting to monitoring page, click “Yes” to download Acti eX if
“security warning” window appears. (CASE
①
)
- Click the yellow information bar to download Acti eX control.
①
②
②②
②
①
①①
①
18
Web Monitoring
- User can download and install Acti eX Setup manually if the information bar
does not appear. (CASE
②
)
- Click “Run” button to install Acti eX file manually (NVSOCX.exe)
► Acti eX Setup window
19
Web Monitoring
▲
▲▲
▲
MONITORING
• 1st / 2nd / 3rd Stream
- Select a Stream to monitor
- If the stream button is inacti ated, check the ideo setting of “ser er setting page”.
• Snapshot
- Capture a JPEG Image of current ideo stream
(JPG file creation: C:/)
Monitoring Page
20
Web Monitoring
• REC
- Record the ideo of current ideo stream (AVI file creation: C:/)
• Full
- Extend the image of current ideo stream to fit monitor size.
• Resolution
- Display a current resolution.
- User can select other resolution.
(If CamPilot MR330 is rebooted, the resolution on the monitoring page is initialized to
the designated alue of “ser er setting page”.)
- Changing the resolution is not a ailable on a guest account.
• Info.
-
Sho
ws
the information of the transferred data from the CamPilot MR330 on the upper of the
image.
- FPS / Camera(Channel) Name / Resolution
- E ent Status : Motion Detect(red) / Digital IN(blue) / Video signal (green)
Resolution
QQVGA
QCIF QVGA CIF VGA 4CIF D1
NTSC 160X112
176X112
320X240
352X240
640X480
704X480
720X480
PAL 160X112
176X144
320X240
352X288
640X480
704X576
720X576
Detect ideo signal
Detect motion e ent
Detect sensor input (Digital IN)
FPS of current ideo stream
Resolution of current image
Channel name
All manuals and user guides at all-guides.com

21
Web Monitoring
• D/O
- Digital Out - This controls the de ice that is connected to CamPilot MR330.
• Bitrate
- Display the bitrate of current ideo stream.
- User can select other bitrate. (If CamPilot MR330 is rebooted, the bitrate on the
monitoring page is initialized to the designated alue of “ser er setting page”.)
- Changing the bitrate is not a ailable on a guest account.
• Enable Audio
- If the box is checked the CamPilot MR330 sends the audio data with the ideo data.
• PTZ Control
- CamPilot MR330 does not support PTZ(RS485) function
22
Web Setting
▲
▲▲
▲
SERVER SETTING
- To apply the changed setting, reboot CamPilot MR330.
(Click Reboot on the menu)
• Status
- This is the initial page of Ser er Setting.
- This shows network status, model information, network traffic status,
connection list and system log.
23
Web Setting
• Networ Status
- MAC Address: Media Access Control Address of CamPilot MR330 (Unchangeable)
- IP Address: the assigned IP Address of CamPilot MR330
- Subnet Mask: Subnetwork of the IP address belongs to.
(Use the alue to fit the network en ironment)
- Gateway: Gateway Address (Use the alue to fit the network en ironment)
- Default DNS: IP Address of Default DNS ser er
• Connection List
- User can check the number of connected clients and IP addresses.
• Log
- “Log” displays the logs of general e ents of CamPilot MR330.
• Basic > Networ (Wired)
- User can set Network Information of CamPilot MR330: IP Address, Subnet Mask,
Gateway, Default DNS
①
①①
①
Static IP
24
Web Setting
- IP Address: Ask network administrator for an appropriate address
- Subnet Mask / Gateway / Default DNS : Ask network administrator
- After setting, click “OK” button
- Click “Reboot” to apply the setting to CamPilot MR330.
②
②②
②
Dynamic IP
- If DHCP ser er is on the local network and you intend to allocate IP address dynamically,
use this method
- Select Dynamic IP tab and click “OK” button, and reboot CamPilot MR330.
- If you want to select Dynamic IP, set Dynamic DNS to access CamPilot MR330.
Click!
< Reboot Message >
All manuals and user guides at all-guides.com
all-guides.com

25
Web Setting
③
③③
③
PPPoE
- Use in case that the network supports PPPoE like xDSL
- Ask ISP(Internet Ser ice Pro ider) for details
- User ID : xDSL user ID
- User Password : xDSL user password
- Ser ice Name : Ser ice name of ISP
- MTU : Maximum transmission unit of data
- IP address of DNS se er can be set to create automatically
- If your xDSL does not use static IP type, you should use Dynamic DNS setting like
DHCP
26
Web Setting
• Basic > Video
- User can select ideo streaming type (Encoder or Decoder mode)
- CamPilot MR330 support only an Encoder mode
- CamPilot MR330 works as Encoder mode
27
Web Setting
Video Setting
- Pre iew : User can check the current ideo setting through the pre iew images.
(1st / 2nd / 3rd stream selectable)
- Video Compressed Type: H.264 / MJPEG
(Compression type of 3rd stream : MPEG4)
- Resolution : QQVGA / QCIF / QVGA / CIF / VGA / 4CIF / D1
(Resolution of 3rd stream : QCIF fixed)
- Bitrate Type : CBR / VBR
• Constant Bitrate : 8M / 7M / 6M / 5M / 4M / 2M / 1.5M / 1M / 750K / 500K / 384K /
256K / 128K / 64K / 32K
• Variable Bitrate : 1~6 (The highest quality is “1”)
- Frame Per Sec : 1 ~ 30 (NTSC) / 1~25 (PAL)
- Group Size : 1~200 (NTSC / PAL)
- Port : Video and Audio streaming port (Each stream must use different port)
- Video Type : NTSC / PAL
- Video Color : Auto / Color / B&W
- Aperture : 0~15 (Max. emphasis alue is “15”)
- Brightness / Contrast / Saturation / Hue : 0~255
- X / Y offset : 1~21
Jpeg Capture
- Enable : Send JPEG Image ia HTTP Protocol (1fps fixed)
- Resolution : Select a resolution (QQVGA~D1)
- Quality : High / 1 / 2 / 3 / 4 / Low
▶
Jpeg Capture
28
Web Setting
MEMOS
_____________________________________________
_____________________________________________
_____________________________________________
_____________________________________________
_____________________________________________
_____________________________________________
_____________________________________________
All manuals and user guides at all-guides.com

29
Web Setting
• Basic > Audio
Server to PC Audio Option
- Audio Type : Mono (Fixed)
- Audio Codec : G.711 / G.726
- Sampling Rate : 8kHz / 32kHz
- Volume : -34.5~12dB
30
Web Setting
• Basic > Event
①
①①
①
Digital Input
31
Web Setting
Common
- Sensor Type: Select a type out of two types.
Preset
- Preset Enable: enables the CamPilot MR330to send the preset signal to the connected
camera which supports preset function
- Preset Number: preset number that assigned to the camera which supports preset
function
Digital Output
- Digital Output Enable: enables the CamPilot MR330to send the digital signal to the
connected de ice
- Digital Output Time: adjusts the time for the CamPilot MR330to send the signal (unit :
sec)
FTP
- Enable: enables the CamPilot MR330to send captured image to FTP ser er
(Assuming JPEG Capture enable on the ideo setting page)
- Ser er : IP address of FTP ser er
- Port : FTP ser er port
- User : Account of FTP ser er
- Password : Password of FTP ser er
- Image name : File name of captured image
(Time information will be added with the image name.)
SMTP (e-mail)
- Enable: enables the CamPilot MR330 to send captured image ia e-mail.
- Outgoing mail ser er : SMTP Ser er
- To e-mail address : e-mail address of recei er
- From e-mail address : e-mail address of sender
- Subject : User can specify e-mail title
- Body : User can specify e-mail massage
32
Web Setting
②
②②
②
Motion Detection
Preset : Same as “Digital Input” setting
Digital Output : Same as “Digital Input” setting
FTP : Same as “Digital Input” setting
SMTP (e-mail) : Same as “Digital Input” setting
All manuals and user guides at all-guides.com

33
Web Setting
Periodic Tim
③
③③
③
er
Common
- Periodic Timer Enable : enables the CamPilot MR330 to send the signal to the client PC
periodically
- Time Inter al : means the period (sec.)
Preset : Same as “Digital Input” setting form
Digital Output : Same as “Digital Input” setting form
FTP : Same as “Digital Input” setting form
SMTP (e-mail) : Same as “Digital Input” setting
34
Web Setting
• Basic > Date / Time
Current Time Set
①
①①
①
Date / Time
- S- Ser er Time : the time that the CamPilot MR330 keeps internally
- New Date / Time: user can assign the specific time oluntarily.
35
Web Setting
②
②②
②
Time Server
Time Server
- Enable : enables the time of CamPilot MR330 synchronize with time ser er periodically.
- Inter al : means the period (sec.)
- Time zone: user can select a time zone
- Daylight Sa ing Time : Check this box in using daylight sa ing time
- Time Ser er: user can assign a Time Ser er to apply the current time to CamPilot
MR330
- After setting, click the “OK” button and reboot CamPilolt.
36
Web Setting
• Basic > OSD (On Screen Display)
Text Color
- Background Color : Select a color of background
- Foreground Color : Select a color of text
- Transparency : 0~10
All manuals and user guides at all-guides.com

37
Web Setting
OSD
- Font Size : Normal / Big
- Date Enable : display date
- Time Enable : display time
- Channel Enable : display channel name
- X Axis: Input a point on the coordinate
- Y Axis: Input a point on the coordinate
Logo
- This means the image that is displayed on OSD of the transferred image.
- First, upload the logo image on “Expert/Firmware Update/OSD logo upload” (BMP file)
- Enable: Check the box to display the image
- X Axis: Input a point on the coordinate
- Y Axis: Input a point on the coordinate
► OSD on image
Date / Time / Channel Name
OSD logo
38
Web Setting
• Expert > PTZ / RS232 (under development)
• Expert > PTZ / RS232
- CamPilot MR330 does not support PTZ(RS485) function
- This page will be deleted on the next firmware release
Channel 1
- Channel Name : the channel name of OSD
- Channel Model (PTZ model)
: Select a model of the connected PTZ camera or recei er
- Channel ID (Rx Address)
: the Rx address of the connected PTZ camera or recei er
- Baud rate / Data bits / Parity / Stop bits
: select the alue properly by the recei er type
RS232
- Baud rate / Data bits / Parity / Stop bits
: select the alue properly by the recei er type
39
Web Setting
• Expert > Local Storage (Optional)
- Local Storage function is automatically mounted when inserted into the SD / SDHC card
slot.
Status
- Display the total space, used space and free space of SD / SDHC Card.
Record Setting
- Mode : Select a record type (OFF / Full Recording / E ent Recording)
- Select a ideo stream of CamPilot MR330 (1st / 2nd / 3rd Stream)
- Select a o erwrite setting of the local storage (ON/OFF)
File list
- Recorded file is produced e ery 10MB.
- User can download and delete a recorded file.
40
Web Setting
• Expert > Port
Web
- Web Port: Default is 80
FTP
- FTP Port: Default is 21
All manuals and user guides at all-guides.com

41
Web Setting
• Expert > Security
Security Level
- HIGH
: Only connections from the local area are permitted
- MEDIUM
: Video and Audio connections from any place and setting from the local area permitted.
- LOW
: All connections from any place permitted
42
Web Setting
• Expert > Account
Account
- The password amendment of administrator account is a ailable.
- The administrator can add up to 5 users and modify the properties.
Guest Permission
- This is to determine the guest permission for access to the CamPilot MR330
- At guest account, ideo and audio monitoring is permitted.
Max Client Limit
- The administrator can restrict the number of simultaneous access (1~20)
43
Web Setting
• Expert > DDNS
- DDNS is the function that matches an IP address and a host name.
- If a CamPilot MR330 has the dynamic IP address, the host name by DDNS (Dynamic
Domain Name Ser ice) must be used instead of the IP address for the credibility of the
network connection.
IPv4 DDNS
- Check the box of “Enable” and select a ser ice out of two.
- Both are required to register some items on each ser ice site.
► Using “ddns.nu”
44
Web Setting
DynDNS
- For use of “ddns.nu” register at www.dyndns.com/
- Type the registered DDNS ID, DDNS Password, Host name and Inter al for updating
and click “OK” button and reboot the CamPilot MR330.
.
▶
Main page of “DynDNS”
All manuals and user guides at all-guides.com
all-guides.com

45
Web Setting
ddns.nu
- For use of “ddns.nu” register at www.ddns.nu
- Type the registered DDNS ID, DDNS Password and DDNS handle and click “OK” button
and reboot the CamPilot MR330
ProutDNS
- ProutDNS is a set of PHP scripts to create your own Dynamic DNS ser ice.
- Type the DDNS ser er, the registered DDNS ID, DDNS Password, Host name and
Inter al for updating and click “OK” button and reboot CamPilot MR330.
※
For details, please refer to user’s guide “DDNS setup”.
▶
Main page of “ddns.nu”
▶
Main page of “ProutDNS”
46
Web Setting
• Expert > UPnP
UPnP
- Enable : Check the box to use UPnP(Uni ersal Plug and Play) of CamPilot MR330
- Friendly name : User can change the friendly name of CamPilot MR330
47
Web Setting
• Expert > Motion Detect
Input Setting
- Check “Enable” box for use of motion detection
- Detect Area: if the detection area is selected, it changes to green (User can check
pre iew image assuming JPEG Capture enable on the ideo setting page.)
- Sensiti ity : 1~30 (Maximum sensiti ity in case of the alue “1”)
48
Web Setting
• Expert > Firmware Update
Language
- Language Select : Select a language file
(After that, it is required to refresh the web browser. Please push F5 button.)
- Language File : Add a language file
Firmware Update
- Uploads the newly firmware after clicking the browsing button and finding a new firmware.
All manuals and user guides at all-guides.com

49
Web Setting
Logo Upload
- Changes the logo image file.
- The process is same as “Firmware Update”
- Use GIF file (Maximum size : 567x175)
OSD Logo Upload
- Changes the logo image on OSD.
- The process is same as “Firmware Update”
- User ha e to use file name by “osd_logo.bmp”
(Maximum size : 120x38)
Control Protocol Upload
- Add a camera control protocol.
50
Web Setting
• Expert > Report
- User can check all of setting of CamPilot MR330.
- User or installer can memo on the report page.
- User or installer can print out this pages and use in arious usages
• Reboot
- To apply the changed setting, reboot CamPilot MR330.
• Logout
- Back to the initial connection page
► Confirmation Dialog
51
Trouble-shooting
Before sending the CamPilot MR330 out for repair, check the items below.
If the problem persists after checking these items, contact your ser ice center.
▲
▲▲
▲
If no image appears
- Is the LAN cable attached securely?
- Are the power and oltage normal?
- Is the connected camera normal?
- Is there adequate illumination?
▲
▲▲
▲
If the image is unclear
- Is the connected camera lens in focus?
- Is the connected camera lens dirty?
- Dirt or fingerprints on the lens can ad ersely affect the images.
Gently wipe any dirt or fingerprints off the lens with a soft cloth or lens
cleaning paper and cleaning fluid (commercially a ailable).
- Is the connected monitor adjusted correctly?
▲
▲▲
▲
If the Audio is not wor
- Is the audio cable attached securely?
- Are the connected de ices(amplifier, microphone, speaker and etc.) normal?
- Are the Client software and de ices normal?
▲
▲▲
▲
If the DIO is not wor
- Is the DIO cable attached securely?
- Is the connected sensor or alarm de ice normal?
All manuals and user guides at all-guides.com
This manual suits for next models
1
Table of contents
Other Cellinx Security Camera manuals

Cellinx
Cellinx CamPilot URH350D-2M User manual

Cellinx
Cellinx CamPilot STH320 User manual

Cellinx
Cellinx CamPilot URH350D-3M User manual

Cellinx
Cellinx CamPilot URH360A-5M User manual

Cellinx
Cellinx CamPilot URH350A-5M User manual

Cellinx
Cellinx CamPilot URH355D-2M User manual

Cellinx
Cellinx CamPilot URH355D-3M User manual

Cellinx
Cellinx CamPilot STH780 User manual