C E L L O
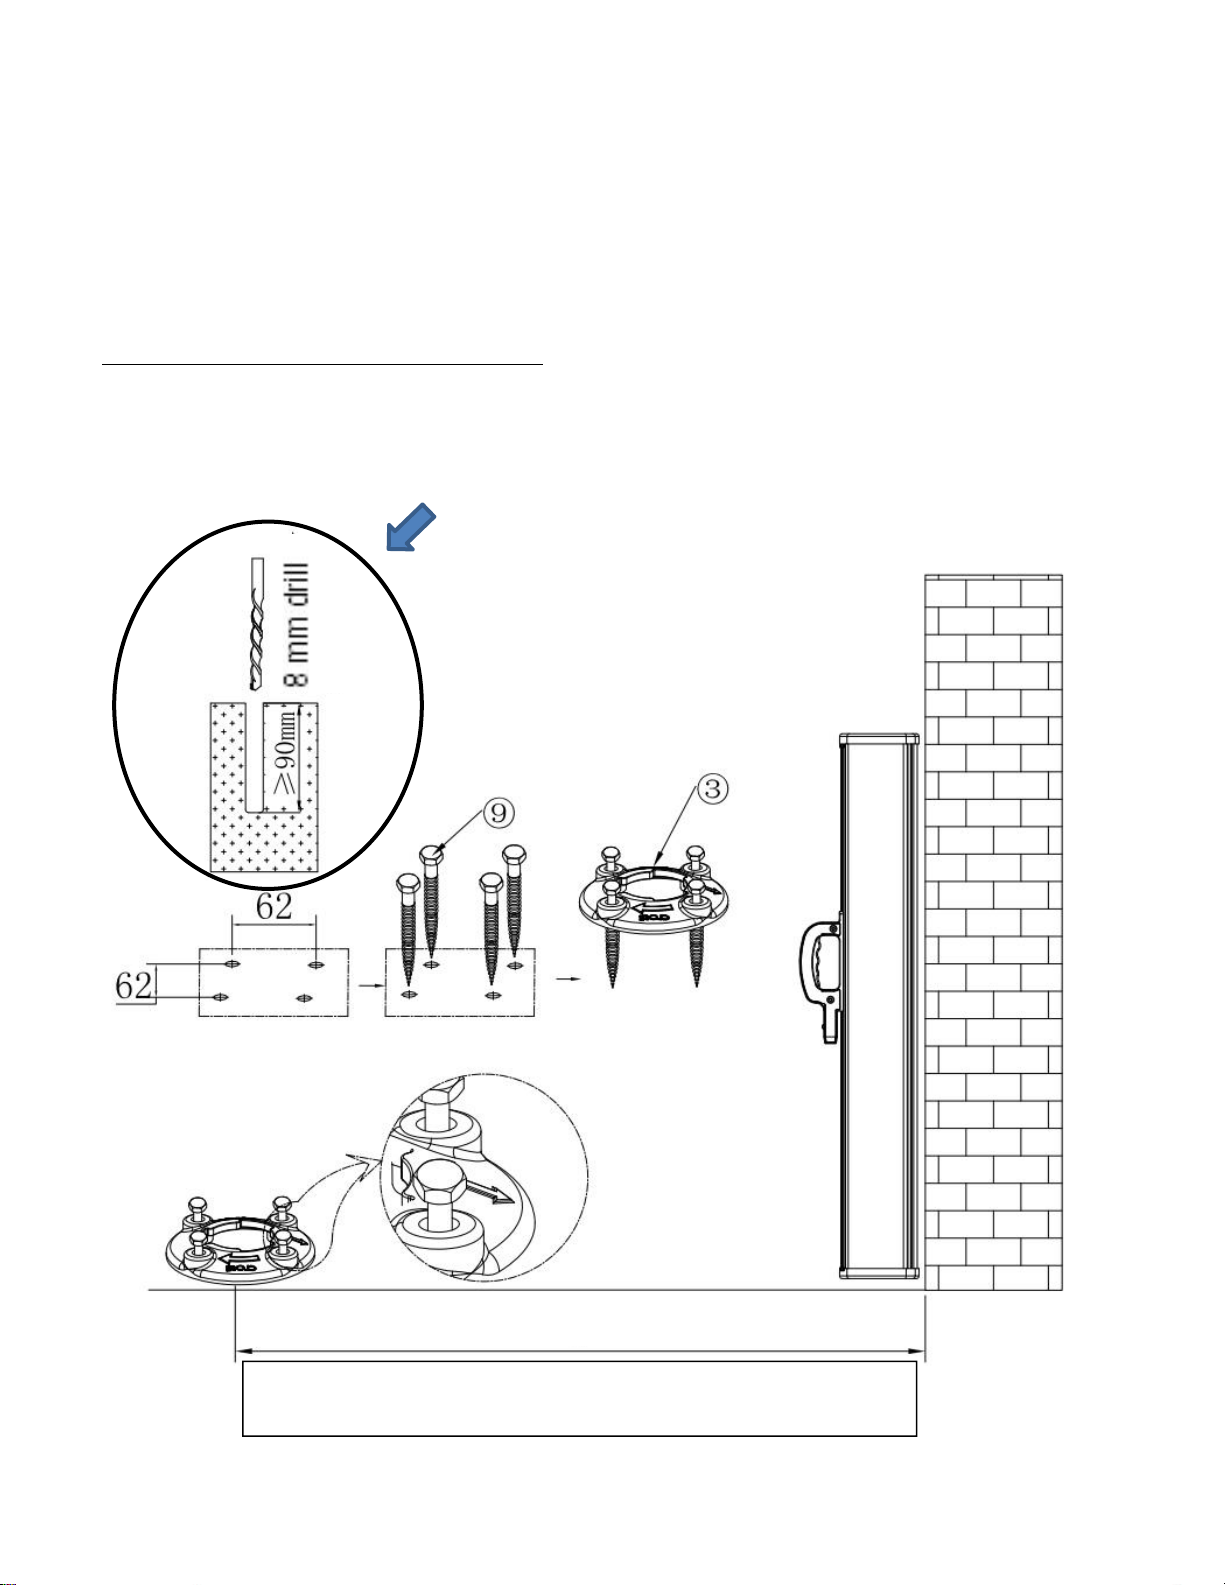
STEP 2: DRILLING HOLES AND INSTALLATION MOUNTING BRACKET
After choosing mounting position you can mark where you need to drill holes for the brackets(no need to drill for the wooden
wall).We already marked where and with what width brackets need to be mounted measure the width between the brackets
and copy it to the line on your wall/support place.
The way of mounting differs depending on whether it is attached to a wooden or concrete/brick wall. See the two options in
Figure 1 below.
Figure 1: The height of the side awning is 1,6M.
Leave a 200mm gap between the lower bracket’s hole of the awning and the surface of the terrace, doing this way the lower
edge of the awning is settling to the height of the surface/
floor.
There is 1200mm between the 2 brackets holes;
48mm is the distance between the hole of brackets.
Fix the brackets on the concrete wall with Screw (ST6*50) and rubber tube.
Fix the brackets on the wooden wall with Screw (ST6*50) without rubber tube.
For stone/concrete wall mounting, drill a 45mm deep hole in the wall for
the rubber tube.
There is no need to drill when attaching to a wooden wall.
Use nr 7 rubber tubes in
concrete/stone walls