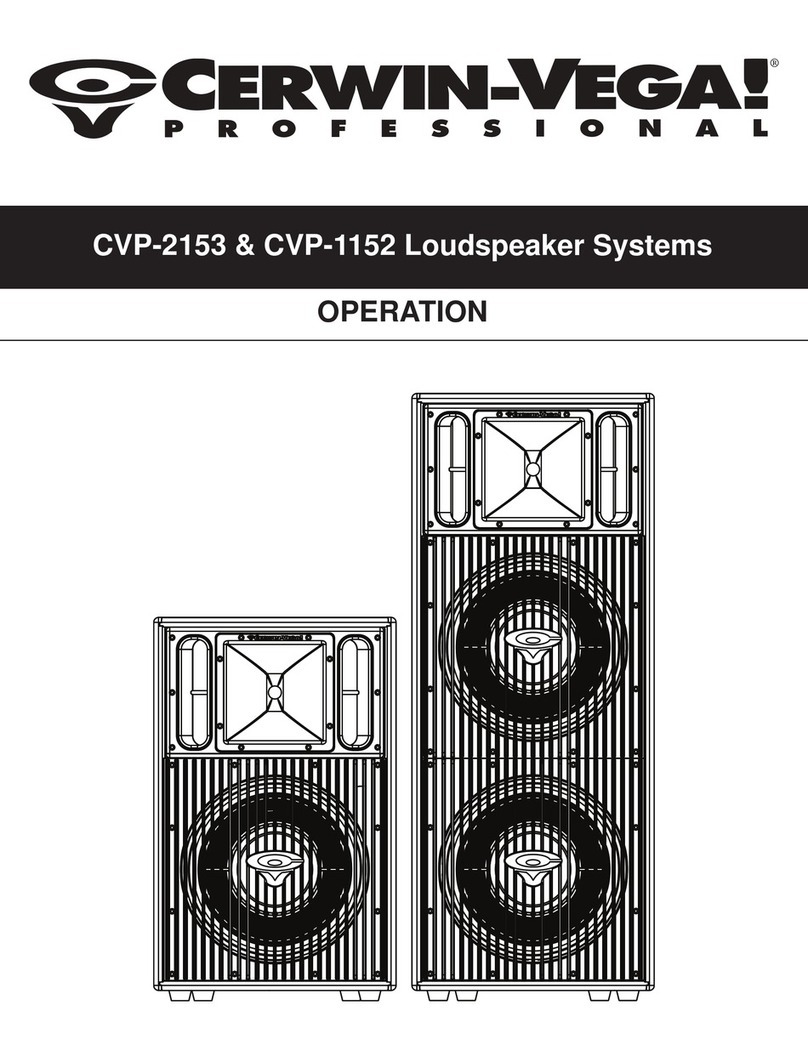
Cerwin-Vega CVP-1152 Instruction Manual

OPERAT ON
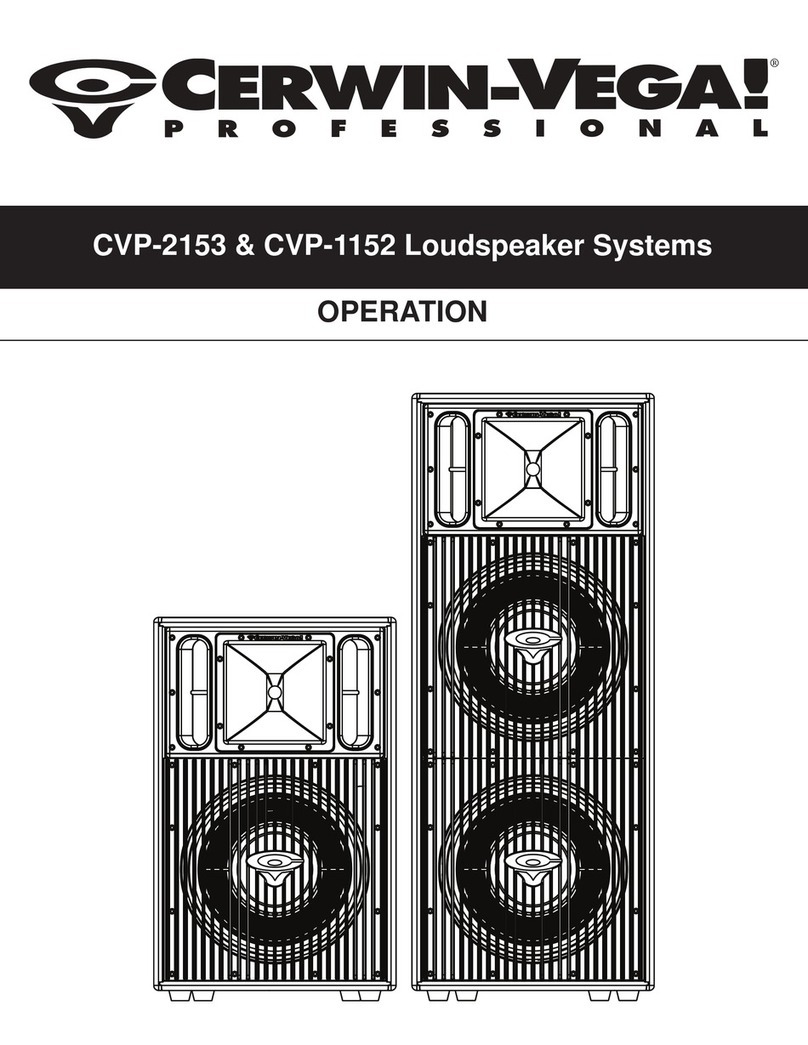
CVP-2153 & CVP-1152 Loudspeaker Systems

2
Cerwin-Vega! CVP-2153 & CVP-1152 Loudspeaker Systems
Contents
1. Welcome to the Cerwin-Vega! Family ................................................................................................ 3
2. Overview - The Cerwin-Vega! CVP-2153 and CVP-1152 Features ................................................... 3
3. Before You Begin: Safety and Care for your CVP Loudspeakers ................................................... 4
4. Set Up and Use of the CVP-2153 and the CVP-1152 ........................................................................ 6
5. Connecting and Daisy Chaining Speakers ....................................................................................... 9
6. High Frequency Fast Reaction Protection Circuit .......................................................................... 10
7. Rotatable Horn ................................................................................................................................... 10
8. Using the CVP-1152 as a Floor Monitor ........................................................................................... 10
9. Warning About Suspending Loudspeakers .................................................................................... 10
10. Suspension of the CVP Series ....................................................................................................... 11
11. Specifications .................................................................................................................................. 11
-SPAN SH version (page 14)
-FRENCH version (page 27)

3
Cerwin-Vega! CVP-2153 & CVP-1152 Loudspeaker Systems
1. WELCOME TO THE CERW N-VEGA! FAM LY
Congratulations! Welcome to the Cerwin-Vega! family. You’ve joined a growing group of audio professionals
who’ve turned to Cerwin-Vega! for the most advanced audio reproduction systems available. All Cerwin-Vega!
systems are thoroughly tested to insure that they meet or exceed our performance specifications. Backed by the
best service in the industry, Cerwin-Vega! is dedicated to quality and reliability. or a complete overview of
Cerwin-Vega! products and services, log onto www.cerwin-vega.com.
2. OVERV EW – THE CERW N-VEGA! CVP-2153 AND CVP-1152 FEATURES
Introducing the CVP Series high performance passive speaker systems from Cerwin-Vega! Professional. The
CVP-1152 (single 15” two-way system) and the CVP-2153 (double 15” three-way system) deliver extreme high
performance, legendary Cerwin-Vega! low frequency reproduction, and excellent sonic quality. Designed to
provide accurate sound reproduction at very high SPL levels, the CVP top box series is performance matched to
stand tough with all of our subwoofer systems, including our folded horns and passive and active direct fire subs.
•New High Performance 15” Driver – We started with a new high performance Cerwin-Vega! 15”
Low/Mid driver in a die cast frame using a 3” voice coil designed to deliver punchy low end and clean,
accurate midrange for high decibel, low distortion performance.
•Mylar Compression Driver for Smooth High End – We integrated a deep drawn high
performance Mylar compression driver that provides low distortion with a smooth high frequency
response and a fast attack transient response. This all means silky high end that has serious throw
capabilities.
•Rugged and Attractive Die Cast Grill for a Clean Cerwin-Vega! System Look – We didn’t stop with the
performance matching either. These full range cabinets also look the part with matched rugged,
die-cast aluminum grills. There will be no doubt that the audience is being entertained by a
full Cerwin-Vega! matched system from looks to performance!
•Rotatable Horn for Concise Pattern Control – The 60 x 40 degree rotatable horn provides flexible
pattern control for install application (or monitor functionality for the CVP-1152).
•Monitor Use for CVP-1152 – The additional 60 degree angle of the CVP-1152 cabinet provides the
ability to lay it on its side for use as a stage monitor. Rotate the horn for better coverage – you can even
rotate the grill so the Cerwin-Vega! logo is oriented correctly! How cool is that!
•Fly Points – We are serious about flexibility and the CVP ull Range Loudspeaker Series delivers.
Twelve Integrated M10 fly points for permanent installations or sound reinforcement applications
requiring overhead suspension are provided.
•Bi Amp Functionality – Use the precise internal cabinet crossover or drive the H and L signals
separately with an active crossover and dedicated amplifiers for amazing control and discrete rock
solid high decibel performance.
•High Frequency Driver Protection – A new Cerwin-Vega! designed High requency fast reacting relay
circuit suppression limiter provides high-quality protection for the high frequency system.

4
Cerwin-Vega! CVP-2153 & CVP-1152 Loudspeaker Systems
3. BEFORE YOU BEG N: SAFETY AND CARE FOR YOUR CVP LOUDSPEAKERS
Positioning
High and upper mid frequencies are a crucial part of the audio spectrum, and have much to do with how we
perceive clarity and intelligibility. Whereas these frequencies are the most easily located, they are also the first
to be acoustically blocked. Taking the coverage angles of the models used into consideration, be sure to set up
your speakers so that the M and H drivers are free from obstructions and the higher frequencies can reach the
entire audience (e.g. slightly above the heads of the audience). This will ensure optimal dispersion of
higher-frequency content and thus improved speech intelligibility and clarity.
Avoiding Feedback
Always place the "front-of-house” speakers (the enclosures facing the audience) in front of the microphones,
(e.g. towards the front edge of the stage). Use professional floor wedges (e.g. CVP-1152) or other dependable
monitoring systems to ensure that the performers on stage can hear themselves. Whenever possible, position
monitor speakers so that they point only to the back side of microphones.
Avoiding Feedback When Using Turntables (e.g. DJ Applications)
Turntables often produce low-end feedback: low frequencies are fed back to the pickup arm and cartridge and
reproduced again by the speakers. Common causes of low-end feedback are speakers positioned too close to
the turntable or on wooden floors or stage elements prone to vibration. To avoid this, position the speakers as far
from the turntable as possible. Placing them on a solid, non-resonating support will also help. If you are using the
CVP-1152 model speakers, try mounting them on stands. This will minimize direct contact between floor and
speakers and reduce vibration.
Protecting Your Speakers
Next to following common-sense rules like exercising caution while setting levels to avoid overdriving your power
amps, and understanding and respecting the physical limits of your system, there are a couple reliable methods
of protecting your speakers – and your entire system – using additional equipment. Using a high pass filter to avoid
excessive low frequencies, low-frequency rumble or extreme low frequencies can lead to an excessive
displacement of the speaker diaphragm and in turn to permanent damage. Using an equalizer or a low-cut/high
pass filter to eliminate the low frequencies below the response curve of the speaker can effectively prevent this.
Most consoles and outboard equalizers, as well as many other outboard signal processors and of course speaker
management systems provide a high pass filter. The use of a high pass filter in the signal path is especially
recommended when using turntables and/or CD players as signal sources. CD players often produce extremely
low frequencies, which can lead to excessive diaphragm displacement. Using a limiter to limit the output level,
Insert the limiter between the mixing console output and your power amp. Many types of outboard signal
processors and most speaker management systems include limiters for this application. Used properly, they can
eliminate overdriving of your audio signals and effectively suppress dangerous signal peaks, which can not only
degrade the sound quality, but also cause permanent damage to your speakers and other system components.
Power Amplifier Selection
Choosing the right power amplifier has a major effect on the performance of your speakers. The amplifier should
always provide at least as much power as the speaker system is capable of handling. In order to ensure precise
reproduction of brief, high-power transients, the amp should provide about twice as much power as the
speakers can handle.The minimum recommended inputpower ratings for CVP-1152 and CVP-2153 systems are
displayed in the Specifications Table.
5
Cerwin-Vega! CVP-2153 & CVP-1152 Loudspeaker Systems
Cable Selection
The quality and characteristics of the speaker cables used also greatly effect speaker performance.Always use
high-quality cables made with professional-grade wire and connectors that are correctly and carefully fitted.
Selection of the appropriate wire gauge is especially important to system operation. A cable that is too light or
low-gauge will result in amplifier power being wasted due to the series resistance of the cable and in loss of
low-frequency performance due to degraded damping factor. The ideal gauge is determined by two factors: the
length of the cable and the load or impedance. or cable runs up to 50 feet (15m) with an 8-Ohm load, we
recommend using at least 14-gauge wire – 12-gauge is minimum for a 4-Ohm load. or runs between 50 and 100
feet (15-30m), use at least 12-gauge for 8-Ohm loads and 10-gauge for 4 Ohms. At 200 feet (60m), you should
use 10-gauge and 8-gauge, respectively, and so on.
Using Poles, Tripod Mounts, and Speaker Movement Due to Vibrations
The Cerwin-Vega! CVP speakers covered by this manual are designed for portable applications in which the
speakers will be stacked directly on the floor, stage, a solid stable platform, mounted on a tripod stand or
pole-mount. (Pole and tripod mounting only applies to the CVP-1152). The CVP Series also may be suspended
using industry standard, forged M10 eye bolts. Please refer to the suspension warnings and instructions further
in this document.
THESE SPEAKERS ARE HEAVY!
Please use common sense and adhere to the manufacturer’s hardware ratings when placing speakers on stands
or poles. Never exceed the rated safety limit of a pole or speaker stand. Never place a speaker on a pole or
tripod that is leaning at an angle as the speaker may tip over.
Cerwin-Vega! Professional speakers can generate considerable energy. When placed on a slippery surface such
as polished wood or linoleum, the speaker may move due to vibration caused by its acoustical energy output.
Precautions should be taken to assure that the speaker does not fall off a stage or platform on which it is placed.
The Cerwin-Vega! CVP-1152 speaker model includes a receptacle cup to allow mounting on tripod stands
or poles. When using stands or poles, be sure to observe the following precautions:
• Check the stand specification to be certain it is designed to support the weight of the speaker.
• Observe all safety precautions specified by the stand manufacturer.
• Always verify that the stand is placed on a flat, level, and stable surface and be sure to fully extend the
legs of tripod type stands. Position the stand so that the legs do not present a trip hazard.
• Route cables so that performers, production crew, and audience will not trip over them pulling the speaker
over.
• Do not attempt to place more than one speaker on a stand designed for a single speaker.
• Always be cautious in windy, outdoor conditions. It may be necessary to place additional weight
(i.e. sandbags) on the base of the stand to improve stability.
• Unless you are confident that you can handle the weight of the speaker, ask another person to help
you lift it onto the tripod stand or pole.
Moisture
Moisture can damage the speaker cone and surround and cause corrosion of electrical contacts. Avoid
exposing the speakers to direct moisture. Keep speakers out of extended or intense direct sunlight. The driver
suspension will prematurely dry out and finished surfaces may be degraded by long-term exposure to intense
ultra-violet (UV) light.

6
Cerwin-Vega! CVP-2153 & CVP-1152 Loudspeaker Systems
Powering Up
To avoid damage to your speaker and other parts of your system, when you turn On your system, always turn On
the power amp last! This will avoid loud, damaging pops that will annoy your audience, and blow your speakers.
When you power down, the amplifier should always be turned Off first to avoid the same problems.
Polarity
When using two or more speaker systems, be sure to match the polarity (+/-) of the speaker system connectors
to those of the amplifier. If polarities do not match, the sounds produced by the speaker will interfere with each
other, making it impossible to achieve a well-balanced sound field.
Hearing damage and prolonged exposure to excessive SPL
CVP Series loudspeakers are easily capable of generating sound pressure levels (SPL) sufficient to cause
permanent hearing damage to performers, production crew, and audience members. Proper precautions should
be taken to avoid prolonged exposure to SPL in excess of 85 dB.
4. SET UP AND USE OF THE CVP-2153 AND THE CVP-1152
nput Configurations / Full Range and Bi Amp Modes
The CVP Series models are equipped with both a 4-pin Speakon connector and two 1/4” phone jack inputs. The
speakers provide ULL RANGE mode where one amplifier signal powers the entire speaker or BI AMP mode
(Speakon only) where one amplifier signal powers the high frequency compression driver and a second
amplifier powers the low frequency driver(s).
The 4-pin Speakon connectors are configured as follows:
- ULL RANGE mode: 1+ positive / 1- negative. (2+ and 2- are not used)
- BI AMP mode: 1+ L positive / 1- negative, 2+ H positive / 2- H negative.
The quarter inch phone jacks are configured as follows:
- ULL RANGE mode only: Tip positive / Sleeve negative.
To change the system to Bi Amp mode follow these directions:
1. Remove the grill (twelve screws) and woofer (eight screws) NOTE: Woofer connection polarity.
2. Move the wire harness from “ ULL RANGE” to “BI AMP” on the input circuit board and the crossover
circuit board. Please check ( igure 1, ull Range Mode), displayed on the next page.

7
Cerwin-Vega! CVP-2153 & CVP-1152 Loudspeaker Systems
3. Ensure the connector is seated properly.
4. Reconnect the woofer and tighten all eight screws.
5. Reinstall the grill with all twelve screws.
To change the system back to ull Range mode see steps 1-5 above, but move the wire harness from “BI AMP”
to “ ULL RANGE” on the input circuit board and the crossover circuit board. Please check ( igure 2, Bi Amp
Mode), displayed on the next page.
igure 1, ull Range Mode

8
Cerwin-Vega! CVP-2153 & CVP-1152 Loudspeaker Systems
igure 2, Bi Amp Mode

9
Cerwin-Vega! CVP-2153 & CVP-1152 Loudspeaker Systems
5. CONNECT NG AND DA SY CHA N NG SPEAKERS
The inputs of the connectors are paralleled to the “through” connectors in both ull Range and Bi Amp modes so
that either connector will work. The other connector can then be used to send the signal to another speaker.
Refer to the following diagrams for the proper impedance values (stated in Ohms) when daisy chaining
speakers. ( igure 3)
igure 3
CVP-1152
CVP-2153

10
Cerwin-Vega! CVP-2153 & CVP-1152 Loudspeaker Systems
6. H GH FREQUENCY FAST REACT ON PROTECT ON C RCU T
Your CVP speakers offer a fast reacting suppression limiter that senses input voltage and reduces potentially
damaging voltage levels that would otherwise reach your high frequency drivers.
7. ROTATABLE HORN
The high frequency horn in the CVP series is installed in a 60 degree horizontal and a 40 degree vertical
orientation. The horn can be rotated to provide 40 degrees vertically and 60 degrees horizontally for an
alternative high frequency dispersion pattern which is useful in certain install situations or when using the
CVP-1152 as a floor monitor.
Remove the screws, then rotate the horn 45 degrees, and replace the screws being careful not to apply too much
torque pressure.
8. US NG THE CVP-1152 AS A FLOOR MON TOR
The CVP-1152 can be used as a floor monitor. Typically, you will want more high frequency coverage from left to
right across your stage or performance area. ollow the instructions earlier in this document to rotate the horn.
Note that you can even rotate the grill to orient the Cerwin-Vega! logo in the correct position! How cool is that?
To rotate the grill, first remove the grill screws. Pull the grill out and turn it 90 degrees. Replace the screws being
careful with the torque pressure applied.
9. WARN NG ABOUT SUSPEND NG LOUDSPEAKERS
The CVP Series uses forged M10 eye bolts.
Only use eye bolts that are professionally certified for the proper 10x load requirements.
Suspending loudspeakers is serious business! Injury or death can occur if loudspeaker systems are not
suspended correctly! Read and follow these instructions carefully!
Speaker suspension must take place in accordance with instructions provided by Cerwin-Vega! and under the
supervision of a licensed, professional sound/rigging engineer or structural engineer. Only use attachments,
mounts, accessories, or brackets specified by Cerwin-Vega! or only specified products rated for overhead
suspension. Refer all servicing to qualified personnel. Servicing is required when the apparatus has been
damaged in any way.
WARN NG! Before placing, installing, rigging, or suspending any speaker product, inspect all hardware, suspension, cabinets,
transducers, brackets and associated equipment for damage. Any missing, corroded, deformed or non-load rated component
could significantly reduce the strength of the suspension, placement, or array. Any such condition severely reduces the safety
of the suspension and should be immediately corrected. Use only hardware which is rated for the loading conditions of the
suspension and any possible short-term unexpected overloading. Never exceed the rating of the hardware or equipment.
Consult a licensed, professional engineer when any doubt or questions arise regarding a physical equipment installation.
Cerwin-Vega! is not responsible for damage or liability for improperly installed or maintained mounting and/or rigging systems.

11
Cerwin-Vega! CVP-2153 & CVP-1152 Loudspeaker Systems
10. SUSPENS ON OF THE CVP SER ES
Remove the fly bracket screws in the fly points where you want to install M10 eye bolts. Screw in the M10 eye
bolts being careful not to strip the fly bracket screw insert point. Do not remove fly bracket screws from areas
where you will not install eye bolts – insure that either an eye bolt or a fly bracket screw is installed in all fly
bracket screw insert locations.
De-rating
Using the mounting points at an angle will de-rate the WLL (Working Load Limit) for each mounting point. Each
point mounted at an angle should be de-rated according to the following formula.
- WLL = cosine (angle) x 500
- Where: angle = degrees form vertical pull
500 = WLL for each CVP mounting point @ vertical pull
11. SPEC F CAT ONS
Cerwin-Vega! Loudspeaker Systems CVP-1152 CVP-2153
Frequency Range -10 dB 50 Hz - 20 kHz 37 Hz - 20 kHz
Frequency Response -3 dB 59 Hz - 18.5 kHz 48 Hz - 18.5 kHz
Sensitivity @ 1w / 1 Meter 99 dB 101 dB
Power Capacity RMS / PK 500 / 1000 w 1000 / 2000 w
Recommend Amplifier Power 750 w - 1000 w 1500 w - 2000 w
Maximum SPL 130 dB 134 dB
Coverage Pattern 60 x 40 rotatable 60 x 40 rotatable
HF Diaphragm Size 1.75” 1.75”
Weight 66.5 lbs 112.5 lbs
Fly Points Yes Yes
Bi Amp use Yes Yes
Rotatable Horn Yes Yes
HF Protection ast Reacting Suppression Limiter
Woofer Ceramic 3” VC
Construction Multi-ply Hardwood
Finish Polyurethane Paint

12
Cerwin-Vega! CVP-2153 & CVP-1152 Loudspeaker Systems
Cerwin-Vega! Loudspeaker Systems CVP-1152 CVP-2153
Recommended Amplifier Power in
Bi Amp Mode
LF - 750wto 1000 w
HF - 100w-150 w
LF/MF - 1500wto 2000 w
HF - 100w-150 w
Bi Amp Crossover Settings CVP-1152 LPF/HPF CVP-2153 LPF / HPF
Gain 0 / -12.5 dB 0 / -10 dB
Type Linkwitz-Riley Linkwitz-Riley
Slope -12 dB Oct / -12 dB Oct -12 dB Oct / -12 dB Oct
Freq 2 kHz/2 kHz 2 kHz / 2 kHz
Impedance 8 Ohms 4 Ohms
Dimensions (HxW x D)
28.1”x18.2”x16”
71.4 cmx46.2 cmx40.7 cm
45”x18.2”x19”
114.3 cmx46.2 cmx48.3 cm

13
Cerwin-Vega! CVP-2153 & CVP-1152 Loudspeaker Systems
28.1” (71.4cm)
18.2” (46.2cm)
16” (40.7cm)
CVP-1152 Dimensions (H x W x D)
( igure 4)
CVP-2153 Dimensions (H x W x D)
( igure 5)
19” (48.3cm)
45” (114.3cm)
18.2” (46.2cm)
igure 4
igure 5

14
Cerwin-Vega! Sistemas de altavoces CVP-2153 y CVP-1152
Contenido
1. Bienvenido a la familia de Cerwin-Vega! .......................................................................................... 15
2. Resumen - Características de Cerwin-Vega! CVP-2153 y CVP-1152 .............................................. 15
3. Antes de empezar: Seguridad y cuidado de sus altavoces CVP ................................................... 16
4. nstalación y uso del CVP-2153 y el CVP-1152 ................................................................................. 19
5. Conexión y encadenamiento de altavoces ....................................................................................... 22
6. Circuito de protección de reacción rápida para altas frecuencias ................................................ 23
7. Bocina rotativa .................................................................................................................................... 23
8. Uso del CVP-1152 como monitor de piso ......................................................................................... 23
9. Advertencia sobre la suspensión de altavoces ............................................................................... 23
10. Suspensión de la serie CVP ............................................................................................................. 24
11. Especificaciones ............................................................................................................................... 24
- ENGL SH version (page 2)
- FRENCH version (page 27)

15
1. B ENVEN DO A LA FAM L A DE CERW N-VEGA!
¡ elicitaciones! Bienvenido a la familia de Cerwin-Vega! Usted se ha unido a un grupo creciente de
profesionales del audio que han adoptado Cerwin-Vega! para obtener los sistemas de reproducción de audio más
avanzados que se encuentran disponibles. Todos los sistemas Cerwin-Vega! se prueban rigurosamente para
asegurar que cumplan o excedan nuestras especificaciones de funcionamiento. Con el respaldo del mejor
servicio de toda la industria, Cerwin-Vega! está dedicado a la calidad y la confiabilidad. Para ver un panorama
completo de los productos y servicios de Cerwin-Vega!, visite www.cerwin-vega.com.
2. RESUMEN - CARACTERÍST CAS DE CERW N-VEGA! CVP-2153 Y CVP-1152
Presentamos los sistemas de altavoces pasivos de alto rendimiento de la Serie CVP de Cerwin-Vega!
Professional. El CVP-1152 (sistema simple de dos víasde 15”) y el CVP-2153 (sistema doble de tres vías de 15”)
ofrecen un rendimiento extremadamente alto, la legendaria reproducción de bajas frecuencias de Cerwin-Vega!,
y una excelente calidad de sonido. Diseñada para ofrecer una reproducción exacta de sonido a niveles de SPL
muy altos, la serie CVP “top box” tiene un rendimiento que se compara con todos nuestros sistemas de
subwoofers, incluidas nuestras bocinas dobladas y nuestros subwoofers pasivos y activos de excitación directa.
• Nuevo driver de alto rendimiento de 15” – Empezamos por un driver de bajas y medianas
frecuencias Cerwin-Vega! de 15” en una armazón moldeada, usando una bobina de voz de 3”
diseñada para brindar graves potentes y una gama media clara y exacta para ofrecer un rendimiento
de altos decibeles y baja distorsión.
• Driver de compresión de Mylar para ofrecer un sonido armonioso en altas frecuencias
Integramos un driver de Mylar de alta compresión que ofrece un bajo nivel de distorsión con una
respuesta armoniosa de altas frecuencias y una respuesta transitoria de ataque rápido. Con esto se
obtiene una gama dealtas frecuencias sedosa con una impresionante capacidad de largo alcance.
• Rejilla moldeada, resistente y atractiva, que dota al sistema Cerwin-Vega! de una apariencia – Y no
nos detuvimos sólo en el rendimiento. Estos gabinetes de gama completa también tienen un aspecto
excepcional, con parrillas de aluminio moldeado de alta resistencia. ¡No quedará duda de que la
audiencia disfrutará de un sistema Cerwin-Vega! completo, desde la apariencia hasta el rendimiento!
• Bocina rotativa para un control preciso de patrones – La bocina rotativa de 60 x 40 grados ofrece un
control flexible de patrones para aplicar a instalaciones (o funcionalidad de monitor, para el CVP-1152).
• Uso del CVP-1152 como monitor – El ángulo adicional de 60 grados del gabinete del CVP-1152
ofrece la posibilidad de colocarlo de lado para usarlo como monitor de escenario. Gire la bocina para
lograr una mejor cobertura — ¡puede incluso girar la parrilla para que el logotipo de Cerwin-Vega! esté
correctamente orientado! ¡Qué le parece!
• Puntos de suspensión – Nos tomamos la flexibilidad en serio, y la serie de altavoces de gama completa
CVP refleja ese compromiso. Se suministran doce puntos de suspensión M10 integrados para
instalaciones permanentes o aplicaciones de refuerzo de sonido que requieren suspensión elevada.
Cerwin-Vega! Sistemas de altavoces CVP-2153 y CVP-1152

16
• Funcionalidad de biamplificación – Use el crossover preciso en el gabinete interno o excite las señales
de alta y de baja frecuencia por separado, con un crossover activo y amplificadores dedicados para
disponer de un control extraordinario y un funcionamiento discreto de gran solidez a alto nivel de decibeles.
• Protección del driver de alta frecuencia – Un nuevo limitador de supresión con circuito de relé de
acción rápida para altas frecuencias, diseñado por Cerwin-Vega!, ofrece una protección de alta
calidad para el sistema de alta frecuencia.
3. ANTES DE EMPEZAR: SEGUR DAD Y CU DADO DE SUS ALTAVOCES CVP
Posicionamiento
Las frecuencias altas y medias son una parte crucial del espectro de sonido, y tienen mucho que ver con la
forma en que percibimos la claridad y la inteligibilidad. Si bien estas frecuencias son las más fácilmente
ubicables, también son las primeras que se bloquean acústicamente. Tomando en cuenta los ángulos de
cobertura de los modelos utilizados, instale los altavoces de modo que los excitadores de frecuencias medias y
altas no tengan obstrucciones y que las altas frecuencias puedan llegar a toda la audiencia (por ejemplo,
ligeramente por encima de las cabezas de la audiencia). Esto asegurará la dispersión óptima del contenido de
alta frecuencia y por lo tanto una mejora de la inteligibilidad y la claridad del habla.
Cómo evitar la realimentación o "feedback"
Coloque siempre los altavoces frontales (losque están de cara a la audiencia) delante de los micrófonos, es decir,
hacia el borde delantero del escenario. Utilice cuñas profesionales para el piso (por ejemplo, CVP-1152) u otros
sistemas de monitoreo confiables, con el fin de asegurar que los artistas que están en el escenario puedan oírse
a sí mismos. Siempre que sea posible, coloque los altavoces de monitoreo de modo que apunten solamente a
la parte trasera de los micrófonos.
Cómo evitar la realimentación al usar bandejas tocadiscos (por ejemplo, aplicaciones de DJ)
Los tocadiscos suelen producir feedback de baja frecuencia: las bajas frecuencias se retroalimentanal brazo de
pickup y al cartucho y son reproducidas de nuevo por los altavoces. Algunas causas comunes del feedback de
baja frecuencia: los altavoces están colocados demasiado cerca del tocadiscos, o sobre pisos de madera o
elementos escénicos propensos a vibrar. Para evitar esto, coloque los altavoces lo más lejos posible de la
bandeja tocadiscos. También puede ser útil colocarlos sobre una base sólida y no resonante. Si está usando los
altavoces modelo CVP-1152, pruebe a montarlas sobre bases. Esto minimizará el contacto directo entre el piso
y los altavoces, con el fin de reducir las vibraciones.
Proteja sus altavoces
Además de cumplir con reglas de sentido común como las precauciones al fijar los niveles, con el fin de evitar
sobrecargar los amplificadores, y entender y respetar las limitaciones físicas de su sistema, hay un par de
métodos confiables para proteger sus altavoces (y todo el sistema de audio) utilizando equipos adicionales:
El uso de un filtro de paso alto para evitar frecuencias excesivamente bajas, ya que el ruido de baja frecuencia,
o las frecuencias extremadamente bajas, pueden causar un desplazamiento excesivo del diafragma del altavoz,
y causar daños El uso de un ecualizador o un filtro de corte bajo/paso alto para eliminar las bajas frecuencias
por debajo de la curva de respuesta del altavoz, puede prevenir eficazmente este problema. La mayoría de las
consolas y ecualizadores externos, así como muchos otros procesadores de señal externos, y por supuesto los
sistemas de manejo de altavoces, proporcionan un filtro de paso alto.
Cerwin-Vega! Sistemas de altavoces CVP-2153 y CVP-1152

17
El uso de un filtro de paso alto en la trayectoria de la señal se recomienda especialmente cuando se usan
bandejas tocadiscos y/o equipos de CD como fuentes de la señal. Los reproductores de CD generan a menudo
frecuencias extremadamente bajas, lo cual puede causar un desplazamiento excesivo del diafragma. El uso de
un limitador para limitar el nivel de salida, insertando el limitador entre la salida de la consola de mezclado y el
amplificador de potencia. Muchos tipos de procesadores externos de señales y la mayor parte de los sistemas
de manejo de altavoces incluyen limitadores para esta aplicación. Si se usan correctamente, pueden eliminar la
sobrecarga de las señales de audio y suprimir eficazmente los picos de señal peligrosos, lo que no solamente
puede degradar la calidad del sonido sino también causar daños irreversibles a los altavoces y a otros
componentes del sistema.
Selección del amplificador de potencia
La selección del amplificador de potencia correcto tiene una influencia fundamental sobre el funcionamiento de
los altavoces. El amplificador debe siempre suministrar por lo menos la potencia que el sistemade altavoces sea
capaz de manejar. Para asegurar la reproducción precisa de transitorios breves de alta potencia, el amplificador
debe proporcionar más o menos el doble de potencia que los amplificadores puedan manejar. Las potencias
mínimas de entrada recomendadas para los sistemas CVP-1152 y CVP-2153 se muestran en la Tabla de
Especificaciones.
Selección de cables
La calidad y las características de los cables de altavoz utilizados afectan también el funcionamiento de los
altavoces. Utilice siempre cables de alta calidad fabricados con alambre de calidad profesional, y conectores
adaptados correcta y cuidadosamente al sistema. La selección del calibre apropiado de alambre es
particularmente importante para el funcionamiento del sistema. Un cable demasiado ligero o de bajo calibre
ocasionará pérdidas de potencia del amplificador, debido a la resistencia en serie del cable, y ocasionará
también una pérdida de bajas frecuencias debido a la degradación del factor de amortiguación. El calibre ideal
se determina a base de dos factores: la longitud del cable y la carga o impedancia. Para las extensiones de
cables de hasta 50 pies (15 m) con una carga de 8 ohmios, recomendamos usar un alambre de calibre 14 como
mínimo; el mínimo para una carga de 4 ohmios es el calibre 12. Para extensiones de 50 a 100 pies (15 a 30 m),
utilice por lo menos un alambre de calibre 12 para cargas de 8 ohmios y calibre 10 para 4 ohmios. A 200 pies
(60 m), utilice cables de calibre 10 y 8, respectivamente, y así sucesivamente.
Uso de postes, monturas en trípodes y movimiento debido a las vibraciones
Los altavoces Cerwin-Vega! CVP a los que se refiere este manual están diseñados para aplicaciones portátiles
en las cuales los altavoces se apilan directamente sobre el piso, escenario, una base sólida estable, o se
montan en un trípode o un poste. (El montaje en poste o trípode solamente se aplica al CVP-1152). La Serie CVP
puede también suspenderse usando anillos forjados M10 estándar en la industria. Consulte las advertencias
e instrucciones de suspensión que aparecen más adelante en este documento.
¡ESTOS ALTAVOCES SON PESADOS!
Use el sentido común y cumpla con las especificaciones del fabricante cuando coloque los altavoces sobre
bases o postes. Nunca exceda el límite de seguridad nominal de un poste o base para altavoz. Nunca coloque
un altavoz en un poste o trípode que está inclinado, ya que el altavoz puede caerse.
Cerwin-Vega! Sistemas de altavoces CVP-2153 y CVP-1152

18
Los altavoces Cerwin-Vega! Professional pueden generar un nivel considerable de energía. Si se coloca sobre
una superficie resbaladiza, por ejemplo un piso de madera pulida o de linóleo, el altavoz puede moverse debido
a la energía acústica que genera. Se deben tomar precauciones para asegurar que el altavoz no se caiga de un
escenario o plataforma donde se encuentra colocado.
El modelo de altavoz Cerwin-Vega! CVP-1152 incluye un accesorio que facilita el montaje sobre bases de
trípode o en postes. Cuando utilice bases o postes, tome las siguientes precauciones:
• Lea la especificación de la base para asegurarse de que esté diseñada para soportar el peso del altavoz.
• Tome todas las precauciones de seguridad indicadas por el fabricante de la base.
• Verifique siempre que la base esté colocada sobre una superficie plana, horizontal y estable, y extienda
totalmente las bases de los trípodes. Coloque la base de modo que las patas no causen tropiezos.
• Encamine los cables de modo que los artistas, la cuadrilla de producción y la audiencia no tropiece en los
mismos y arrastre y haga caer el altavoz.
• No coloque más de un altavoz sobre una base diseñada para soportar un solo altavoz.
• Sea siempre cuidadoso al aire libre, cuando haya viento. Puede ser necesario colocar pesos
adicionales (por ejemplo, bolsas de arena) al pie de la base para mejorar la estabilidad de la misma.
• A menos que tenga confianza de poder levantar el peso del altavoz, pídale a otra persona que le ayude a
subirlo a la base de trípode o poste.
Humedad
La humedad puede dañar el cono y el borde del altavoz y del surround y causar la corrosión de los contactos
eléctricos. Evite exponer directamente los altavoces a la humedad. Mantenga los altavoces apartados de la luz
solar extendida o directa intensa. La suspensión del excitador o driver se resecará prematuramente, y las
superficies acabadas pueden degradarse a través de la exposición a largo plazo a la luz ultravioleta intensa.
Encendido
Para evitar dañar su altavoz y otras partes de su sistema, siempre encienda en último lugar el amplificador de
potencia. Esto evitará ruidos fuertes y dañinos que molestarán a su audiencia y dañarán sus altavoces. Cuando
apague el sistema, siempre deberá apagar primero el amplificador, a fin de evitar los mismos problemas.
Polaridad
Cuando use dos o más sistemas de altavoces, haga corresponder la polaridad (+/-) de los conectores del
sistema de altavoces con la del amplificador. Si las polaridades no coinciden, los sonidos generados por el
altavoz se interferirán mutuamente, con lo cual será imposible conseguir un campo de sonido bien equilibrado.
Daños auditivos y exposición prolongada a una SPL excesiva
Los altavoces de la Serie CVP pueden generar fácilmente niveles de presión de sonido (SPL) suficientes para
causar daños irreversibles al oído de los artistas, la cuadrilla de producción y los miembros de la audiencia. Es
necesario tomar las debidas precauciones para evitar la exposición prolongada a presiones de sonido
superiores a 85 dB.
Cerwin-Vega! Sistemas de altavoces CVP-2153 y CVP-1152

19
4. NSTALAC ÓN Y USO DEL CVP-2153 Y EL CVP-1152
Configuraciones de entrada / Modos de gama completa y biamplificado
Los modelos de la Serie CVP están equipados con un conector Speakon de 4 patillas y dos entradas de
conector telefónico de 1/4”. Los altavoces ofrecen un modo de GAMA COMPLETA ( ULL RANGE) en el que la
señal de un amplificador alimenta al altavoz completo, o un modo de biamplificación (BIAMP) en el que la señal
de un amplificador alimenta el driver de compresión de altas frecuencias y un segundo amplificador alimenta los
drivers de bajas frecuencias.
Los conectores Speakon de 4 patillas están configurados como sigue:
- Modo de gama completa ( ULL RANGE): 1+ positivo / 1- negativo. (2+ y 2- no se usan.)
- Modo BIAMP: 1+ L positivo / 1- negativo, 2+ H positivo / 2- H negativo.
Los conectores telefónicos de un cuarto de pulgada se configuran como sigue:
Modo de gama completa ( ULL RANGE), únicamente: Punta positiva / Camisa negativa.
Para cambiar el sistema al modo Bi Amp, siga estas instrucciones:
1. Retire la rejilla (doce tornillos) y el woofer (ocho tornillos) NOTA: Polaridad de conexión del woofer.
2. Mueva el arnés de cables de “ ULL RANGE” a “BI AMP” en la tarjeta de circuitos de entrada y en la
tarjeta de circuitos de crossover. ( igura 1, ull Range Mode)
3. Verifique que el conector esté bien colocado.
4. Reconecte el woofer y apriete los ocho tornillos.
5. Reinstale la rejilla con los doce tornillos.
Cerwin-Vega! Sistemas de altavoces CVP-2153 y CVP-1152

20
Para cambiar de nuevo el sistema al modo “ ULL RANGE” (vea los pasos 1 a 5 anteriores), pero mueva el
arnés de cables de “BI AMP” a “ ULL RANGE” en la tarjeta de circuitos de entrada y en la tarjeta de circuitos
de crossover. ( igura 2, Bi Amp Mode)
Cerwin-Vega! Sistemas de altavoces CVP-2153 y CVP-1152
igura 1, ull Range Mode
Other manuals for CVP-1152
1
This manual suits for next models
1
Table of contents
Languages:
Other Cerwin-Vega Speakers System manuals

Cerwin-Vega
Cerwin-Vega SDS-525 Instruction Manual

Cerwin-Vega
Cerwin-Vega CMX5.1 User manual

Cerwin-Vega
Cerwin-Vega Professional CVA-28 Quick start guide

Cerwin-Vega
Cerwin-Vega CVP-2153 User manual

Cerwin-Vega
Cerwin-Vega CVHD Series User manual

Cerwin-Vega
Cerwin-Vega Vision VIS-122 User manual

Cerwin-Vega
Cerwin-Vega CVT-12 User manual

Cerwin-Vega
Cerwin-Vega CVP-1152 Instruction Manual

Cerwin-Vega
Cerwin-Vega VE Series User manual