PUTTING INTO SERVICE
lighting
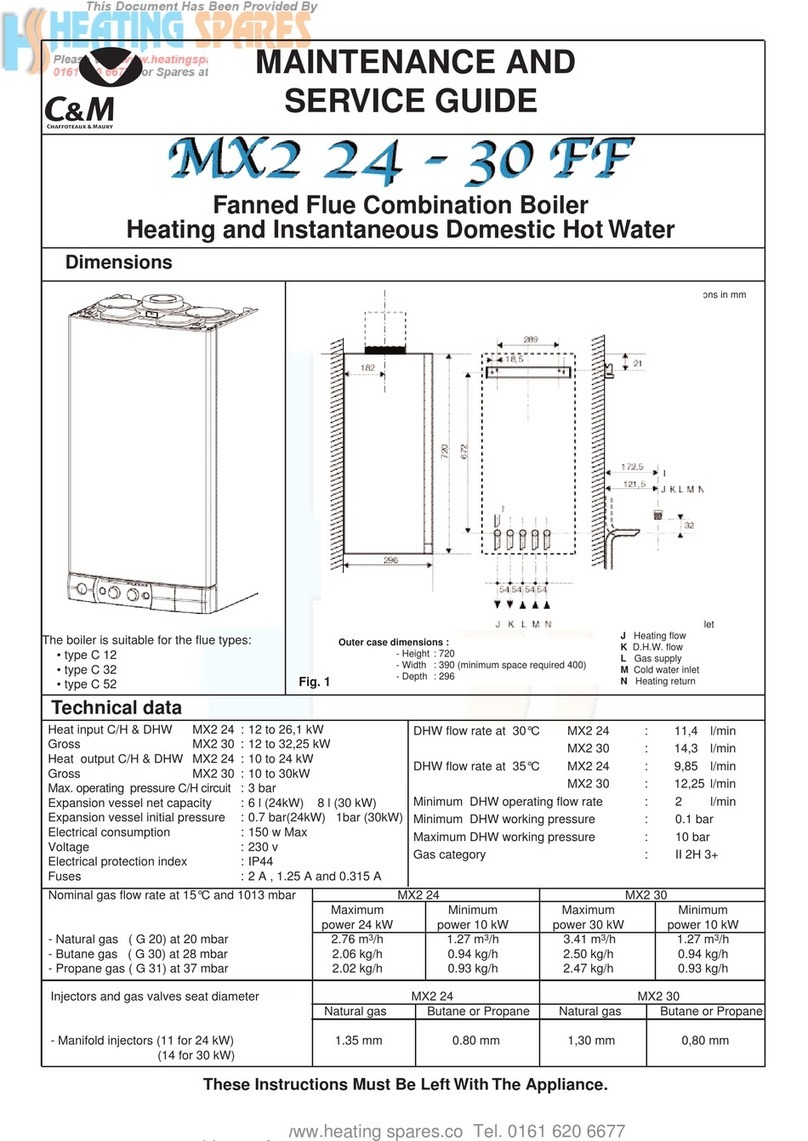
Turn gasservice tap to left to sign (6).
With the ieft hand push in the pilot button (3) (fig. 18).
With the other hand push the ignitor button(6) (lig. 18).
When the pilot light is established hold the ptiot button
pushedin for 30 seconds.
(If lighting for the first time it may take a short time to clear
theair from the gaspipe before gasis available at the piiot).
Gently release the pilot button. If the pilot does not hold
repeatthis procedure again until the piiot is maintained.
Check that the heating isolating valve (26) (fig. 17)is open.
Switch the main electric switch (9) (fig. 18) to start the
pump. The tiring of the main burner is initiated by the star-
ting of the pump.
- SUMMER (hot water oniy) place the switch in the 5.1:po-
sition and open a tap.
- WINTER (heating and hot water) put the switch into po-
sition 9. Setthe room thermostat to the required tempe-
rature and the timer on the boiler to STOP.
How your boiler works
cleaning and servicing
1) Production of hot water
Your boiler is designed to give hot water at a temperature
of 60’ C. with the temperature seiector on +, (7) (fig. 18).
when a tap ISturned on. The maximum flow rate will be :
6 Vmin (I .32 gpm) for the 2.20 RSC unit and 8 Vmin
(1.75 gpm) for the 2.24 RSCunit. It is possible to obtain
higher water volumes at lower temperature - to fill a bath
for example. turn the temperature selector to the sign -
and open the bath tap fully.
Remarks : It is possible to leave the temperature selector
on + and to reduce the temperature at the outlets by
mixing cold water through a mixing vaive. particularly for
showering and washing. in this casethe boiler will operate
on its thermostat and may not come onto full gasrate, the
boiler will also cycle on/off.
2)
1)
Note : When in hot water only mode the temperature on
the temperature guageon the boiler will beabout 90’ C.
Heating
Your boiler automatically adjusts the boiier output to the
heating. The boiler thermostat acts directly on the gas
control. it is normal for the burner to stay alight for long
periods but the flame will modulate.
controls
Installation without a room thermostat (not recommen-
ded)
Setthe boiler thermostat 5 (fig. 18)on the boiler asa func-
tion of the external temperature and the required internal
temperature.
To increasethe temperature turn the control to +, to redu-
cethe temperature turn to -.
2) Installation with a room thermostat
- Set the control on the room thermostat to the desired
temperature.
- The room thermostat automatically controls the firing
of the boiler to achieve the chosen temperature.
- In cold weather the boiler thermostat (5) (fig. 18)can be
left in the position +.
- In warm weather it is recommended that the thermostat
issetto an intermediate position.
- The room thermostat will ensure that a uniform inter-
nal temperature is obtained.
To turn off the heating
- Put the control switch (9) (fig. 18) to the summer position
<<c:H.The boiier will now operateonly on hot waterdemand.
To turn off the boiler
- Put the controi swnch to STOP.
- Turn otTthe gasby turning lever (281(fig. 16).
To isolate heating during summer only
In some installations where the boiler is the lowest part of the
system and the pipes rise vertically it is possible after the boi-
ler has been operating continuously for a period to provide
hot water to geta thermosyphon circulation in the heating pi-
pes. One wiil first observe that the pipes are getting hot and
eventually the first radiator wiil heat. This phenomenom can
beannoying in summer.
- The heating flow is fitted with an isolating valve (26) (fig.
16)giving, in the abovecircumstances the ability to prevent
the thermosyphon action in summer.
- When one switches to i:: also close the isolating valve on
the heating flow.
DO
not forget to open the valve again at
the start of the heating seasonwhen the control switch will
heset on 9 .
The boiier should be cleaned and serviced annually. It is re-
commended that you enter into a service agreement with a
competent. qualified installer. Chaffoteaux Ltd can a&t
with names and addressesof approved installers/service engi-
neers.
Recommendations
- Your installation will not function correctly unless it is ab-
solutely free of air and full of water.
- It is normai that the pressure shown on the pressure guage
will be lower when the water is cold than when it is hut.
- If the pressure on the pressureguage(12)(fig. 18), falls be-
low 1 bar when cold re-pressurise the installation as foi-
IOWS.
- Put the switch to STOP.
- Open the fill valve
- When pressure is about 1.5bar (12) (fig. 18) close the fill
valve.
- Return the switch to its original position.
Note : it is possible after filling for a smali amount of water to
be expelled from the safetyvalve when the water temperature
rises. This is normal.
To remove the cover (fig. 18)
- Remove the thermostat knob (S), the timer knob (lo), se-
lector knob (7), by pulling towards you.
- Remove the six screws(32).
- Remove the cover.
Access to air purger
i Remove the top front panel to give better sight of the purger
- and passa screwdriver through the hole made for this putpo-
sein the front cover.
Precautions in caseof frost
1) Drain the hot water system
- Turn off the mains stop cock. open a hot water tap, and
a cold water tap.
- Remove the drain screw(33) and (34) (fig. 16and 17).
- To re-fill the systemproceed in reverseorder.
2) Draining the heating system
- Turn off the boner by putting main switch to STOP.
- Leave the systemto cool down.
- Open the valve on the safety valve (30) (fig. -16and 17).
- Drain the systemat all low points of the installation.
- Open the drain plug (35) (fig. 16or 17).
5


